lqc_10大linux必备运维工具
2016-11-18 17:22
344 查看
一.常用安全工具:rootkit检测工具,aide文件监控,TCPdump抓包工具
1.rootkit
a.了解rootkit
针对多个系统,如win、sunos、linux
rootkit由几个独立程序组成:
1)网络嗅探程序,用于获取用户名密码,并且上传。
2)特洛伊木马,inetd、login为攻击者提供后门。
3)隐藏攻击者目录、进程:ps、netstat、ls替换。
4)清理工具,zap、z2攻击者使用这些工具可删除wtmp、utmp、lastlog等用户记录有关的日志。
b.检测rootkit
防止rootkit:做好系统及时更新,权限管理准确,开启selinux及时检测rootkit
chkrootkit:检测linux系统是否被rootkit攻击
RKHunter:检测rootkit
1)安装和使用chkrootkit
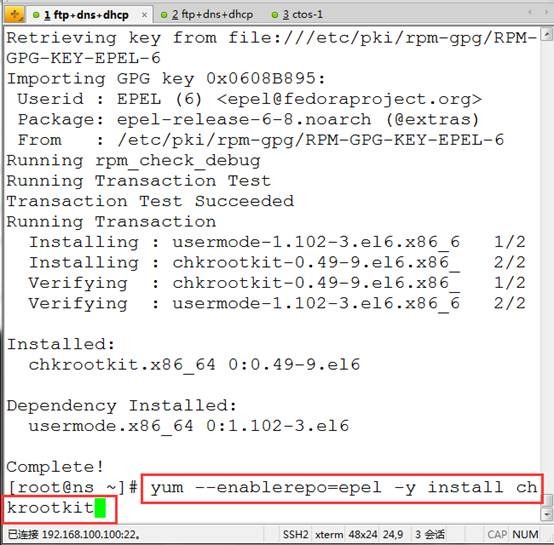
yum --enablerepo=epel -y install chkrootkit (必须先配置好epel的源)

chkrootkit ##执行检测
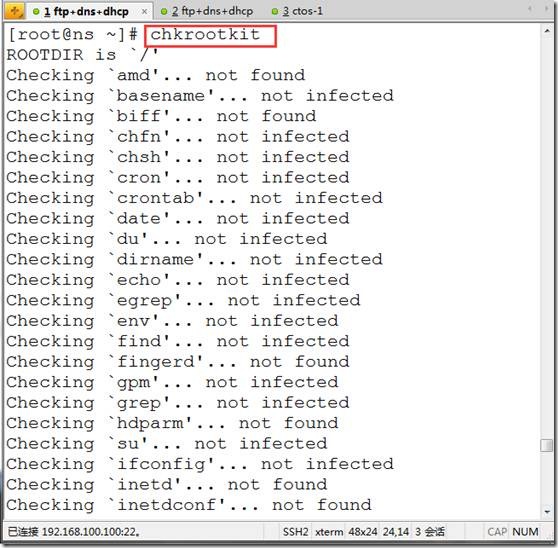
chkrootkit |grep INFECTED ##如果显示有结果证明中招,没结果即没问题

2)RKHunter安装及使用
rpm -qa |grep rkhunter
rpm -e rkhunter
yum --enablerepo=epel -y install rkhunter (必须先配置好epel的yum源)

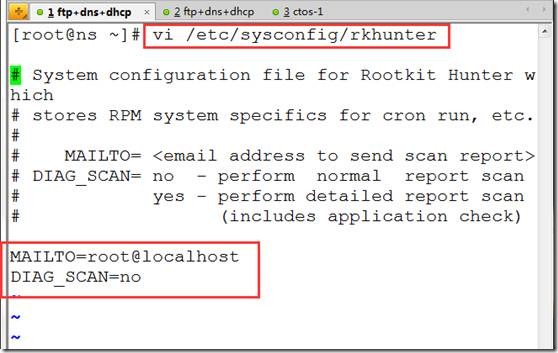
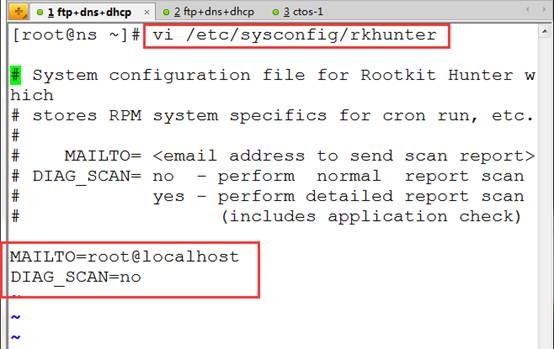
vi /etc/sysconfig/rkhunter
MAILTO=root@localhost ##检测通知邮箱,可以自定义
DIAG_SCAN=no ##快速扫描,如果yes,详细扫描。
:wq
rkhunter --update ##更新rkhunter数据库(病毒库)

rkhunter --propupd ##更新系统文件的优先级

rkhunter --check --sk ##检测rootkit病毒,DIAG_SCAN=no

rkhunter --check --rwo ##详细检测,DIAG_SCAN=yes
System checks summary
=====================
File properties checks...
Files checked: 133
Suspect files: 2
Rootkit checks...
Rootkits checked : 376
Possible rootkits: 0 ##0个rootkits
Applications checks...
All checks skipped
The system checks took: 1 minute and 22 seconds
All results have been written to the log file: /var/log/rkhunter/rkhunter.log
One or more warnings have been found while checking the system.
Please check the log file (/var/log/rkhunter/rkhunter.log)

2.AIDE文件、目录监测工具
aide:可以实现监测文件:权限变化,文件大小,重命名,移动等。
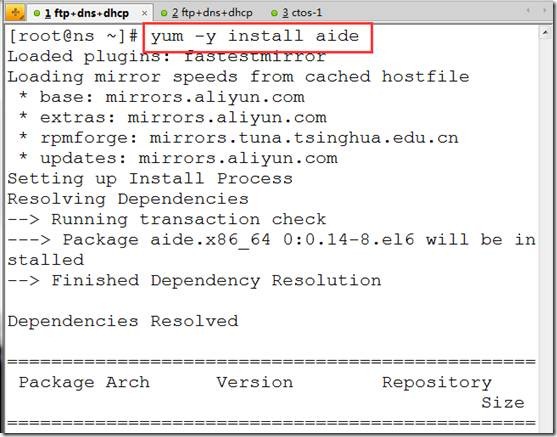
yum -y install aide
vi /etc/aide.conf
:87,$s/^/#/g ##注释掉默认监测规则


在87行后添加:
MYAT = p+u+g+acl ##定义监控事件,p权限、u用户、g组、acl文件的facl
/etc/linuxfan MYAT ##对目录的MYAT的事件进行监控
:wq

mkdir /etc/linuxfan

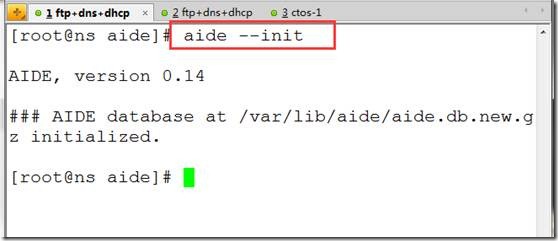
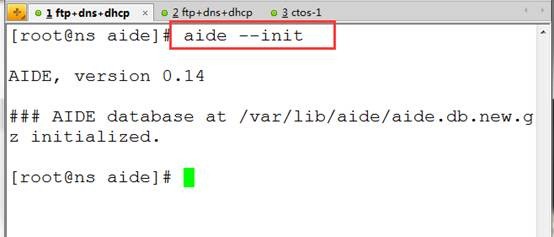
aide --init ##初始化数据库
mv /var/lib/aide/aide.db.new.gz /var/lib/aide/aide.db.gz ##对比模板数据库

aide --check ##监测目录是否有变化,无变化

chmod 777 /etc/linuxfan

aide --check ##监测目录的变化

aide --update ##更新变化,确认变化是合法

cp /var/lib/aide/aide.db.new.gz /var/lib/aide/aide.db.gz ##去掉new保证前面设置的权限合法化

echo '0 1 * * * /usr/sbin/aide --update |mail -s 'Daily check by aide' linuxfan360@163.com' >>/var/spool/cron/root

3.TCPdump抓包工具
截取网络部分流量数据,并且输出。常见的排错和网络分析工具。
案例:
tcpdump arp ##当怀疑arp攻击时使用
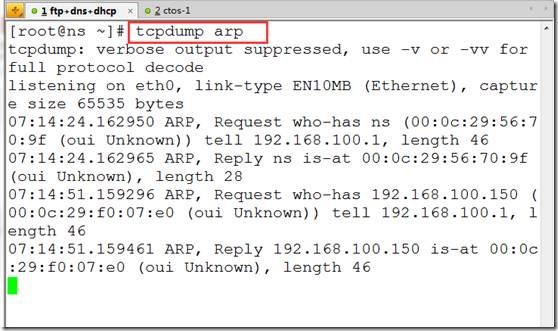
tcpdump icmp ##当怀疑ddos攻击时使用

tcpdump ip host 192.168.3.200 and port 22 and tcp ##只抓ssh包

tcpdump -vv ##显示抓包的详细信息
二:回顾常用工具,分析工具lsof,sar,ss,iperf3网络测速,双网卡bonding
1.常用工具:磁盘、内存、cpu
磁盘:
df -hT ##硬盘的使用情况

du -sh /* ##统计目录的每个文件及目录大小

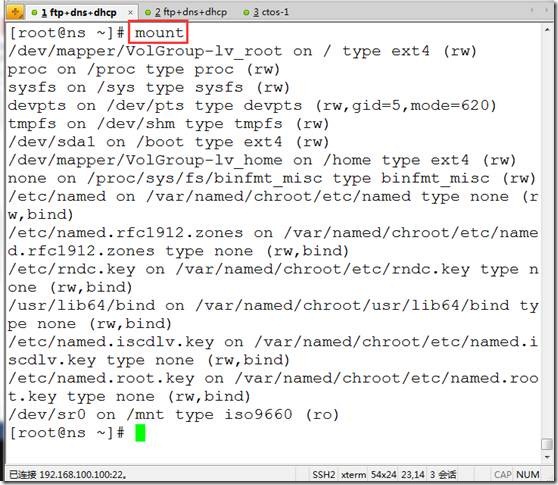
mount ##查看已经挂载的内容
内存:
free

cat /proc/meminfo

cpu查看:
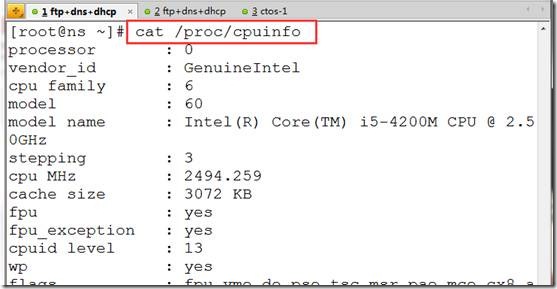
cat /proc/cpuinfo
echo "scale=4; 100/3" |bc ##用于计算相关显示信息,scale指定小数的位数

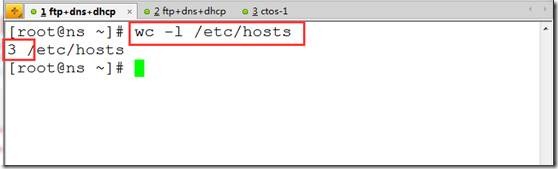
wc -l /etc/hosts ##统计文件的行数
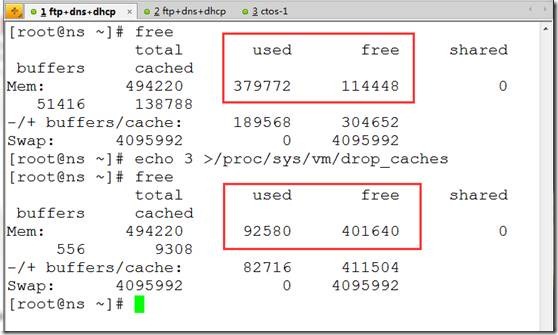
[root@www ~]# sync ##将有效数据从内存中写入硬盘
[root@www ~]# echo 3 >/proc/sys/vm/drop_caches ##清楚内存中的数据
[root@www ~]# free
2.分析工具
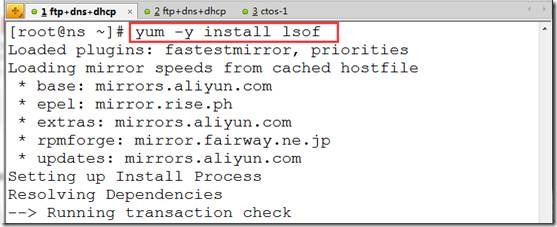
1)lsof:列出系统打开的文件
案例:
lsof #列出所有的打开的文件
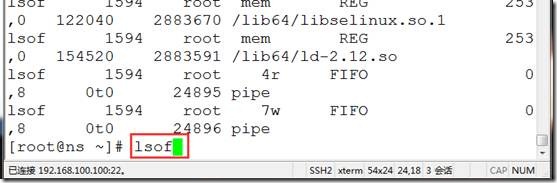
COMMAND PID(进程) USER(用户) TYPE NODE(节点) NAME
a.递归查找某个目录所有被打开的文件
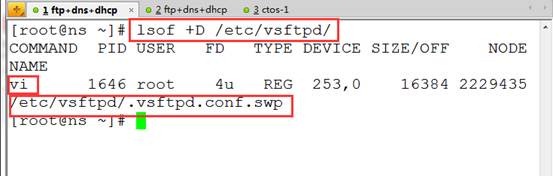
lsof +D /opt/data

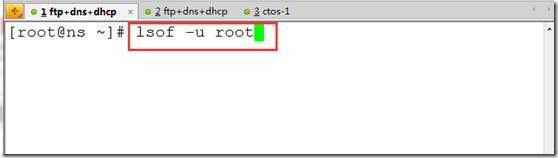
b.列出某个用户打开所有文件
lsof -u root
lsof -u ^root ##-u用户,^取反

c.查找某个进程所打开文件
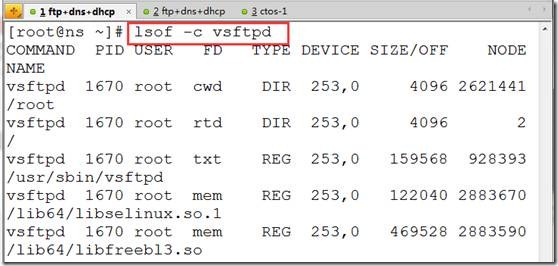
lsof -c nginx
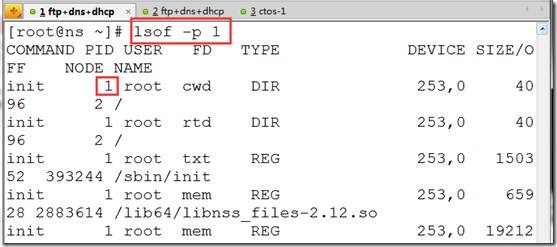
d.列出某个进程打开文件
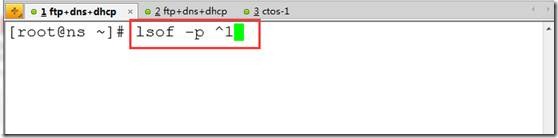
lsof -p 1
lsof -p ^1
e.列出网络连接打开的文件
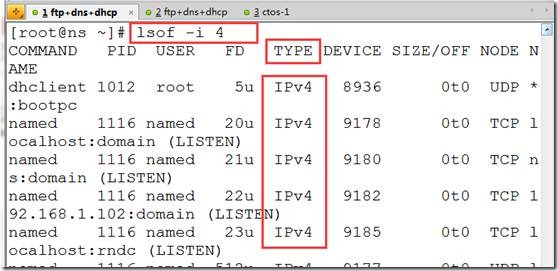
lsof -i ##列出所有包括ipv4、ipv6;lsof -i 4 (只列出ipv4)
lsof -a -u hacker -i ##找到hacker用户的所有网络连接
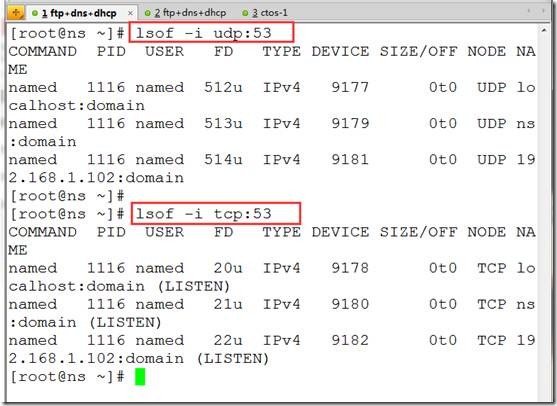
lsof -i udp:53 ##查看udp53端口网络连接
lsof -i tcp:53
f.输出某类资源的pid
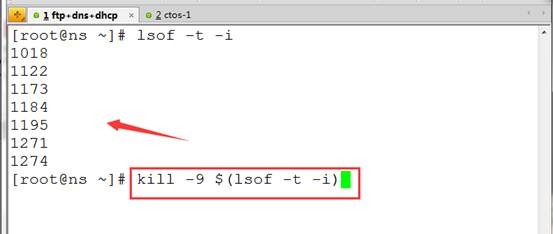
lsof -t -i ##将所有的网络的进程输出

kill -9 $(lsof -t -i)

2.sar,资源监控

sar是有sysstat软件提供,需要单独安装。
sar支持监控内存、cpu、硬盘
案例:
[root@ns ~]# yum -y install sysstat
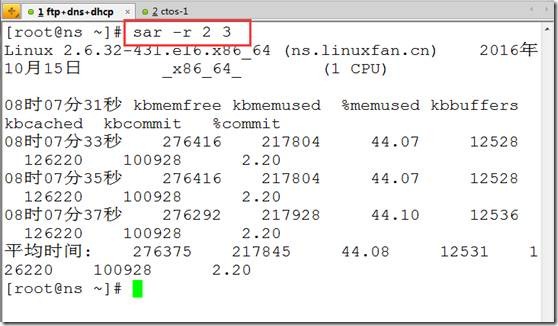
sar -r 2 3 ##监控内存,每隔2秒一次共3次
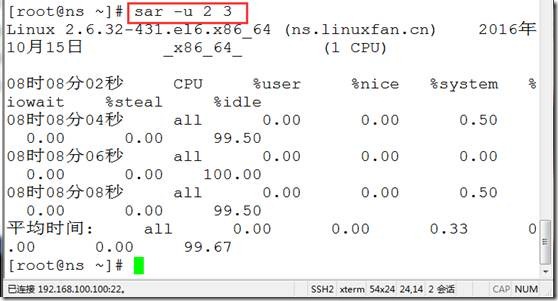
sar -u 2 3 ##监控cpu的使用情况
sar -b 2 3 ##监控硬盘使用情况

支持文件的操作:
sar -b -f /var/log/sa/sa18

LC_ALL=C sar -u 2 3 ##指定时间的显示方式为19:10:12的格式

3.ss查看网络连接情况
ss -a ##查看所有的网络连接

ss -o state established ##过滤出established状态的连接

4.iperf3:网络测速工具
c/s模式,通过给客户端传输数据测速网络情况
同时在c端和s端安装iperf3
yum -y install epel-release
yum -y install iperf3
s端:
iperf3 -s ##监听
c端:
iperf3 -c 192.168.10.113 ##测速
5.双网卡绑定:
eth0和eth1同时接到同一个网络中,
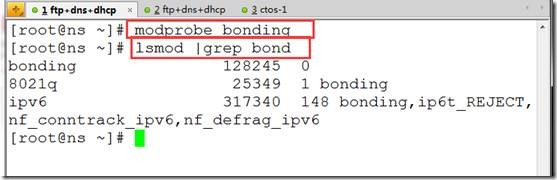
modprobe bonding ##加载bonding内核模块
lsmod |grep bond ##确认是否成功
cd /etc/sysconfig/network-scripts/
[root@localhost network-scripts]# cat ifcfg-eth0
DEVICE=eth0
TYPE=Ethernet
ONBOOT=yes
NM_CONTROLLED=no
BOOTPROTO=none
MASTER=bond0
IPV6INIT=no
SLAVE=yes
cd /etc/sysconfig/network-scripts/
[root@localhost network-scripts]# cat ifcfg-eth1
DEVICE=eth1
TYPE=Ethernet
ONBOOT=yes
NM_CONTROLLED=no
BOOTPROTO=none
MASTER=bond0
IPV6INIT=no
SLAVE=yes
[root@localhost network-scripts]# cat ifcfg-bond0
DEVICE=bond0
BOOTPROTO=none
ONBOOT=yes
IPV6INIT=no
IPADDR=192.168.10.21
NETMASK=255.255.255.0
GATEWAY=192.168.10.1
DNS1=192.168.3.5
BOND_OPTS="mode=1 primary=eth0 miimon" ##mode=1表示容错,0表示负载均衡,虚拟机只支持1,0-6真机支持。
/etc/init.d/network restart
cat <<END >>/etc/rc.local
modprobe bonding
/etc/init.d/network restart
6.iftop+ntop网络监控流量
注意安全前必须配置好rpmforge和epel源:
[root@ns bin]# yum -y install --enablerepo=rpmforge iftop ##安装iftop

[root@ns bin]# iftop ##使用iftop
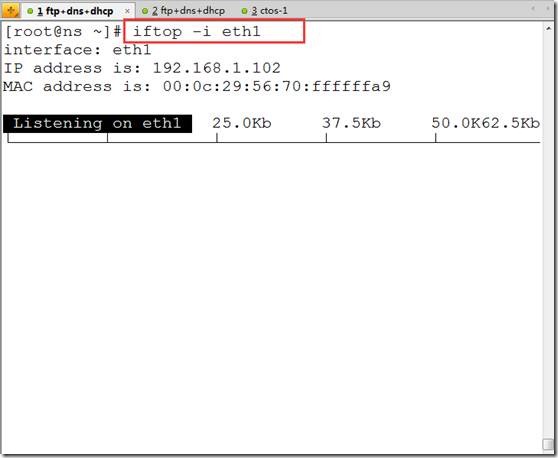
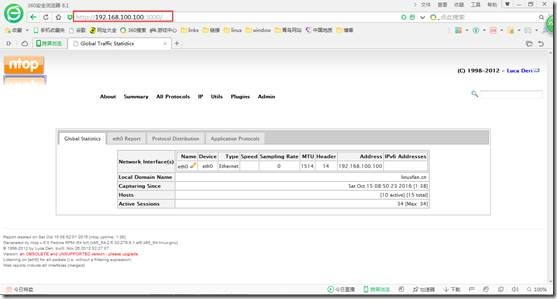
[root@ns ~]# yum -y install --enablerepo=epel ntop ##安装ntop

[root@ns ~]# ntop -i eth0 -u ntop ##在内网卡上启动ntop

http://192.168.100.100:3000/ ##浏览器中访问查看,最好配置翻墙软件,ntop调用google地图
1.rootkit
a.了解rootkit
针对多个系统,如win、sunos、linux
rootkit由几个独立程序组成:
1)网络嗅探程序,用于获取用户名密码,并且上传。
2)特洛伊木马,inetd、login为攻击者提供后门。
3)隐藏攻击者目录、进程:ps、netstat、ls替换。
4)清理工具,zap、z2攻击者使用这些工具可删除wtmp、utmp、lastlog等用户记录有关的日志。
b.检测rootkit
防止rootkit:做好系统及时更新,权限管理准确,开启selinux及时检测rootkit
chkrootkit:检测linux系统是否被rootkit攻击
RKHunter:检测rootkit
1)安装和使用chkrootkit
yum --enablerepo=epel -y install chkrootkit (必须先配置好epel的源)
chkrootkit ##执行检测

chkrootkit |grep INFECTED ##如果显示有结果证明中招,没结果即没问题

2)RKHunter安装及使用
rpm -qa |grep rkhunter
rpm -e rkhunter
yum --enablerepo=epel -y install rkhunter (必须先配置好epel的yum源)

vi /etc/sysconfig/rkhunter
MAILTO=root@localhost ##检测通知邮箱,可以自定义
DIAG_SCAN=no ##快速扫描,如果yes,详细扫描。
:wq
rkhunter --update ##更新rkhunter数据库(病毒库)

rkhunter --propupd ##更新系统文件的优先级

rkhunter --check --sk ##检测rootkit病毒,DIAG_SCAN=no

rkhunter --check --rwo ##详细检测,DIAG_SCAN=yes
System checks summary
=====================
File properties checks...
Files checked: 133
Suspect files: 2
Rootkit checks...
Rootkits checked : 376
Possible rootkits: 0 ##0个rootkits
Applications checks...
All checks skipped
The system checks took: 1 minute and 22 seconds
All results have been written to the log file: /var/log/rkhunter/rkhunter.log
One or more warnings have been found while checking the system.
Please check the log file (/var/log/rkhunter/rkhunter.log)

2.AIDE文件、目录监测工具
aide:可以实现监测文件:权限变化,文件大小,重命名,移动等。
yum -y install aide

vi /etc/aide.conf
:87,$s/^/#/g ##注释掉默认监测规则


在87行后添加:
MYAT = p+u+g+acl ##定义监控事件,p权限、u用户、g组、acl文件的facl
/etc/linuxfan MYAT ##对目录的MYAT的事件进行监控
:wq

mkdir /etc/linuxfan

aide --init ##初始化数据库
mv /var/lib/aide/aide.db.new.gz /var/lib/aide/aide.db.gz ##对比模板数据库

aide --check ##监测目录是否有变化,无变化

chmod 777 /etc/linuxfan

aide --check ##监测目录的变化

aide --update ##更新变化,确认变化是合法

cp /var/lib/aide/aide.db.new.gz /var/lib/aide/aide.db.gz ##去掉new保证前面设置的权限合法化

echo '0 1 * * * /usr/sbin/aide --update |mail -s 'Daily check by aide' linuxfan360@163.com' >>/var/spool/cron/root

3.TCPdump抓包工具
截取网络部分流量数据,并且输出。常见的排错和网络分析工具。
案例:
tcpdump arp ##当怀疑arp攻击时使用

tcpdump icmp ##当怀疑ddos攻击时使用

tcpdump ip host 192.168.3.200 and port 22 and tcp ##只抓ssh包

tcpdump -vv ##显示抓包的详细信息
二:回顾常用工具,分析工具lsof,sar,ss,iperf3网络测速,双网卡bonding
1.常用工具:磁盘、内存、cpu
磁盘:
df -hT ##硬盘的使用情况

du -sh /* ##统计目录的每个文件及目录大小

mount ##查看已经挂载的内容

内存:
free

cat /proc/meminfo

cpu查看:
cat /proc/cpuinfo

echo "scale=4; 100/3" |bc ##用于计算相关显示信息,scale指定小数的位数

wc -l /etc/hosts ##统计文件的行数

[root@www ~]# sync ##将有效数据从内存中写入硬盘
[root@www ~]# echo 3 >/proc/sys/vm/drop_caches ##清楚内存中的数据
[root@www ~]# free

2.分析工具
1)lsof:列出系统打开的文件
案例:
lsof #列出所有的打开的文件

COMMAND PID(进程) USER(用户) TYPE NODE(节点) NAME
a.递归查找某个目录所有被打开的文件
lsof +D /opt/data
b.列出某个用户打开所有文件
lsof -u root

lsof -u ^root ##-u用户,^取反

c.查找某个进程所打开文件
lsof -c nginx

d.列出某个进程打开文件
lsof -p 1

lsof -p ^1

e.列出网络连接打开的文件
lsof -i ##列出所有包括ipv4、ipv6;lsof -i 4 (只列出ipv4)

lsof -a -u hacker -i ##找到hacker用户的所有网络连接
lsof -i udp:53 ##查看udp53端口网络连接
lsof -i tcp:53

f.输出某类资源的pid
lsof -t -i ##将所有的网络的进程输出

kill -9 $(lsof -t -i)
2.sar,资源监控

sar是有sysstat软件提供,需要单独安装。
sar支持监控内存、cpu、硬盘
案例:
[root@ns ~]# yum -y install sysstat
sar -r 2 3 ##监控内存,每隔2秒一次共3次

sar -u 2 3 ##监控cpu的使用情况

sar -b 2 3 ##监控硬盘使用情况

支持文件的操作:
sar -b -f /var/log/sa/sa18

LC_ALL=C sar -u 2 3 ##指定时间的显示方式为19:10:12的格式

3.ss查看网络连接情况
ss -a ##查看所有的网络连接

ss -o state established ##过滤出established状态的连接

4.iperf3:网络测速工具
c/s模式,通过给客户端传输数据测速网络情况
同时在c端和s端安装iperf3
yum -y install epel-release
yum -y install iperf3
s端:
iperf3 -s ##监听
c端:
iperf3 -c 192.168.10.113 ##测速
5.双网卡绑定:
eth0和eth1同时接到同一个网络中,
modprobe bonding ##加载bonding内核模块
lsmod |grep bond ##确认是否成功

cd /etc/sysconfig/network-scripts/
[root@localhost network-scripts]# cat ifcfg-eth0
DEVICE=eth0
TYPE=Ethernet
ONBOOT=yes
NM_CONTROLLED=no
BOOTPROTO=none
MASTER=bond0
IPV6INIT=no
SLAVE=yes
cd /etc/sysconfig/network-scripts/
[root@localhost network-scripts]# cat ifcfg-eth1
DEVICE=eth1
TYPE=Ethernet
ONBOOT=yes
NM_CONTROLLED=no
BOOTPROTO=none
MASTER=bond0
IPV6INIT=no
SLAVE=yes
[root@localhost network-scripts]# cat ifcfg-bond0
DEVICE=bond0
BOOTPROTO=none
ONBOOT=yes
IPV6INIT=no
IPADDR=192.168.10.21
NETMASK=255.255.255.0
GATEWAY=192.168.10.1
DNS1=192.168.3.5
BOND_OPTS="mode=1 primary=eth0 miimon" ##mode=1表示容错,0表示负载均衡,虚拟机只支持1,0-6真机支持。
/etc/init.d/network restart
cat <<END >>/etc/rc.local
modprobe bonding
/etc/init.d/network restart
6.iftop+ntop网络监控流量
注意安全前必须配置好rpmforge和epel源:
[root@ns bin]# yum -y install --enablerepo=rpmforge iftop ##安装iftop

[root@ns bin]# iftop ##使用iftop

[root@ns ~]# yum -y install --enablerepo=epel ntop ##安装ntop

[root@ns ~]# ntop -i eth0 -u ntop ##在内网卡上启动ntop

http://192.168.100.100:3000/ ##浏览器中访问查看,最好配置翻墙软件,ntop调用google地图


相关文章推荐
- linux安全---10大linux必备运维工具
- 快收藏!高手Linux运维管理必备工具大全,你会吗?
- Linux运维必备命令行工具
- Linux运维工程师必备技能及实用工具
- Linux 运维必备的 13 款实用工具,拿好了~
- Linux运维工程师必备的80个监控工具全集(上)
- linux下运维必备的性能分析工具总结
- Linux高手必备工具之nmap
- Linux系统管理员必备工具系列之vmstat 1
- 28 个必备的 Linux 命令行工具
- 管理员必备的20个LINUX系统监控工具
- 管理员必备的Linux系统监控工具
- Unix/Linux运维首选工具Xmanager Enterprise 3.0的使用教程
- 管理员必备的Linux系统监控工具
- 管理员必备的20个Linux系统监控工具
- [转]28 个必备的 Linux 命令行工具