自定义AlertDialog.Builder对话框
2016-11-18 11:46
381 查看
在工作中,原生态的AlertDialog已经远远不能满足我们工作的需求,这时候,就需要使用自定义的AlertDialog.Builder:
在自定义之前,我们先了解下,
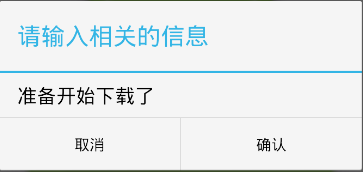
示意图:
2,自定义:就必须使用setView();设置自定义的布局
效果示意图:

2.1,自定义AlertDialog方法二
在自定义之前,我们先了解下,
**原生态的AlertDialog的基本使用**
setTitle():设置对话框标题
setMessage():设置对话框内容
setIcon():设置对话框图标
setItems():设置要在对话框中显示的列表项目
**setView();设置自定义的对话框样式**
setSingleChoiceItems();设置对话框显示出一个单选框
setMultiChoiceItems():设置对话框显示一系列的复选框
setPositiveButton();设置对话框显示一个"确定"的按钮
setNegativeButton();设置对话框显示一个"取消"的按钮
setNeutralButton();设置对话框显示一个"退出"的按钮
create();创建一个AlertDialog的对话框
show();显示对话框

实例代码:
//对话框的实现
final AlertDialog.Builder builder = new AlertDialog.Builder(this);
builder.setTitle("请输入相关的信息");
builder.setMessage("准备开始下载了");
//设置确认按钮
builder.setPositiveButton("确认", new DialogInterface.OnClickListener() {
@Override
public void onClick(DialogInterface dialogInterface, int i) {
Toast.makeText(SplashActivity.this, "完成了", Toast.LENGTH_SHORT).show();
}
});
//设置取消按钮
builder.setNegativeButton("取消", new DialogInterface.OnClickListener() {
@Override
public void onClick(DialogInterface dialogInterface, int i) {
//取消就要让界面消失
mDialog.dismiss();
}
});
//按住旁边的按钮,对话框也消失
builder.setOnCancelListener(new DialogInterface.OnCancelListener() {
@Override
public void onCancel(DialogInterface dialogInterface) {
mDialog.dismiss();
}
});
//显示对话框
mDialog = builder.show();
示意图:
2,自定义:就必须使用setView();设置自定义的布局
//设置密码框
private void showSetPasswordDialog() {

mBuilder = new AlertDialog.Builder(HomeActivity.this);
mView = View.inflate(getApplicationContext(), R.layout.dialog_view_home, null);
//设置自定义的布局
mBuilder.setView(mView);
//拿到控件,设置数据
mEt_first_password = (EditText) mView.findViewById(R.id.et_first_password);
mEt_second_password = (EditText) mView.findViewById(R.id.et_second_password);
mBtn_ok = (Button) mView.findViewById(R.id.btn_ok);
mBtn_cancel = (Button) mView.findViewById(R.id.btn_cancel);
//给button设置点击事件
//取消
mBtn_cancel.setOnClickListener(new View.OnClickListener() {

@Override
public void onClick(View v) {
//关闭掉对话框,拿到对话框的对象
mAlertDialog.dismiss();
}
});
//确认
mBtn_ok.setOnClickListener(new View.OnClickListener() {

@Override
public void onClick(View v) {
//先获得两个输入框的值
String first_passwprd = mEt_first_password.getText().toString().trim();
String secode_password = mEt_second_password.getText().toString().trim();
// 先做非空判断
if (TextUtils.isEmpty(first_passwprd) || TextUtils.isEmpty(secode_password)) {
//说明至少有一个为空
Toast.makeText(HomeActivity.this, "请按要求输入", Toast.LENGTH_SHORT).show();
return;
}
//在比对两个密码是否相等
if (!first_passwprd.equals(secode_password)) {
//说明不相等
Toast.makeText(HomeActivity.this, "两次输入不相等", Toast.LENGTH_SHORT).show();
return;
}
//走到这里,说明数据没有问题
//相等的话,保存密码
SPUtils.putString(getApplicationContext(), Constacts.PASSWORD, MD5Utils.Md5Utils(first_passwprd));
mAlertDialog.dismiss();
}
});
mAlertDialog = mBuilder.show();
}
其布局文件为:
<?xml version="1.0" encoding="utf-8"?>
<LinearLayout xmlns:android="http://schemas.android.com/apk/res/android"
android:orientation="vertical"
android:layout_width="match_parent"
android:layout_height="wrap_content">
<TextView
android:text="设置密码"
android:textColor="#fff"
android:background="@drawable/blue_bkg"
style="@style/Tv_Title"/>

<EditText
android:id="@+id/et_first_password"
android:hint="请输入密码"
android:textColor="#000"
android:inputType="numberPassword"
android:layout_width="match_parent"
android:layout_height="wrap_content"/>
<EditText
android:id="@+id/et_second_password"
android:hint="请确认输入"
android:inputType="numberPassword"
android:textColor="#000"
android:layout_width="match_parent"
android:layout_height="wrap_content"/>

<LinearLayout
android:layout_width="match_parent"
android:orientation="horizontal"
android:layout_height="wrap_content">
<Button
android:id="@+id/btn_ok"
android:layout_width="0dp"
android:layout_weight="1"
android:text="确认"
android:background="@drawable/btn_selector"
android:layout_height="wrap_content"/>
<Button
android:id="@+id/btn_cancel"
android:layout_width="0dp"
android:layout_weight="1"
android:text="取消"
android:background="@drawable/btn_selector"
android:layout_height="wrap_content"/>

</LinearLayout>
</LinearLayout>
效果示意图:
2.1,自定义AlertDialog方法二
private AlertDialog.Builder defineDialog;
//1,找到相应的布局文件
View view = View.inflate(getApplicationContext,R.Layout.define_AlertDialog_item);
//2,获取布局中的控件
//TODO
//3,创建一个AlertDialog的对话框,并加载自定义对话框样式
defineDialog = new AlertDialog.Builder(getApplicationContext)
.setTitle("付款界面"),
.setView(view),
.setPositiveButton("确认",this),
.setNegativeButton("取消",this),
.create();
defineDialog .show();

相关文章推荐
- 使用AlertDialog.Builder自定义对话框
- Android之自定义对话框AlertDialog.Builder+getLayoutInflater().inflate
- 【边做项目边学Android】知识点:Android控件系列之对话框AlertDialog.Builder
- android AlertBuilder创建的dialog,使用自定义样式
- android-如何关闭AlertDialog.Builder对话框
- Android开发之AlertDialog 关于重写onCreatDialog自定义对话框的问题 问题出自于《疯狂Android讲义》这本书
- android AlertDialog.Builder 设置对话框不消失
- 关闭AlertDialog.Builder对话框
- android-如何关闭AlertDialog.Builder对话框
- 安卓使用 AlertDialog.Builder创建单选列表对话框
- Android 对话框AlertDialog和AlertDialog.Builder两者的区别
- alertdialog.builder 自定义弹窗
- 自定义对话框AlertDialog.getWindow().setContentView(view)是EditText无法输入
- 关于AlertDialog.Builder的自定义
- Android AlertDialog对话框自定义风格的另类实现
- AlertDialog自定义对话框显示黑色边框
- android 简单列表对话框(AlertDialog.Builder().setItems())
- Androidの自定义对话框AlertDialog(二)
- AlertDialog.Builder(各种对话框实现)
- android-如何关闭AlertDialog.Builder对话框