Js动态添加div实现模块复制
2016-10-08 19:52
267 查看
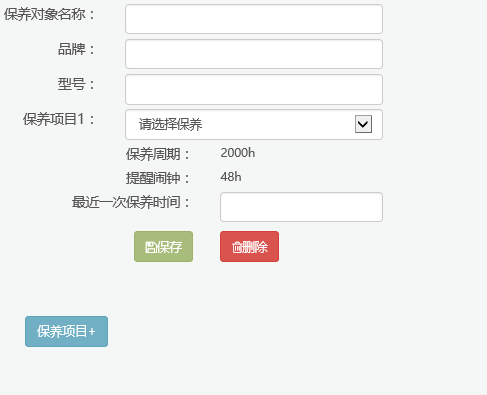
**原DIV效果图↓**
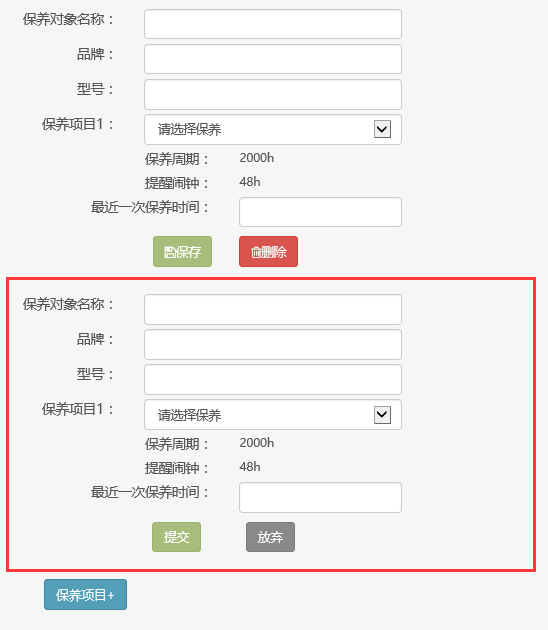
点击“保养项目+”后效果图如下(红色线框中就是动态添加出来的)↓
接下来看代码↓
html 代码块↓
<div id="father">
<div class="row">
<div class="col-md-2" style="font-size: 15px; text-align: right">
保养对象名称:
</div>
<div class="col-md-3">
@Html.TextBox("Mobile", null, new { @class = "form-control" })
</div>
</div>
<div class="row" style="margin-top: 5px">
<div class="col-md-2" style="font-size: 15px; text-align: right">
品牌:
</div>
<div class="col-md-3">
@Html.TextBox("Mobile", null, new { @class = "form-control" })
</div>
</div>
<div class="row" style="margin-top: 5px">
<div class="col-md-2" style="font-size: 15px; text-align: right">
型号:
</div>
<div class="col-md-3">
@Html.TextBox("Mobile", null, new { @class = "form-control" })
</div>
</div>
<div class="row" style="margin-top: 5px">
<div class="col-md-2" style="font-size: 15px; text-align: right">
保养项目1:
</div>
<div class="col-md-3">
<select name="select" id="select_k1" class="form-control">
<option value="">请选择保养</option>
<option value="XX保养规定1">XX保养规定1</option>
<option value="XX保养规定2">XX保养规定2</option>
<option value="XX保养规定3">XX保养规定3</option>
</select>
</div>
</div>
<div class="row" style="margin-top: 5px">
<div class="col-md-3" style="font-size: 15px; text-align: right">
保养周期:
</div>
<div class="col-md-3">
2000h
</div>
</div>
<div class="row" style="margin-top: 5px">
<div class="col-md-3" style="font-size: 15px; text-align: right">
提醒闹钟:
</div>
<div class="col-md-3">
48h
</div>
</div>
<div class="row" style="margin-top: 5px">
<div class="col-md-3" style="font-size: 15px; text-align: right">
最近一次保养时间:
</div>
<div class="col-md-2">
<input class="form-control" type="text" value="" placeholder="" id="Datetime" name="Datetime" />
</div>
</div>
</div>

<div class="row" style="margin-top: 10px">
<div class="col-md-3" style="font-size: 15px; text-align: right">
<a class="btn btn-success" id="save" href="javascript:;"><i class="fa fa-save (alias)"></i>保存</a>
</div>
<div class="col-md-3">
<a class="btn btn-danger" title="删除" href="javascript:if(confirm('确定要删除?')) location='/Cms/Maintain/Delete?ID=1'"><i class="fa fa-trash-o"></i>删除</a>
</div>
</div>

<div id="parent" style="margin-top: 30px"></div>
<input style="margin-left: 100px; margin-top: 30px" class="btn btn-info" type="button" onclick="addDiv();" value="保养项目+" />
js 代码块↓
<script type="text/javascript">
$('#Datetime').datepicker({
language: 'zh-CN'
});

$(document).ready(function () {
App.init(); //Initialise plugins and elements
});

$("#select_k1").change(function () {
var  val = document.getElementById("select_k1").value;
if (val != "") {
var data = ["2016年10月07日", "2016年10月05日", "2016年10月08日"];
var rnd = Math.floor(Math.random() * 3);
document.getElementById("Datetime").placeholder = data[rnd];
} else {
document.getElementById("Datetime").placeholder = "";
}
});

//以下是获取原有div的内容再添加到动态生成的div中
var divs = 0,number = 0;//divs是创建各个控件时赋值变量ID所用,number是计数用
var addDiv = function () {
if (number == 5) return;//最多添加5个div
var oDiv = document.createElement("div");
document.getElementById("parent").appendChild(oDiv);
oDiv.id = "div_" + divs;
oDiv.style.width = "100%";
oDiv.style.height = "auto";
oDiv.style.marginTop = "30px";
var _div = document.getElementById("father").innerHTML;
document.getElementById(oDiv.id).innerHTML = _div;
//添加提交、放弃button
var commit = document.createElement("input");
commit.type = "button";
commit.value = "提交";
commit.id = "com_" + divs;
commit.className = "btn btn-success";
commit.style.marginTop = "10px";
commit.style.marginLeft = "220px";
oDiv.appendChild(commit);
var dele = document.createElement("input");
dele.type = "button";
dele.value = "放弃";
dele.id = "dele_" + divs;
dele.className = "btn btn-grey";
dele.style.marginTop = "10px";
dele.style.marginLeft = "50px";
oDiv.appendChild(dele);
//为dele添加事件的监听
dele.onclick = remove;
function remove() {
document.getElementById(oDiv.id).removeNode(true);
number--;
}
divs++;
number++;
}
</script>
当然,上面有几个没有用的js代码,主要动态加载的已经贴上去了,如果有更好的方法可以任意替换的。

相关文章推荐
- JS实现动态添加和删除DIV
- JS实现动态添加和删除DIV
- JS动态添加的div点击跳转到另一页面实现代码
- 使用jQuery加DIV实现可以动态添加的金字塔结构
- js动态添加div(一)
- js动态添加div(三)
- 使用js实现对table的动态添加、删除和更新
- 使用jQuery加DIV实现可以动态添加的金字塔结构
- JS自定义功能函数实现动态添加网址参数修改网址参数值
- js实现当用户复制网页内容时添加版权等额外信息源码
- Js动态添加事件 实现附加自己的事件属性
- js实现前台动态添加文本框,后台获取文本框内容
- 动态添加js事件实现代码
- JS实现下拉框的动态添加(附效果)
- Js实现无刷新添加新层,拖动DIV层可互换位置丨www.CsrCode.cn
- 动态添加diV,实现了拖拽功能
- js实现复制,删除一行div或一行table
- JS函数实现动态添加CSS样式表文件
- js 向 div 动态 添加 内容 table
- JS实现下拉框的动态添加(附效果)