[置顶] Spring框架研究总结之IOC
2016-09-27 15:45
375 查看
Spring框架研究总结之IOC
Spring是一个开源的企业应用框架,是一个分层架构,由7个定义稳定的模块所组成,而所有的模块都是在核心容器基础上搭建;其体系本身提供了强大的IOC(控制反转)、AOP(面向切面)以及DI(依赖注入)等较显著的功能,那么下面就来详细介绍下Spring框架的模块组成及相关特点。
l 框架结构
l 依赖注入
l 控制反转
一、框架结构
Spring是一个分层架构,目前由7个稳定的模块所组成,而其它所有的模块都构建于核心容器之上,而核心容器负责Bean的创建、配置及管理Bean的方式,具体结构图如下:
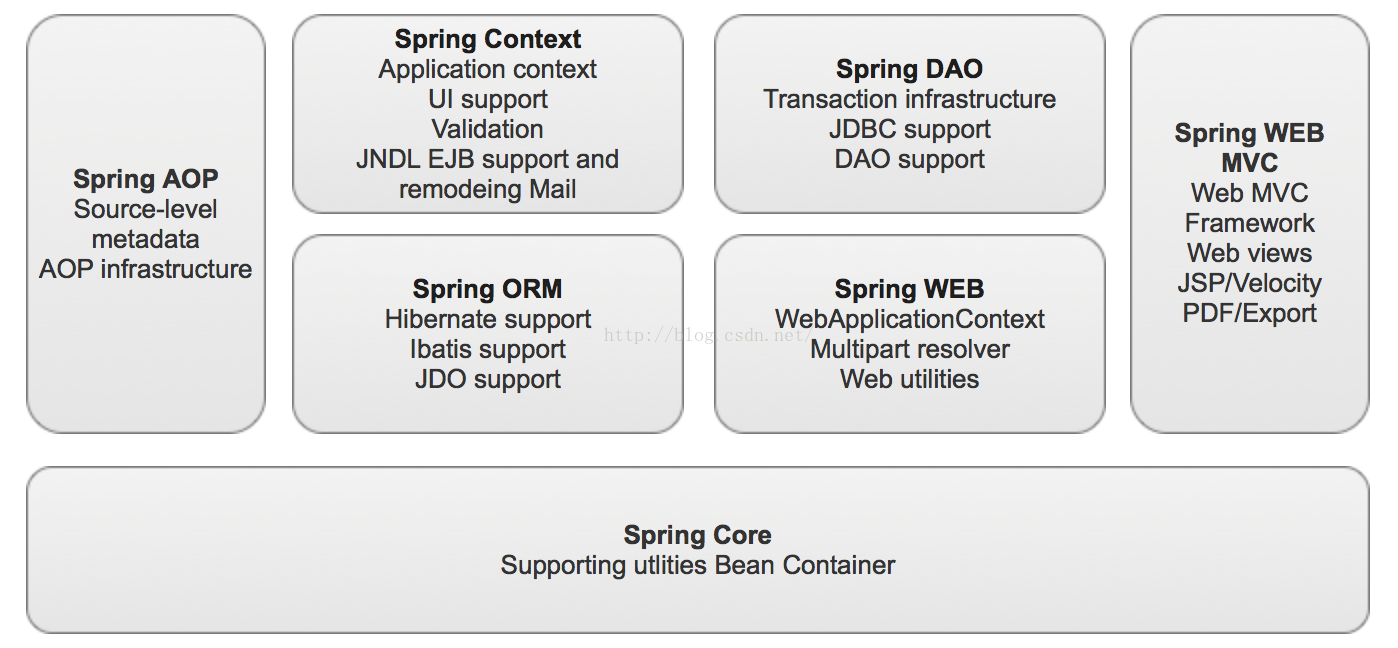
正如上面的结构图所示,组成Spring框架的每个模块都可以单独存在,或者与其它多个模块结合使用,具体每个模块的功能如下:
1、Spring Core
该模块提供了Spring框架的基本功能,其主要的组件是BeanFactory,该组件是由工厂模式实现,并且使用控制反转(IOC)模式将应用程序的配置和依赖规范与实际应用程序分开来。
2、Spring Context
该模块向Spring框架提供上下文配置信息,该配置信息包括但不限于:EJB、JNDI、Main、校验、调度及国际化功能。
3、Spring ORM
Spring 框架插入了若干个 ORM
框架,从而提供了 ORM 的对象关系工具,其中包括 JDO、Hibernate 和iBatis SQL Map。所有这些都遵从 Spring 的通用事务和 DAO 异常层次结构。
4、Spring DAO
JDBC DAO 抽象层提供了有意义的异常层次结构,可用该结构来管理异常处理和不同数据库供应商抛出的错误消息。异常层次结构简化了错误处理,并且极大地降低了需要编写的异常代码数量(例如打开和关闭连接)。Spring DAO
的面向 JDBC 的异常遵从通用的 DAO 异常层次结构。
5、Spring WEB
Web 上下文模块建立在应用程序上下文模块之上,为基于 Web
的应用程序提供了上下文。所以,Spring 框架支持与 Jakarta Struts 的集成。Web 模块还简化了处理多部分请求以及将请求参数绑定到域对象的工作。
6、Spring WEB MVC
MVC 框架是一个全功能的构建 Web 应用程序的 MVC 实现。通过策略接口,MVC 框架变成为高度可配置的,MVC 容纳了大量视图技术,其中包括 JSP、Velocity、Tiles、iText和 POI。
最后,Spring 框架的功能可以用在任何 J2EE
服务中,大多数功能也适用于不受管理的环境。而Spring 的核心是:支持不绑定到特定 J2EE 服务的可重用业务和数据访问对象,这样的对象可以在不同 J2EE 环境 (Web 或 EJB)、独立应用程序、测试环境之间重用。
二、依赖注入(DI)
什么是依赖注入?我的理解就是当类A的一个对象必须引用另一个类B的对象才能完成其所需功能时,我们称A和B两者间存在依赖关系,如果类A只是通过类B实现的接口来引用类B的对象,我们说这两个类是松耦合的,而Spring的DI模式通过一种灵活的方式将类B对象赋值给了类A,而类A不需要知道类B的存在,这种方式我们称之为依赖注入。至于如何把类B的对象注入到类A中,实际是使用了Java的反射机制来实现,当然这些不需要我们操心,一切全交给了Spring自动完成。下面分别介绍,并举例验证,最后以一个Java项目为例结合DI、IOC的使用。
1、注入内容
在Spring中,我们注入的内容称之为Bean,也就是JavaBean,而在MVC架构中,Bean充当model层,在一般程序中,我们称之为数据层,也就是用来存储数据的属性和一些行为,然后提供属性的get/set操作。
2、Setter注入
Setter注入就是根据Bean的set方法来注入另一个依赖的对象,具体如下:
A、Bean准备
Person类:
public
class Person {
private String
name;
private String
address;
private
int age;
public String getName() {
return
name;
}
public
void setName(String name) {
this.name =
name;
}
public String getAddress() {
return
address;
}
public
voidsetAddress(String address) {
this.address =
address;
}
public
int getAge() {
return
age;
}
public
void setAge(int
age) {
this.age =
age;
}
@Override
public String toString() {
return
"Person [name=" +
name + ", address=" +
address + ", age=" +
age
+"]";
}
}
Customer类:
public
class Customer {
private Person
person = null;
public Person getPerson() {
return
person;
}
public
void setPerson(Personperson) {
this.person =
person;
}
@Override
public String toString() {
return
"Customer [person=" +
person + "]";
}
}
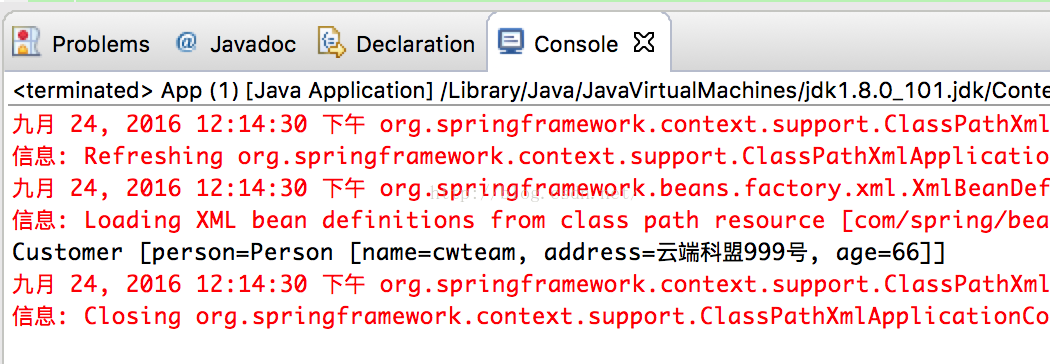
B、XML注入
<bean
id="CustomerBean"class="com.spring.beandi.bean.Customer"
>
<property
name="person"ref="PersonBean"
/>
</bean>
<bean
id="PersonBean"class="com.spring.beandi.bean.Person"
>
<property
name="name"value="cwteam"
/>
<property
name="address"value="云端科盟999号"
/>
<property
name="age"value="66"
/>
</bean>
注意:
这里为Person类中的属性name、address及age给予默认值,也可以在代码实现中动态赋值,这样更加清楚的展示依赖注入的原理。
C、如何使用
由于创建的是Java项目,所以需要使用org.springframework.context中的ConfigurableApplicationContext完成xml配置文件加载到Spring容器。
具体如下使用:
public
class App {
private
staticConfigurableApplicationContext context;
public
static void main(String[]
args) throws IOException, JAXBException {
context =
new ClassPathXmlApplicationContext("com/spring/beandi/config/applicationContext.xml");
Customerc = (Customer)
context.getBean("CustomerBean");
log(c);
context.close();
}
static
void log(Object obj) {
System.out.println(obj.toString());
}
}
运行结果显示:
3、构造注入
构造注入,也就是根据Bean的构造函数依赖注入另一个对象,具体如下:
A、Bean准备
Person类:
public
class Person {
private String
name;
private String
address;
private
int age;
public String getName() {
return
name;
}
public
void setName(String name) {
this.name =
name;
}
public String getAddress() {
return
address;
}
public
voidsetAddress(String address) {
this.address =
address;
}
public
int getAge() {
return
age;
}
public
void setAge(int
age) {
this.age =
age;
}
@Override
public String toString() {
return
"Person [name=" +
name + ", address=" +
address + ", age=" +
age
+"]";
}
}
Customer类:
public
class Customer {
private Person
person = null;
public Customer(Person
person) {
this.person =
person;
}
public Person getPerson() {
return
person;
}
@Override
public String toString() {
return
"Customer [person=" +
person + "]";
}
}
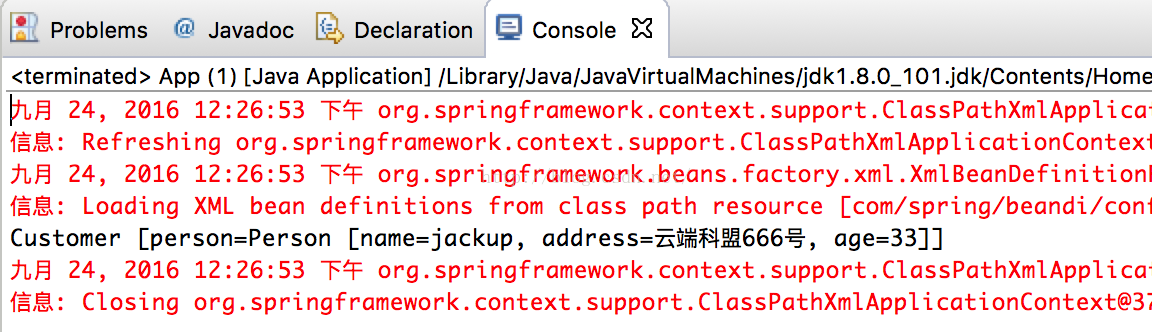
B、XML配置
<bean
id="CustomerBean"class="com.spring.beandi.bean.Customer"
>
<constructor-arg>
<bean
class="com.spring.beandi.bean.Person">
<property
name="name"value="jackup"
/>
<property
name="address"value="云端科盟666号"
/>
<property
name="age"value="33"
/>
</bean>
</constructor-arg>
</bean>
注意:
这里使用<constructor-arg/>标签,直接将Person嵌入其中,并指定默认的属性值,接下来Spring容器便会自动实例化。
C、如何使用
public
class App {
private
staticConfigurableApplicationContext context;
public
static void main(String[]
args) throws IOException, JAXBException {
context =
new ClassPathXmlApplicationContext("com/spring/beandi/config/applicationContext2.xml");
Customerc = (Customer)
context.getBean("CustomerBean");
log(c);
context.close();
}
static
void log(Object obj) {
System.out.println(obj.toString());
}
}
运行结果显示:
三、控制反转(IOC)
IOC容器是具备依赖注入功能的容器,该依赖注入功能是借助于DI机制实现,并且IOC容器也负责存储实例、实例化、定位、配置应用程序中的对象以及建立对象间的关系,而Spring中的所有实例对象都存放在IOC这个容器中,由Spring自动搜寻和分配对应的实例,某种意义上说,IOC与DI很相似,可以理解为DI是IOC功能的子集,这是个人理解,如有异议请在评论中言明探讨,在下面就以一个简单的例子来说明!
1、Bean准备
HelloWorld接口:
public
interfaceHelloWorld {
void printMsg(String
msg);
}
HelloWorldImpl类:
public
class HelloWorldImpl
implements HelloWorld {
@Override
public
void printMsg(String msg) {
System.out.println("Hello:" +
msg);
}
}
2、XML注入
<bean
id="helloService"class="com.spring.helloworld.Impl.HelloWorldImpl"
/>
注意:
这里指定了实现接口的类的类路径,Spring容器通过id值获取并实例化这个类对象。
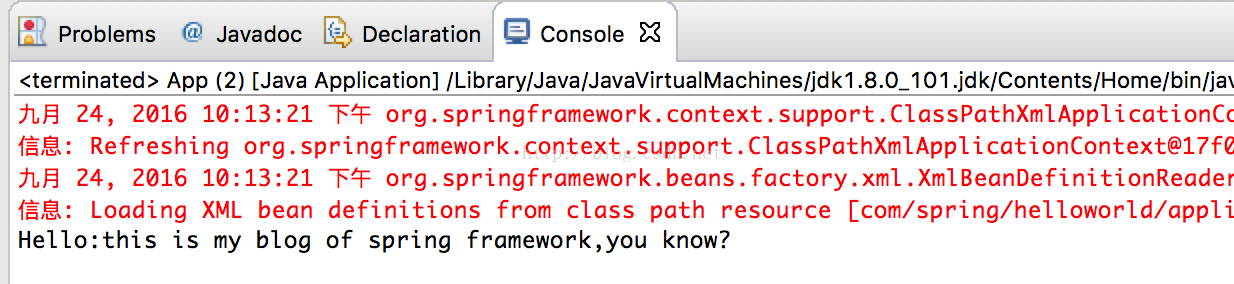
3、如何使用
public
class App {
private
staticApplicationContext context =
null;
public
static void main(String[]
args) {
// 读取配置文件实例化一个IOC容器
context =
new
ClassPathXmlApplicationContext("com/spring/helloworld/applicationContext.xml");
// 从容器中获取Bean,注意此处是“面向接口编程”
HelloWorldhelloService =
context.getBean("helloService",HelloWorld.class);
// 执行业务逻辑
helloService.printMsg("this is my blog of springframework,you know?");
}
}
运行结果显示:
4、scope使用
默认情况下,bean工厂生产的实例为单例模式对象,也就是只有一个类并且该类可以被其它需要的实例所调用,并不创建一个新的实例对象,此种对象称之为“无状态”对象实例;而“有状态”的实例,指的是随着拥有该状态实例的对象生命消失时,其用用的状态实例也自然消失,而“无状态”正好反之。所以,如果我们想在Spring中创建一个有状态的实例对象,那么我们可以在定义Bean时,为其指定关键字scope,内容为prototype即可,具体如下代码:
<bean
id="PersonBean"class="com.spring.beandi.bean.Person"
scope="prototype"
>
<property
name="name"value=" jackup "
/>
<property
name="address"value="云端科盟666号"
/>
<property
name="age"value="33"
/>
</bean>
5、集合属性
在Spring中,我们不仅可以实例化基本的数据类型属性,还可以实例化集合属性,比如:List、Set、Map以及Properties类型数据,具体如下:
Bean对象DataCollection:
public
class DataCollection {
private List<Object>
lists;
private Set<Object>
sets;
private Map<Object, Object>
maps;
private Properties
pros;
public List<Object> getLists() {
return
lists;
}
public
voidsetLists(List<Object> lists) {
this.lists =
lists;
}
public Set<Object> getSets() {
return
sets;
}
public
voidsetSets(Set<Object> sets) {
this.sets =
sets;
}
public Map<Object, Object> getMaps() {
return
maps;
}
public
voidsetMaps(Map<Object, Object> maps) {
this.maps =
maps;
}
public Properties getPros() {
return
pros;
}
public
voidsetPros(Properties pros) {
this.pros =
pros;
}
@Override
public String toString() {
return
"Customer2 [lists=" +
lists + ", sets=" +
sets + ", maps="
+maps +
", pros=" + pros +
"]";
}
}
A、List
<property
name="lists">
<list>
<value>1</value>
<ref
bean="PersonBean"/>
<bean
class="com.spring.beandi.bean.Person">
<property
name="name"value="Kitty"
/>
<property
name="address"value="云端科盟666号"
/>
<property
name="age"value="25"
/>
</bean>
</list>
</property>
注意:
lists:对应Bean对象中的属性lists,必须一致否则找不到;
<list/>:标签内可以存放多种类型的内容,与Java中List使用相同,也可以引用已经存在的Bean对象,也可以使用<bean/>标签直接在该属性中加入属性字段即可;
B、Set
<property
name="sets">
<set>
<value>1</value>
<ref
bean="PersonBean"/>
<bean
class="com.spring.beandi.bean.Person">
<property
name="name"value="Jackey "
/>
<property
name="address"value="云端科盟666号"
/>
<property
name="age"value="30"
/>
</bean>
</set>
</property>
注意:
与List使用方式相同,不同的是不能存在重复的数据;
C、Map
<property
name="maps">
<map>
<entry
key="K1"value="1"
/>
<entry
key="K2"value-ref="PersonBean"
/>
<entry
key="K3">
<bean
class="com.spring.beandi.bean.Person">
<property
name="name"value="Mayper "
/>
<property
name="address"value="云端科盟666号"
/>
<property
name="age"value="31"
/>
</bean>
</entry>
</map>
</property>
注意:
存放键-值形式数据,若加入对象实例,需要放在<entry />标签内使用。
最后,整体的文件如下:
<?xml
version="1.0"encoding="UTF-8"?>
<beans
xmlns="http://www.springframework.org/schema/beans"
xmlns:xsi="http://www.w3.org/2001/XMLSchema-instance"
xsi:schemaLocation="http://www.springframework.org/schema/beans
http://www.springframework.org/schema/beans/spring-beans-4.0.xsd"> <bean
id="dataCollectionBean"class="com.spring.beandi.bean.DataCollection">
<!-- java.util.List -->
<property
name="lists">
<list>
<value>1</value>
<ref
bean="PersonBean"/>
<bean
class="com.spring.beandi.bean.Person">
<property
name="name"value="Kitty"
/>
<property
name="address"value="云端科盟666号"
/>
<property
name="age"value="25"
/>
</bean>
</list>
</property>
<!-- java.util.Set -->
<property
name="sets">
<set>
<value>1</value>
<ref
bean="PersonBean"/>
<bean
class="com.spring.beandi.bean.Person">
<property
name="name"value="Jackey "
/>
<property
name="address"value="云端科盟666号"
/>
<property
name="age"value="30"
/>
</bean>
</set>
</property>
<!-- java.util.Map -->
<property
name="maps">
<map>
<entry
key="K1"value="1"
/>
<entry
key="K2"value-ref="PersonBean"
/>
<entry
key="K3">
<bean
class="com.spring.beandi.bean.Person">
<property
name="name"value="Mayper "
/>
<property
name="address"value="云端科盟666号"
/>
<property
name="age"value="31"
/>
</bean>
</entry>
</map>
</property>
</bean>
<bean
id="PersonBean"class="com.spring.beandi.bean.Person">
<property
name="name"value="David"
/>
<property
name="address"value="上海世博园-中国馆"
/>
<property
name="age"value="30"
/>
</bean>
</beans>
6、日期处理
这里以处理简单的日期为例,即使用java.text.SimpleDateFormat来格式化日期时间,具体的XML如下:
<bean
id="dateFormat"class="java.text.SimpleDateFormat"
>
<constructor-arg
value="yyyy-M-d"/>
</bean>
<bean
id="dateformat2"class="com.spring.beandi.bean.DateFormatDemo">
<property
name="date">
<bean
factory-bean="dateFormat"factory-method="parse">
<constructor-arg
value="2016-08-09"/>
</bean>
</property>
</bean>
7、类的继承
A、Bean准备
父类:
public
class Father {
private String
name;
private
int age;
private String
address;
public String getName() {
return
name;
}
public
void setName(String name) {
this.name =
name;
}
public
int getAge() {
return
age;
}
public
void setAge(int
age) {
this.age =
age;
}
public String getAddress() {
return
address;
}
public
voidsetAddress(String address) {
this.address =
address;
}
@Override
public String toString() {
return
"Father [name=" +
name + ", age=" +
age + ", address=" +
address
+"]";
}
}
子类:
public
class Child extends Father {
private String
name;
private
int age;
private String
address;
private String
email;
public String getName() {
return
name;
}
public
void setName(String name) {
this.name =
name;
}
public
int getAge() {
return
age;
}
public
void setAge(int
age) {
this.age =
age;
}
public String getAddress() {
return
address;
}
public
voidsetAddress(String address) {
this.address =
address;
}
public String getEmail() {
return
email;
}
public
void setEmail(String email) {
this.email =
email;
}
@Override
public String toString() {
return
"Child [name=" + name +
", age=" + age +
", address=" + address
+", email=" +
email + "]";
}
}
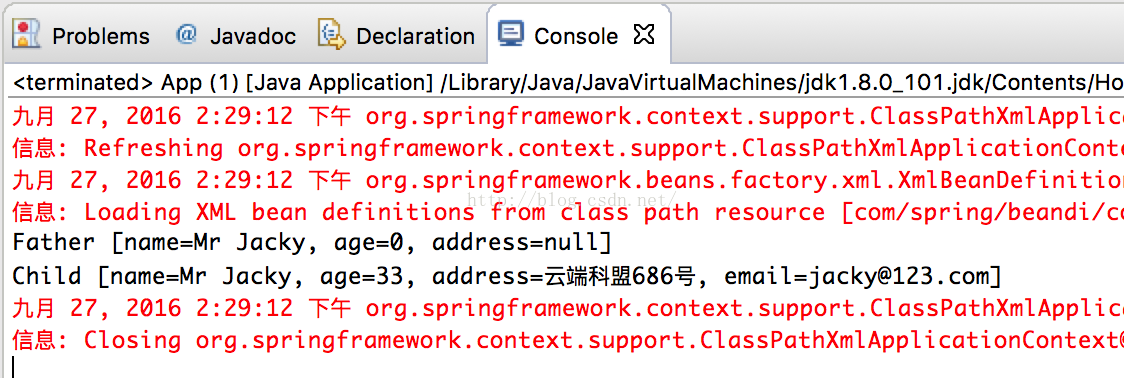
B、XML准备
<bean
id="father"class="com.spring.beandi.bean.Father"
abstract="false">
<property
name="name"value="Mr Jacky"
/>
</bean>
<bean
id="child"class="com.spring.beandi.bean.Child"
parent="father">
<property
name="age"value="33"
/>
<property
name="address"value="云端科盟686号"
/>
<property
name="email"value="jacky@123.com"
/>
</bean>
C、如何使用
public
class App {
private
staticConfigurableApplicationContext context;
public
static void main(String[]
args) throws IOException, JAXBException {
context =
new ClassPathXmlApplicationContext("com/spring/beandi/config/applicationContext4.xml");
Fatherfather = (Father)
context.getBean("father");
log(father);
Childchild = (Child)
context.getBean("child");
log(child);
context.close();
}
static
void log(Object obj) {
System.out.println(obj.toString());
}
}
结果显示:
8、方法调用
在Spring中,允许在Bean中自定义执行的方法,待该Bean被实例化时,可以调用init-method指定的Bean方法,而Bean结束销毁时,则调用destroy-method指定的Bean方法,具体如下:
A、Bean准备
public
class Person2 {
private String
name;
private String
address;
private
int age;
// Bean初始化方法
public
void init() throws Exception {
System.out.println("Spring initialize method is callingnow!");
}
// Bean销毁方法
public
void cleanup() throws Exception {
System.out.println("Spring destroy method is callingnow!");
}
public
String getName() {
return
name;
}
public
void setName(String name) {
this.name =
name;
}
public String getAddress() {
return
address;
}
public
voidsetAddress(String address) {
this.address =
address;
}
public
int getAge() {
return
age;
}
public
void setAge(int
age) {
this.age =
age;
}
@Override
public String toString() {
return
"Person2 [name=" +
name + ", address=" +
address + ", age="
+age +
"]";
}
}
B、XML准备
<bean
id="PersonBean"class="com.spring.beandi.bean.Person2"
init-method="init"destroy-method="cleanup"
>
<property
name="name"value="jacky"
/>
<property
name="address"value="云端科盟686号"
/>
<property
name="age"value="32"
/>
</bean>
注意:
其实很简单,只需要在Bean的xml配置中,添加init-method和destroy-method标签即可,待bean被实例化及生命周期触发执行。
C、如何使用
ConfigurableApplicationContext context =
new ClassPathXmlApplicationContext("com/spring/beandi/config/applicationContext7.xml");
Person2 p = (Person2) context.getBean("PersonBean");
log(p);
结果显示:
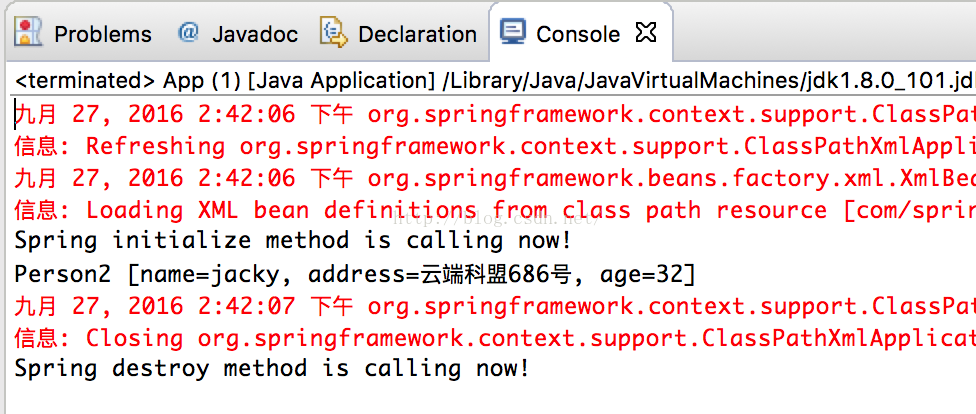
注意:
从上图可以知道,先执行的是init-method指定的方法,再执行我们打印的日志方法,最后,因为我们调用了context.close()方法,所以Bean生命周期结束,所以调用了destroy-method指定的方法了。
好了,Spring框架之IOC就介绍到这里,由于作者水平有限,如有问题请在评论发言或是QQ群讨论,谢谢。
技术讨论群:
245389109(新)
Spring是一个开源的企业应用框架,是一个分层架构,由7个定义稳定的模块所组成,而所有的模块都是在核心容器基础上搭建;其体系本身提供了强大的IOC(控制反转)、AOP(面向切面)以及DI(依赖注入)等较显著的功能,那么下面就来详细介绍下Spring框架的模块组成及相关特点。
l 框架结构
l 依赖注入
l 控制反转
一、框架结构
Spring是一个分层架构,目前由7个稳定的模块所组成,而其它所有的模块都构建于核心容器之上,而核心容器负责Bean的创建、配置及管理Bean的方式,具体结构图如下:
正如上面的结构图所示,组成Spring框架的每个模块都可以单独存在,或者与其它多个模块结合使用,具体每个模块的功能如下:
1、Spring Core
该模块提供了Spring框架的基本功能,其主要的组件是BeanFactory,该组件是由工厂模式实现,并且使用控制反转(IOC)模式将应用程序的配置和依赖规范与实际应用程序分开来。
2、Spring Context
该模块向Spring框架提供上下文配置信息,该配置信息包括但不限于:EJB、JNDI、Main、校验、调度及国际化功能。
3、Spring ORM
Spring 框架插入了若干个 ORM
框架,从而提供了 ORM 的对象关系工具,其中包括 JDO、Hibernate 和iBatis SQL Map。所有这些都遵从 Spring 的通用事务和 DAO 异常层次结构。
4、Spring DAO
JDBC DAO 抽象层提供了有意义的异常层次结构,可用该结构来管理异常处理和不同数据库供应商抛出的错误消息。异常层次结构简化了错误处理,并且极大地降低了需要编写的异常代码数量(例如打开和关闭连接)。Spring DAO
的面向 JDBC 的异常遵从通用的 DAO 异常层次结构。
5、Spring WEB
Web 上下文模块建立在应用程序上下文模块之上,为基于 Web
的应用程序提供了上下文。所以,Spring 框架支持与 Jakarta Struts 的集成。Web 模块还简化了处理多部分请求以及将请求参数绑定到域对象的工作。
6、Spring WEB MVC
MVC 框架是一个全功能的构建 Web 应用程序的 MVC 实现。通过策略接口,MVC 框架变成为高度可配置的,MVC 容纳了大量视图技术,其中包括 JSP、Velocity、Tiles、iText和 POI。
最后,Spring 框架的功能可以用在任何 J2EE
服务中,大多数功能也适用于不受管理的环境。而Spring 的核心是:支持不绑定到特定 J2EE 服务的可重用业务和数据访问对象,这样的对象可以在不同 J2EE 环境 (Web 或 EJB)、独立应用程序、测试环境之间重用。
二、依赖注入(DI)
什么是依赖注入?我的理解就是当类A的一个对象必须引用另一个类B的对象才能完成其所需功能时,我们称A和B两者间存在依赖关系,如果类A只是通过类B实现的接口来引用类B的对象,我们说这两个类是松耦合的,而Spring的DI模式通过一种灵活的方式将类B对象赋值给了类A,而类A不需要知道类B的存在,这种方式我们称之为依赖注入。至于如何把类B的对象注入到类A中,实际是使用了Java的反射机制来实现,当然这些不需要我们操心,一切全交给了Spring自动完成。下面分别介绍,并举例验证,最后以一个Java项目为例结合DI、IOC的使用。
1、注入内容
在Spring中,我们注入的内容称之为Bean,也就是JavaBean,而在MVC架构中,Bean充当model层,在一般程序中,我们称之为数据层,也就是用来存储数据的属性和一些行为,然后提供属性的get/set操作。
2、Setter注入
Setter注入就是根据Bean的set方法来注入另一个依赖的对象,具体如下:
A、Bean准备
Person类:
public
class Person {
private String
name;
private String
address;
private
int age;
public String getName() {
return
name;
}
public
void setName(String name) {
this.name =
name;
}
public String getAddress() {
return
address;
}
public
voidsetAddress(String address) {
this.address =
address;
}
public
int getAge() {
return
age;
}
public
void setAge(int
age) {
this.age =
age;
}
@Override
public String toString() {
return
"Person [name=" +
name + ", address=" +
address + ", age=" +
age
+"]";
}
}
Customer类:
public
class Customer {
private Person
person = null;
public Person getPerson() {
return
person;
}
public
void setPerson(Personperson) {
this.person =
person;
}
@Override
public String toString() {
return
"Customer [person=" +
person + "]";
}
}
B、XML注入
<bean
id="CustomerBean"class="com.spring.beandi.bean.Customer"
>
<property
name="person"ref="PersonBean"
/>
</bean>
<bean
id="PersonBean"class="com.spring.beandi.bean.Person"
>
<property
name="name"value="cwteam"
/>
<property
name="address"value="云端科盟999号"
/>
<property
name="age"value="66"
/>
</bean>
注意:
这里为Person类中的属性name、address及age给予默认值,也可以在代码实现中动态赋值,这样更加清楚的展示依赖注入的原理。
C、如何使用
由于创建的是Java项目,所以需要使用org.springframework.context中的ConfigurableApplicationContext完成xml配置文件加载到Spring容器。
具体如下使用:
public
class App {
private
staticConfigurableApplicationContext context;
public
static void main(String[]
args) throws IOException, JAXBException {
context =
new ClassPathXmlApplicationContext("com/spring/beandi/config/applicationContext.xml");
Customerc = (Customer)
context.getBean("CustomerBean");
log(c);
context.close();
}
static
void log(Object obj) {
System.out.println(obj.toString());
}
}
运行结果显示:
3、构造注入
构造注入,也就是根据Bean的构造函数依赖注入另一个对象,具体如下:
A、Bean准备
Person类:
public
class Person {
private String
name;
private String
address;
private
int age;
public String getName() {
return
name;
}
public
void setName(String name) {
this.name =
name;
}
public String getAddress() {
return
address;
}
public
voidsetAddress(String address) {
this.address =
address;
}
public
int getAge() {
return
age;
}
public
void setAge(int
age) {
this.age =
age;
}
@Override
public String toString() {
return
"Person [name=" +
name + ", address=" +
address + ", age=" +
age
+"]";
}
}
Customer类:
public
class Customer {
private Person
person = null;
public Customer(Person
person) {
this.person =
person;
}
public Person getPerson() {
return
person;
}
@Override
public String toString() {
return
"Customer [person=" +
person + "]";
}
}
B、XML配置
<bean
id="CustomerBean"class="com.spring.beandi.bean.Customer"
>
<constructor-arg>
<bean
class="com.spring.beandi.bean.Person">
<property
name="name"value="jackup"
/>
<property
name="address"value="云端科盟666号"
/>
<property
name="age"value="33"
/>
</bean>
</constructor-arg>
</bean>
注意:
这里使用<constructor-arg/>标签,直接将Person嵌入其中,并指定默认的属性值,接下来Spring容器便会自动实例化。
C、如何使用
public
class App {
private
staticConfigurableApplicationContext context;
public
static void main(String[]
args) throws IOException, JAXBException {
context =
new ClassPathXmlApplicationContext("com/spring/beandi/config/applicationContext2.xml");
Customerc = (Customer)
context.getBean("CustomerBean");
log(c);
context.close();
}
static
void log(Object obj) {
System.out.println(obj.toString());
}
}
运行结果显示:
三、控制反转(IOC)
IOC容器是具备依赖注入功能的容器,该依赖注入功能是借助于DI机制实现,并且IOC容器也负责存储实例、实例化、定位、配置应用程序中的对象以及建立对象间的关系,而Spring中的所有实例对象都存放在IOC这个容器中,由Spring自动搜寻和分配对应的实例,某种意义上说,IOC与DI很相似,可以理解为DI是IOC功能的子集,这是个人理解,如有异议请在评论中言明探讨,在下面就以一个简单的例子来说明!
1、Bean准备
HelloWorld接口:
public
interfaceHelloWorld {
void printMsg(String
msg);
}
HelloWorldImpl类:
public
class HelloWorldImpl
implements HelloWorld {
@Override
public
void printMsg(String msg) {
System.out.println("Hello:" +
msg);
}
}
2、XML注入
<bean
id="helloService"class="com.spring.helloworld.Impl.HelloWorldImpl"
/>
注意:
这里指定了实现接口的类的类路径,Spring容器通过id值获取并实例化这个类对象。
3、如何使用
public
class App {
private
staticApplicationContext context =
null;
public
static void main(String[]
args) {
// 读取配置文件实例化一个IOC容器
context =
new
ClassPathXmlApplicationContext("com/spring/helloworld/applicationContext.xml");
// 从容器中获取Bean,注意此处是“面向接口编程”
HelloWorldhelloService =
context.getBean("helloService",HelloWorld.class);
// 执行业务逻辑
helloService.printMsg("this is my blog of springframework,you know?");
}
}
运行结果显示:
4、scope使用
默认情况下,bean工厂生产的实例为单例模式对象,也就是只有一个类并且该类可以被其它需要的实例所调用,并不创建一个新的实例对象,此种对象称之为“无状态”对象实例;而“有状态”的实例,指的是随着拥有该状态实例的对象生命消失时,其用用的状态实例也自然消失,而“无状态”正好反之。所以,如果我们想在Spring中创建一个有状态的实例对象,那么我们可以在定义Bean时,为其指定关键字scope,内容为prototype即可,具体如下代码:
<bean
id="PersonBean"class="com.spring.beandi.bean.Person"
scope="prototype"
>
<property
name="name"value=" jackup "
/>
<property
name="address"value="云端科盟666号"
/>
<property
name="age"value="33"
/>
</bean>
5、集合属性
在Spring中,我们不仅可以实例化基本的数据类型属性,还可以实例化集合属性,比如:List、Set、Map以及Properties类型数据,具体如下:
Bean对象DataCollection:
public
class DataCollection {
private List<Object>
lists;
private Set<Object>
sets;
private Map<Object, Object>
maps;
private Properties
pros;
public List<Object> getLists() {
return
lists;
}
public
voidsetLists(List<Object> lists) {
this.lists =
lists;
}
public Set<Object> getSets() {
return
sets;
}
public
voidsetSets(Set<Object> sets) {
this.sets =
sets;
}
public Map<Object, Object> getMaps() {
return
maps;
}
public
voidsetMaps(Map<Object, Object> maps) {
this.maps =
maps;
}
public Properties getPros() {
return
pros;
}
public
voidsetPros(Properties pros) {
this.pros =
pros;
}
@Override
public String toString() {
return
"Customer2 [lists=" +
lists + ", sets=" +
sets + ", maps="
+maps +
", pros=" + pros +
"]";
}
}
A、List
<property
name="lists">
<list>
<value>1</value>
<ref
bean="PersonBean"/>
<bean
class="com.spring.beandi.bean.Person">
<property
name="name"value="Kitty"
/>
<property
name="address"value="云端科盟666号"
/>
<property
name="age"value="25"
/>
</bean>
</list>
</property>
注意:
lists:对应Bean对象中的属性lists,必须一致否则找不到;
<list/>:标签内可以存放多种类型的内容,与Java中List使用相同,也可以引用已经存在的Bean对象,也可以使用<bean/>标签直接在该属性中加入属性字段即可;
B、Set
<property
name="sets">
<set>
<value>1</value>
<ref
bean="PersonBean"/>
<bean
class="com.spring.beandi.bean.Person">
<property
name="name"value="Jackey "
/>
<property
name="address"value="云端科盟666号"
/>
<property
name="age"value="30"
/>
</bean>
</set>
</property>
注意:
与List使用方式相同,不同的是不能存在重复的数据;
C、Map
<property
name="maps">
<map>
<entry
key="K1"value="1"
/>
<entry
key="K2"value-ref="PersonBean"
/>
<entry
key="K3">
<bean
class="com.spring.beandi.bean.Person">
<property
name="name"value="Mayper "
/>
<property
name="address"value="云端科盟666号"
/>
<property
name="age"value="31"
/>
</bean>
</entry>
</map>
</property>
注意:
存放键-值形式数据,若加入对象实例,需要放在<entry />标签内使用。
最后,整体的文件如下:
<?xml
version="1.0"encoding="UTF-8"?>
<beans
xmlns="http://www.springframework.org/schema/beans"
xmlns:xsi="http://www.w3.org/2001/XMLSchema-instance"
xsi:schemaLocation="http://www.springframework.org/schema/beans
http://www.springframework.org/schema/beans/spring-beans-4.0.xsd"> <bean
id="dataCollectionBean"class="com.spring.beandi.bean.DataCollection">
<!-- java.util.List -->
<property
name="lists">
<list>
<value>1</value>
<ref
bean="PersonBean"/>
<bean
class="com.spring.beandi.bean.Person">
<property
name="name"value="Kitty"
/>
<property
name="address"value="云端科盟666号"
/>
<property
name="age"value="25"
/>
</bean>
</list>
</property>
<!-- java.util.Set -->
<property
name="sets">
<set>
<value>1</value>
<ref
bean="PersonBean"/>
<bean
class="com.spring.beandi.bean.Person">
<property
name="name"value="Jackey "
/>
<property
name="address"value="云端科盟666号"
/>
<property
name="age"value="30"
/>
</bean>
</set>
</property>
<!-- java.util.Map -->
<property
name="maps">
<map>
<entry
key="K1"value="1"
/>
<entry
key="K2"value-ref="PersonBean"
/>
<entry
key="K3">
<bean
class="com.spring.beandi.bean.Person">
<property
name="name"value="Mayper "
/>
<property
name="address"value="云端科盟666号"
/>
<property
name="age"value="31"
/>
</bean>
</entry>
</map>
</property>
</bean>
<bean
id="PersonBean"class="com.spring.beandi.bean.Person">
<property
name="name"value="David"
/>
<property
name="address"value="上海世博园-中国馆"
/>
<property
name="age"value="30"
/>
</bean>
</beans>
6、日期处理
这里以处理简单的日期为例,即使用java.text.SimpleDateFormat来格式化日期时间,具体的XML如下:
<bean
id="dateFormat"class="java.text.SimpleDateFormat"
>
<constructor-arg
value="yyyy-M-d"/>
</bean>
<bean
id="dateformat2"class="com.spring.beandi.bean.DateFormatDemo">
<property
name="date">
<bean
factory-bean="dateFormat"factory-method="parse">
<constructor-arg
value="2016-08-09"/>
</bean>
</property>
</bean>
7、类的继承
A、Bean准备
父类:
public
class Father {
private String
name;
private
int age;
private String
address;
public String getName() {
return
name;
}
public
void setName(String name) {
this.name =
name;
}
public
int getAge() {
return
age;
}
public
void setAge(int
age) {
this.age =
age;
}
public String getAddress() {
return
address;
}
public
voidsetAddress(String address) {
this.address =
address;
}
@Override
public String toString() {
return
"Father [name=" +
name + ", age=" +
age + ", address=" +
address
+"]";
}
}
子类:
public
class Child extends Father {
private String
name;
private
int age;
private String
address;
private String
email;
public String getName() {
return
name;
}
public
void setName(String name) {
this.name =
name;
}
public
int getAge() {
return
age;
}
public
void setAge(int
age) {
this.age =
age;
}
public String getAddress() {
return
address;
}
public
voidsetAddress(String address) {
this.address =
address;
}
public String getEmail() {
return
email;
}
public
void setEmail(String email) {
this.email =
email;
}
@Override
public String toString() {
return
"Child [name=" + name +
", age=" + age +
", address=" + address
+", email=" +
email + "]";
}
}
B、XML准备
<bean
id="father"class="com.spring.beandi.bean.Father"
abstract="false">
<property
name="name"value="Mr Jacky"
/>
</bean>
<bean
id="child"class="com.spring.beandi.bean.Child"
parent="father">
<property
name="age"value="33"
/>
<property
name="address"value="云端科盟686号"
/>
<property
name="email"value="jacky@123.com"
/>
</bean>
C、如何使用
public
class App {
private
staticConfigurableApplicationContext context;
public
static void main(String[]
args) throws IOException, JAXBException {
context =
new ClassPathXmlApplicationContext("com/spring/beandi/config/applicationContext4.xml");
Fatherfather = (Father)
context.getBean("father");
log(father);
Childchild = (Child)
context.getBean("child");
log(child);
context.close();
}
static
void log(Object obj) {
System.out.println(obj.toString());
}
}
结果显示:
8、方法调用
在Spring中,允许在Bean中自定义执行的方法,待该Bean被实例化时,可以调用init-method指定的Bean方法,而Bean结束销毁时,则调用destroy-method指定的Bean方法,具体如下:
A、Bean准备
public
class Person2 {
private String
name;
private String
address;
private
int age;
// Bean初始化方法
public
void init() throws Exception {
System.out.println("Spring initialize method is callingnow!");
}
// Bean销毁方法
public
void cleanup() throws Exception {
System.out.println("Spring destroy method is callingnow!");
}
public
String getName() {
return
name;
}
public
void setName(String name) {
this.name =
name;
}
public String getAddress() {
return
address;
}
public
voidsetAddress(String address) {
this.address =
address;
}
public
int getAge() {
return
age;
}
public
void setAge(int
age) {
this.age =
age;
}
@Override
public String toString() {
return
"Person2 [name=" +
name + ", address=" +
address + ", age="
+age +
"]";
}
}
B、XML准备
<bean
id="PersonBean"class="com.spring.beandi.bean.Person2"
init-method="init"destroy-method="cleanup"
>
<property
name="name"value="jacky"
/>
<property
name="address"value="云端科盟686号"
/>
<property
name="age"value="32"
/>
</bean>
注意:
其实很简单,只需要在Bean的xml配置中,添加init-method和destroy-method标签即可,待bean被实例化及生命周期触发执行。
C、如何使用
ConfigurableApplicationContext context =
new ClassPathXmlApplicationContext("com/spring/beandi/config/applicationContext7.xml");
Person2 p = (Person2) context.getBean("PersonBean");
log(p);
结果显示:
注意:
从上图可以知道,先执行的是init-method指定的方法,再执行我们打印的日志方法,最后,因为我们调用了context.close()方法,所以Bean生命周期结束,所以调用了destroy-method指定的方法了。
好了,Spring框架之IOC就介绍到这里,由于作者水平有限,如有问题请在评论发言或是QQ群讨论,谢谢。
技术讨论群:
245389109(新)

相关文章推荐
- [置顶] Spring框架研究总结之AOP(一)
- [置顶] Spring框架研究总结之SpEL
- [置顶] Spring框架研究总结之AOP(二)
- [置顶]程序员面试、算法研究、编程艺术、红黑树4大系列集锦与总结
- [置顶] Java开源代码研究总结
- [置顶] 最近研究了下接口,对interface的有关总结
- [置顶] Spring框架总结之依赖注入(一)
- [置顶] Spring框架介绍和IoC容器中Bean配置(Spring框架)
- Spring框架总结——第二部分(基于xml配置+注解的方式配置IOC)
- [置顶]程序员面试、算法研究、编程艺术、红黑树4大系列集锦与总结
- [置顶] Spring框架总结之Profile使用
- Spring框架总结,控制反转(IOC),依赖注入(DI),面向切面编程(AOP)
- [置顶] 十三个经典算法研究与总结、目录+索引
- [置顶] MongoDB研究总结之索引部分
- [置顶] Spring框架总结之面向切面(一)
- Notes文档查询的研究(摘自别人的总结)
- ASP.NET 2.0 Beta 1研究总结
- 上海财经大学暑期社会实践-开源ERP可行性研究项目结束,把总结感想写下来,这也是一次很好的经历
- ASP.NET 2.0 Beta 1研究总结
- User Interface Process(UIP) Application Block 2.0 研究总结