cocos2dx学习之路--拼图游戏
2016-09-06 15:41
113 查看
作为一名初学者想通过写博客来记录自己学习的过程,第一个例程是一个简单的拼图游戏。
1.头文件CuttingPhotos.h
出现的问题:频繁交叉点击图片和外界会出现数组越界的问题,暂未解决。
注:例程来自极客学院视频网站
1.头文件CuttingPhotos.h
<span style="font-size:18px;">#pragma once
#include "cocos2d.h"
USING_NS_CC;
class CuttingPhotos:public Layer
{
public:
CuttingPhotos();
~CuttingPhotos();

//行数和列数
static CuttingPhotos*create(const char*photo, unsigned int rows = 3, unsigned int columns = 3);
protected:
unsigned int _row;//行数
unsigned int _column;//列数
unsigned int _sliceWidth;//格子宽度
unsigned int _sliceHeight;//格子高度

std::vector<std::vector<Sprite*>> _slices;//二维数组存储我们的切片;

virtual bool initWithPhoto(const char*photo, unsigned int rows , unsigned int columns );//初始化函数

bool initSlices(const char*photo);//切割图片

void initTouchEventListener();//初始化触摸事件

void move(int x, int y);//移动图片切片
public:
void restart();//重新开始游戏

};</span>2.源文件CuttingPhotos.cpp#include "CuttingPhotos.h"
CuttingPhotos::CuttingPhotos():_row(3),_column(3)//构造函数,初始化
{
}
CuttingPhotos::~CuttingPhotos()//析构函数
{
this->removeAllChildren();
}
CuttingPhotos* CuttingPhotos::create(const char*photo, unsigned int rows, unsigned int columns) {
CuttingPhotos*cp = new CuttingPhotos();
if (cp&&cp->initWithPhoto(photo,rows,columns))
{
cp->autorelease();
return cp;
}
CC_SAFE_DELETE(cp);
return nullptr;
}
bool CuttingPhotos::initWithPhoto(const char*photo, unsigned int rows, unsigned int columns) {
bool result = false;
if (Layer::init())
{
_row = rows;
_column = columns;
if (initSlices(photo)) //执行初始化函数
{
initTouchEventListener();
restart();
result = true;
}
else
{ result = false; }
}
else
{
result = false;
}
return result;
}
bool CuttingPhotos::initSlices(const char*photo) {
/*
Cocos引擎主要有三种缓存类:
> 纹理缓存:TextureCache
> 精灵帧缓存:SpriteFrameCache
> 动画缓存:AnimationCache
缓存的目的就是:先将所需资源(如纹理图片)加载到内存中,之后再次使用该资源的时候,
就可以直接从内存中取出,而不需要重新加载。从而减少了CPU和GPU的内存占用。
*/
Texture2D *texture = Director::getInstance()->getTextureCache()->addImage(photo);
if (texture==nullptr)
{
return false;
}
//初始化二维数组
for (int w=0;w<_row;++w)
{
std::vector<Sprite*>row;
for (int h=0;h<_column;++h)
{
row.push_back(nullptr);
}
_slice
4000
s.push_back(row);
}
//计算图片的宽与高
auto size = texture->getContentSize();
_sliceWidth = size.width / _row;
_sliceHeight = size.height / _column;
this->setContentSize(size);//设置Layer的大小,this是类中的隐藏指针,指向这个类所定义的对象本身。用来区分临时变量和类成员
//挖出最后一块,右下角
auto endSlice = Sprite::createWithTexture(texture,
Rect(_sliceWidth*(_row - 1), _sliceHeight*(_column - 1), _sliceWidth, _sliceHeight));
endSlice->setAnchorPoint(Vec2(0, 0));
endSlice->setPosition(_sliceWidth*(_row - 1), 0);
endSlice->setOpacity(100);
this->addChild(endSlice);
_slices[_row - 1][_column - 1] = nullptr;//表明是起点
//创建切片
for (int w=0;w<_row;++w)
{
for (int h=0;h<_column;++h)
{
if (w==_row-1&&h==_column-1)
{
break;//最后一片没有压进数组
}
Sprite*slices = Sprite::createWithTexture(texture,
Rect(_sliceWidth*w,_sliceHeight*h,_sliceWidth,_sliceHeight));
slices->setAnchorPoint(Vec2(0, 0));
slices->setPosition(w*_sliceWidth, size.height - (h + 1)*_sliceHeight);
this->addChild(slices);
_slices[w][h] = slices;
}
}
return true;
}3.HelloWorldScene.cpp里的代码auto visibleSize = Director::getInstance()->getVisibleSize();
auto *photo = CuttingPhotos::create("123.png",3,3);
auto size = photo->getContentSize();
/*
Layer默认锚点为(0,0),且要修改前必须加上
photo->ignoreAnchorPointForPosition(false);才可修改
photo->setAnchorPoint(Vec2(0.5, 0.5));
Sprite锚点默认(0.5,0.5),修改前无需加上
*/
photo->setPosition(visibleSize.width/2-size.width/2,visibleSize.height/2-size.height/2);
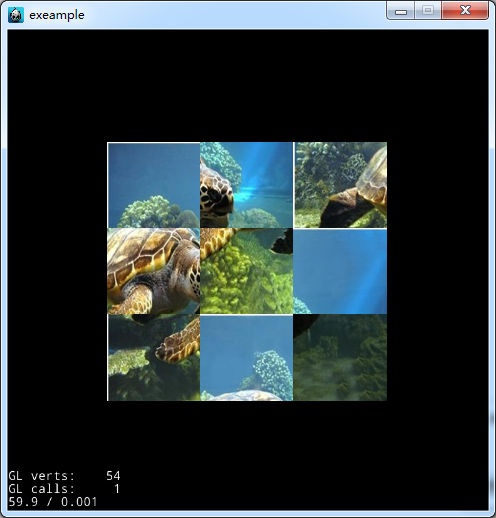
addChild(photo);4.最后的效果图出现的问题:频繁交叉点击图片和外界会出现数组越界的问题,暂未解决。
注:例程来自极客学院视频网站

相关文章推荐
- cocos2dx3.2学习之路之新建项目
- cocos2dx3.2学习之路之基本概念
- cocos2dx学习之路----第十三篇(动作类初探)
- cocos2dx学习之路——毕业工作感悟(一)
- cocos2dx学习之路----第十一篇(对声音的操作处理)
- cocos2dx学习之路----第十章(Node节点生命周期详解)
- cocos2dx3.2学习之路之锚点
- cocos2dx学习之路----第三篇(场景的创建)
- cocos2dx学习之路----第二篇(HelloWorld深入讲解)
- cocos2dx学习之路----第十二篇(关于Node节点的自我更新函数Update探讨及定时器的使用)
- cocos2dx学习之路----第七篇(坐标系统中本地坐标与世界坐标的转换详解)
- cocos2dx3.2学习之路之目录结构及包含库
- cocos2dx学习之路----第一篇(开发环境搭建)
- cocos2dx学习之路----第五篇(切换场景的另一种方式:使用popScene与pushScene)
- cocos2dx学习之路----第九篇(深入理解单点触摸的事件机制)
- cocos2dx学习之路----第十四篇(内存管理机制)
- cocos2dx 3.0 学习之路1篇 --搭建基础环境
- cocos2dx学习之路----第六篇(cocos2dx坐标系系统简单窥视)
- cocos2dx3.2学习之路之环境搭建
- cocos2dx3.2学习之路之动作