用Android自带的DrawerLayout和ActionBarDrawerToggle实现侧滑效果
2016-08-17 17:17
423 查看
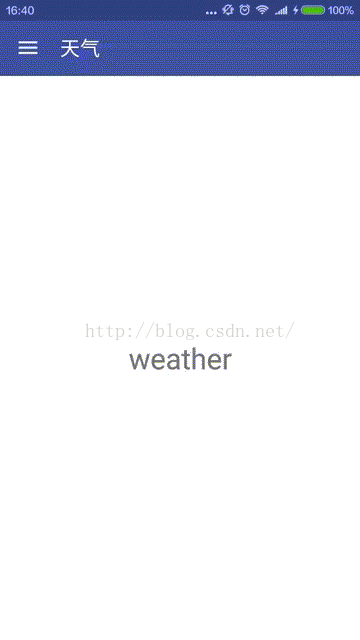
首先上效果图:
先说一下toolbar上的箭头实现:
只需要两句代码就可以显示箭头,但默认的颜色是黑色的,要想变成白色,就在toolbar的布局文件中添加注释的两句代码即可。
下面就是Drawer的实现了。
先贴一下toolbar的布局,因为它适合drawer联动的,等会要用到它,至于为什么单独放一个文件中,说是这样可以提高复用率。
接着是DrawerLayout的布局,因为它也是一个组件,所以可以在布局文件中使用。
从上面的代码可以看出,DrawerLayout实在v4包中的。将它作为根布局使用,其中上面一个线性布局作为主界面的容器,下面的一个是作为侧滑菜单内容的容器。要强调的一点是:在下面的LinearLayout中要添加
这个属性,才能将它作为侧滑菜单内容的容器,否则其会覆盖上面的LinearLayout。
将上面两个布局用include属性引入MainActivity的布局文件:
接下来就要在代码中做相关操作了。
首先,先获取toolbar和DrawerLayout的引用:
然后创建抽屉的开关,将toolbar和DrawerLayout作为参数传递给它:
通过下面这句实现toolbar和Drawer的联动:
如果没有上面的代码,箭头是不会随着侧滑菜单的开关而变换的,具体的可以自己试验一下。
最后给DrawerLayout设置开关的监听:
这样就可以实现开头的图片效果了。
下面说一下用Fragment实现点击侧滑菜单项变换页面的效果。
首先定义三个布局,
三个长得差不多,就贴一个了。
再定义三个Fragment继承自Fragment也可以继承v4包的,我这里继承的不是v4包里的。
恩,也贴一个吧,反正都差不多。
下面是MainActivity中的相关操作:
首先我让MainActivity中的容器默认添加NewsFragment:
其次获取侧滑菜单列表的引用,并设置数据和item点击事件:
能看到在上面的点击事件方法中调用了switchFragment方法,用于切换Framment,从而实现页面变换。其具体定义:
解释一下,其中的currentFragmentId表示当前正在显示的Fragment的编号,我是根据侧滑菜单项的下标指定其编号的。方法的第一句代码实现了关闭菜单的功能,其中的参数ll_drawer就是菜单内容容器的引用。然后判断所点菜单项的下标是否等于当前显示的Fragment的id,如果是,则返回,不是,则修改currentFragmentId为当前点击项的下标,最后通过FragmentTransaction的replace方法实现页面变换。
源码地址:https://github.com/miyuexingchen/Swen
先说一下toolbar上的箭头实现:
// 这两句显示左边的三条杠,如果要变为白色在toolbar的布局文件里添加这两句:
// android:popupTheme="@style/ThemeOverlay.AppCompat.Light"
// app:theme="@style/ThemeOverlay.AppCompat.Dark.ActionBar"
getSupportActionBar().setHomeButtonEnabled(true);
getSupportActionBar().setDisplayHomeAsUpEnabled(true);
只需要两句代码就可以显示箭头,但默认的颜色是黑色的,要想变成白色,就在toolbar的布局文件中添加注释的两句代码即可。
下面就是Drawer的实现了。
先贴一下toolbar的布局,因为它适合drawer联动的,等会要用到它,至于为什么单独放一个文件中,说是这样可以提高复用率。
<?xml version="1.0" encoding="utf-8"?>
<android.support.v7.widget.Toolbar xmlns:android="http://schemas.android.com/apk/res/android"
xmlns:app="http://schemas.android.com/apk/res-auto"
android:layout_width="match_parent"
android:layout_height="wrap_content"
android:id="@+id/toolbar"
android:background="?attr/colorPrimary"
android:minHeight="?attr/actionBarSize"
android:popupTheme="@style/ThemeOverlay.AppCompat.Light"
app:theme="@style/ThemeOverlay.AppCompat.Dark.ActionBar"
>
</android.support.v7.widget.Toolbar>
接着是DrawerLayout的布局,因为它也是一个组件,所以可以在布局文件中使用。
<?xml version="1.0" encoding="utf-8"?>
<android.support.v4.widget.DrawerLayout xmlns:android="http://schemas.android.com/apk/res/android"
android:layout_width="match_parent"
android:layout_height="match_parent"
android:id="@+id/drawer_layout">
<LinearLayout
android:id="@+id/ll_content"
android:layout_width="match_parent"
android:layout_height="match_parent">
</LinearLayout>
<LinearLayout
android:id="@+id/ll_drawer"
android:layout_width="240dp"
android:layout_height="match_parent"
android:layout_gravity="start"
android:background="@android:color/white">
<ListView
android:id="@+id/lv_drawer"
android:layout_width="240dp"
android:layout_height="match_parent"
android:divider="@null"
/>
</LinearLayout>
</android.support.v4.widget.DrawerLayout>
从上面的代码可以看出,DrawerLayout实在v4包中的。将它作为根布局使用,其中上面一个线性布局作为主界面的容器,下面的一个是作为侧滑菜单内容的容器。要强调的一点是:在下面的LinearLayout中要添加
android:layout_gravity="start"
这个属性,才能将它作为侧滑菜单内容的容器,否则其会覆盖上面的LinearLayout。
将上面两个布局用include属性引入MainActivity的布局文件:
<?xml version="1.0" encoding="utf-8"?>
<LinearLayout xmlns:android="http://schemas.android.com/apk/res/android"
android:fitsSystemWindows="true"
android:layout_width="match_parent"
android:layout_height="match_parent"
android:orientation="vertical">
<include layout="@layout/layout_toolbar"/>
<include layout="@layout/layout_drawer"/>
</LinearLayout>
接下来就要在代码中做相关操作了。
首先,先获取toolbar和DrawerLayout的引用:
toolbar = (Toolbar) findViewById(R.id.toolbar);
setSupportActionBar(toolbar);
mDrawerLayout = (DrawerLayout) findViewById(R.id.drawer_layout);
然后创建抽屉的开关,将toolbar和DrawerLayout作为参数传递给它:
mToggle = new ActionBarDrawerToggle(this, mDrawerLayout, toolbar, R.string.drawer_open, R.string.drawer_close);
通过下面这句实现toolbar和Drawer的联动:
mToggle.syncState();
如果没有上面的代码,箭头是不会随着侧滑菜单的开关而变换的,具体的可以自己试验一下。
最后给DrawerLayout设置开关的监听:
mDrawerLayout.addDrawerListener(mToggle);
这样就可以实现开头的图片效果了。
下面说一下用Fragment实现点击侧滑菜单项变换页面的效果。
首先定义三个布局,
<?xml version="1.0" encoding="utf-8"?>
<LinearLayout xmlns:android="http://schemas.android.com/apk/res/android"
android:orientation="vertical" android:layout_width="match_parent"
android:layout_height="match_parent">
<TextView
android:layout_width="match_parent"
android:layout_height="match_parent"
android:text="news"
android:gravity="center"
android:textSize="29sp"
/>
</LinearLayout>
三个长得差不多,就贴一个了。
再定义三个Fragment继承自Fragment也可以继承v4包的,我这里继承的不是v4包里的。
public class NewsFragment extends Fragment {@Nullable
@Override
public View onCreateView(LayoutInflater inflater, ViewGroup container, Bundle savedInstanceState) {return inflater.inflate(R.layout.fragment_news, container, false);
}
}
恩,也贴一个吧,反正都差不多。
下面是MainActivity中的相关操作:
首先我让MainActivity中的容器默认添加NewsFragment:
// 主页面默认添加NewsFragment
fragmentManager = getFragmentManager();
fragmentManager.beginTransaction().add(R.id.ll_content, new NewsFragment()).commit();
其次获取侧滑菜单列表的引用,并设置数据和item点击事件:
lv_drawer = (ListView) findViewById(R.id.lv_drawer);
mAdapter = new ArrayAdapter(this, android.R.layout.simple_list_item_1, items);
lv_drawer.setAdapter(mAdapter);
ll_drawer = (LinearLayout) findViewById(R.id.ll_drawer);
lv_drawer.setOnItemClickListener(new AdapterView.OnItemClickListener() {@Override
public void onItemClick(AdapterView<?> parent, View view, int position, long id) {switchFragment(position);
}
});
能看到在上面的点击事件方法中调用了switchFragment方法,用于切换Framment,从而实现页面变换。其具体定义:
// 根据所点列表项的下标,切换fragment
@Override
public void switchFragment(int fragmentId) {mDrawerLayout.closeDrawer(ll_drawer);
if(currentFragmentId == fragmentId)
return;
currentFragmentId = fragmentId;
FragmentTransaction fragmentTransaction = fragmentManager.beginTransaction();
switch (fragmentId)
{case 0:
fragmentTransaction.replace(R.id.ll_content, new NewsFragment());
toolbar.setTitle("新闻资讯");break;
case 1:
fragmentTransaction.replace(R.id.ll_content, new VideoFragment());
toolbar.setTitle("视频");break;
case 2:
fragmentTransaction.replace(R.id.ll_content, new WeatherFragment());
toolbar.setTitle("天气");break;
}
fragmentTransaction.commit();
}
解释一下,其中的currentFragmentId表示当前正在显示的Fragment的编号,我是根据侧滑菜单项的下标指定其编号的。方法的第一句代码实现了关闭菜单的功能,其中的参数ll_drawer就是菜单内容容器的引用。然后判断所点菜单项的下标是否等于当前显示的Fragment的id,如果是,则返回,不是,则修改currentFragmentId为当前点击项的下标,最后通过FragmentTransaction的replace方法实现页面变换。
源码地址:https://github.com/miyuexingchen/Swen

相关文章推荐
- Android的DrawerLayout和ActionBarDrawerToggle实现侧滑
- ActionBar、Drawerlayout、ActionBarDrawerToggle实现抽屉效果
- Android DrawerLayout+ToolBar+NavigationView实现侧滑菜单效果,沉浸式状态栏
- Android中DrawerLayout+Toolbar实现侧滑效果[DrawerLayout+ToolBar+NavigationView]
- Android使用DrawerLayout和NavigationView实现侧滑效果
- Android中DrawerLayout实现侧滑菜单效果
- Android ActionBarDrawerToggle、DrawerLayout、ActionBar 结合
- Android布局控件DrawerLayout实现完美侧滑效果
- Android 使用Toolbar+DrawerLayout快速实现仿“知乎APP”侧滑导航效果
- Android ActionBarDrawerToggle、DrawerLayout、ActionBar 结合
- Android ActionBarDrawerToggle、DrawerLayout、ActionBar 结合
- android组件之DrawerLayout -- Android自带侧滑菜单效果
- Android Drawerlayout实现侧滑菜单效果
- Android DrawerLayout+Toolbar+NavigationView(实现侧拉侧滑效果)
- Android中DrawerLayout和ActionBarDrawerToggle 的三种使用方式
- Android ActionBarDrawerToggle、DrawerLayout、ActionBar 结合
- Android使用DrawerLayout实现侧滑菜单效果
- android 使用ViewDragHelper轻松实现DrawerLayout和SlidMenu侧滑效果
- Android ActionBarDrawerToggle、DrawerLayout、ActionBar 结合
- Android中级:ActionBar + DrawerLayout实现侧滑菜单