Excel数据驱动框架实战
2016-07-31 16:25
197 查看
由于该测试框架是我在工作的系统中搭建的,故不写系统网址,重点记录搭建的框架过程与重点介绍,方便以后察看。
一、系统介绍:
1)在系统中进行登陆
2)在系统登陆的情况下,进行新增操作
3)在新增的数据中进入详情界面,新增属性值
二、数据驱动框架搭建的详细过程:
1、新建一个java工程,并配置好工程中的WebDriver和TestNG环境,并导入Excel操作相关和Log4j相关的JAR文件到工程中。
2、在工程中新建4个Package,分别命名为:
1)cn.oms.modules,用于实现复用的业务逻辑封装方法。
2)cn.oms.pageobjects,用于实现被测系统的页面对象。
3)cn.oms.autotest,用于实现具体的测试脚本逻辑。
4)cn.oms.util,用于实现测试过程中调用的工具类方法,例如文件操作、mapObject、页面元素的操作方法等。
3、在cn.oms.util的Package下新建ObjectMap类,用于实现在外部配置文件中配置页面元素的定位表达式。ObjectMap代码如下:
import java.io.FileInputStream;
import java.io.IOException;
import java.util.Properties;
public class ObjectMap {
Properties properties;
public ObjectMap(String propFile){
properties=new Properties();
try{
FileInputStream in=new FileInputStream(propFile);
properties.load(in);
in.close();
}catch(IOException e){
System.out.println("读取对象文件出错");
e.printStackTrace();
}
}
public By getLocator(String ElementNameInpropFile) throws Exception{
//根据变量ElementNameInpropFile,从属性配置文件中读取对应的配置文件
String locator=properties.getProperty(ElementNameInpropFile);
//将配置对象中的定位类型存到locatorType变量,将定位表达式的值存入locatorValue变量
String locatorType=locator.split(">")[0];
String locatorValue=locator.split(">")[1];
//在Eclipse中的配置文件均默认为ISO-8859-1编码存储,使用getBytes方法可以将字符串编码转换为UTF-8编码,以此来解决在配置文件读取中文为乱码的问题
locatorValue=new String(locatorValue.getBytes("ISO-8859-1"), "UTF-8");
//输出locatorType变量值和locatorValue变量值,验证是否赋值正确
System.out.println("获取的定位类型:"+locatorType+"\t 获取的定位表达式"+locatorValue);
//根据locatorType的变量值内容判断返回何种定位方式的By对象
if(locatorType.toLowerCase().equals("id"))
return By.id(locatorValue);
else if(locatorType.toLowerCase().equals("name"))
return By.name(locatorValue);
else if((locatorType.toLowerCase().equals("classname"))||(locatorType.toLowerCase().equals("class")))
return By.className(locatorValue);
else if((locatorType.toLowerCase().equals("tagname"))||(locatorType.toLowerCase().equals("tag")))
return By.className(locatorValue);
else if((locatorType.toLowerCase().equals("linktext"))||(locatorType.toLowerCase().equals("link")))
return By.linkText(locatorValue);
else if(locatorType.toLowerCase().equals("partiallinktext"))
return By.partialLinkText(locatorValue);
else if((locatorType.toLowerCase().equals("cssselector"))||(locatorType.toLowerCase().equals("css")))
return By.cssSelector(locatorValue);
else if(locatorType.toLowerCase().equals("xpath"))
return By.xpath(locatorValue);
else {
throw new Exception("输入的locator type未在程序中定义"+ locatorType);
}
}
}4、在工程中添加一个存储页面定位方式和定位表达式的配置文件objectMap.properties,文件内容如下:
oms.loginPage.username=id>username
oms.loginPage.password=id>password
oms.loginPage.loginbutton=xpath>//button[@type='submit']
oms.StationManagePage.stationMenu=id>menu_0000000002
oms.StationManagePage.smanageMenu=id>menu_0000000060
oms.StationManagePage.createstationMenu=xpath>//a[@data-target='#modStationModel']
oms.StationManagePage.I_stationName=name>station_name
oms.StationManagePage.I_operMerchant=name>oper_merchant_id
oms.StationManagePage.I_selectedArea=xpath>//*[@id='city_box'][@ng-show='!!!required']/select[1]
oms.StationManagePage.I_selectedCity=xpath>//*[@id='city_box'][@ng-show='!!!required']/select[2]
oms.StationManagePage.I_selectedDistrict=xpath>//*[@id='city_box'][@ng-show='!!!required']/select[3]
oms.StationManagePage.I_establishTime=name>establish_time
oms.StationManagePage.I_saveButton=xpath>//button[@w5c-form-submit='modifyOwnOnlineStation();']
oms.StationManagePage.I_OKButton=xpath>//button[@data-bb-handler='ok']
oms.StationManagePage.I_search=xpath>//input[@type='search']
oms.StationManagePage.I_detailButton=xpath>//a[@class='btn']
oms.StationManagePage.I_locationManageButton=xpath>//a[@ng-click='stationLocationManage();']
oms.StationManagePage.I_newCreateButton=id>addSubmit
oms.StationManagePage.I_coordinateX=name>coordinate_x
oms.StationManagePage.I_coordinateY=name>coordinate_y
oms.StationManagePage.I_locationsaveButton=xpath>//button[@w5c-form-submit='modifyStationLocation();']
oms.StationManagePage.I_locationokButton=xpath>//button[@data-bb-handler='ok']
oms.StationManagePage.I_locationcloseButton=xpath>//*[@id='stationLocationList']/div/div/div[3]/button测试页面中的所有页面元素的定位方式和定位表达式均可在此文件中进行定义,实现定位数据和测试程序的分离。在一个配置文件中修改定位数据,可以在测试脚本中全局生效,此方式可以大大提高定位表达式的维护效率。
5、在cn.oms.pageobjects的Package下新建Login_Page类,用于实现系统登陆页面的pageobject对象。Login_Page类的代码如下:
import org.openqa.selenium.WebDriver;
import org.openqa.selenium.WebElement;
import cn.oms.util.ObjectMap;
public class Login_Page {
private WebElement element=null;
//指定页面元素定位表达式配置文件的绝对文件路径
private ObjectMap objectMap=new ObjectMap("E:\\test summary\\DataDrivenFrameWork\\objectMap.properties");
private WebDriver driver;
public Login_Page(WebDriver driver){
this.driver=driver;
}
//返回登录页面中的用户名输入框页面元素对象
public WebElement username() throws Exception{
//使用ObjectMap类中的getLocator方法获取配置文件中关于用户名的定位方式和定位表达式
element=driver.findElement(objectMap.getLocator("oms.loginPage.username"));
return element;
}
//返回登录页面中的密码输入框页面元素对象
public WebElement password() throws Exception{
// 使用ObjectMap类中的getLocator方法获取配置文件中关于密码的定位方式和定位表达式
element = driver.findElement(objectMap.getLocator("oms.loginPage.password"));
return element;
}
//返回登录页面中的登录按钮页面元素对象
public WebElement loginButton() throws Exception{
// 使用ObjectMap类中的getLocator方法获取配置文件中关于登录按钮的定位方式和定位表达式
element = driver.findElement(objectMap.getLocator("oms.loginPage.loginbutton"));
return element;
}
}6、在cn.oms.modules的Package下新建Login_Action类,将登录的操作逻辑封装,方便其他测试脚本进行调用,其代码如下:
import org.openqa.selenium.WebDriver;
import org.testng.Assert;
import cn.oms.pageobjects.Login_Page;
import cn.oms.util.Constant;
import cn.oms.util.Log;
//由于登录过程是其他测试过程的前提条件,所以将登录的操作逻辑封装在login_Action类的execute方法中,方便其他测试脚本进行调用
public class Login_Action {
public static void execute(WebDriver driver,String userName,String passWord) throws Exception{
//访问被测试网站
driver.get(Constant.Url);
//生成一个Login_Page对象实例
Login_Page loginPage=new Login_Page(driver);
//直接使用页面对象的用户名元素对象,输入用户名
loginPage.username().sendKeys(userName);
//直接使用页面对象的密码元素对象,输入用户密码
loginPage.password().sendKeys(passWord);
//登录
loginPage.loginButton().click();
Thread.sleep(6000);
//断言登陆后页面是否包含用户名关键字,来验证是否登录成功
Assert.assertTrue(driver.getPageSource().contains(userName));
Log.info("登录成功");
}
}7、在cn.oms.autotest中新增LoginTest类,调用Login_Action的execute方法,大大减少测试脚本的重复编写。其代码如下:
import org.openqa.selenium.WebDriver;
import org.openqa.selenium.chrome.ChromeDriver;
import org.testng.annotations.AfterMethod;
import org.testng.annotations.BeforeMethod;
import org.testng.annotations.Test;
import cn.oms.modules.Login_Action;
import cn.oms.util.Constant;
public class LoginTest {
private WebDriver driver;
@Test
public void testLogin() throws Exception {
Login_Action.execute(driver,Constant.username,Constant.password);
}
@BeforeMethod
public void beforeMethod() throws InterruptedException {
//若无法打开chrome浏览器,可设定chrome浏览器的安装路径
System.setProperty("webdriver.chrome.driver", "C:\\Program Files (x86)\\Google\\Chrome\\Application\\chromedriver.exe");
driver=new ChromeDriver();
}
@AfterMethod
public void afterMethod() {
//关闭打开的浏览器
driver.quit();
}
}8、在cn.oms.pageobjects下增加Station_Manage_Page类,并在配置文件objectMap.properties中补充新增页面的定位表达式,用于实现系统新增页面的pageobject对象。Station_Manage_Page类的代码如下:
9、在cn.oms.modules下增加StationPage_Action类,具体代码:
package cn.oms.modules;
import org.openqa.selenium.WebDriver;
import cn.oms.pageobjects.Station_Manage_Page;
//进入新增页面
public class StationPage_Action {
public static void execute(WebDriver driver) throws Exception{
Station_Manage_Page stationManagePage=new Station_Manage_Page(driver);
stationManagePage.stationMenu().click();
stationManagePage.smanageMenu().click();
Thread.sleep(3000);
}
}10、在cn.oms.util下增加Constant类,用于存放常量对象,代码如下:
如果数据发生了变更,只需要修改该类中的静态常量值就可以实现修改值在全部测试代码中生效,减少了代码的维护成本,并且使用常量还增加了测试代码的可读性。
11、加入Log4j的打印日志功能。在工程的根目录下,新建名称为log4j.xml的文件,具体的文件内容如下:
<?xml version="1.0" encoding="UTF-8"?>
<!DOCTYPE log4j:configuration SYSTEM "log4j.dtd">
<log4j:configuration xmlns:log4j="http://jakarta.apache.org/log4j/" debug="false">
<appender name="fileAppender" class="org.apache.log4j.FileAppender">
<param name="Threshold" value="INFO"/>
<param name="File" value="OMSTestLogfile.log"/>
<layout class="org.apache.log4j.PatternLayout">
<param name="ConversionPattern" value="%d %-5p [%c{1}] %m %n"/>
</layout>
</appender>
<root>
<level value="INFO"/>
<appender-ref ref="fileAppender"/>
</root>
</log4j:configuration>在cn.oms.util下增加Log类,代码如下:
package cn.oms.util;
import org.apache.log4j.Logger;
public class Log {
private static Logger Log=Logger.getLogger(Log.class.getName());
//定义测试用例开始执行的打印方法,在日志中打印测试用例开始执行的信息
public static void startTestCase(String testCaseName){
Log.info("------------- \""+testCaseName+"\"开始执行 -------------");
}
//定义测试用例执行完毕后的打印方法,在日志中打印测试用例执行完毕的信息
public static void endTestCase(String testCaseName){
Log.info("------------- \""+testCaseName+"\"测试执行结束 -------------");
}
//定义打印info级别日志的方法
public static void info(String message){
Log.info(message);
}
//定义打印error级别日志的方法
public static void error(String message){
Log.error(message);
}
//定义打印debug级别日志的方法
public static void debug(String message){
Log.debug(message);
}
}
使用此方法可以将测试代码的执行逻辑打印到工程的根目录下名称为OMSTestLogfile.log的文件中。通过日志信息,可以查看测试执行过程中的执行逻辑,日志文件可以用于后续测试执行中问题分析和过程监控。
12、新建Excel测试数据文件omstestdata.xlsx,包含2个sheet,其中Sheet1为addstationdata,Sheet2为addlocationdata,如下:


13、在cn.oms.util下增加ExcelUtil类,用于实现对Excel文件的读写操作,代码如下:
package cn.oms.util;
import java.io.File;
import java.io.FileInputStream;
import java.io.FileOutputStream;
import java.io.IOException;
import java.util.ArrayList;
import java.util.List;
import org.apache.poi.hssf.usermodel.HSSFWorkbook;
import org.apache.poi.ss.usermodel.Sheet;
import org.apache.poi.ss.usermodel.Workbook;
import org.apache.poi.xssf.usermodel.XSSFCell;
import org.apache.poi.xssf.usermodel.XSSFRow;
import org.apache.poi.xssf.usermodel.XSSFSheet;
import org.apache.poi.xssf.usermodel.XSSFWorkbook;
import org.apache.poi.ss.usermodel.Row;
//主要实现文件扩展名为.xlsx的Excel文件操作
public class ExcelUtil {
private XSSFSheet ExcelWSheet;
private XSSFWorkbook ExcelWBook;
private XSSFCell Cell;
private XSSFRow Row;
//设定要操作Excel的文件路径和Excel文件中的Sheet名称
//在读/写Excel的时候,均需要先调用此方法,设定要操作Excel的文件路径和Excel文件中的Sheet名称
public void setExcelFile(String Path,String SheetName) throws Exception{
FileInputStream ExcelFile;
try{
//实例化Excel文件的FileInputStream对象
ExcelFile=new FileInputStream(Path);
//实例化Excel文件的XSSFWorkbook对象
ExcelWBook=new XSSFWorkbook(ExcelFile);
//实例化ExcelWSheet对象,指定Excel文件的Sheet名称,后续用于Sheet中行、列和单元格操作
ExcelWSheet=ExcelWBook.getSheet(SheetName);
}catch(Exception e){
throw(e);
}
}
//读取Excel文件指定单元格的函数,此函数只支持扩展名为.xlsx的Excel文件
public String getCellData(int RowNum,int ColNum) throws Exception{
try{
//通过函数参数指定单元格的行号和列号,获取指定的单元格对象
Cell=ExcelWSheet.getRow(RowNum).getCell(RowNum);
//如果单元格的内容为字符串类型,则使用getStringCellValue方法获取单元格的内容
//如果单元格的内容为数字类型,则使用getNumericCellValue方法获取单元格的内容
String CellData=(String)(Cell.getCellType()==XSSFCell.CELL_TYPE_STRING
? Cell.getStringCellValue()+""
:Cell.getNumericCellValue());
return CellData;
}catch(Exception e){
return "";
}
}
//在Excel文件的执行单元格中输入数据,此函数只支持扩展名为.xlsx的Excel文件写入
public void setCellData(int RowNum,int ColNum,String Result) throws Exception{
try{
//获取Excel文件中的行对象
Row=ExcelWSheet.getRow(RowNum);
//如果单元格为空,则返回NULL
Cell=Row.getCell(ColNum,Row.RETURN_BLANK_AS_NULL);
if(Cell==null){
//当单元格对象是NULL时,则创建单元格
//如果单元格为空,无法直接调用单元格对象的setCellValue方法设定单元格的值
Cell=Row.createCell(ColNum);
//调用单元格对象的setCellValue方法设定单元格的值
Cell.setCellValue(Result);
}else{
//单元格有内容,可直接调用单元格对象的setCellValue方法设定单元格的值
Cell.setCellValue(Result);
}
//实例化写入Excel文件的文件输出流对象,相当于保存
FileOutputStream fileOut=new FileOutputStream(Constant.TestDataExcelFilePath);
//将内容写入Excel文件中
ExcelWBook.write(fileOut);
//调用flush()方法强制刷新写入文件
fileOut.flush();
//关闭文件输出流对象
fileOut.close();
}catch(Exception e){
throw(e);
}
}
//从Excel文件获取测试数据的静态方法
public static Object[][] getTestData(String excelFilePath,String sheetName) throws IOException{
//读取路径中的文件
File file=new File(excelFilePath);
//创建FileInputStream对象用于读取Excel文件
FileInputStream inputStream = new FileInputStream(file);
Workbook Workbook = null;
//获取文件名参数的扩展名,判断是.xlsx文件还是.xls文件
String fileExtensionName = excelFilePath.substring(excelFilePath
.indexOf("."));
if (fileExtensionName.equals(".xlsx")) {
Workbook = new XSSFWorkbook(inputStream);
} else if (fileExtensionName.equals(".xls")) {
Workbook = new HSSFWorkbook(inputStream);
}
//通过sheetName参数,声称Sheet对象
Sheet Sheet = Workbook.getSheet(sheetName);
//获取Excel数据文件Sheet中数据的行数,getLastRowNum()方法获取数据的最后一行行号
//getFirstRowNum()方法获取数据的第一行行号,相减之后得出数据的行数,Excel文件的行号和列号都是从0开始
int rowCount = Sheet.getLastRowNum() - Sheet.getFirstRowNum();
//创建list对象存储从Excel数据文件读取的数据
List<Object[]> records = new ArrayList<Object[]>();
//循环遍历Excel数据文件的所有数据,除了第一行,第一行是数据列名称
for (int i = 1; i < rowCount + 1; i++) {
//使用getShow方法获取行对象
Row row = Sheet.getRow(i);
/*声明一个数组,存储Excel数据文件每行中的测试用例和数据,数组大小用getLastCellNum()-2来进行动态声明。
* 因为Excel中测试数据行的最后一个单元格为测试执行结果,倒数第二个单元格为此测试数据行是否运行的状态,所以最后2列的数据不需要传入测试方法中
*/
String fields[] = new String[row.getLastCellNum()-2];
//判断数据行是否要参与测试执行,标记为 y表示数据行被测试执行,非y则不会执行,会被跳过
if(row.getCell(row.getLastCellNum()-2).getStringCellValue().equals("y")){
for (int j = 0; j < row.getLastCellNum()-2; j++) {
// 使用getCell()和getStringCellValue()方法获取Excel文件中的单元格数据
//判断Excel的单元格字段是数字还是字符,字符串格式用getStringCellValue方法获取,数字用getNumericCellValue方法获取
fields[j] = (String)(row.getCell(j).getCellType()==XSSFCell.CELL_TYPE_STRING ?
row.getCell(j).getStringCellValue() :""+ row.getCell(j).getNumericCellValue());
}
// 将fields的数据对象存入records的list中
records.add(fields);
}
}
// 将存储测试数据的List转换为一个Object的二维数组
Object[][] results = new Object[records.size()][];
// 设置二位数组每行的值,每行是一个Object对象
for (int i = 0; i < records.size(); i++) {
results[i] = records.get(i);
}
return results;
}
public int getLastColumnNum(){
//返回数据文件最后一列的列号
return ExcelWSheet.getRow(0).getLastCellNum()-1;
}
}14、在cn.oms.modules下增加QueryStation_Action类,用于查询数据代码的封装,代码如下:
package cn.oms.modules;
import org.openqa.selenium.WebDriver;
import cn.oms.pageobjects.Station_Manage_Page;
public class QueryStation_Action {
public static void execute(WebDriver driver,String I_stationName) throws Exception{
Station_Manage_Page stationManagePage=new Station_Manage_Page(driver);
// 在搜索框输入站点名称
stationManagePage.I_search().clear();
stationManagePage.I_search().sendKeys(I_stationName);
}
}15、在cn.oms.autotest下增加StationManageTest类,用于实现新增功能,代码如下:
三、数据测试驱动框架的优点分析:
1、通过配置文件,实现页面元素定位表达式和测试代码的分离。
2、使用ObjectMap方式 ,简化页面元素定位相关的代码工作量。
3、使用PageObject模式,封装了系统中的页面元素,方便测试代码调用,也实现了一处维护全局生效的目标。
4、在cn.oms.modules的Package中封装了常用的页面对象操作方法,简化了测试脚本编写的工作量。
5、在Excel文件中定义多个测试数据,测试框架可自动调用测试数据完成数据驱动测试。
6、实现了测试执行过程中的日志记录功能,可以通过日志文件分析测试脚本执行的情况。
7、在Excel文件测试数据行中,通过设定“测试数据是否执行”列的内容为y或者n,可自定义选择测试数据,测试执行结束后会在“测试结果”列中显示测试执行的结果,方便测试人员查看。
四、总结:
这是我第一个自己搭建的自动化框架,过程中也查看了很多资料,有以下几个感悟:
个人觉得那个页面元素和测试代码分离在我测试的系统中不是很必要,这个可以应用在页面元素比较多的情况,我所测系统的页面元素不是很多,使用FindBy注解就可以了。
在StationManageTest类中有2个不同的案例,用到的数据不一样,我使用了TestNG的数据驱动注解进行数据驱动测试,但是这个方法必须把一个案例中所有数据都测试完成了才能进行下一个案例测试,其实我2个案例是有关联的,还需要继续研究如何实现2个测试类中数据一行行的执行。
该框架中缺少截图功能,需要添加。
在我刚进入自动化测试工作时,用过基于数据库和网页搭建的框架。通过这个框架,我觉得可以借鉴此框架的思想实现基于数据库和网页框架的数据驱动框架。借助Web方式,通过浏览器来进行数据驱动测试,完成测试数据的定义、测试用例的执行和测试结果的查看。
一、系统介绍:
1)在系统中进行登陆
2)在系统登陆的情况下,进行新增操作
3)在新增的数据中进入详情界面,新增属性值
二、数据驱动框架搭建的详细过程:
1、新建一个java工程,并配置好工程中的WebDriver和TestNG环境,并导入Excel操作相关和Log4j相关的JAR文件到工程中。
2、在工程中新建4个Package,分别命名为:
1)cn.oms.modules,用于实现复用的业务逻辑封装方法。
2)cn.oms.pageobjects,用于实现被测系统的页面对象。
3)cn.oms.autotest,用于实现具体的测试脚本逻辑。
4)cn.oms.util,用于实现测试过程中调用的工具类方法,例如文件操作、mapObject、页面元素的操作方法等。
3、在cn.oms.util的Package下新建ObjectMap类,用于实现在外部配置文件中配置页面元素的定位表达式。ObjectMap代码如下:
import java.io.FileInputStream;
import java.io.IOException;
import java.util.Properties;
public class ObjectMap {
Properties properties;
public ObjectMap(String propFile){
properties=new Properties();
try{
FileInputStream in=new FileInputStream(propFile);
properties.load(in);
in.close();
}catch(IOException e){
System.out.println("读取对象文件出错");
e.printStackTrace();
}
}
public By getLocator(String ElementNameInpropFile) throws Exception{
//根据变量ElementNameInpropFile,从属性配置文件中读取对应的配置文件
String locator=properties.getProperty(ElementNameInpropFile);
//将配置对象中的定位类型存到locatorType变量,将定位表达式的值存入locatorValue变量
String locatorType=locator.split(">")[0];
String locatorValue=locator.split(">")[1];
//在Eclipse中的配置文件均默认为ISO-8859-1编码存储,使用getBytes方法可以将字符串编码转换为UTF-8编码,以此来解决在配置文件读取中文为乱码的问题
locatorValue=new String(locatorValue.getBytes("ISO-8859-1"), "UTF-8");
//输出locatorType变量值和locatorValue变量值,验证是否赋值正确
System.out.println("获取的定位类型:"+locatorType+"\t 获取的定位表达式"+locatorValue);
//根据locatorType的变量值内容判断返回何种定位方式的By对象
if(locatorType.toLowerCase().equals("id"))
return By.id(locatorValue);
else if(locatorType.toLowerCase().equals("name"))
return By.name(locatorValue);
else if((locatorType.toLowerCase().equals("classname"))||(locatorType.toLowerCase().equals("class")))
return By.className(locatorValue);
else if((locatorType.toLowerCase().equals("tagname"))||(locatorType.toLowerCase().equals("tag")))
return By.className(locatorValue);
else if((locatorType.toLowerCase().equals("linktext"))||(locatorType.toLowerCase().equals("link")))
return By.linkText(locatorValue);
else if(locatorType.toLowerCase().equals("partiallinktext"))
return By.partialLinkText(locatorValue);
else if((locatorType.toLowerCase().equals("cssselector"))||(locatorType.toLowerCase().equals("css")))
return By.cssSelector(locatorValue);
else if(locatorType.toLowerCase().equals("xpath"))
return By.xpath(locatorValue);
else {
throw new Exception("输入的locator type未在程序中定义"+ locatorType);
}
}
}4、在工程中添加一个存储页面定位方式和定位表达式的配置文件objectMap.properties,文件内容如下:
oms.loginPage.username=id>username
oms.loginPage.password=id>password
oms.loginPage.loginbutton=xpath>//button[@type='submit']
oms.StationManagePage.stationMenu=id>menu_0000000002
oms.StationManagePage.smanageMenu=id>menu_0000000060
oms.StationManagePage.createstationMenu=xpath>//a[@data-target='#modStationModel']
oms.StationManagePage.I_stationName=name>station_name
oms.StationManagePage.I_operMerchant=name>oper_merchant_id
oms.StationManagePage.I_selectedArea=xpath>//*[@id='city_box'][@ng-show='!!!required']/select[1]
oms.StationManagePage.I_selectedCity=xpath>//*[@id='city_box'][@ng-show='!!!required']/select[2]
oms.StationManagePage.I_selectedDistrict=xpath>//*[@id='city_box'][@ng-show='!!!required']/select[3]
oms.StationManagePage.I_establishTime=name>establish_time
oms.StationManagePage.I_saveButton=xpath>//button[@w5c-form-submit='modifyOwnOnlineStation();']
oms.StationManagePage.I_OKButton=xpath>//button[@data-bb-handler='ok']
oms.StationManagePage.I_search=xpath>//input[@type='search']
oms.StationManagePage.I_detailButton=xpath>//a[@class='btn']
oms.StationManagePage.I_locationManageButton=xpath>//a[@ng-click='stationLocationManage();']
oms.StationManagePage.I_newCreateButton=id>addSubmit
oms.StationManagePage.I_coordinateX=name>coordinate_x
oms.StationManagePage.I_coordinateY=name>coordinate_y
oms.StationManagePage.I_locationsaveButton=xpath>//button[@w5c-form-submit='modifyStationLocation();']
oms.StationManagePage.I_locationokButton=xpath>//button[@data-bb-handler='ok']
oms.StationManagePage.I_locationcloseButton=xpath>//*[@id='stationLocationList']/div/div/div[3]/button测试页面中的所有页面元素的定位方式和定位表达式均可在此文件中进行定义,实现定位数据和测试程序的分离。在一个配置文件中修改定位数据,可以在测试脚本中全局生效,此方式可以大大提高定位表达式的维护效率。
5、在cn.oms.pageobjects的Package下新建Login_Page类,用于实现系统登陆页面的pageobject对象。Login_Page类的代码如下:
import org.openqa.selenium.WebDriver;
import org.openqa.selenium.WebElement;
import cn.oms.util.ObjectMap;
public class Login_Page {
private WebElement element=null;
//指定页面元素定位表达式配置文件的绝对文件路径
private ObjectMap objectMap=new ObjectMap("E:\\test summary\\DataDrivenFrameWork\\objectMap.properties");
private WebDriver driver;
public Login_Page(WebDriver driver){
this.driver=driver;
}
//返回登录页面中的用户名输入框页面元素对象
public WebElement username() throws Exception{
//使用ObjectMap类中的getLocator方法获取配置文件中关于用户名的定位方式和定位表达式
element=driver.findElement(objectMap.getLocator("oms.loginPage.username"));
return element;
}
//返回登录页面中的密码输入框页面元素对象
public WebElement password() throws Exception{
// 使用ObjectMap类中的getLocator方法获取配置文件中关于密码的定位方式和定位表达式
element = driver.findElement(objectMap.getLocator("oms.loginPage.password"));
return element;
}
//返回登录页面中的登录按钮页面元素对象
public WebElement loginButton() throws Exception{
// 使用ObjectMap类中的getLocator方法获取配置文件中关于登录按钮的定位方式和定位表达式
element = driver.findElement(objectMap.getLocator("oms.loginPage.loginbutton"));
return element;
}
}6、在cn.oms.modules的Package下新建Login_Action类,将登录的操作逻辑封装,方便其他测试脚本进行调用,其代码如下:
import org.openqa.selenium.WebDriver;
import org.testng.Assert;
import cn.oms.pageobjects.Login_Page;
import cn.oms.util.Constant;
import cn.oms.util.Log;
//由于登录过程是其他测试过程的前提条件,所以将登录的操作逻辑封装在login_Action类的execute方法中,方便其他测试脚本进行调用
public class Login_Action {
public static void execute(WebDriver driver,String userName,String passWord) throws Exception{
//访问被测试网站
driver.get(Constant.Url);
//生成一个Login_Page对象实例
Login_Page loginPage=new Login_Page(driver);
//直接使用页面对象的用户名元素对象,输入用户名
loginPage.username().sendKeys(userName);
//直接使用页面对象的密码元素对象,输入用户密码
loginPage.password().sendKeys(passWord);
//登录
loginPage.loginButton().click();
Thread.sleep(6000);
//断言登陆后页面是否包含用户名关键字,来验证是否登录成功
Assert.assertTrue(driver.getPageSource().contains(userName));
Log.info("登录成功");
}
}7、在cn.oms.autotest中新增LoginTest类,调用Login_Action的execute方法,大大减少测试脚本的重复编写。其代码如下:
import org.openqa.selenium.WebDriver;
import org.openqa.selenium.chrome.ChromeDriver;
import org.testng.annotations.AfterMethod;
import org.testng.annotations.BeforeMethod;
import org.testng.annotations.Test;
import cn.oms.modules.Login_Action;
import cn.oms.util.Constant;
public class LoginTest {
private WebDriver driver;
@Test
public void testLogin() throws Exception {
Login_Action.execute(driver,Constant.username,Constant.password);
}
@BeforeMethod
public void beforeMethod() throws InterruptedException {
//若无法打开chrome浏览器,可设定chrome浏览器的安装路径
System.setProperty("webdriver.chrome.driver", "C:\\Program Files (x86)\\Google\\Chrome\\Application\\chromedriver.exe");
driver=new ChromeDriver();
}
@AfterMethod
public void afterMethod() {
//关闭打开的浏览器
driver.quit();
}
}8、在cn.oms.pageobjects下增加Station_Manage_Page类,并在配置文件objectMap.properties中补充新增页面的定位表达式,用于实现系统新增页面的pageobject对象。Station_Manage_Page类的代码如下:
package cn.oms.pageobjects;
import org.openqa.selenium.WebDriver;
import org.openqa.selenium.WebElement;
import cn.oms.util.ObjectMap;
public class Station_Manage_Page {
private WebElement element=null;
//指定页面元素定位表达式配置文件的绝对文件路径
private ObjectMap objectMap=new ObjectMap("E:\\test summary\\DataDrivenFrameWork\\objectMap.properties");
private WebDriver driver;
public Station_Manage_Page(WebDriver driver){
this.driver=driver;
}
public WebElement stationMenu() throws Exception{
element=driver.findElement(objectMap.getLocator("oms.StationManagePage.stationMenu"));
return element;
}
public WebElement smanageMenu() throws Exception{
element=driver.findElement(objectMap.getLocator("oms.StationManagePage.smanageMenu"));
return element;
}
public WebElement createstationMenu() throws Exception{
element=driver.findElement(objectMap.getLocator("oms.StationManagePage.createstationMenu"));
return element;
}
public WebElement I_stationName() throws Exception{
element=driver.findElement(objectMap.getLocator("oms.StationManagePage.I_stationName"));
return element;
}
public WebElement I_operMerchant() throws Exception{
element=driver.findElement(objectMap.getLocator("oms.StationManagePage.I_operMerchant"));
return element;
}
//选择所在城市-省份
public WebElement I_selectedArea() throws Exception{
element=driver.findElement(objectMap.getLocator("oms.StationManagePage.I_selectedArea"));
return element;
}
//选择所在城市-城市
public WebElement I_selectedCity() throws Exception{
element=driver.findElement(objectMap.getLocator("oms.StationManagePage.I_selectedCity"));
return element;
}
//选择所在城市-地区
public WebElement I_selectedDistrict() throws Exception{
element=driver.findElement(objectMap.getLocator("oms.StationManagePage.I_selectedDistrict"));
return element;
}
public WebElement I_establishTime() throws Exception{
element=driver.findElement(objectMap.getLocator("oms.StationManagePage.I_establishTime"));
return element;
}
//获取界面中的“保存”按钮
public WebElement I_saveButton() throws Exception{
element=driver.findElement(objectMap.getLocator("oms.StationManagePage.I_saveButton"));
return element;
}
//获取界面中的“确定”按钮
public WebElement I_OKButton() throws Exception{
element=driver.findElement(objectMap.getLocator("oms.StationManagePage.I_OKButton"));
return element;
}
//搜索输入框
public WebElement I_search() throws Exception{
element=driver.findElement(objectMap.getLocator("oms.StationManagePage.I_search"));
return element;
}
//详情按钮
public WebElement I_detailButton() throws Exception{
element=driver.findElement(objectMap.getLocator("oms.StationManagePage.I_detailButton"));
return element;
}
//坐标管理按钮
public WebElement I_locationManageButton() throws Exception{
element=driver.findElement(objectMap.getLocator("oms.StationManagePage.I_locationManageButton"));
return element;
}
//新增按钮
public WebElement I_newCreateButton() throws Exception{
element=driver.findElement(objectMap.getLocator("oms.StationManagePage.I_newCreateButton"));
return element;
}
//经度
public WebElement I_coordinateX() throws Exception{
element=driver.findElement(objectMap.getLocator("oms.StationManagePage.I_coordinateX"));
return element;
}
//纬度
public WebElement I_coordinateY() throws Exception{
element=driver.findElement(objectMap.getLocator("oms.StationManagePage.I_coordinateY"));
return element;
}
//保存按钮
public WebElement I_locationsaveButton() throws Exception{
element=driver.findElement(objectMap.getLocator("oms.StationManagePage.I_locationsaveButton"));
return element;
}
//确定按钮
public WebElement I_locationokButton() throws Exception{
element=driver.findElement(objectMap.getLocator("oms.StationManagePage.I_locationokButton"));
return element;
}
//关闭按钮
public WebElement I_locationcloseButton() throws Exception{
element=driver.findElement(objectMap.getLocator("oms.StationManagePage.I_locationcloseButton"));
return element;
}
}
9、在cn.oms.modules下增加StationPage_Action类,具体代码:
package cn.oms.modules;
import org.openqa.selenium.WebDriver;
import cn.oms.pageobjects.Station_Manage_Page;
//进入新增页面
public class StationPage_Action {
public static void execute(WebDriver driver) throws Exception{
Station_Manage_Page stationManagePage=new Station_Manage_Page(driver);
stationManagePage.stationMenu().click();
stationManagePage.smanageMenu().click();
Thread.sleep(3000);
}
}10、在cn.oms.util下增加Constant类,用于存放常量对象,代码如下:
package cn.oms.util;
public class Constant {
//定义测试网址的常量
public static final String Url="http://baidu.com/";
//测试数据路径
public static final String TestDataExcelFilePath="E:\\test summary\\DataDrivenFrameWork\\omstestdata.xlsx";
//登录用户名
public static final String username="username";
//登录密码
public static final String password="password";
//测试登录数据文件sheet名称
public static final String TestLoginDataExcelFileSheet="logindata";
//测试新增数据文件sheet名称
public static final String TestAddStationDataExcelFileSheet="addstationdata";
//测试新增属性数据文件sheet名称
public static final String TestAddLocationDataExcelFileSheet="addlocationdata";
}
如果数据发生了变更,只需要修改该类中的静态常量值就可以实现修改值在全部测试代码中生效,减少了代码的维护成本,并且使用常量还增加了测试代码的可读性。
11、加入Log4j的打印日志功能。在工程的根目录下,新建名称为log4j.xml的文件,具体的文件内容如下:
<?xml version="1.0" encoding="UTF-8"?>
<!DOCTYPE log4j:configuration SYSTEM "log4j.dtd">
<log4j:configuration xmlns:log4j="http://jakarta.apache.org/log4j/" debug="false">
<appender name="fileAppender" class="org.apache.log4j.FileAppender">
<param name="Threshold" value="INFO"/>
<param name="File" value="OMSTestLogfile.log"/>
<layout class="org.apache.log4j.PatternLayout">
<param name="ConversionPattern" value="%d %-5p [%c{1}] %m %n"/>
</layout>
</appender>
<root>
<level value="INFO"/>
<appender-ref ref="fileAppender"/>
</root>
</log4j:configuration>在cn.oms.util下增加Log类,代码如下:
package cn.oms.util;
import org.apache.log4j.Logger;
public class Log {
private static Logger Log=Logger.getLogger(Log.class.getName());
//定义测试用例开始执行的打印方法,在日志中打印测试用例开始执行的信息
public static void startTestCase(String testCaseName){
Log.info("------------- \""+testCaseName+"\"开始执行 -------------");
}
//定义测试用例执行完毕后的打印方法,在日志中打印测试用例执行完毕的信息
public static void endTestCase(String testCaseName){
Log.info("------------- \""+testCaseName+"\"测试执行结束 -------------");
}
//定义打印info级别日志的方法
public static void info(String message){
Log.info(message);
}
//定义打印error级别日志的方法
public static void error(String message){
Log.error(message);
}
//定义打印debug级别日志的方法
public static void debug(String message){
Log.debug(message);
}
}
使用此方法可以将测试代码的执行逻辑打印到工程的根目录下名称为OMSTestLogfile.log的文件中。通过日志信息,可以查看测试执行过程中的执行逻辑,日志文件可以用于后续测试执行中问题分析和过程监控。
12、新建Excel测试数据文件omstestdata.xlsx,包含2个sheet,其中Sheet1为addstationdata,Sheet2为addlocationdata,如下:
13、在cn.oms.util下增加ExcelUtil类,用于实现对Excel文件的读写操作,代码如下:
package cn.oms.util;
import java.io.File;
import java.io.FileInputStream;
import java.io.FileOutputStream;
import java.io.IOException;
import java.util.ArrayList;
import java.util.List;
import org.apache.poi.hssf.usermodel.HSSFWorkbook;
import org.apache.poi.ss.usermodel.Sheet;
import org.apache.poi.ss.usermodel.Workbook;
import org.apache.poi.xssf.usermodel.XSSFCell;
import org.apache.poi.xssf.usermodel.XSSFRow;
import org.apache.poi.xssf.usermodel.XSSFSheet;
import org.apache.poi.xssf.usermodel.XSSFWorkbook;
import org.apache.poi.ss.usermodel.Row;
//主要实现文件扩展名为.xlsx的Excel文件操作
public class ExcelUtil {
private XSSFSheet ExcelWSheet;
private XSSFWorkbook ExcelWBook;
private XSSFCell Cell;
private XSSFRow Row;
//设定要操作Excel的文件路径和Excel文件中的Sheet名称
//在读/写Excel的时候,均需要先调用此方法,设定要操作Excel的文件路径和Excel文件中的Sheet名称
public void setExcelFile(String Path,String SheetName) throws Exception{
FileInputStream ExcelFile;
try{
//实例化Excel文件的FileInputStream对象
ExcelFile=new FileInputStream(Path);
//实例化Excel文件的XSSFWorkbook对象
ExcelWBook=new XSSFWorkbook(ExcelFile);
//实例化ExcelWSheet对象,指定Excel文件的Sheet名称,后续用于Sheet中行、列和单元格操作
ExcelWSheet=ExcelWBook.getSheet(SheetName);
}catch(Exception e){
throw(e);
}
}
//读取Excel文件指定单元格的函数,此函数只支持扩展名为.xlsx的Excel文件
public String getCellData(int RowNum,int ColNum) throws Exception{
try{
//通过函数参数指定单元格的行号和列号,获取指定的单元格对象
Cell=ExcelWSheet.getRow(RowNum).getCell(RowNum);
//如果单元格的内容为字符串类型,则使用getStringCellValue方法获取单元格的内容
//如果单元格的内容为数字类型,则使用getNumericCellValue方法获取单元格的内容
String CellData=(String)(Cell.getCellType()==XSSFCell.CELL_TYPE_STRING
? Cell.getStringCellValue()+""
:Cell.getNumericCellValue());
return CellData;
}catch(Exception e){
return "";
}
}
//在Excel文件的执行单元格中输入数据,此函数只支持扩展名为.xlsx的Excel文件写入
public void setCellData(int RowNum,int ColNum,String Result) throws Exception{
try{
//获取Excel文件中的行对象
Row=ExcelWSheet.getRow(RowNum);
//如果单元格为空,则返回NULL
Cell=Row.getCell(ColNum,Row.RETURN_BLANK_AS_NULL);
if(Cell==null){
//当单元格对象是NULL时,则创建单元格
//如果单元格为空,无法直接调用单元格对象的setCellValue方法设定单元格的值
Cell=Row.createCell(ColNum);
//调用单元格对象的setCellValue方法设定单元格的值
Cell.setCellValue(Result);
}else{
//单元格有内容,可直接调用单元格对象的setCellValue方法设定单元格的值
Cell.setCellValue(Result);
}
//实例化写入Excel文件的文件输出流对象,相当于保存
FileOutputStream fileOut=new FileOutputStream(Constant.TestDataExcelFilePath);
//将内容写入Excel文件中
ExcelWBook.write(fileOut);
//调用flush()方法强制刷新写入文件
fileOut.flush();
//关闭文件输出流对象
fileOut.close();
}catch(Exception e){
throw(e);
}
}
//从Excel文件获取测试数据的静态方法
public static Object[][] getTestData(String excelFilePath,String sheetName) throws IOException{
//读取路径中的文件
File file=new File(excelFilePath);
//创建FileInputStream对象用于读取Excel文件
FileInputStream inputStream = new FileInputStream(file);
Workbook Workbook = null;
//获取文件名参数的扩展名,判断是.xlsx文件还是.xls文件
String fileExtensionName = excelFilePath.substring(excelFilePath
.indexOf("."));
if (fileExtensionName.equals(".xlsx")) {
Workbook = new XSSFWorkbook(inputStream);
} else if (fileExtensionName.equals(".xls")) {
Workbook = new HSSFWorkbook(inputStream);
}
//通过sheetName参数,声称Sheet对象
Sheet Sheet = Workbook.getSheet(sheetName);
//获取Excel数据文件Sheet中数据的行数,getLastRowNum()方法获取数据的最后一行行号
//getFirstRowNum()方法获取数据的第一行行号,相减之后得出数据的行数,Excel文件的行号和列号都是从0开始
int rowCount = Sheet.getLastRowNum() - Sheet.getFirstRowNum();
//创建list对象存储从Excel数据文件读取的数据
List<Object[]> records = new ArrayList<Object[]>();
//循环遍历Excel数据文件的所有数据,除了第一行,第一行是数据列名称
for (int i = 1; i < rowCount + 1; i++) {
//使用getShow方法获取行对象
Row row = Sheet.getRow(i);
/*声明一个数组,存储Excel数据文件每行中的测试用例和数据,数组大小用getLastCellNum()-2来进行动态声明。
* 因为Excel中测试数据行的最后一个单元格为测试执行结果,倒数第二个单元格为此测试数据行是否运行的状态,所以最后2列的数据不需要传入测试方法中
*/
String fields[] = new String[row.getLastCellNum()-2];
//判断数据行是否要参与测试执行,标记为 y表示数据行被测试执行,非y则不会执行,会被跳过
if(row.getCell(row.getLastCellNum()-2).getStringCellValue().equals("y")){
for (int j = 0; j < row.getLastCellNum()-2; j++) {
// 使用getCell()和getStringCellValue()方法获取Excel文件中的单元格数据
//判断Excel的单元格字段是数字还是字符,字符串格式用getStringCellValue方法获取,数字用getNumericCellValue方法获取
fields[j] = (String)(row.getCell(j).getCellType()==XSSFCell.CELL_TYPE_STRING ?
row.getCell(j).getStringCellValue() :""+ row.getCell(j).getNumericCellValue());
}
// 将fields的数据对象存入records的list中
records.add(fields);
}
}
// 将存储测试数据的List转换为一个Object的二维数组
Object[][] results = new Object[records.size()][];
// 设置二位数组每行的值,每行是一个Object对象
for (int i = 0; i < records.size(); i++) {
results[i] = records.get(i);
}
return results;
}
public int getLastColumnNum(){
//返回数据文件最后一列的列号
return ExcelWSheet.getRow(0).getLastCellNum()-1;
}
}14、在cn.oms.modules下增加QueryStation_Action类,用于查询数据代码的封装,代码如下:
package cn.oms.modules;
import org.openqa.selenium.WebDriver;
import cn.oms.pageobjects.Station_Manage_Page;
public class QueryStation_Action {
public static void execute(WebDriver driver,String I_stationName) throws Exception{
Station_Manage_Page stationManagePage=new Station_Manage_Page(driver);
// 在搜索框输入站点名称
stationManagePage.I_search().clear();
stationManagePage.I_search().sendKeys(I_stationName);
}
}15、在cn.oms.autotest下增加StationManageTest类,用于实现新增功能,代码如下:
package cn.oms.autotest;
import java.io.IOException;
import java.util.concurrent.TimeUnit;
import org.apache.log4j.xml.DOMConfigurator;
import org.openqa.selenium.JavascriptExecutor;
import org.openqa.selenium.WebDriver;
import org.openqa.selenium.chrome.ChromeDriver;
import org.openqa.selenium.support.ui.Select;
import org.testng.Assert;
import org.testng.annotations.AfterClass;
import org.testng.annotations.BeforeClass;
import org.testng.annotations.DataProvider;
import org.testng.annotations.Test;
import cn.oms.modules.Login_Action;
import cn.oms.modules.QueryStation_Action;
import cn.oms.modules.StationPage_Action;
import cn.oms.pageobjects.Station_Manage_Page;
import cn.oms.util.Constant;
import cn.oms.util.ExcelUtil;
import cn.oms.util.Log;
public class StationManageTest {
private WebDriver driver;
//设定测试 程序使用的数据文件和SHEET名称
ExcelUtil AddStationData=new ExcelUtil();
ExcelUtil AddLocationData=new ExcelUtil();

@DataProvider(name="testData")
public static Object[][] testData() throws IOException{
return ExcelUtil.getTestData(Constant.TestDataExcelFilePath, Constant.TestAddStationDataExcelFileSheet);
}
@Test(dataProvider="testData",priority=1)
public void testAddStation(String CaseRowNumber,String testCaseName,String I_stationName,String I_operMerchant,
String I_selectedArea,String I_selectedCity,String I_selectedDistrict,String I_establishTime) throws Exception{
AddStationData.setExcelFile(Constant.TestDataExcelFilePath, Constant.TestAddStationDataExcelFileSheet);
//传入变量testCaseName,在日志中打印测试用例被执行的日志信息
Log.startTestCase(testCaseName);
Log.info("新增");
try{
Station_Manage_Page stationManagePage=new Station_Manage_Page(driver);
StationPage_Action.execute(driver);
//点击新增按钮
stationManagePage.createstationMenu().click();
Thread.sleep(1000);
//添加站界面输入信息-名称
stationManagePage.I_stationName().sendKeys(I_stationName);
//服务商
Select operMerchant=new Select(stationManagePage.I_operMerchant());
operMerchant.selectByVisibleText(I_operMerchant);
//所在城市省份
Select selectedArea=new Select(stationManagePage.I_selectedArea());
selectedArea.selectByVisibleText(I_selectedArea);
//所在城市-选择城市
Select selectedCity = new Select(stationManagePage.I_selectedCity());
selectedCity.selectByVisibleText(I_selectedCity);
//所在城市-选择地区
Select selectedDistrict = new Select(stationManagePage.I_selectedDistrict());
selectedDistrict.selectByVisibleText(I_selectedDistrict);
//选择建立时间--清除日期控件是readonly属性
JavascriptExecutor removeAttribute = (JavascriptExecutor)driver;
//remove readonly attribute
removeAttribute.executeScript("var setDate=document.getElementsByName(\"establish_time\")[0];setDate.removeAttribute('readonly');") ;
stationManagePage.I_establishTime().sendKeys(I_establishTime);
// 点击保存按钮
stationManagePage.I_saveButton().click();
Thread.sleep(1000);
//点击确定按钮
stationManagePage.I_OKButton().click();
}catch(AssertionError error){
Log.info("添加失败");
/*执行AddStation_Action的execute方法失败时,catch语句可以捕获AssertionError类型异常,并设置Excel中测试数据行的执行结果为“测试执行失败”.
* 由于Excel中的序号格式被默认设定为带有一位小数,所以用split("[.]")[0]语句获取序号的整数部分,并传给setCellData函数在对应序号的测试数据行的最后
* 一列设定“测试执行失败”.
*/
AddStationData.setCellData(Integer.parseInt(CaseRowNumber.split("[.]")[0]), AddStationData.getLastColumnNum(), "测试执行失败");
//调用Assert.fail方法将此测试用例设定为执行失败,后续测试代码将不被执行
Assert.fail("添加失败");
}
Log.info("添加后,等待3秒");
Thread.sleep(3000);
QueryStation_Action.execute(driver, I_stationName);//输入名称进行查询
Thread.sleep(3000);
Log.info("断言界面是否包含新增名称的关键字");
try{
Assert.assertTrue(driver.getPageSource().contains(I_stationName));
}catch(AssertionError error){
Log.info("断言管理界面是否包含新增名称关键字失败");
AddStationData.setCellData(Integer.parseInt(CaseRowNumber.split("[.]")[0]), AddStationData.getLastColumnNum(), "测试执行失败");
//调用Assert.fail方法将此测试用例设定为执行失败,后续测试代码将不被执行
Assert.fail("断言管理界面是否包含新增名称的关键字失败");
}
Log.info("新增全部断言成功,在Excel的测试数据文件的“测试执行结果”列中写入“执行成功”");
AddStationData.setCellData(Integer.parseInt(CaseRowNumber.split("[.]")[0]), AddStationData.getLastColumnNum(), "测试成功");
Log.info("测试结果写入Excel数据文件的“测试执行结果”列");
Log.endTestCase(testCaseName);
}

@DataProvider(name="addLocationData")
public static Object[][] LocationData() throws IOException {
return ExcelUtil.getTestData(Constant.TestDataExcelFilePath, Constant.TestAddLocationDataExcelFileSheet);
}
@Test(dataProvider="addLocationData",priority=2)
public void testAddLocation(String CaseRowNumber,String testCaseName,String I_stationName,String I_coordinateX,String I_coordinateY)
throws Exception{
AddLocationData.setExcelFile(Constant.TestDataExcelFilePath, Constant.TestAddLocationDataExcelFileSheet);
//传入变量testCaseName,在日志中打印测试用例被执行的日志信息
Log.startTestCase(testCaseName);
Station_Manage_Page stationManagePage=new Station_Manage_Page(driver);
StationPage_Action.execute(driver);
QueryStation_Action.execute(driver, I_stationName);//输入名称进行查询
Thread.sleep(1000);
stationManagePage.I_detailButton().click();
Thread.sleep(2000);
try{
stationManagePage.I_locationManageButton().click();
Thread.sleep(2000);
stationManagePage.I_newCreateButton().click();
stationManagePage.I_coordinateX().sendKeys(I_coordinateX);
stationManagePage.I_coordinateY().sendKeys(I_coordinateY);
stationManagePage.I_locationsaveButton().click();
stationManagePage.I_locationokButton().click();
}catch(AssertionError error){
Log.info("添加坐标失败");
AddLocationData.setCellData(Integer.parseInt(CaseRowNumber.split("[.]")[0]), AddLocationData.getLastColumnNum(), "测试执行失败");
//调用Assert.fail方法将此测试用例设定为执行失败,后续测试代码将不被执行
Assert.fail("添加坐标失败");
}
Thread.sleep(3000);
Log.info("断言坐标界面是否包含新增经度的关键字");
try{
Assert.assertTrue(driver.getPageSource().contains(I_coordinateX));
}catch(AssertionError error){
Log.info("断言管理界面是否包含新增经度关键字失败");
AddLocationData.setCellData(Integer.parseInt(CaseRowNumber.split("[.]")[0]), AddLocationData.getLastColumnNum(), "测试执行失败");
//调用Assert.fail方法将此测试用例设定为执行失败,后续测试代码将不被执行
Assert.fail("断言管理界面是否包含新增经度的关键字失败");
}

Log.info("断言管理界面是否包含新增纬度的关键字");
try{
Assert.assertTrue(driver.getPageSource().contains(I_coordinateY));
}catch(AssertionError error){
Log.info("断言管理界面是否包含新增纬度关键字失败");
AddLocationData.setCellData(Integer.parseInt(CaseRowNumber.split("[.]")[0]), AddLocationData.getLastColumnNum(), "测试执行失败");
//调用Assert.fail方法将此测试用例设定为执行失败,后续测试代码将不被执行
Assert.fail("断言管理界面是否包含新增纬度的关键字失败");
}
Log.info("新增全部断言成功,在Excel的测试数据文件的“测试执行结果”列中写入“执行成功”");
AddLocationData.setCellData(Integer.parseInt(CaseRowNumber.split("[.]")[0]), AddLocationData.getLastColumnNum(), "测试成功");
Log.info("测试结果写入Excel数据文件的“测试执行结果”列");
stationManagePage.I_locationcloseButton().click();
Log.endTestCase(testCaseName);
}
@BeforeClass
public void BeforeClass() throws Exception{
DOMConfigurator.configure("log4j.xml");
//若无法打开chrome浏览器,可设定chrome浏览器的安装路径
System.setProperty("webdriver.chrome.driver", "C:\\Program Files (x86)\\Google\\Chrome\\Application\\chromedriver.exe");
driver=new ChromeDriver();
//设定等待时间为5秒
driver.manage().timeouts().implicitlyWait(5, TimeUnit.SECONDS);
Login_Action.execute(driver,Constant.username,Constant.password);
}
@AfterClass
public void afterTest() {
//关闭打开的浏览器
driver.quit();
}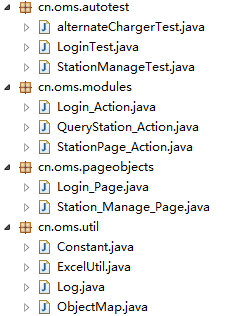
}在Eclipse工程中,所有Package和类的结构如下:三、数据测试驱动框架的优点分析:
1、通过配置文件,实现页面元素定位表达式和测试代码的分离。
2、使用ObjectMap方式 ,简化页面元素定位相关的代码工作量。
3、使用PageObject模式,封装了系统中的页面元素,方便测试代码调用,也实现了一处维护全局生效的目标。
4、在cn.oms.modules的Package中封装了常用的页面对象操作方法,简化了测试脚本编写的工作量。
5、在Excel文件中定义多个测试数据,测试框架可自动调用测试数据完成数据驱动测试。
6、实现了测试执行过程中的日志记录功能,可以通过日志文件分析测试脚本执行的情况。
7、在Excel文件测试数据行中,通过设定“测试数据是否执行”列的内容为y或者n,可自定义选择测试数据,测试执行结束后会在“测试结果”列中显示测试执行的结果,方便测试人员查看。
四、总结:
这是我第一个自己搭建的自动化框架,过程中也查看了很多资料,有以下几个感悟:
个人觉得那个页面元素和测试代码分离在我测试的系统中不是很必要,这个可以应用在页面元素比较多的情况,我所测系统的页面元素不是很多,使用FindBy注解就可以了。
在StationManageTest类中有2个不同的案例,用到的数据不一样,我使用了TestNG的数据驱动注解进行数据驱动测试,但是这个方法必须把一个案例中所有数据都测试完成了才能进行下一个案例测试,其实我2个案例是有关联的,还需要继续研究如何实现2个测试类中数据一行行的执行。
该框架中缺少截图功能,需要添加。
在我刚进入自动化测试工作时,用过基于数据库和网页搭建的框架。通过这个框架,我觉得可以借鉴此框架的思想实现基于数据库和网页框架的数据驱动框架。借助Web方式,通过浏览器来进行数据驱动测试,完成测试数据的定义、测试用例的执行和测试结果的查看。

相关文章推荐
- Web自动化框架LazyUI使用手册(8)--excel数据驱动详解(ExcelDataProvider)
- 自己写的粗糙的Excel数据驱动Http接口测试框架(一)
- Web自动化框架LazyUI使用手册(8)--excel数据驱动详解(ExcelDataProvider)
- excel数据驱动接口测试框架
- android内核字符驱动设备实战之----------运行时库层jni动态库编程(应该是应用框架层)
- android内核字符驱动设备实战之----------应用框架层aidl服务编程篇
- POI实战-java开发excel详解(第二章 单元格各类型数据读取)
- QTP的那些事--在QC中importsheet方式导入excel数据驱动
- 如何处理Oledb中EXCEL驱动读取EXCEL文件中字段长度大于255字符时出现的"数据截断"问题.
- QTP数据驱动之读取Excel数据
- 网站分析实战——如何以数据驱动决策:提升网站价值
- 创建游戏中的人类世界:数据驱动的开放世界AI框架
- 基于数据驱动的接口测试框架设计
- 基于testNG框架的分层式数据驱动自动化测试设计与研发(一)
- CI Codeigniter框架里面PHPExcel的使用|导出数据到Excel文件
- 网站分析实战--如何以数据驱动决策,提升网站价值(大数据时代的分析利器)
- 【软件自动化测试-QTP实战技能 16】==QTP_调用外部EXCEL数据替换DataTable中的数据
- 使用 IBM Rational Functional Tester 实现自动化框架: 数据驱动
- DDTUnit 数据驱动框架介绍及其在单元测试中的应用
- 网站分析实战——如何以数据驱动决策,提升网站价值(大数据时代的分析利器)