Centos7配置LAMP+xcache,rpm,php模块
2016-07-24 14:16
375 查看
博客作业: (1)CentOS 7, apm+xcache, rpm包, php module; a)一个虚拟主机提供phpMyAdmin,另一个虚拟主机提供wordpress; b)为phpMyAdmim提供https服务;
安装篇:一、安装Apache yum -y install httpd
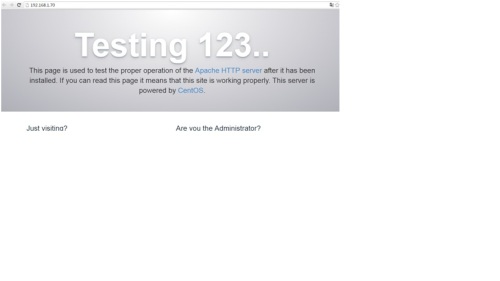
systemctl start httpd.service #启动apache systemctl stop httpd.service #停止apache systemctl restart httpd.service #重启apache systemctl enable httpd.service #设置apache开机启动 在客户端浏览器中打开服务器IP地址,会出现下面的界面,说明apache安装成功
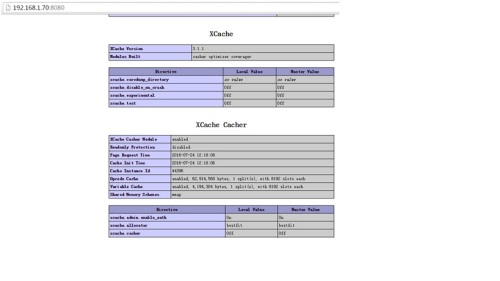
二、安装mariadb yum install mariadb mariadb-server #询问是否要安装,输入Y即可自动安装,直到安装完成 systemctl start mariadb.service #启动MariaDB systemctl stop mariadb.service #停止MariaDB systemctl restart mariadb.service #重启MariaDB systemctl enable mariadb.service #设置开机启动 为root账户设置密码 mysql_secure_installation 回车,根据提示输入Y 输入2次密码,回车 根据提示一路输入Y 最后出现:Thanks for using MySQL! MySql密码设置完成,重新启动 MySQL: systemctl restart mariadb.service #重启MariaDB mysql -uroot -p 登陆测试 三、安装php [root@centos7 yum.repos.d]# yum install php四、安装php组件php-mysql以连接mariadb yum install php-mysql systemctl restart mariadb.service #重启MariaDB systemctl restart httpd.service #重启apache 五、安装xcache yuminstall php-xcache apachectlstop apachectlstart
六、做相关的配置 1、vim /etc/httpd/conf/httpd.conf DirectoryIndex index.html #修改为:DirectoryIndex index.html index.htmDefault.html Default.htm index.php(设置默认首页文件,增加index.php) 2、vim /etc/php.ini date.timezone = PRC #把前面的分号去掉,改为date.timezone = PRC 3、cd /var/www/html vi index.php #输入下面内容 <?php phpinfo(); ?> 4、chown apache.apache -R /var/www/html
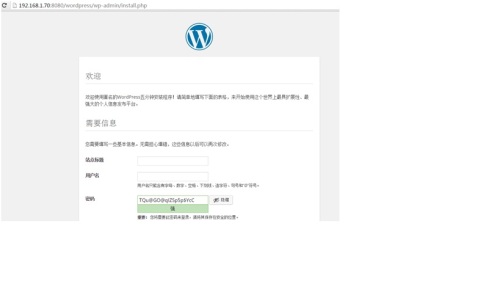
七、配置虚拟主机1提供phpMyAdmin,虚拟主机2提供wordpress虚拟主机 基于端口设置两个虚拟主机 mkdir/var/www/vhost1 mkdir/var/www/vhost2 vim/etc/httpd/conf.d/vhost1.conf vim/etc/httpd/conf.d/vhost2.conf内容如下: 虚拟主机1 <VirtualHost192.168.1.70:80> ServerNamewww1.magedu.com DocumentRoot/var/www/vhost1 CustomLoglogs/www1-access_log combined </VirtualHost>虚拟主机2 <VirtualHost192.168.1.70:8080> ServerName www1.magedu.com DocumentRoot /var/www/vhost1 CustomLog logs/www1-access_log combined </VirtualHost> 虚拟主机2配置wordpress 下载wordpress源码包,拷贝到/var/www/vhost2 解压配置mv wp-config-sample.conf wp-config.conf mysql -uroot -p GRANT ALL ON wpdb.* TO 'wpuser'@'192.168.%.%'IDENTIFIED BY 'wppass'; CREATE DATABASE wpdb; http://192.168.1.70:8080/wordpress/wp-admin/install.php href="http://s2.51cto.com/wyfs02/M00/84/8B/wKioL1eTw6fhsuknAAB4knvFiNA182.jpg-wh_500x0-wm_3-wmp_4-s_3604068024.jpg" target=_blank>
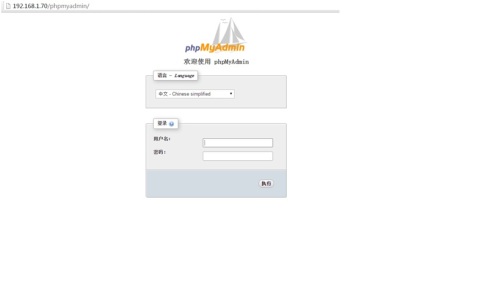
虚拟主机1配置phpmyadmin yum install phpmyadmin (需要yum源配置epel库) http://192.168.1.70/phpmyadmin/出现页面是代码,原因是装了php-fpm,没装php模块 vim /etc/httpd/conf.d/phpMyAdmin.conf 需配置允许访问的ip地址
为虚拟主机1上的phpmyadmin提供https服务 (1)#cd /etc/pki/CA #(umask 077;openssl genrsa -outprivate/cakey.pem 2048) #openssl req -new -x509 -key private/cakey.pem-out cacert.pem(生成签署请求) CN Beijing ... #touch index.txt #echo 01 > serial (2) 配置httpd支持使用ssl,及使用的证书; # yum -y install mod_ssl # mkdir /etc/httpd/ssl #(umask 077;openssl genrsa -out httpd.key1024)(在ssl目录下) #openssl req -new -key httpd.key -out httpd.csr 配置文件:/etc/httpd/conf.d/ssl.conf DocumentRoot ServerName SSLCertificateFile SSLCertificateKeyFile (3) 测试基于https访问相应的主机; # openssl s_client [-connect host:port][-cert filename] [-CApath directory] [-CAfile filename] openssl s_client -connect 192.168.1.70:443-CAfile /etc/pki/CA/cacert.pem
安装篇:一、安装Apache yum -y install httpd
systemctl start httpd.service #启动apache systemctl stop httpd.service #停止apache systemctl restart httpd.service #重启apache systemctl enable httpd.service #设置apache开机启动 在客户端浏览器中打开服务器IP地址,会出现下面的界面,说明apache安装成功
二、安装mariadb yum install mariadb mariadb-server #询问是否要安装,输入Y即可自动安装,直到安装完成 systemctl start mariadb.service #启动MariaDB systemctl stop mariadb.service #停止MariaDB systemctl restart mariadb.service #重启MariaDB systemctl enable mariadb.service #设置开机启动 为root账户设置密码 mysql_secure_installation 回车,根据提示输入Y 输入2次密码,回车 根据提示一路输入Y 最后出现:Thanks for using MySQL! MySql密码设置完成,重新启动 MySQL: systemctl restart mariadb.service #重启MariaDB mysql -uroot -p 登陆测试 三、安装php [root@centos7 yum.repos.d]# yum install php四、安装php组件php-mysql以连接mariadb yum install php-mysql systemctl restart mariadb.service #重启MariaDB systemctl restart httpd.service #重启apache 五、安装xcache yuminstall php-xcache apachectlstop apachectlstart
六、做相关的配置 1、vim /etc/httpd/conf/httpd.conf DirectoryIndex index.html #修改为:DirectoryIndex index.html index.htmDefault.html Default.htm index.php(设置默认首页文件,增加index.php) 2、vim /etc/php.ini date.timezone = PRC #把前面的分号去掉,改为date.timezone = PRC 3、cd /var/www/html vi index.php #输入下面内容 <?php phpinfo(); ?> 4、chown apache.apache -R /var/www/html
七、配置虚拟主机1提供phpMyAdmin,虚拟主机2提供wordpress虚拟主机 基于端口设置两个虚拟主机 mkdir/var/www/vhost1 mkdir/var/www/vhost2 vim/etc/httpd/conf.d/vhost1.conf vim/etc/httpd/conf.d/vhost2.conf内容如下: 虚拟主机1 <VirtualHost192.168.1.70:80> ServerNamewww1.magedu.com DocumentRoot/var/www/vhost1 CustomLoglogs/www1-access_log combined </VirtualHost>虚拟主机2 <VirtualHost192.168.1.70:8080> ServerName www1.magedu.com DocumentRoot /var/www/vhost1 CustomLog logs/www1-access_log combined </VirtualHost> 虚拟主机2配置wordpress 下载wordpress源码包,拷贝到/var/www/vhost2 解压配置mv wp-config-sample.conf wp-config.conf mysql -uroot -p GRANT ALL ON wpdb.* TO 'wpuser'@'192.168.%.%'IDENTIFIED BY 'wppass'; CREATE DATABASE wpdb; http://192.168.1.70:8080/wordpress/wp-admin/install.php
为虚拟主机1上的phpmyadmin提供https服务 (1)#cd /etc/pki/CA #(umask 077;openssl genrsa -outprivate/cakey.pem 2048) #openssl req -new -x509 -key private/cakey.pem-out cacert.pem(生成签署请求) CN Beijing ... #touch index.txt #echo 01 > serial (2) 配置httpd支持使用ssl,及使用的证书; # yum -y install mod_ssl # mkdir /etc/httpd/ssl #(umask 077;openssl genrsa -out httpd.key1024)(在ssl目录下) #openssl req -new -key httpd.key -out httpd.csr 配置文件:/etc/httpd/conf.d/ssl.conf DocumentRoot ServerName SSLCertificateFile SSLCertificateKeyFile (3) 测试基于https访问相应的主机; # openssl s_client [-connect host:port][-cert filename] [-CApath directory] [-CAfile filename] openssl s_client -connect 192.168.1.70:443-CAfile /etc/pki/CA/cacert.pem

相关文章推荐
- 小心服务器内存居高不下的元凶--WebAPI服务
- Android Manifest 用法
- Android学习笔记(二九):嵌入浏览器
- 峰回路转,Firefox 浏览器即将重返 iOS 平台
- 峰回路转,Firefox 浏览器即将重返 iOS 平台
- 运维入门
- 回顾 Firefox 历史
- 小白观察:微软释放出其基于 Chromium 的 Edge 浏览器
- 利用开源软件打造自己的全功能远程工具
- dns。dhcp,ftp
- Linux5.9无人值守安装
- 数据中心和云未来的十二大趋势
- 虚拟化基础架构Windows 2008篇之11-WSUS服务器的安装与配置
- 用vsftp快速搭建ftp服务器
- Linux快速构建apache web服务器
- 服务器监控策略浅谈
- 互联网业内的迷雾 谨慎选择虚拟主机
- 选定虚拟主机 性能凸显优势
- 如何降低服务器采购成本 原理分析