使用Spring4搭建Java web项目(初级入门)
2016-07-13 14:09
441 查看
日期: 2016-7-13
内容: 使用spring4.1.6搭建web开发项目
一、 搭建框架:
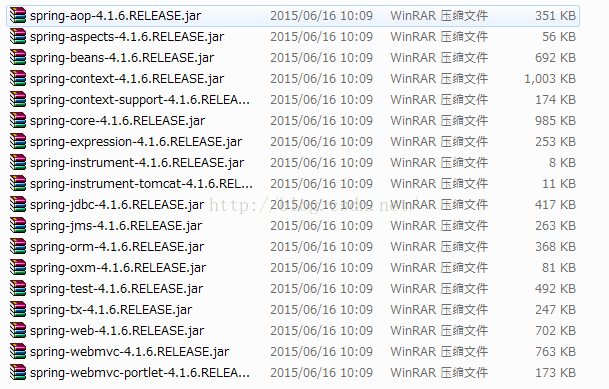
1、 下载并且准备搭建spring框架需要的jar包。
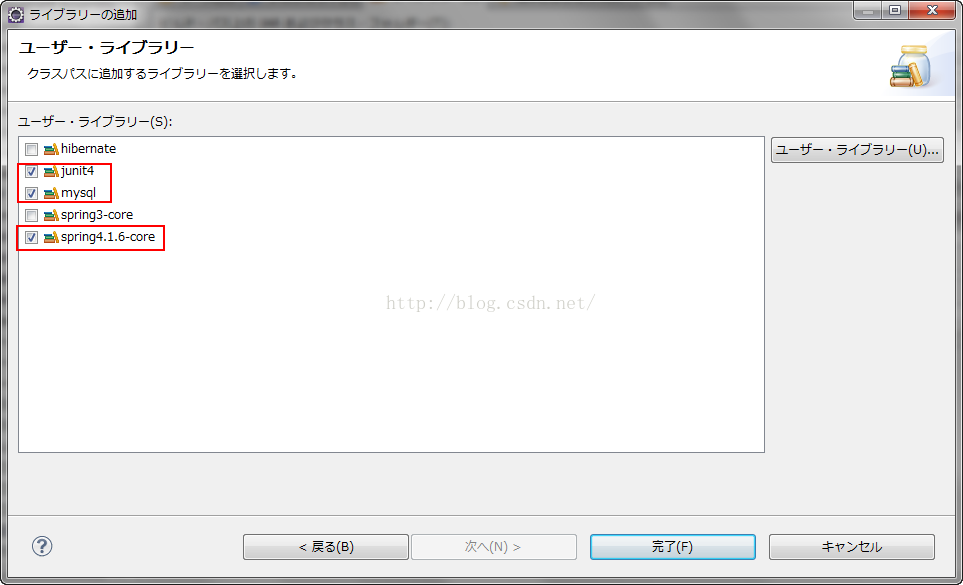
2、 添加spring,mysql,junit4需要的jar包:
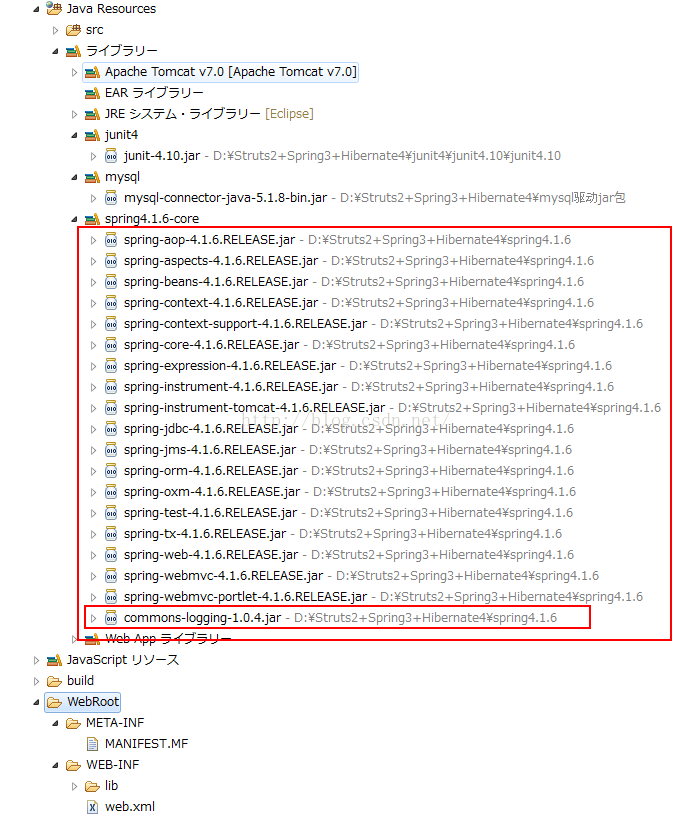
3、 导入jar包之后的目录结构:
4、 接着我们在项目底下的src目录下新建一个Spring的applicationContext.xml配置文件,其实我们也可以新建成beans.xml,但往往是新建成为第一种,这个文件我们可以从Spring的官网文档里找到。
文件截图:
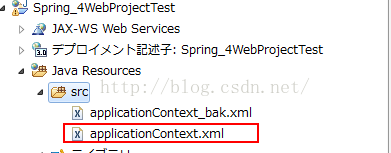
这里的名字applicationContext.xml只是一个约定俗称的名称,并不是强制的。
在这里添加一个比较全面的配置文件配置,以备不时之需。
二、 编写测试代码。检查spring环境是不是配置成功。
1、编写测试Person.java人接口。
2、编写GoodMan.jva好人类继承Person.java接口:
3、编写BadMan竭诚Person接口;
4、在配置文件applicationContext.xml中配置bean;
5、 编写测试类:
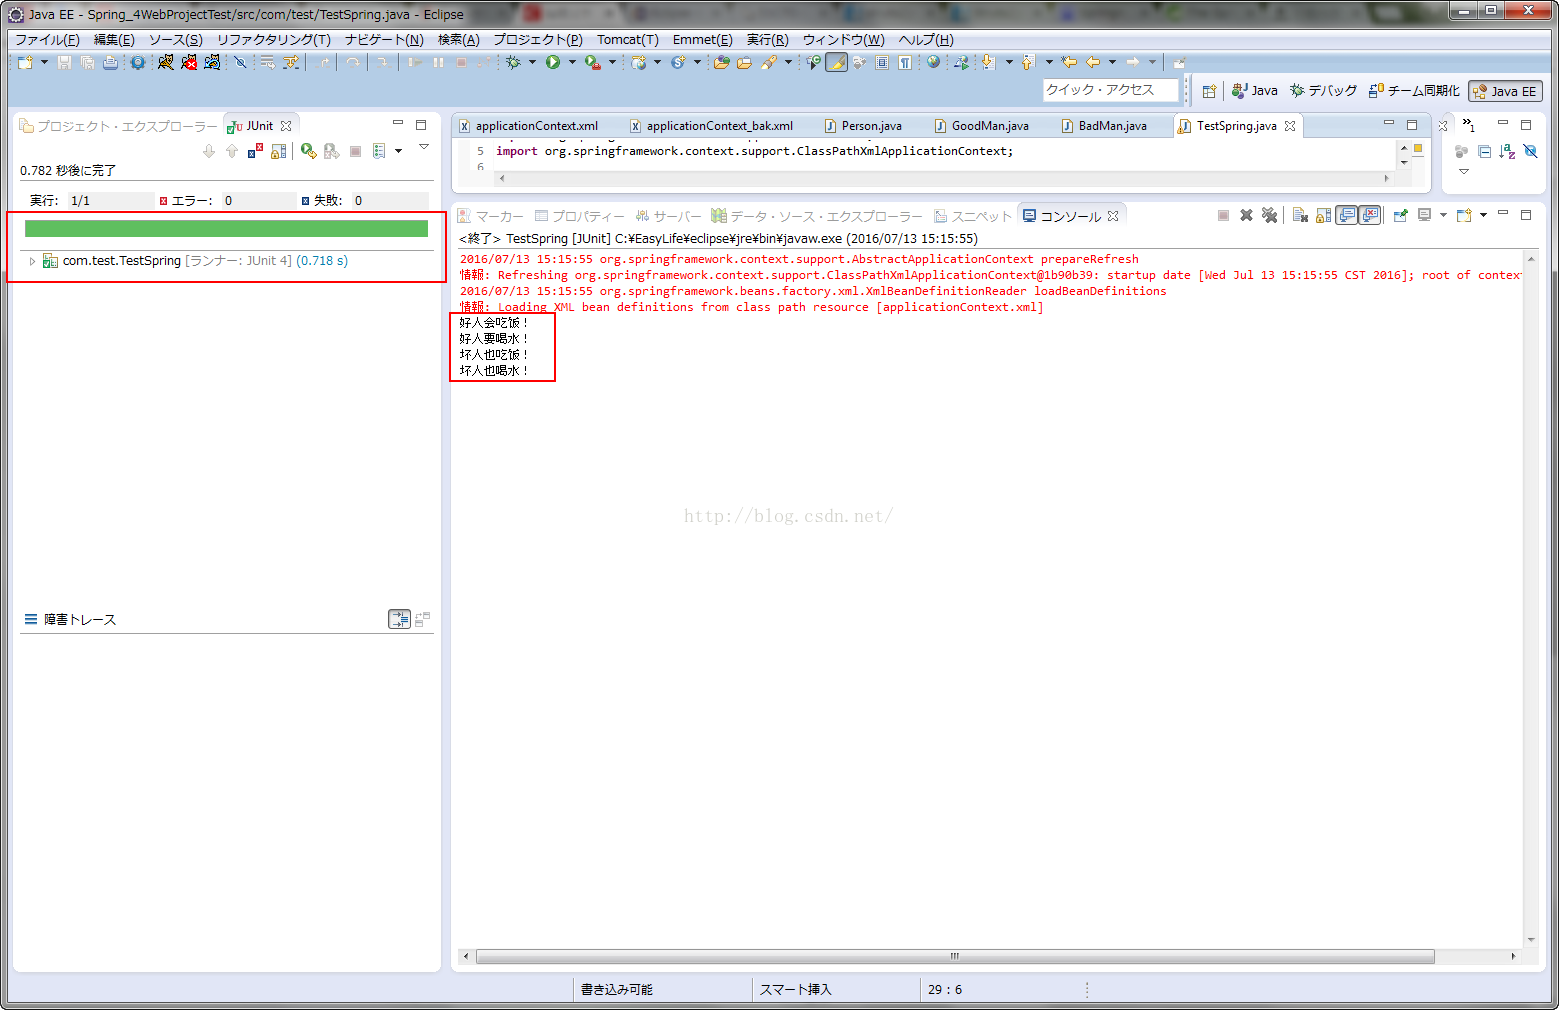
6、运行测试类获得结果:
测试完毕!
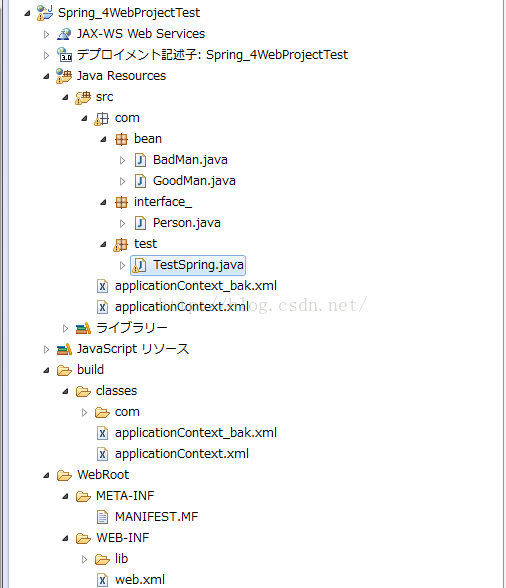
项目的结构如下:
内容: 使用spring4.1.6搭建web开发项目
一、 搭建框架:
1、 下载并且准备搭建spring框架需要的jar包。
2、 添加spring,mysql,junit4需要的jar包:
3、 导入jar包之后的目录结构:
4、 接着我们在项目底下的src目录下新建一个Spring的applicationContext.xml配置文件,其实我们也可以新建成beans.xml,但往往是新建成为第一种,这个文件我们可以从Spring的官网文档里找到。
文件截图:
这里的名字applicationContext.xml只是一个约定俗称的名称,并不是强制的。
在这里添加一个比较全面的配置文件配置,以备不时之需。
<?xml version="1.0" encoding="UTF-8"?>
<beans xmlns="http://www.springframework.org/schema/beans" xmlns:context="http://www.springframework.org/schema/context" xmlns:xsi="http://www.w3.org/2001/XMLSchema-instance" xmlns:aop="http://www.springframework.org/schema/aop"
xmlns:tx="http://www.springframework.org/schema/tx" xmlns:p="http://www.springframework.org/schema/p" xmlns:util="http://www.springframework.org/schema/util" xmlns:jdbc="http://www.springframework.org/schema/jdbc"
xmlns:cache="http://www.springframework.org/schema/cache"
xsi:schemaLocation=" http://www.springframework.org/schema/context http://www.springframework.org/schema/context/spring-context.xsd http://www.springframework.org/schema/beans http://www.springframework.org/schema/beans/spring-beans.xsd http://www.springframework.org/schema/tx http://www.springframework.org/schema/tx/spring-tx.xsd http://www.springframework.org/schema/jdbc http://www.springframework.org/schema/jdbc/spring-jdbc-3.1.xsd http://www.springframework.org/schema/cache http://www.springframework.org/schema/cache/spring-cache-3.1.xsd http://www.springframework.org/schema/aop http://www.springframework.org/schema/aop/spring-aop.xsd http://www.springframework.org/schema/util http://www.springframework.org/schema/util/spring-util.xsd">

<!-- 自动扫描web包 ,将带有注解的类 纳入spring容器管理 -->
<context:component-scan base-package="com.eduoinfo.finances.bank.web"></context:component-scan>

<!-- 引入jdbc配置文件 -->
<bean id="propertyConfigurer" class="org.springframework.beans.factory.config.PropertyPlaceholderConfigurer">
<property name="locations">
<list>
<value>classpath*:jdbc.properties</value>
</list>
</property>
</bean>

<!-- dataSource 配置 -->
<bean id="dataSource" class="com.alibaba.druid.pool.DruidDataSource" init-method="init" destroy-method="close">
<!-- 基本属性 url、user、password -->
<property name="url" value="${jdbc.url}" />
<property name="username" value="${jdbc.username}" />
<property name="password" value="${jdbc.password}" />

<!-- 配置初始化大小、最小、最大 -->
<property name="initialSize" value="1" />
<property name="minIdle" value="1" />
<property name="maxActive" value="20" />

<!-- 配置获取连接等待超时的时间 -->
<property name="maxWait" value="60000" />

<!-- 配置间隔多久才进行一次检测,检测需要关闭的空闲连接,单位是毫秒 -->
<property name="timeBetweenEvictionRunsMillis" value="60000" />

<!-- 配置一个连接在池中最小生存的时间,单位是毫秒 -->
<property name="minEvictableIdleTimeMillis" value="300000" />

<property name="validationQuery" value="SELECT 'x'" />
<property name="testWhileIdle" value="true" />
<property name="testOnBorrow" value="false" />
<property name="testOnReturn" value="false" />

<!-- 打开PSCache,并且指定每个连接上PSCache的大小 -->
<property name="poolPreparedStatements" value="false" />
<property name="maxPoolPreparedStatementPerConnectionSize" value="20" />

<!-- 配置监控统计拦截的filters -->
<property name="filters" value="stat" />
</bean>

<!-- mybatis文件配置,扫描所有mapper文件 -->
<bean id="sqlSessionFactory" class="org.mybatis.spring.SqlSessionFactoryBean" p:dataSource-ref="dataSource" p:configLocation="classpath:mybatis-config.xml" p:mapperLocations="classpath:com/eduoinfo/finances/bank/web/dao/*.xml" />

<!-- spring与mybatis整合配置,扫描所有dao -->
<bean class="org.mybatis.spring.mapper.MapperScannerConfigurer" p:basePackage="com.eduoinfo.finances.bank.web.dao" p:sqlSessionFactoryBeanName="sqlSessionFactory" />

<!-- 对dataSource 数据源进行事务管理 -->
<bean id="transactionManager" class="org.springframework.jdbc.datasource.DataSourceTransactionManager" p:dataSource-ref="dataSource" />

<!-- 配置使Spring采用CGLIB代理 -->
<aop:aspectj-autoproxy proxy-target-class="true" />

<!-- 启用对事务注解的支持 -->
<tx:annotation-driven transaction-manager="transactionManager" />

<!-- Cache配置 -->
<cache:annotation-driven cache-manager="cacheManager" />
<bean id="ehCacheManagerFactory" class="org.springframework.cache.ehcache.EhCacheManagerFactoryBean" p:configLocation="classpath:ehcache.xml" />
<bean id="cacheManager" class="org.springframework.cache.ehcache.EhCacheCacheManager" p:cacheManager-ref="ehCacheManagerFactory" />

</beans>
到此为止,环境基本上配置完毕。
二、 编写测试代码。检查spring环境是不是配置成功。
1、编写测试Person.java人接口。
package com.interface_;

//编写person接口
public interface Person {

public void eat();//吃饭

public void drink();//喝水
}
2、编写GoodMan.jva好人类继承Person.java接口:
package com.bean;

import com.interface_.Person;

public class GoodMan implements Person {

@Override
public void eat() {
System.out.println("好人会吃饭!");

}

@Override
public void drink() {
System.out.println("好人要喝水!");
}

}
3、编写BadMan竭诚Person接口;
package com.bean;

import com.interface_.Person;

public class BadMan implements Person {

@Override
public void eat() {
System.out.println("坏人也吃饭!");

}

@Override
public void drink() {
System.out.println("坏人也喝水!");

}

}
4、在配置文件applicationContext.xml中配置bean;
<?xml version="1.0" encoding="UTF-8"?>
<beans xmlns="http://www.springframework.org/schema/beans" xmlns:context="http://www.springframework.org/schema/context" xmlns:xsi="http://www.w3.org/2001/XMLSchema-instance" xmlns:aop="http://www.springframework.org/schema/aop"
xmlns:tx="http://www.springframework.org/schema/tx" xmlns:p="http://www.springframework.org/schema/p" xmlns:util="http://www.springframework.org/schema/util" xmlns:jdbc="http://www.springframework.org/schema/jdbc"
xmlns:cache="http://www.springframework.org/schema/cache"
xsi:schemaLocation=" http://www.springframework.org/schema/context http://www.springframework.org/schema/context/spring-context.xsd http://www.springframework.org/schema/beans http://www.springframework.org/schema/beans/spring-beans.xsd http://www.springframework.org/schema/tx http://www.springframework.org/schema/tx/spring-tx.xsd http://www.springframework.org/schema/jdbc http://www.springframework.org/schema/jdbc/spring-jdbc-3.1.xsd http://www.springframework.org/schema/cache http://www.springframework.org/schema/cache/spring-cache-3.1.xsd http://www.springframework.org/schema/aop http://www.springframework.org/schema/aop/spring-aop.xsd http://www.springframework.org/schema/util http://www.springframework.org/schema/util/spring-util.xsd">

<!-- 配置bean -->
<span style="color:#ff6666;"><bean id="good" class="com.bean.GoodMan"></bean>
<bean id="bad" class="com.bean.BadMan"></bean></span>

</beans>
5、 编写测试类:
package com.test;

import org.junit.Test;
import org.springframework.context.ApplicationContext;
import org.springframework.context.support.ClassPathXmlApplicationContext;

import com.bean.BadMan;
import com.bean.GoodMan;

//测试环境配置是否成功
public class TestSpring {

@Test
public void testSpring()
{
//加载Spring的配置文件applicationContext.xml
ApplicationContext ac = new ClassPathXmlApplicationContext("applicationContext.xml");

//获得好人的对象
GoodMan gm = (GoodMan)ac.getBean("good");
//调用好人的吃饭喝水方法
gm.eat();
gm.drink();

//获得坏人的对象
BadMan bm = (BadMan)ac.getBean("bad");
bm.eat();
bm.drink();
}
}
6、运行测试类获得结果:
测试完毕!
项目的结构如下:

相关文章推荐
- java对世界各个时区(TimeZone)的通用转换处理方法(转载)
- java-注解annotation
- java-模拟tomcat服务器
- java-用HttpURLConnection发送Http请求.
- java-WEB中的监听器Lisener
- Android IPC进程间通讯机制
- Android Native 绘图方法
- Android java 与 javascript互访(相互调用)的方法例子
- 介绍一款信息管理系统的开源框架---jeecg
- 聚类算法之kmeans算法java版本
- java实现 PageRank算法
- PropertyChangeListener简单理解
- c++11 + SDL2 + ffmpeg +OpenAL + java = Android播放器
- 插入排序
- 冒泡排序
- 堆排序
- 快速排序
- 二叉查找树