canvas 渐变(很全面,很实用)
2016-07-12 21:18
477 查看
出处:http://blog.sina.com.cn/s/blog_877284510102we1e.html
canvas 渐变
(2016-05-04 18:32:10)
转载▼
渐变
Context对象可以通过createLinearGradient()和createRadialGradient()两个方法创建渐变对象,这两个方法的原型如下:Object createLinearGradient(x1, y1, x2, y2);
创建一个从(x1, y1)点到(x2, y2)点的线性渐变对象。
Object createRadialGradient(x1, y1, r1, x2, y2, r2);
创建一个从以(x1, y1)点为圆心、r1为半径的圆到以(x2, y2)点为圆心、r2为半径的圆的径向渐变对象。
渐变对象创建完成之后必须使用它的addColorStop()方法来添加颜色,该方法的原型如下:
void addColorStop(position, color);
其中position表示添加颜色的位置,取值范围为[0, 1],0表示起点,1表示终点;color表示添加的颜色,取值可以是任何CSS颜色值。
渐变对象创建并配置完成之后就可以将其赋予Context对象的strokeStyle属性或者fillStyle属性,然后绘制的图形就具有了所需的渐变效果。
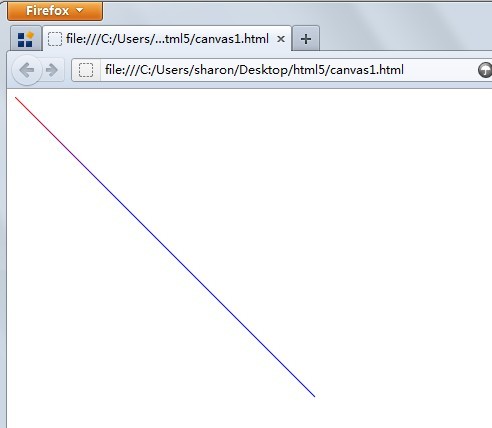
首先来完成一个直线渐变的例子:
[html] view plain copy
>
<< /span>[b]html> [/b]
<< /span>[b]body> [/b]
<< /span>[b]canvas id="canvas" width="800"height="800"> [/b]
<</span>[b]p>Your browserdoes not support the canvas element!</</span>[b]p> [/b][/b]
< /</span>[b]canvas> [/b]
<< /span>[b]script type="text/javascript"> [/b]
var canvas =document.getElementById("canvas");
var context =canvas.getContext("2d");
{
var lg = context.createLinearGradient(0,0, 100, 100); //可以尝试改变这里的参数,你可以获取更多
lg.addColorStop(0, '#ff0000');
lg.addColorStop(1, '#0000ff');
context.strokeStyle = lg;
context.beginPath();
context.moveTo(0,0);
context.lineTo(300,300)
context.stroke();
}
< /</span>[b]script> [/b]
< /</span>[b]body> [/b]
< /</span>[b]html> [/b]
效果:
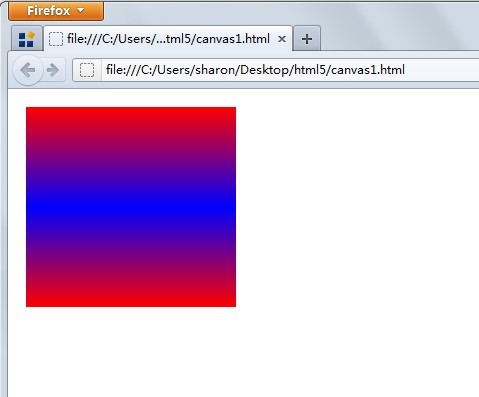
现在来完成一个颜色垂直对称的矩形:
[html] view plain copy
>
<< /span>[b]html> [/b]
<< /span>[b]body> [/b]
<< /span>[b]canvas id="canvas" width="800"height="800"> [/b]
<</span>[b]p>Your browserdoes not support the canvas element!</</span>[b]p> [/b][/b]
< /</span>[b]canvas> [/b]
<< /span>[b]script type="text/javascript"> [/b]
var canvas =document.getElementById("canvas");
var context =canvas.getContext("2d");
{
//画整个矩形的上半部分
var lg1 = context.createLinearGradient(10,10, 10, 110);
lg1.addColorStop(0, '#ff0000');
lg1.addColorStop(1, '#0000ff');
context.fillStyle = lg1;
context.beginPath();
context.fillRect(10,10,210,100);
//画整个矩形的下半部分
var lg2 = context.createLinearGradient(10,110, 10, 210);
lg2.addColorStop(0, '#0000ff');
lg2.addColorStop(1, '#ff0000');
context.fillStyle = lg2;
context.beginPath();
context.fillRect(10,110,210,100);
}
< /</span>[b]script> [/b]
< /</span>[b]body> [/b]
< /</span>[b]html> [/b]
效果图:
现在来看一个createRadialGradient的例子:
[html] view plain copy
>
<< /span>[b]html> [/b]
<< /span>[b]body> [/b]
<< /span>[b]canvas id="canvas" width="800"height="800"> [/b]
<</span>[b]p>Your browserdoes not support the canvas element!</</span>[b]p> [/b][/b]
< /</span>[b]canvas> [/b]
<< /span>[b]script type="text/javascript"> [/b]
var canvas =document.getElementById("canvas");
var context =canvas.getContext("2d");
var rg =context.createRadialGradient(450, 150, 20, 450, 150, 100);
rg.addColorStop(0, '#ff0000');
rg.addColorStop(1, '#0000ff');
context.fillStyle = rg;
context.beginPath();
context.arc(450,150,100,0,Math.PI*2,true);
context.fill();
< /</span>[b]script> [/b]
< /</span>[b]body> [/b]
< /</span>[b]html> [/b]
效果图:
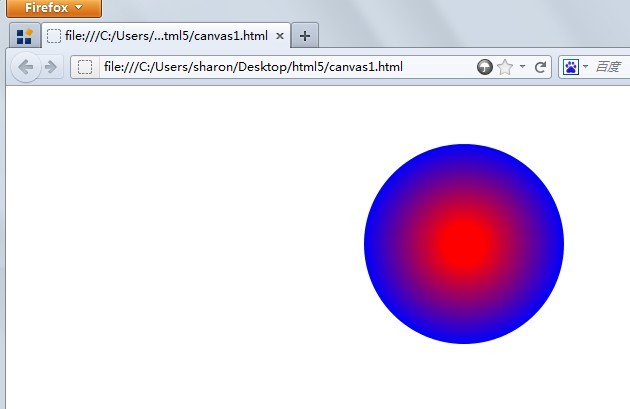
从三个实验可以看出,渐变的实现其实就是实现一支特殊的画笔(createLinearGradient或者createRadialGradient),但是要注意画笔渐变对象的坐标,需要和将要画的图形的坐标配对,不然,你将不能得到想要的效果。

相关文章推荐
- HTML5中在客户端验证文件上传的大小
- html5 web数据存储
- HTML5调用摄像头实例
- 页面元素查找之Selectors API
- 使用ajax实现用户登录验证(升级版)
- Canvas 在高清屏下绘制图片变模糊的解决方法
- 关于前端的思考与感悟
- 新时代编辑神器:Atom
- rem : web app适配的秘密武器
- jquery高级应用之Deferred对象
- 又被事件冒泡坑了一把,这次要彻底弄懂浏览器的事件流
- 移动端点击事件全攻略,这里的坑你知多少?
- $q 实例分析 Angular 中的 Promise
- 浏览器中唤起native app || 跳转到应用商城下载
- Angular directive 实例详解
- 关于浮动与清除浮动,你应该知道的
- 数组reduce方法的高级技巧