openstack学习笔记五 多节点部署之 rabbitmq信息中枢与元数据
2016-07-05 18:01
603 查看
元数据
rabbitmq信息中枢
rabbitmq信息中枢
所有组件通信的时候 实用 AMQP 高级消息队列
qpid
rabbitmq 端口5672 sll加密 5671
在h3上操作 配置YUM源 把openstack软件包上传到openstack目录下
可以用web管理
http://192.168.1.203:15672/ 用户guest 密码guest

元数据 metadata
查看控制节点 网卡设置是否有问题
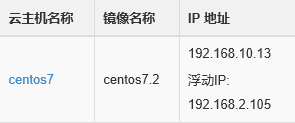

实例云主机
可以查看metadate的设置数据
本文出自 “何全” 博客,请务必保留此出处http://hequan.blog.51cto.com/5701886/1796041
rabbitmq信息中枢
rabbitmq信息中枢
所有组件通信的时候 实用 AMQP 高级消息队列
qpid
rabbitmq 端口5672 sll加密 5671
192.168.1.201       h1.hequan.com     h1
192.168.1.202       h2.hequan.com     h2
192.168.1.203       h3.hequan.com     h3
在h3上操作 配置YUM源 把openstack软件包上传到openstack目录下
[openstack]
name=openstack
baseurl=file:///openstack
enabled=1
gpgcheck=0
yum clean all
yum makecache
[root@h1 yum.repos.d]# yum  install -y rabbitmq-server.noarch
[root@h3 ~]# systemctl   start rabbitmq-server.service
[root@h3 ~]# systemctl   enable rabbitmq-server.service
[root@h3 ~]# netstat -lntup | grep  5672
tcp        0      0 0.0.0.0:25672           0.0.0.0:*               LISTEN      1354/beam.smp
tcp6       0      0 :::5672                 :::*                    LISTEN      1354/beam.smp  #使用这个
[root@h1 keystone]# egrep  -v  '^$|^#'  keystone.conf  | grep rabbit
[oslo_messaging_rabbit]
rabbit_host = localhost
rabbit_port = 5672
rabbit_hosts = localhost:5672
rabbit_use_ssl = False
rabbit_userid = guest    #默认用户
rabbit_password = guest
rabbit_virtual_host = /
rabbit_ha_queues = False
[root@h3 ~]# cd /etc/rabbitmq/
[root@h3 rabbitmq]# ls
rabbitmq.config             ##配置文件
[root@h1 rabbitmq]# cat rabbitmq-env.conf
NODE_PORT=5672
可以用web管理
[root@h3 rabbitmq]# rabbitmq-plugins  list   ##查看插件
[root@h3 rabbitmq]# rabbitmq-plugins   enable   rabbitmq_management  ##启用管理插件
The following plugins have been enabled:
mochiweb
webmachine
rabbitmq_web_dispatch
amqp_client
rabbitmq_management_agent
rabbitmq_management
Plugin configuration has changed. Restart RabbitMQ for changes to take effect.
[root@h3 rabbitmq]# systemctl  restart rabbitmq-server.service
[root@h3 rabbitmq]# netstat -lntup | grep 15672
tcp        0      0 0.0.0.0:15672     0.0.0.0:*               LISTEN      1976/beam.smp
http://192.168.1.203:15672/ 用户guest 密码guest
元数据 metadata
查看控制节点 网卡设置是否有问题
[root@h1 ~]# ovs-vsctl show
c34056d1-7b80-437f-b73c-5bf05258d303
Bridge br-ex
Port "qg-c4dff563-63"
Interface "qg-c4dff563-63"
type: internal
Port "qg-62a3088b-40"
Interface "qg-62a3088b-40"
type: internal
Port "qg-df2db69c-60"
Interface "qg-df2db69c-60"
type: internal
Port "eth0"
Interface "eth0"
Port br-ex
Interface br-ex
type: internal
[root@h1 ~]# cat /proc/sys/net/ipv4/ip_forward           ##转发功能
1
[root@h2 ~]# cd /etc/nova/
[root@h2 nova]# grep metadata nova.conf
# Number of metadata items allowed per instance (integer value)
#quota_metadata_items=128
#enabled_apis=ec2,osapi_compute,metadata
# OpenStack metadata service manager (string value)
#metadata_manager=nova.api.manager.MetadataManager
# The IP address on which the metadata API will listen. (string value)
#metadata_listen=0.0.0.0
# The port on which the metadata API will listen. (integer value)
#metadata_listen_port=8775
# Number of workers for metadata service. The default will be the number of
#metadata_workers=<None>
# List of metadata versions to skip placing into the config drive (string
#vendordata_driver=nova.api.metadata.vendordata_json.JsonFileVendorData
# Time in seconds to cache metadata; 0 to disable metadata caching entirely
# metadata API when under heavy load. Higher values may increase memoryusage
# and result in longer times for host metadata changes to take effect. (integer
#metadata_cache_expiration=15
# The IP address for the metadata API server (string value)
#metadata_host=$my_ip
metadata_host=192.168.1.201                 ################主机
# The port for the metadata API port (integer value)
#metadata_port=8775
# Set flag to indicate Neutron will proxy metadata requests and resolve
#service_metadata_proxy=false
# Shared secret to validate proxies Neutron metadata requests (string value)
#metadata_proxy_shared_secret =
实例云主机
可以查看metadate的设置数据
curl  htt://169.254.169.254/2009-04-04/meta-data/
hostname
local-ipv4
public-ipv4
seruity-groups   安全组
本文出自 “何全” 博客,请务必保留此出处http://hequan.blog.51cto.com/5701886/1796041

相关文章推荐
- OpenGL的GLUT事件处理(Event Processing)窗口管理(Window Management)函数[转]
- OpenGL的GLUT注册回调函数[转]
- Linux下几种文件传输命令 sz rz sftp scp
- 用Apache Ivy实现项目里的依赖管理
- 一天一条Linux指令-umount
- I/O空间-----I/O端口和I/O内存
- centos 安装mysql,启动时报错Starting MySQL.Manager of pid-file quit without updating file.[FAILED]
- adb shell error: no devices/emulators found
- Ubuntu下的LAMP环境搭建笔记 (基础向)
- shell脚本应用
- openstack M版安装 storage(cinder)服务篇
- shell脚本中的数值运算
- svn 报 Previous operation has not finished; run 'cleanup' if it was interrupted
- linux centos6.3 升级svn1.6到svn1.8
- CentOS6.5搭建LNMP
- 深入了解preventDefault与stopPropagation
- PHP搭建网站登录页面(一个iOS开发者的PHP之路)
- CentOS6.8下Hadoop2.7.2怎么运行自带的wordcount程序
- 系统认证内部错误的解决办法
- Centos常用工具包和命令