android 资讯阅读器(二)
2016-06-27 17:07
519 查看
接着上次的博客,上次移植完了tab以后整个app的框架就算是定下来了.
本次目标:
1.数据的获取与展示(ListView)
2.官方的下拉刷新效果(SwipeRefreshLayout)
3.数据接口的申请(mob 官网 mob api)
4.webview的使用(webview)
实现效果如下:

首先,为listview的item写个布局:就叫list_item
list_item.xml :
效果如下:
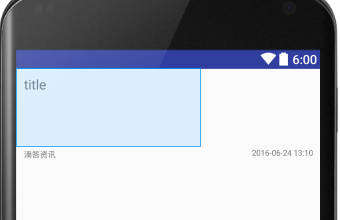
也看不粗啥,就照着上面 ctry+c ctry+v
就行. 不懂可以直接留言联系我.嘿嘿
下面编写Fragment
对应第一的tab 的fragmen 叫TopicalFragment
TopicalFragment.java :
上面访问网络的操作使用的是google 提供的Volley 框架很方便.具体用法可以看我的博客(近期会写... 也可以先行百度一下,有很多大神写的很棒)
这里简单介绍下获取json返回的方法:
1. 引入官方jar包,可以网上直接下载或者 百度云: http://pan.baidu.com/s/1skSFERb
2. 获取 requestQueue 对象:
2. 接收json返回的请求方法:(第一个参数 是请求 地址 , 第二个参数 get 请求时为null , 第三个参数 请求成功的回调 , 第四个请求失败的 回调)
3. 将requestqueue 加入请求队列
4. 解析返回的json参数
返回参数 格式:
可以看到该返回整体是个jsonobject类型 , 包含三个参数 :msg, result,retCode
result 又是一个jsobject类型 包含 三个参数 : curPage , list , total
list 是一个jsonArray类型.
下面就是根据返回参数解析:
解析后log打印的结果:
本次目标:
1.数据的获取与展示(ListView)
2.官方的下拉刷新效果(SwipeRefreshLayout)
3.数据接口的申请(mob 官网 mob api)
4.webview的使用(webview)
实现效果如下:
首先,为listview的item写个布局:就叫list_item
list_item.xml :
<?xml version="1.0" encoding="utf-8"?>
<LinearLayout xmlns:android="http://schemas.android.com/apk/res/android"
android:layout_width="match_parent"
android:layout_height="wrap_content"
android:orientation="vertical">

<LinearLayout
android:layout_width="match_parent"
android:layout_height="wrap_content"
android:layout_weight="8"
android:orientation="horizontal">

<TextView
android:id="@+id/item_title"
android:layout_width="0dp"
android:layout_height="match_parent"
android:layout_weight="1"
android:paddingLeft="10dp"
android:paddingTop="10dp"
android:paddingRight="10dp"
android:text="title"
android:maxLines="3"
android:textSize="17dp" />

<ImageView
android:id="@+id/item_pic"
android:layout_marginTop="10dp"
android:layout_width="140dp"
android:layout_height="80dp"
android:layout_gravity="center"
android:layout_marginBottom="10dp"
android:layout_marginRight="10dp" />

</LinearLayout>

<LinearLayout
android:layout_width="match_parent"
android:layout_height="wrap_content"
android:layout_weight="2"
android:orientation="horizontal">

<TextView
android:layout_width="wrap_content"
android:layout_height="match_parent"
android:gravity="center_vertical"
android:paddingLeft="10dp"
android:textSize="10dp"
android:text="滴答资讯" />

<TextView
android:layout_width="0dp"
android:layout_height="match_parent"
android:layout_weight="1" />

<TextView
android:id="@+id/item_time"
android:layout_width="wrap_content"
android:layout_height="match_parent"
android:textSize="10dp"
android:layout_marginRight="10dp"
android:text="2016-06-24 13:10" />
</LinearLayout>
</LinearLayout>
效果如下:
也看不粗啥,就照着上面 ctry+c ctry+v
就行. 不懂可以直接留言联系我.嘿嘿
下面编写Fragment
对应第一的tab 的fragmen 叫TopicalFragment
TopicalFragment.java :
package com.zfls.didainf;

import android.content.Intent;
import android.os.Bundle;
import android.os.Handler;
import android.support.annotation.Nullable;
import android.support.v4.app.Fragment;
import android.support.v4.widget.SwipeRefreshLayout;
import android.util.Log;
import android.view.LayoutInflater;
import android.view.View;
import android.view.ViewGroup;
import android.widget.AdapterView;
import android.widget.ListView;
import android.widget.Toast;

import com.android.volley.RequestQueue;
import com.android.volley.Response;
import com.android.volley.VolleyError;
import com.android.volley.toolbox.JsonObjectRequest;
import com.android.volley.toolbox.Volley;
import com.zfls.didainf.itembean.ItemBean;
import com.zfls.didainf.network.NetWork;

import org.json.JSONArray;
import org.json.JSONException;
import org.json.JSONObject;

import java.util.ArrayList;
import java.util.List;
import java.util.Map;

import static com.zfls.didainf.network.NetWork.SEARCH;

/**
* Created by guwei on 16-6-23.
*/
public class TopicalFragment extends Fragment implements SwipeRefreshLayout.OnRefreshListener{

SwipeRefreshLayout mSwipeRefreshLayout;
ListView mListview;
List<ItemBean> itemBeenlist = new ArrayList<>();

//请求的页码
int page = 1;
@Nullable
@Override
public View onCreateView(LayoutInflater inflater, @Nullable ViewGroup container, @Nullable Bundle savedInstanceState) {

View view = inflater.inflate(R.layout.tab_topical , container , false);

initView(view);

getDate();
return view;
}

private void initView(View view) {
mListview = (ListView) view.findViewById(R.id.tab_topical_list);
mSwipeRefreshLayout = (SwipeRefreshLayout) view.findViewById(R.id.swiperefreshlayout);

mSwipeRefreshLayout.setColorSchemeResources(R.color.colorRed , R.color.colorGre , R.color.colorBlu);
mSwipeRefreshLayout.setProgressViewEndTarget(true , 150);
mSwipeRefreshLayout.setOnRefreshListener(this);

mListview.setOnItemClickListener(new AdapterView.OnItemClickListener() {
@Override
public void onItemClick(AdapterView<?> parent, View view, int position, long id) {
Map<String  , String> map = new MyAdapter(getContext() , itemBeenlist).getItem(position);
Intent intent = new Intent(getActivity() , Webview.class);
String title = map.get("title");
String url = map.get("sourceUrl");
Bundle bundle = new Bundle();
bundle.putString("title" , title);
bundle.putString("url" , url);
bundle.putString("Activity" , "Topical");
intent.putExtras(bundle);
startActivity(intent);
}
});
}

//滑动手势监听 , 加载数据
@Override
public void onRefresh() {
Toast.makeText(getActivity() , "loding..." , Toast.LENGTH_SHORT).show();
getDate();
mSwipeRefreshLayout.setRefreshing(false);
}

private void getDate() {
final String url = SEARCH;
RequestQueue requestQueue = Volley.newRequestQueue(getContext());

JsonObjectRequest jsonObjectRequest = new JsonObjectRequest(url+"2&page="+page, null,
new Response.Listener<JSONObject>() {
@Override
public void onResponse(JSONObject jsonObject) {
try {
int retCode = jsonObject.getInt("retCode");
Log.i("TAG" , retCode+"");
Log.i("TAG" , url+"2&page="+page);
if(retCode == 200){
JSONObject result = jsonObject.getJSONObject("result");
JSONArray arrobj = result.getJSONArray("list");
for(int i=0 ; i<arrobj.length() ; i++){
JSONObject item = arrobj.getJSONObject(i);
String title = item.getString("title");
String pubTime = item.getString("pubTime");
String sourceUrl = item.getString("sourceUrl");
//String thumbnails = item.getString("thumbnails");
itemBeenlist.add(new ItemBean( title ,pubTime , null, sourceUrl));
Log.i("TAG" , title+"\t"+pubTime+"\t"+sourceUrl);
}
mListview.setAdapter(new MyAdapter(getContext() , itemBeenlist));

}
} catch (JSONException e) {
e.printStackTrace();
}
}
},
new Response.ErrorListener() {
@Override
public void onErrorResponse(VolleyError volleyError) {
Toast.makeText(getActivity() , "loding..." , Toast.LENGTH_SHORT).show();
}
});
requestQueue.add(jsonObjectRequest);
++page;
}

}
上面访问网络的操作使用的是google 提供的Volley 框架很方便.具体用法可以看我的博客(近期会写... 也可以先行百度一下,有很多大神写的很棒)
这里简单介绍下获取json返回的方法:
1. 引入官方jar包,可以网上直接下载或者 百度云: http://pan.baidu.com/s/1skSFERb
2. 获取 requestQueue 对象:
RequestQueue requestQueue = Volley.newRequestQueue(getContext());
2. 接收json返回的请求方法:(第一个参数 是请求 地址 , 第二个参数 get 请求时为null , 第三个参数 请求成功的回调 , 第四个请求失败的 回调)
JsonObjectRequest jsonObjectRequest = new JsonObjectRequest(String url , null , Listener , errorListener );
3. 将requestqueue 加入请求队列
requestQueue.add(jsonObjectRequest);
4. 解析返回的json参数
返回参数 格式:
{
"msg": "success",
"result": {
"curPage": 1,
"list": [
{
"cid": "2",
"cvtPubTime": 1466741280000,
"id": "3477587",
"pubTime": "2016-06-24 12:08",
"sourceUrl": "http://www.yinews.cn/article/3477587.shtm",
"subTitle": "双喜!王哲林也登陆NBA!第57顺位被灰熊队选中",
"title": "双喜!王哲林也登陆NBA!第57顺位被灰熊队选中"
},
{
"cid": "2",
"cvtPubTime": 1466727480000,
"id": "3477232",
"pubTime": "2016-06-24 08:18",
"sourceUrl": "http://www.yinews.cn/article/3477232.shtm",
"subTitle": "战备危机!美媒称美军已无力抵御中俄“高端威胁”",
"title": "战备危机!美媒称美军已无力抵御中俄“高端威胁”"
}
],
"total": 11126
},
"retCode": "200"
}
可以看到该返回整体是个jsonobject类型 , 包含三个参数 :msg, result,retCode
result 又是一个jsobject类型 包含 三个参数 : curPage , list , total
list 是一个jsonArray类型.
下面就是根据返回参数解析:
new Response.Listener<JSONObject>() {
@Override
public void onResponse(JSONObject jsonObject) {
try {
int retCode = jsonObject.getInt("retCode");
Log.i("TAG" , retCode+"");
Log.i("TAG" , url+"2&page="+page);
if(retCode == 200){
JSONObject result = jsonObject.getJSONObject("result");
JSONArray arrobj = result.getJSONArray("list");
for(int i=0 ; i<arrobj.length() ; i++){
JSONObject item = arrobj.getJSONObject(i);
String title = item.getString("title");
String pubTime = item.getString("pubTime");
String sourceUrl = item.getString("sourceUrl");
//String thumbnails = item.getString("thumbnails");
itemBeenlist.add(new ItemBean( title ,pubTime , null, sourceUrl));
Log.i("TAG" , title+"\t"+pubTime+"\t"+sourceUrl);
}
mListview.setAdapter(new MyAdapter(getContext() , itemBeenlist));

}
} catch (JSONException e) {
e.printStackTrace();
}
}
}
解析后log打印的结果:
06-27 15:21:38.474 23997-23997/com.zfls.didainf I/TAG: 200 06-27 15:21:38.474 23997-23997/com.zfls.didainf I/TAG: http://apicloud.mob.com/wx/article/search?key=你的key&size=10&cid=2&page=3 06-27 15:21:38.474 23997-23997/com.zfls.didainf I/TAG: 惊天大盗丨这名律师看了一眼车牌号,车主信用卡里的钱就没了! 2016-06-27 11:04 http://www.yinews.cn/article/3486126.shtm 06-27 15:21:38.474 23997-23997/com.zfls.didainf I/TAG: 湖南大巴起火致35死:司机是否弃车逃生? 2016-06-27 10:29 http://www.yinews.cn/article/3485957.shtm 06-27 15:21:38.474 23997-23997/com.zfls.didainf I/TAG: 093B改进型核潜艇曝光 提升安静性和反潜能力 2016-06-27 08:47 http://www.yinews.cn/article/3485839.shtm 06-27 15:21:38.474 23997-23997/com.zfls.didainf I/TAG: 两湖猪价简析:肥肉贱卖 猪价破位下跌 2016-06-27 07:19 http://www.yinews.cn/article/3485871.shtm 06-27 15:21:38.475 23997-23997/com.zfls.didainf I/TAG: 湖南一副局长再次偷窥未成年女孩洗澡,纪委已立案 2016-06-27 07:18 http://www.yinews.cn/article/3485701.shtm 06-27 15:21:38.475 23997-23997/com.zfls.didainf I/TAG: 宝钢武钢筹划战略重组 钢企最大合并案拉开序幕 2016-06-27 07:13 http://www.yinews.cn/article/3485503.shtm 06-27 15:21:38.475 23997-23997/com.zfls.didainf I/TAG: 英国:实验证明,群众的眼睛不是雪亮的,群众的眼睛是盲 2016-06-27 06:22 http://www.yinews.cn/article/3485496.shtm 06-27 15:21:38.475 23997-23997/com.zfls.didainf I/TAG: 自杀厅官刘小华:曾每隔一两周自费飞广州看妻子 2016-06-27 05:34 http://www.yinews.cn/article/3485389.shtm 06-27 15:21:38.475 23997-23997/com.zfls.didainf I/TAG: 被情人骂渣男中行一分行长获赔 2016-06-27 02:44 http://www.yinews.cn/article/3485321.shtm 06-27 15:21:38.475 23997-23997/com.zfls.didainf I/TAG: 北京故宫3年内将拆除所有违建 只保留古代建筑 2016-06-27 02:43 http://www.yinews.cn/article/3485756.shtm[/code]
至此获取数据的任务就已经完成了.(数据申请 可以去mob官方网站 , 或者其他提供接口的网站)
下一步: 创建一个itembean
ItemBean.java :package com.zfls.didainf.itembean; import android.widget.ImageView; import android.widget.TextView; /** * Created by guwei on 16-6-24. */ public class ItemBean { public String mTitle; public String mTime; public String mImageUrl; public String mInforUrl; public ItemBean(String mTitle, String mTime, String mImageUrl , String mInforUrl) { this.mTitle = mTitle; this.mTime = mTime; this.mImageUrl = mImageUrl; this.mInforUrl = mInforUrl; } }
编写适配器:
MyAdapter.java :package com.zfls.didainf; import android.content.Context; import android.view.LayoutInflater; import android.view.View; import android.view.ViewGroup; import android.widget.BaseAdapter; import android.widget.ImageView; import android.widget.TextView; import com.zfls.didainf.itembean.ItemBean; import com.zfls.didainf.network.ImageLoader; import java.util.HashMap; import java.util.List; import java.util.Map; /** * Created by guwei on 16-6-24. */ public class MyAdapter extends BaseAdapter { private LayoutInflater mLayoutInflater; private List<ItemBean> mDataList; private ImageLoader mImageLoader; public MyAdapter(Context context , List<ItemBean> list){ mDataList = list; mLayoutInflater = LayoutInflater.from(context); mImageLoader = new ImageLoader(); } //获取数据数量 @Override public int getCount() { return mDataList.size(); } //获取对应项的id @Override public long getItemId(int position) { return position; } //获取对应postion的item @Override public Map<String , String> getItem(int position) { ItemBean itemBean = mDataList.get(position); Map<String , String> map = new HashMap<>(); map.put("title" , itemBean.mTitle); map.put("pubTime" , itemBean.mTime); map.put("sourceUrl" , itemBean.mInforUrl); return map; } @Override public View getView(int position, View convertView, ViewGroup parent) { ViewHolder viewHolder = new ViewHolder(); if(convertView == null){ convertView = mLayoutInflater.inflate(R.layout.list_item ,null); viewHolder.itempic = (ImageView) convertView.findViewById(R.id.item_pic); viewHolder.title = (TextView) convertView.findViewById(R.id.item_title); viewHolder.time = (TextView) convertView.findViewById(R.id.item_time); convertView.setTag(viewHolder); }else{ viewHolder = (ViewHolder) convertView.getTag(); } ItemBean bean = mDataList.get(position); viewHolder.itempic.setBackgroundResource(R.mipmap.icon_no_pic); //异步加载图片 // String url = bean.mImageUrl; // if(url == null){ // viewHolder.itempic.setBackgroundResource(R.mipmap.ic_launcher); // }else{ // viewHolder.itempic.setTag(url); // mImageLoader.showImageByThread(viewHolder.itempic , url); // } viewHolder.title.setText(bean.mTitle); viewHolder.time.setText(bean.mTime); return convertView; } class ViewHolder{ private ImageView itempic; private TextView title; private TextView time; } }
MyAdapter 继承自 BaseAdapter方法 重写四个方法:
getCont()
getItemId()
getItem()
getView()
此处只重点描述getView()方法:
ViewHolder是google很早前建议使用的方法.可以减少重复的绑定工作:@Override public View getView(int position, View convertView, ViewGroup parent) { ViewHolder viewHolder = new ViewHolder(); //判断convertView 是否已经绑定过控件,绑定过直接返回 if(convertView == null){ convertView = mLayoutInflater.inflate(R.layout.list_item ,null); viewHolder.itempic = (ImageView) convertView.findViewById(R.id.item_pic); viewHolder.title = (TextView) convertView.findViewById(R.id.item_title); viewHolder.time = (TextView) convertView.findViewById(R.id.item_time); convertView.setTag(viewHolder); }else{ viewHolder = (ViewHolder) convertView.getTag(); } ItemBean bean = mDataList.get(position); viewHolder.itempic.setBackgroundResource(R.mipmap.icon_no_pic);//设置无网络时默认图片 viewHolder.title.setText(bean.mTitle); viewHolder.time.setText(bean.mTime); return convertView; }
目前google又推出了新的用于替代listview和grideview的控件
RecyclerView有时间的朋友可以研究下.
到此基本的列表展示的功能已经实现了.
下面就要实现item的点击事件:mListview.setOnItemClickListener(new AdapterView.OnItemClickListener() { @Override public void onItemClick(AdapterView<?> parent, View view, int position, long id) { Map<String , String> map = new MyAdapter(getContext() , itemBeenlist).getItem(position); Intent intent = new Intent(getActivity() , Webview.class); String title = map.get("title"); String url = map.get("sourceUrl"); Bundle bundle = new Bundle(); bundle.putString("title" , title); bundle.putString("url" , url); bundle.putString("Activity" , "Topical"); intent.putExtras(bundle); startActivity(intent); } });
通过getItem方法获取到点击的Item的相关数据.
使用bundle将title , url 传递给webview展示相关的url
编写webview类 Webview.java:package com.zfls.didainf; /** * Created by guwei on 16-6-24. */ import android.app.Activity; import android.content.Intent; import android.net.Uri; import android.os.Bundle; import android.support.design.widget.NavigationView; import android.support.v7.app.AppCompatActivity; import android.support.v7.widget.Toolbar; import android.util.Log; import android.view.KeyEvent; import android.view.MenuItem; import android.view.View; import android.webkit.WebChromeClient; import android.webkit.WebView; import android.webkit.WebViewClient; import android.widget.ProgressBar; import android.widget.Toast; import com.google.android.gms.appindexing.Action; import com.google.android.gms.appindexing.AppIndex; import com.google.android.gms.common.api.GoogleApiClient; /** * Created by guwei on 16-6-24. */ public class Webview extends AppCompatActivity implements View.OnClickListener{ private WebView mWebView; private ProgressBar jindu; private Toolbar toolbar; private Activity mActivity; /** * ATTENTION: This was auto-generated to implement the App Indexing API. * See https://g.co/AppIndexing/AndroidStudio for more information. */ private GoogleApiClient client; @Override public void onCreate(Bundle savedInstanceState) { super.onCreate(savedInstanceState); setContentView(R.layout.webview); initview(); initwork(); // ATTENTION: This was auto-generated to implement the App Indexing API. // See https://g.co/AppIndexing/AndroidStudio for more information. client = new GoogleApiClient.Builder(this).addApi(AppIndex.API).build(); } private void initview() { jindu = (ProgressBar) findViewById(R.id.progressBar); mWebView = (WebView) findViewById(R.id.webView); toolbar = (Toolbar) findViewById(R.id.webView_toolbar); } private void initwork() { Intent geturl = getIntent(); String title = geturl.getStringExtra("title"); String url = geturl.getStringExtra("url"); String activity = geturl.getStringExtra("activity"); //设置toolbar标题 toolbar.setTitle(title); toolbar.setTitleTextColor(getResources().getColor(R.color.colorWrite)); //设置toolbar的logo //toolbar.setLogo() //setNavigationIcon设置图标 toolbar.setNavigationIcon(R.mipmap.icon_title_back_arrow); setSupportActionBar(toolbar); //监听放在setSupportAction()之后 toolbar.setNavigationOnClickListener(new View.OnClickListener() { @Override public void onClick(View v) { //简单粗暴 还实用!! finish(); } }); Log.i("xxx", url); //设置可以执行javascript脚本 mWebView.getSettings().setJavaScriptEnabled(true); mWebView.loadUrl(url); mWebView.setWebChromeClient(new mywebChromeClient()); mWebView.setWebViewClient(new myWebViewClient()); } @Override public void onClick(View v) { switch (v.getId()){ // case R.id. } } @Override public void onStart() { super.onStart(); // ATTENTION: This was auto-generated to implement the App Indexing API. // See https://g.co/AppIndexing/AndroidStudio for more information. client.connect(); Action viewAction = Action.newAction( Action.TYPE_VIEW, // TODO: choose an action type. "Webview Page", // TODO: Define a title for the content shown. // TODO: If you have web page content that matches this app activity's content, // make sure this auto-generated web page URL is correct. // Otherwise, set the URL to null. Uri.parse("http://host/path"), // TODO: Make sure this auto-generated app URL is correct. Uri.parse("android-app://com.zfls.didainf/http/host/path") ); AppIndex.AppIndexApi.start(client, viewAction); } @Override public void onStop() { super.onStop(); // ATTENTION: This was auto-generated to implement the App Indexing API. // See https://g.co/AppIndexing/AndroidStudio for more information. Action viewAction = Action.newAction( Action.TYPE_VIEW, // TODO: choose an action type. "Webview Page", // TODO: Define a title for the content shown. // TODO: If you have web page content that matches this app activity's content, // make sure this auto-generated web page URL is correct. // Otherwise, set the URL to null. Uri.parse("http://host/path"), // TODO: Make sure this auto-generated app URL is correct. Uri.parse("android-app://com.zfls.didainf/http/host/path") ); AppIndex.AppIndexApi.end(client, viewAction); client.disconnect(); } private class myWebViewClient extends WebViewClient { @Override public boolean shouldOverrideUrlLoading(WebView view, String url) { view.loadUrl(url); return true; } } private class mywebChromeClient extends WebChromeClient { @Override public void onProgressChanged(WebView view, int newProgress) { jindu.setMax(100); jindu.setProgress(newProgress); } } }
用法很基础,有兴趣深入研究可以自己百度.
关于toolbar (google推出用于替代actionbar)的用法可以等我发博客.
谢谢查看;
转载请注明转自我的博客.
项目地址 : https://github.com/wobeinianqing/DidaINF

相关文章推荐
- Android studio怎么使用git获取最新内容然后合并?
- 基于ndk jni技术实现串口收发的方法
- Android真机调试打印日志的方法
- 自定义提示加载数据Dialog的实现
- android:贝塞尔曲线简单实现
- 【腾讯bugly干货分享】Android自绘动画实现与优化实战——以Tencent OS录音机波形动
- android-support-percent的学习使用笔记
- 嵌入式Android系统开发-未完待续
- android插入耳机状态使用扬声器外放音乐
- Android 软键盘--的控制
- 让旋转动画没有停顿
- Android自定义图表:ChartView
- 【Android基础】Android 手动显示和隐藏软键盘
- android中system_server中的服务概述
- Android View事件机制 21问21答
- 如何自学Android
- Android View绘制机制 13问13答
- (OK) install chrome & busybox in android-x86_64 —— uninstall chrome
- android事件分发(二)源码源码
- Android EventBus详解