Swift: 你好, AutoLayout!
2016-06-23 11:11
579 查看
Xcode8已经发布,带了Swift3的预览版本,以后都是默认采用Swift3的语法。
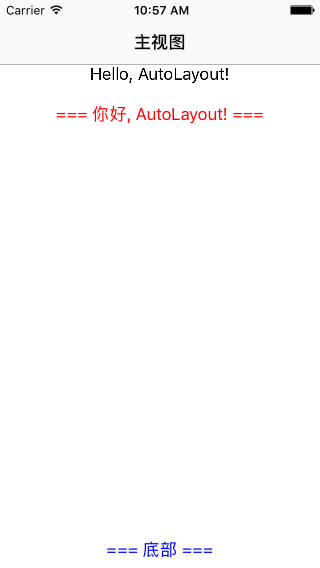
这个例子主要是演示iOS中如何用纯代码实现自动布局,先看看效果。
还是先创建程序入口文件
创建UI程序入口
然后创建视图控制器
其中
完成。
https://chai2010.cn/
这个例子主要是演示iOS中如何用纯代码实现自动布局,先看看效果。
还是先创建程序入口文件
main.swift:
import UIKit

let argc = Process.argc
let argv = UnsafeMutablePointer<UnsafeMutablePointer<CChar>>(Process.unsafeArgv)

UIApplicationMain(argc, argv, NSStringFromClass(MainApp), NSStringFromClass(MainAppDelegate))
创建UI程序入口
App.swift,增加了一个导航栏:
import UIKit

class MainApp: UIApplication {
override func sendEvent(_ event: UIEvent) {
super.sendEvent(event)
}
}

class MainAppDelegate: UIResponder, UIApplicationDelegate {

var window: UIWindow?

func application(_ app: UIApplication, didFinishLaunchingWithOptions opt: [NSObject: AnyObject]?) -> Bool {

self.window = UIWindow(frame: UIScreen.main().bounds)

self.window!.rootViewController = UINavigationController(rootViewController:MainViewController())
self.window!.backgroundColor = UIColor.white()
self.window!.makeKeyAndVisible()

return true
}
}
然后创建视图控制器
ViewController.swift, 在这里实现自动布局:
import UIKit

class MainViewController: UIViewController {

var label0_: UILabel!
var label1_: UILabel!
var label2_: UILabel!

override func viewDidLoad() {
super.viewDidLoad()

self.title = "主视图"

self.label0_ = {
let label = UILabel()
label.textAlignment = .center
label.text = "Hello, AutoLayout!"
return label
}()

self.label1_ = {
let label = UILabel()
label.textColor = UIColor.red()
label.textAlignment = .center
label.text = "=== 你好, AutoLayout! ==="
return label
}()

self.label2_ = {
let label = UILabel()
label.textColor = UIColor.blue()
label.textAlignment = .center
label.text = "=== 底部 ==="
return label
}()

self.view.addSubview(self.label0_)
self.view.addSubview(self.label1_)
self.view.addSubview(self.label2_)

self.view.setupAutoLayout {
return (
layputs: [
("H:|-(20)-[label0]-20-|",[]),
("H:|-(20)-[label1]-20-|",[]),
("H:|-(20)-[label2]-20-|",[]),

("V:|[topGuide]-(0)-[label0(20)]-20-[label1(20)]-(>=0)-[label2]-[bottomGuide]|",[])
],
viewsMap: [
"topGuide": self.topLayoutGuide,
"bottomGuide": self.bottomLayoutGuide,

"label0": self.label0_,
"label1": self.label1_,
"label2": self.label2_
]
)
}
}
}
其中
self.view.setupAutoLayout是针对
UIView类型作的扩展:
extension UIView {
func setupAutoLayout(closure: () -> (layouts: [(String,NSLayoutFormatOptions)], viewsMap: [String:AnyObject]) ) {
let (viewsLayouts, viewsMap) = closure()

// 采用自动布局
for view in viewsMap.values {
if let v = view as? UIView {
v.translatesAutoresizingMaskIntoConstraints = false
}
}

// 添加自动布局规则
for layout in viewsLayouts {
self.addConstraints(
NSLayoutConstraint.constraints(
withVisualFormat: layout.0,
options: layout.1, metrics: nil,
views: viewsMap
)
)
}
}
}
完成。
https://chai2010.cn/

相关文章推荐
- 峰回路转,Firefox 浏览器即将重返 iOS 平台
- 峰回路转,Firefox 浏览器即将重返 iOS 平台
- 不可修补的 iOS 漏洞可能导致 iPhone 4s 到 iPhone X 永久越狱
- iOS 12.4 系统遭黑客破解,漏洞危及数百万用户
- Apple Swift学习教程
- 每日安全资讯:NSO,一家专业入侵 iPhone 的神秘公司
- [转][源代码]Comex公布JailbreakMe 3.0源代码
- 介绍 Fedora 上的 Swift
- 讲解iOS开发中基本的定位功能实现
- iOS中定位当前位置坐标及转换为火星坐标的方法
- js判断客户端是iOS还是Android等移动终端的方法
- iOS应用开发中AFNetworking库的常用HTTP操作方法小结
- iOS应用中UISearchDisplayController搜索效果的用法
- iOS App开发中的UISegmentedControl分段组件用法总结
- IOS开发环境windows化攻略
- iOS应用中UITableView左滑自定义选项及批量删除的实现
- iOS中UIAlertView警告框组件的使用教程
- 浅析iOS应用开发中线程间的通信与线程安全问题