AltertDialog在DialogFragment中的使用
2016-06-09 17:03
363 查看
从android3.0引入,若要支持android3.0以下需要使用support v4中的DialogFragment.
和普通的创建AlertDialog,没有什么区别;
然后在需要调用的Activity中调用,调用方法如下:
Chain together various setter methods to set the dialog characteristics
Get the AlertDialog from create()
4.添加“确定”等操作按钮
添加“取消”按钮
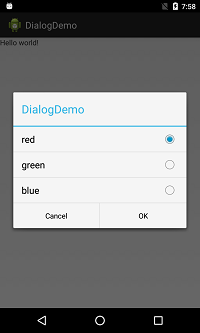
5.在Dialog中展示列表
数据源

注意:setMessage后setItems将没有任何效果
这时点击某一项时Dialog就会消失,如果不想让其消失使用setSingleChoiceItems取代setItems.如下所示
注意:setSingleChoiceItems第二个参数是默认选中的位置,如果没有请设置为-1。
如果想一次选中多个,请看下文,Dialog多选模式。
与单选模式类似,如果不想默认选中,第二个参数可以传递null;
注意:在这里用于计数的数组mSelectedItems初始情况要与默认选中情况相同
写的挺多,思路很简单
1.CustomDialogFrament定义一个接口,让Activity实现;
2.在onAttach,CustomDialogFrament拿到Activity的引用;
3.在进行相关操作的时候,调用Activity中实现的方法。
mIsLargeLayout,为你判定展示Dialog还是全屏的变量
转载地址
https://developer.android.com/guide/topics/ui/dialogs.html#DismissingADialog
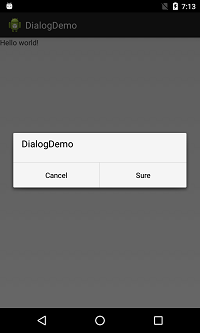
创建一个简单的Dialog
public class CustomDialogFragment extends DialogFragment {
@Override
public Dialog onCreateDialog(Bundle savedInstanceState) {
// Use the Builder class for convenient dialog construction
AlertDialog.Builder builder = new AlertDialog.Builder(getActivity());
builder.setMessage(R.string.app_name)
.setPositiveButton("Sure",
new DialogInterface.OnClickListener() {
public void onClick(DialogInterface dialog, int id) {
// FIRE ZE MISSILES!
}
})
.setNegativeButton("Cancel",
new DialogInterface.OnClickListener() {
public void onClick(DialogInterface dialog, int id) {
// User cancelled the dialog
}
});
// Create the AlertDialog object and return it
return builder.create();
}
}
和普通的创建AlertDialog,没有什么区别;
然后在需要调用的Activity中调用,调用方法如下:
@Override
protected void onCreate(Bundle savedInstanceState) {
super.onCreate(savedInstanceState);
setContentView(R.layout.activity_main);
CustomDialogFragment dialogFragment=new CustomDialogFragment();
dialogFragment.show(getSupportFragmentManager(), "xxxx");
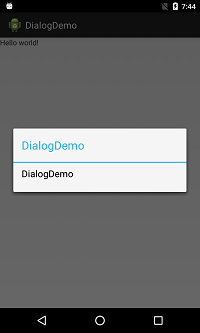
}构建提醒对话框
Instantiate an AlertDialog.Builder with its constructorAlertDialog.Builder builder = new AlertDialog.Builder(getActivity());
Chain together various setter methods to set the dialog characteristics
builder.setMessage(R.string.dialog_message)
.setTitle(R.string.dialog_title);
Get the AlertDialog from create()
AlertDialog dialog = builder.create();
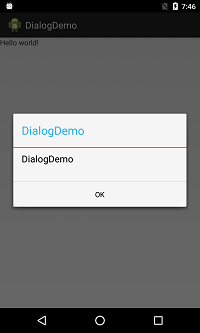
4.添加“确定”等操作按钮
builder.setPositiveButton(R.string.ok, new DialogInterface.OnClickListener() {
public void onClick(DialogInterface dialog, int id) {
// User clicked OK button
}
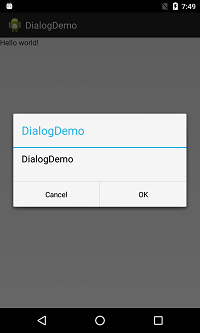
});添加“取消”按钮
builder.setNegativeButton("Cancel", new OnClickListener() {

@Override
public void onClick(DialogInterface dialog, int which) {
// TODO Auto-generated method stub

}
});
5.在Dialog中展示列表
数据源
<string-array name="colors_array">
<item>red</item>
<item>green</item>
<item>blue</item>
</string-array>
builder.setItems(R.array.colors_array, new DialogInterface.OnClickListener() {
public void onClick(DialogInterface dialog, int which) {
// The 'which' argument contains the index position
// of the selected item
}
});
注意:setMessage后setItems将没有任何效果
这时点击某一项时Dialog就会消失,如果不想让其消失使用setSingleChoiceItems取代setItems.如下所示
Dialog单选模式
将setItems修改为setSingleChoiceItemsbuilder.setSingleChoiceItems(R.array.colors_array, 0,new OnClickListener() {
@Override
public void onClick(DialogInterface dialog, int which) {
// TODO Auto-generated method stub
}
});注意:setSingleChoiceItems第二个参数是默认选中的位置,如果没有请设置为-1。
如果想一次选中多个,请看下文,Dialog多选模式。
Dialog多选模式
如果想多选请使用setMultiChoiceItems方法,其用法如下:builder
.setMultiChoiceItems(R.array.colors_array, new boolean[]{true,true,false},
new DialogInterface.OnMultiChoiceClickListener() {
@Override
public void onClick(DialogInterface dialog, int which,
boolean isChecked) {
if (isChecked) {
// If the user checked the item, add it to the selected items
mSelectedItems.add(which);
} else if (mSelectedItems.contains(which)) {
// Else, if the item is already in the array, remove it
mSelectedItems.remove(Integer.valueOf(which));
}
}
});与单选模式类似,如果不想默认选中,第二个参数可以传递null;
注意:在这里用于计数的数组mSelectedItems初始情况要与默认选中情况相同
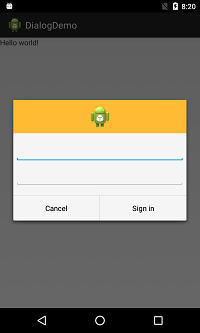
自定义布局
@Override
public Dialog onCreateDialog(Bundle savedInstanceState) {
AlertDialog.Builder builder = new AlertDialog.Builder(getActivity());
// Get the layout inflater
LayoutInflater inflater = getActivity().getLayoutInflater();

// Inflate and set the layout for the dialog
// Pass null as the parent view because its going in the dialog layout
builder.setView(inflater.inflate(R.layout.dialog_signin, null))
// Add action buttons
.setPositiveButton("Sign in", new DialogInterface.OnClickListener() {
@Override
public void onClick(DialogInterface dialog, int id) {
// sign in the user ...
}
})
.setNegativeButton("Cancel", new DialogInterface.OnClickListener() {
public void onClick(DialogInterface dialog, int id) {
CustomDialogFragment.this.getDialog().cancel();
}
});
return builder.create();
}
Activity获取Dialog操作情况
public class CustomDialogFragment extends DialogFragment {
private DialogButtonListener dialogButtonListener;
public interface DialogButtonListener{
public void onPositiveClick(CustomDialogFragment customDialogFragment);
public void onNegativeClick(CustomDialogFragment customDialogFragment);

}
@Override
public void onAttach(Activity activity) {
super.onAttach(activity);

if(!(activity instanceof DialogButtonListener)){
throw new RuntimeException("activity must implement DialogButtonListener ");
}else{
dialogButtonListener=(DialogButtonListener)activity;
}

}

@Override
public Dialog onCreateDialog(Bundle savedInstanceState) {
AlertDialog.Builder builder = new AlertDialog.Builder(getActivity());
builder.setMessage("XXXXXX");
builder.setPositiveButton("Sign in", new DialogInterface.OnClickListener() {
@Override
public void onClick(DialogInterface dialog, int id) {
dialogButtonListener.onPositiveClick(CustomDialogFragment.this);
}
})
.setNegativeButton("Cancel", new DialogInterface.OnClickListener() {
public void onClick(DialogInterface dialog, int id) {
dialogButtonListener.onNegativeClick(CustomDialogFragment.this);
}
});
return builder.create();
}
public class MainActivity extends FragmentActivity implements DialogButtonListener{
@Override
protected void onCreate(Bundle savedInstanceState) {
super.onCreate(savedInstanceState);
setContentView(R.layout.activity_main);
CustomDialogFragment dialogFragment=new CustomDialogFragment();
dialogFragment.show(getSupportFragmentManager(), "xxxx");
}
@Override
public void onPositiveClick(CustomDialogFragment customDialogFragment) {
Toast.makeText(this, "positive clicked!", Toast.LENGTH_LONG).show();
}
@Override
public void onNegativeClick(CustomDialogFragment customDialogFragment) {
Toast.makeText(this, "negative clicked!", Toast.LENGTH_LONG).show();
}写的挺多,思路很简单
1.CustomDialogFrament定义一个接口,让Activity实现;
2.在onAttach,CustomDialogFrament拿到Activity的引用;
3.在进行相关操作的时候,调用Activity中实现的方法。
自适应为Dialog还是全屏
public class CustomDialogFragment extends DialogFragment {

/** The system calls this to get the DialogFragment's layout, regardless
of whether it's being displayed as a dialog or an embedded fragment. */
@Override
public View onCreateView(LayoutInflater inflater, ViewGroup container,
Bundle savedInstanceState) {
// Inflate the layout to use as dialog or embedded fragment
return inflater.inflate(R.layout.activity_main, container, false);
}

/** The system calls this only when creating the layout in a dialog. */
@Override
public Dialog onCreateDialog(Bundle savedInstanceState) {
// The only reason you might override this method when using
// onCreateView() is
// to modify any dialog characteristics. For example, the dialog
// includes a
// title by default, but your custom layout might not need it. So here
// you can
// remove the dialog title, but you must call the superclass to get the
// Dialog.
Dialog dialog = super.onCreateDialog(savedInstanceState);
dialog.requestWindowFeature(Window.FEATURE_NO_TITLE);
return dialog;
}

}
mIsLargeLayout,为你判定展示Dialog还是全屏的变量
public void showDialog() {
FragmentManager fragmentManager = getSupportFragmentManager();
CustomDialogFragment newFragment = new CustomDialogFragment();

if (mIsLargeLayout) {
// The device is using a large layout, so show the fragment as a dialog
newFragment.show(fragmentManager, "dialog");
} else {
// The device is smaller, so show the fragment fullscreen
FragmentTransaction transaction = fragmentManager.beginTransaction();
// For a little polish, specify a transition animation
transaction.setTransition(FragmentTransaction.TRANSIT_FRAGMENT_OPEN);
// To make it fullscreen, use the 'content' root view as the container
// for the fragment, which is always the root view for the activity
transaction.add(android.R.id.content, newFragment)
.addToBackStack(null).commit();
}
}
转载地址
https://developer.android.com/guide/topics/ui/dialogs.html#DismissingADialog

相关文章推荐
- 三种禁用FileSystemObject组件的方法
- 用vbs列出机器上所有能调用的组件
- 剖析ASP.NET MVC的DependencyResolver组件
- asp水印组件之AspJpeg的结合代码实例
- Node.js编写组件的三种实现方式
- Bootstrap表单组件教程详解
- JS上传组件FileUpload自定义模板的使用方法
- 适用于WebForm Mvc的Pager分页组件C#实现
- js组件SlotMachine实现图片切换效果制作抽奖系统
- Android搜索框组件SearchView的基本使用方法
- 浅析Bootstrap缩略图组件与警示框组件
- 第九章之路径分页标签与徽章组件
- JS组件Bootstrap ContextMenu右键菜单使用方法
- JavaScript资源预加载组件和滑屏组件的使用推荐
- 浅谈Sticky组件的改进实现
- 编写轻量ajax组件01-与webform平台上的各种实现方式比较
- Ajax核心XMLHTTP组件资料第1/2页
- JS组件系列之Bootstrap Icon图标选择组件
- jQuery Chart图表制作组件Highcharts用法详解
- jQuery技巧之让任何组件都支持类似DOM的事件管理