自定义PopupWindow轻松实现从底部弹出
2016-04-28 18:20
288 查看
首先,肯定要有动画资源吧,要不怎么弹嘞。啥都不管,先定义两个动画肯定用的着。
2.肯定需要将上面两个动画加载到我们的PopupWindow上吧,ok,我们可以在styles文件下定义
3.PopupWindow肯定是拥有自己的布局吧,没布局弹出空气吗?
4.开始自定义所需的PopupWindow~
5.ok写完啦,写个activity测试一下
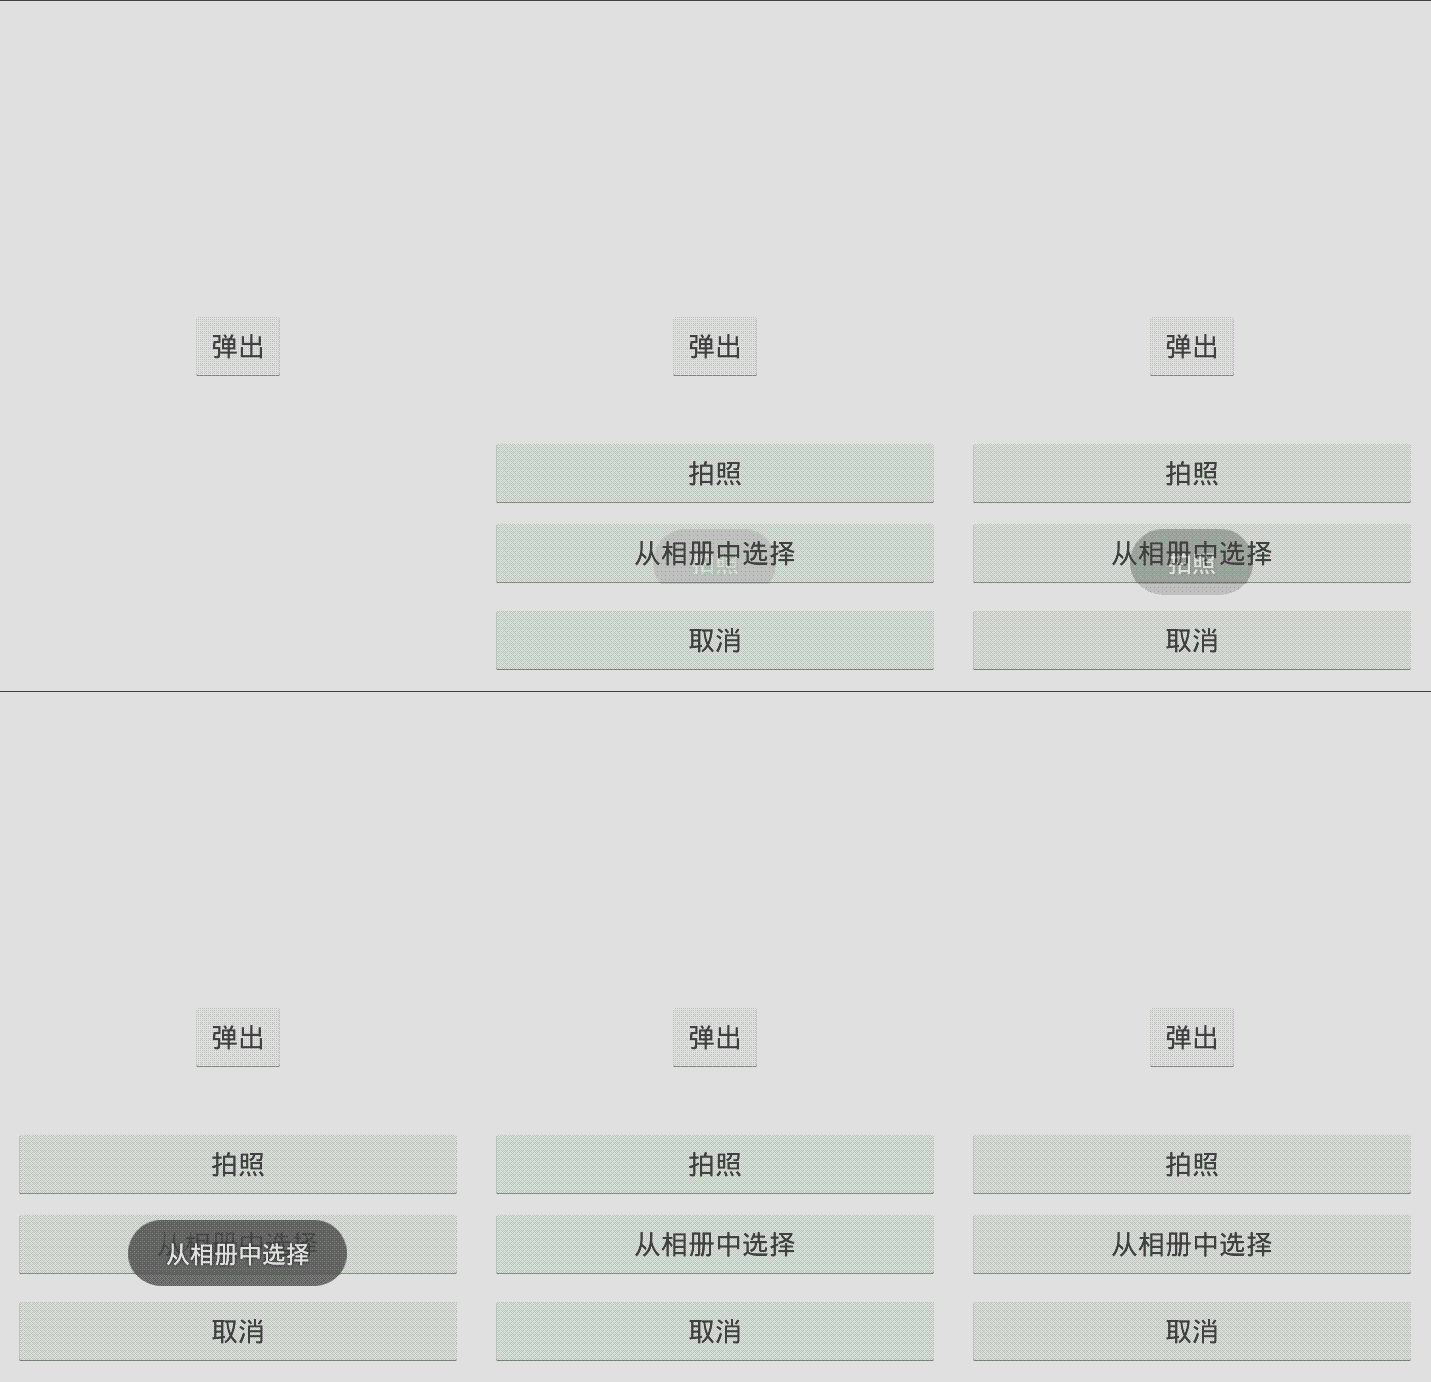
效果图,虽然丑~~~

<?xml version="1.0" encoding="utf-8"?>
<!-- res/anim文件夹下定义  -->
<!-- 名为push_bottom_in.xml -->
<set xmlns:android="http://schemas.android.com/apk/res/android" >

<translate
android:duration="500"
android:fromYDelta="100%p"
android:toYDelta="0" />

</set>

<?xml version="1.0" encoding="utf-8"?>
<!-- push_buttom_out.xml-->
<set xmlns:android="http://schemas.android.com/apk/res/android" >

<translate
android:duration="500"
android:fromYDelta="0"
android:toYDelta="50%p" />
</set>
2.肯定需要将上面两个动画加载到我们的PopupWindow上吧,ok,我们可以在styles文件下定义
<style name="mypopwindow_anim_style">
<item name="android:windowEnterAnimation">@anim/push_bottom_in</item>
<!-- 指定显示的动画xml -->

<item name="android:windowExitAnimation">@anim/push_buttom_out</item>
<!-- 指定消失的动画xml -->
</style>
3.PopupWindow肯定是拥有自己的布局吧,没布局弹出空气吗?
<?xml version="1.0" encoding="utf-8"?>
<RelativeLayout xmlns:android="http://schemas.android.com/apk/res/android"
android:layout_width="match_parent"
android:layout_height="wrap_content"
android:gravity="center_horizontal">

<LinearLayout
android:id="@+id/id_pop_layout"
android:layout_width="match_parent"
android:layout_height="wrap_content"
android:orientation="vertical"
android:layout_alignParentBottom="true">

<Button
android:id="@+id/id_btn_take_photo"
android:layout_width="match_parent"
android:layout_height="wrap_content"
android:layout_marginTop="10dp"
android:layout_marginLeft="10dp"
android:layout_marginRight="10dp"
android:text="拍照"/>

<Button
android:id="@+id/id_btn_select"
android:layout_width="match_parent"
android:layout_height="wrap_content"
android:layout_marginTop="5dp"
android:layout_marginLeft="10dp"
android:layout_marginRight="10dp"
android:text="从相册中选择"/>

<Button
android:id="@+id/id_btn_cancelo"
android:layout_width="match_parent"
android:layout_height="wrap_content"
android:layout_margin="10dp"
android:text="取消"/>

</LinearLayout>

</RelativeLayout>
4.开始自定义所需的PopupWindow~
public class CustomPopupWindow extends PopupWindow implements OnClickListener {

private Button btnTakePhoto, btnSelect, btnCancel;
private View mPopView;
private OnItemClickListener mListener;

public CustomPopupWindow(Context context) {
super(context);
// TODO Auto-generated constructor stub
init(context);
setPopupWindow();
btnTakePhoto.setOnClickListener(this);
btnSelect.setOnClickListener(this);
btnCancel.setOnClickListener(this);

}

/**
* 初始化
*
* @param context
*/
private void init(Context context) {
// TODO Auto-generated method stub
LayoutInflater inflater = LayoutInflater.from(context);
//绑定布局
mPopView = inflater.inflate(R.layout.custom_popup_window, null);

btnTakePhoto = (Button) mPopView.findViewById(R.id.id_btn_take_photo);
btnSelect = (Button) mPopView.findViewById(R.id.id_btn_select);
btnCancel = (Button) mPopView.findViewById(R.id.id_btn_cancelo);
}

/**
* 设置窗口的相关属性
*/
@SuppressLint("InlinedApi")
private void setPopupWindow() {
this.setContentView(mPopView);// 设置View
this.setWidth(LayoutParams.MATCH_PARENT);// 设置弹出窗口的宽
this.setHeight(LayoutParams.WRAP_CONTENT);// 设置弹出窗口的高
this.setFocusable(true);// 设置弹出窗口可
this.setAnimationStyle(R.style.mypopwindow_anim_style);// 设置动画
this.setBackgroundDrawable(new ColorDrawable(0x00000000));// 设置背景透明
mPopView.setOnTouchListener(new OnTouchListener() {// 如果触摸位置在窗口外面则销毁

@Override
public boolean onTouch(View v, MotionEvent event) {
// TODO Auto-generated method stub
int height = mPopView.findViewById(R.id.id_pop_layout).getTop();
int y = (int) event.getY();
if (event.getAction() == MotionEvent.ACTION_UP) {
if (y < height) {
dismiss();
}
}
return true;
}
});
}

/**
* 定义一个接口,公布出去 在Activity中操作按钮的单击事件
*/
public interface OnItemClickListener {
void setOnItemClick(View v);
}

public void setOnItemClickListener(OnItemClickListener listener) {
this.mListener = listener;
}

@Override
public void onClick(View v) {
// TODO Auto-generated method stub
if (mListener != null) {
mListener.setOnItemClick(v);
}
}

}
5.ok写完啦,写个activity测试一下
public class MainActivity extends Activity implements OnItemClickListener{

private CustomPopupWindow mPop;

@Override
protected void onCreate(Bundle savedInstanceState) {
super.onCreate(savedInstanceState);
setContentView(R.layout.activity_main);
mPop=new CustomPopupWindow(this);
mPop.setOnItemClickListener(this);
findViewById(R.id.id_start).setOnClickListener(new View.OnClickListener() {

@Override
public void onClick(View v) {
//设置PopupWindow中的位置
mPop.showAtLocation(MainActivity.this.findViewById(R.id.main), Gravity.BOTTOM|Gravity.CENTER_HORIZONTAL, 0, 0);
}
});
}
@Override
public void setOnItemClick(View v) {
// TODO Auto-generated method stub
switch(v.getId()){
case R.id.id_btn_take_photo:
Toast.makeText(getApplicationContext(), "拍照", Toast.LENGTH_LONG).show();
break;
case R.id.id_btn_select:
Toast.makeText(getApplicationContext(),"从相册中选择", Toast.LENGTH_LONG).show();
break;
case R.id.id_btn_cancelo:
mPop.dismiss();
break;
}
}
}
效果图,虽然丑~~~

相关文章推荐
- 使用C++实现JNI接口需要注意的事项
- Android IPC进程间通讯机制
- Android Manifest 用法
- [转载]Activity中ConfigChanges属性的用法
- Android之获取手机上的图片和视频缩略图thumbnails
- Android之使用Http协议实现文件上传功能
- Android学习笔记(二九):嵌入浏览器
- android string.xml文件中的整型和string型代替
- i-jetty环境搭配与编译
- android之定时器AlarmManager
- android wifi 无线调试
- Android Native 绘图方法
- Android java 与 javascript互访(相互调用)的方法例子
- android 代码实现控件之间的间距
- android FragmentPagerAdapter的“标准”配置
- Android"解决"onTouch和onClick的冲突问题
- android:installLocation简析
- android searchView的关闭事件
- SourceProvider.getJniDirectories
