feature visualization from ipython notebook
2016-04-24 15:41
756 查看
Feature visualization from ipython notebook
Wang Xiao
1. install anaconda2 from: https://www.continuum.io/downloads
Note: download the version 2 not version 3 ! Or the following will always wrong !!!

2. Then install python.protobuf follow the blog from: http://www.voidcn.com/blog/woainiwss/article/p-5002715.html
(1). Download: http://protobuf.googlecode.com/files/protobuf-2.5.0.zip
(2). Unzip protobuf-2.5.0 and cd protobuf-2.5.0
(3). Do the following in the terminal
(4). cd ./python
(5). >>python
check if you input the >> import google.protobuf , it does not inform you any error, it means everything is ok.

If your screen like the above figure, you only could try it again like me.
(6).Then, input : ipython notebook in the terminal, and a page will be opened in your Browser.

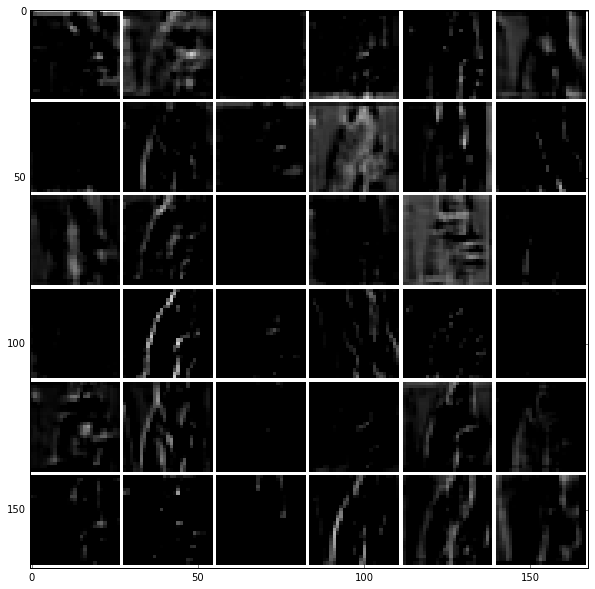
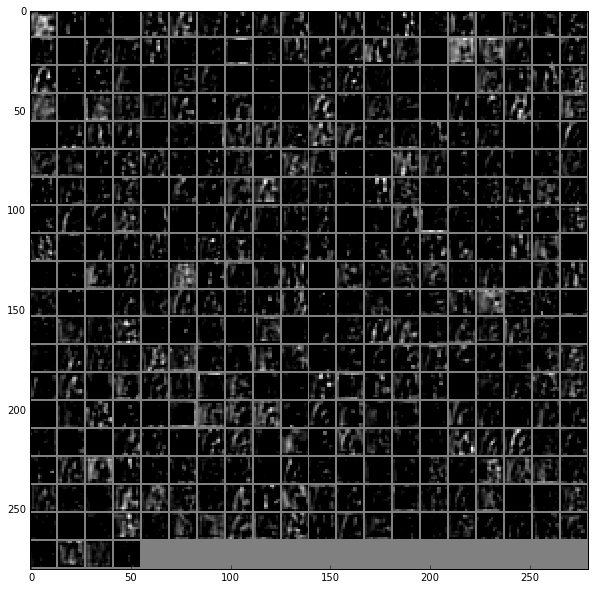
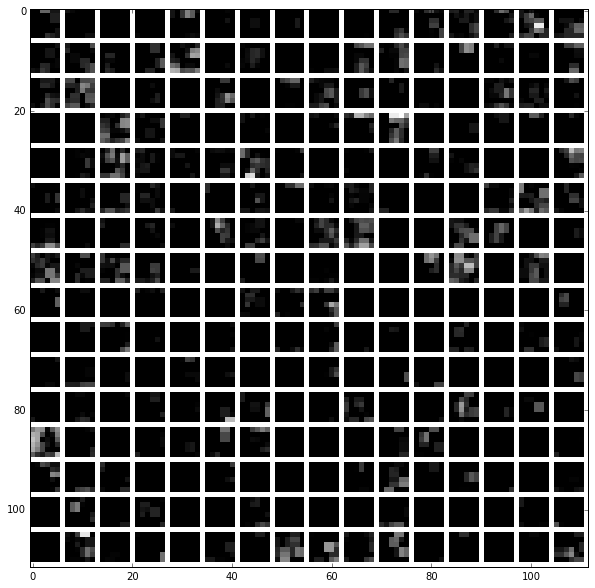
Then Compile the python file in what you needed way. Then run it step by step, you will see your image in each layer.

(7). The results can be shown in the following way:


Wang Xiao
1. install anaconda2 from: https://www.continuum.io/downloads
Note: download the version 2 not version 3 ! Or the following will always wrong !!!
2. Then install python.protobuf follow the blog from: http://www.voidcn.com/blog/woainiwss/article/p-5002715.html
(1). Download: http://protobuf.googlecode.com/files/protobuf-2.5.0.zip
(2). Unzip protobuf-2.5.0 and cd protobuf-2.5.0
(3). Do the following in the terminal
[b]make -j4
make check -j4
sudo make install [/b]
(4). cd ./python
python setup.py build
python setup.py test
python setup.py install
(5). >>python
check if you input the >> import google.protobuf , it does not inform you any error, it means everything is ok.
If your screen like the above figure, you only could try it again like me.
(6).Then, input : ipython notebook in the terminal, and a page will be opened in your Browser.
Then Compile the python file in what you needed way. Then run it step by step, you will see your image in each layer.
(7). The results can be shown in the following way:

相关文章推荐
- Python实现的KNN分类器
- python numpy中随机数生成包random
- python实现编写一个@performance,它可以打印出函数调用的时间。
- 首次开通
- python的list由多个tuple组成,如何返回每个tuple的每个元素
- python文件读写
- python 装饰器、内部函数、闭包简单理解
- python format()方法
- Python 爬百度帖吧图片
- 用分治法解决最近点对问题:python实现
- [原创]python MySQLdb在windows环境下的安装、出错问题以及解决办法
- python flask 框架后端如何获取前端的表单数据 文本 单选框 多选框
- 【leetcode】(Python)Reverse Vowels of a String实现字符串内元字符倒序
- python函数(一)
- python的多重继承
- Python, MySQLdb 编码问题 UnicodeEncodeError:'latin-1' codec can't encode character ...
- 菜鸟学python(11)list列表基本操作
- python range和xrange
- ipython and bpython
- windows环境下在python中用opencv