基于KVM的Mirantis Fuel 8.0环境搭建
2016-04-18 21:12
417 查看
目前Mirantis官网只有在VirtualBox下安装Fuel的教程和自动化部署脚本,由于我使用的虚拟化产品一直都是KVM,于是动手尝试在KVM下安装Fuel.
一、安装的大体流程:
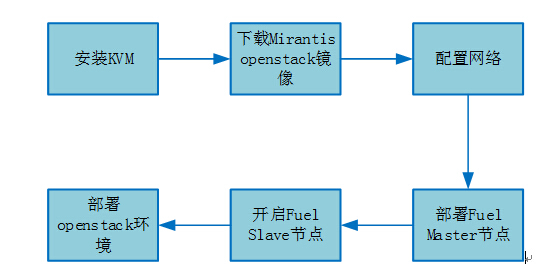
Mirantisopenstack镜像下载地址:https://www.mirantis.com
2、硬件要求:
FuelMaster节点:
OS type:Linux
CPU:2virtualCPU cores
RAM:2048+MB
HDD:64Gdynamicallyallocated
Network:2Host-onlyAdapters,1 NAT Adapter
FuelSlave 节点
os type:Linux
CPU:2virtualCPU cores
RAM:2048+MB
HDD:3disks*64G,with dynamicallydisk expansion
Network:3Host-only Adaptersr
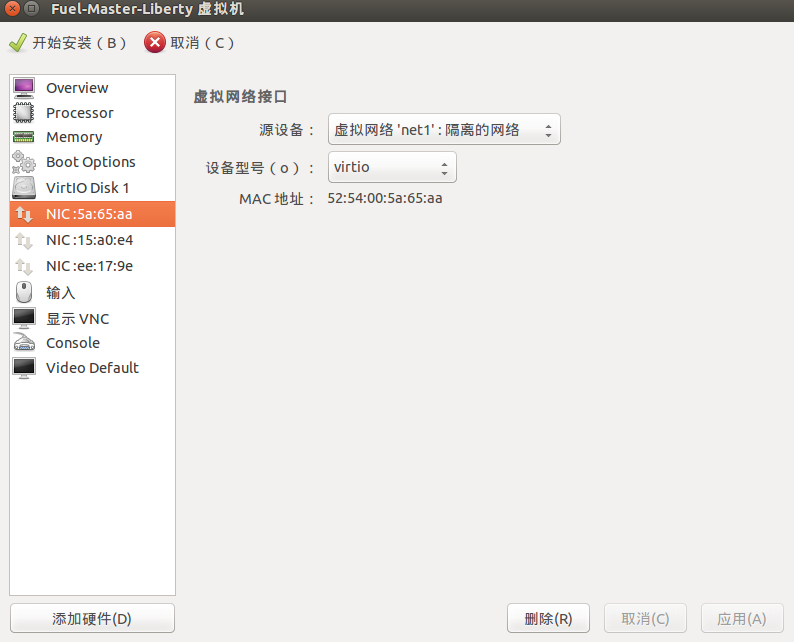
3、网络配置:
需要配置四张网卡
(1).net1----------host-only
IPv4:10.20.0.1
IPv4netmask:255.255.255.0
DHCP:disable
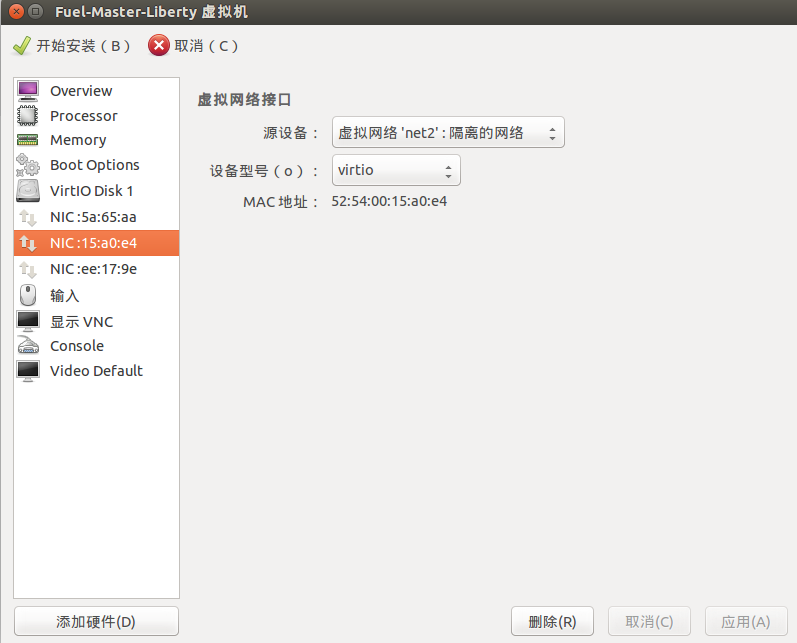
(2).net2----------host-only
IPv4:172.16.0.254
IPv4netmask:255.255.255.0
DHCP:disable
(3).net3----------host-only
IPv4:172.16.1.1
IPv4netmask:255.255.255.0
DHCP:disable
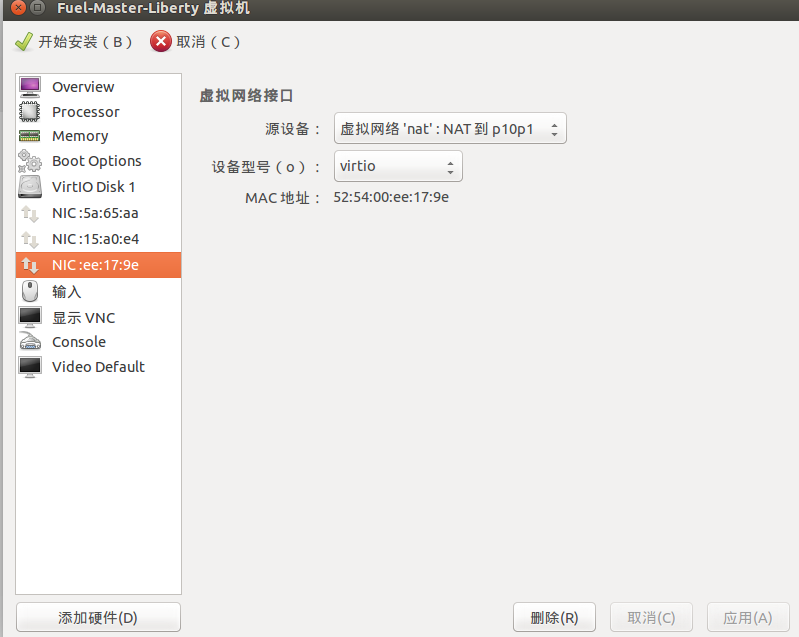
(4). net4----------nat
IPv4:192.168.122.1
IPv4netmask:255.255.255.0
DHCP:enable
具体可以参见我的配置文件:
net1.xml
<network>
<name>net1</name>
<uuid>4fd0dee2-4f4f-44b8-9795-2da597f0a1c0</uuid>
<bridgename='virbr2' stp='on' delay='0'/>
<macaddress='52:54:00:c7:49:f6'/>
<ipaddress='10.20.0.1' netmask='255.255.255.0'>
</ip>
</network>
net2.xml
<network>
<name>net2</name>
<uuid>ae479fe3-b9ef-47b0-8f61-9eb989f63fc6</uuid>
<bridgename='virbr3' stp='on' delay='0'/>
<macaddress='52:54:00:23:32:7d'/>
<ipaddress='172.16.0.254' netmask='255.255.255.0'>
</ip>
</network>
net3.xml
<network>
<name>net3</name>
<uuid>f6c1bb2e-d9b0-4f2e-82f4-4b5440f9eb13</uuid>
<bridgename='virbr4' stp='on' delay='0'/>
<macaddress='52:54:00:a5:19:e9'/>
<ipaddress='172.16.1.1' netmask='255.255.255.0'>
</ip>
</network>
nat.xml
<network>
<name>nat</name>
<uuid>20681267-0c50-4b54-8bc6-3c050af67603</uuid>
<forwarddev='p10p1' mode='nat'>
<interfacedev='p10p1'/>
</forward>
<bridgename='virbr1' stp='on' delay='0'/>
<macaddress='52:54:00:80:d0:9a'/>
<ipaddress='192.168.122.1' netmask='255.255.255.0'>
<dhcp>
<rangestart='192.168.122.128' end='192.168.122.254'/>
</dhcp>
</ip>
</network>
可以将这些xml文件拷到你的环境中,通过virsh命令创建及启动网络。
4、部署Fuel Master
在KVM中新建Master节点,按照上面的硬件要求,配置好网卡和其他硬件,然后安装。
例如我的网卡配置是这样的:
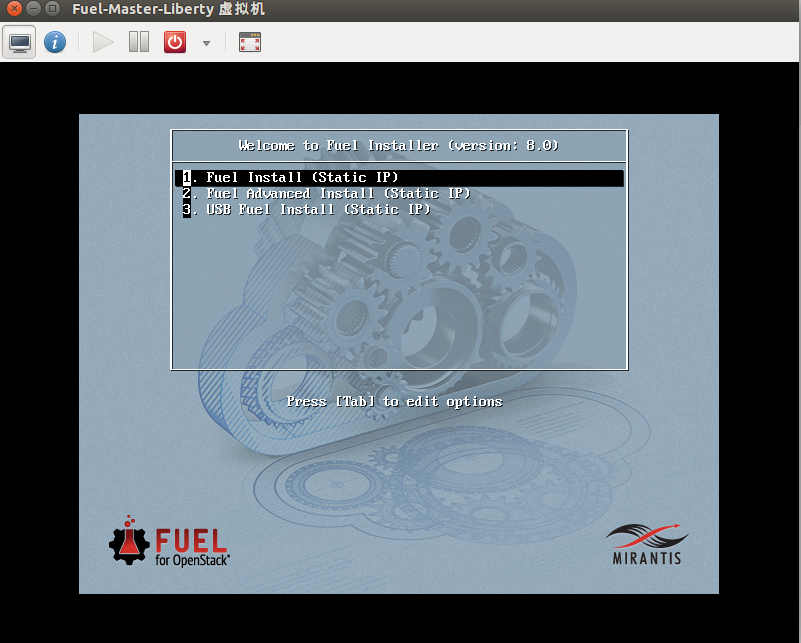
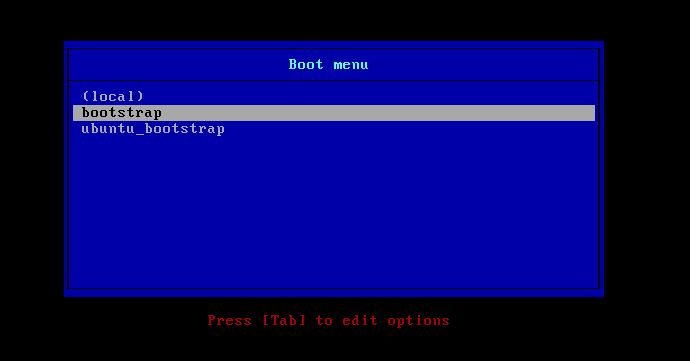
1.点击开始安装,启动Fuel虚拟机,选择第一项
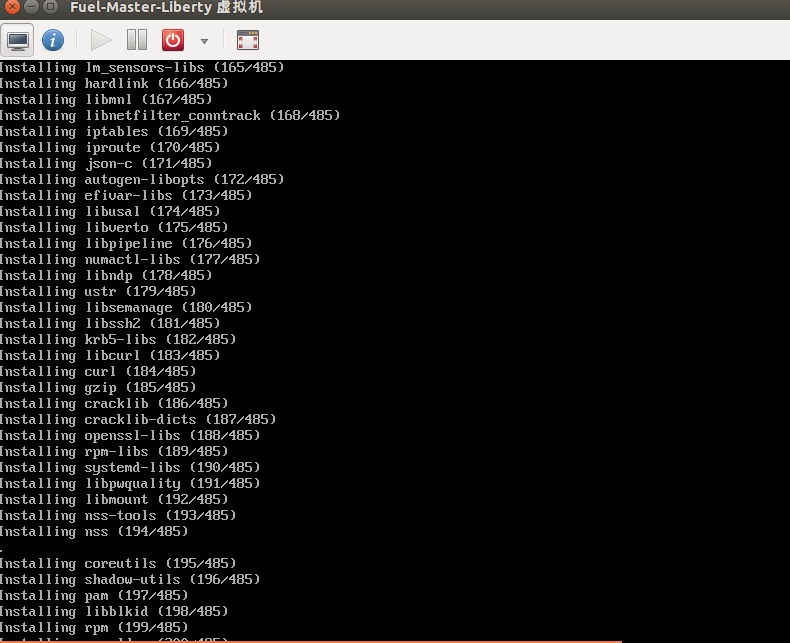
master节点将会自动安装:
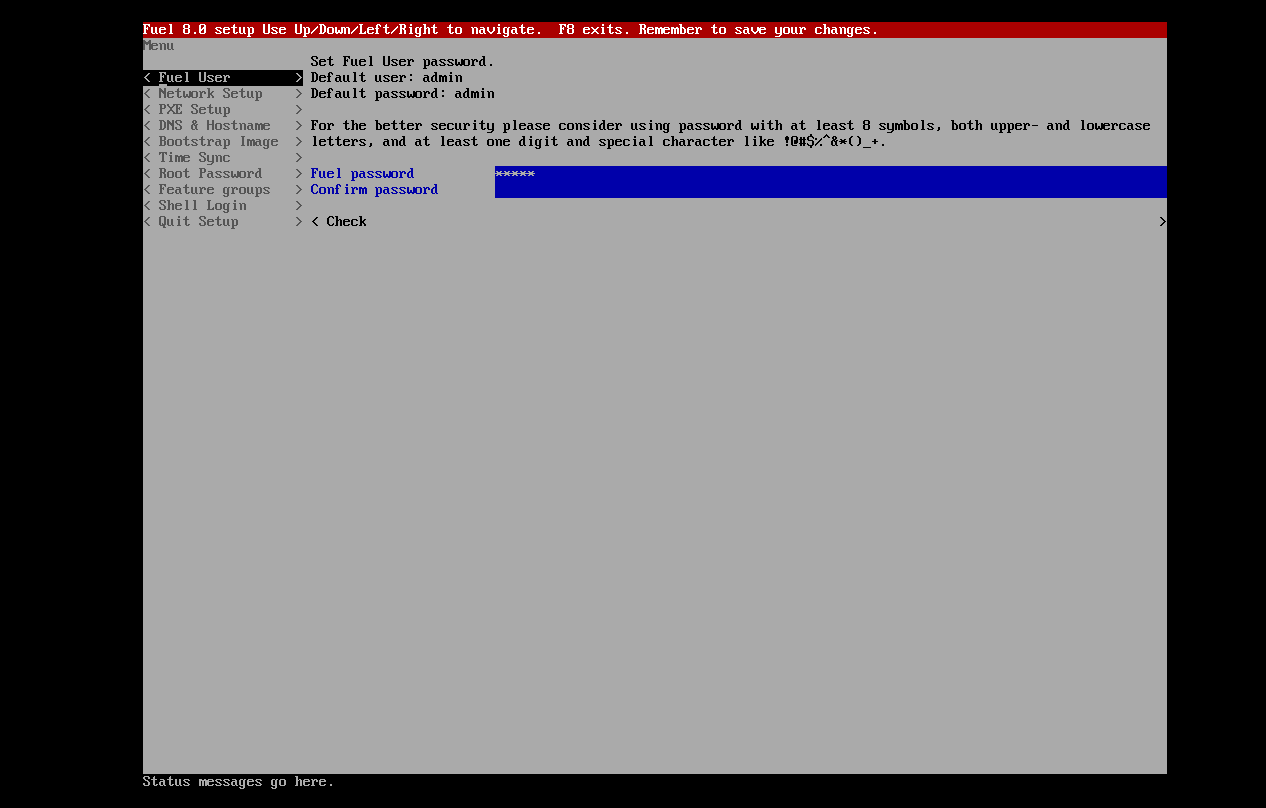
之后会自动重启,进入Fuel8.0的配置
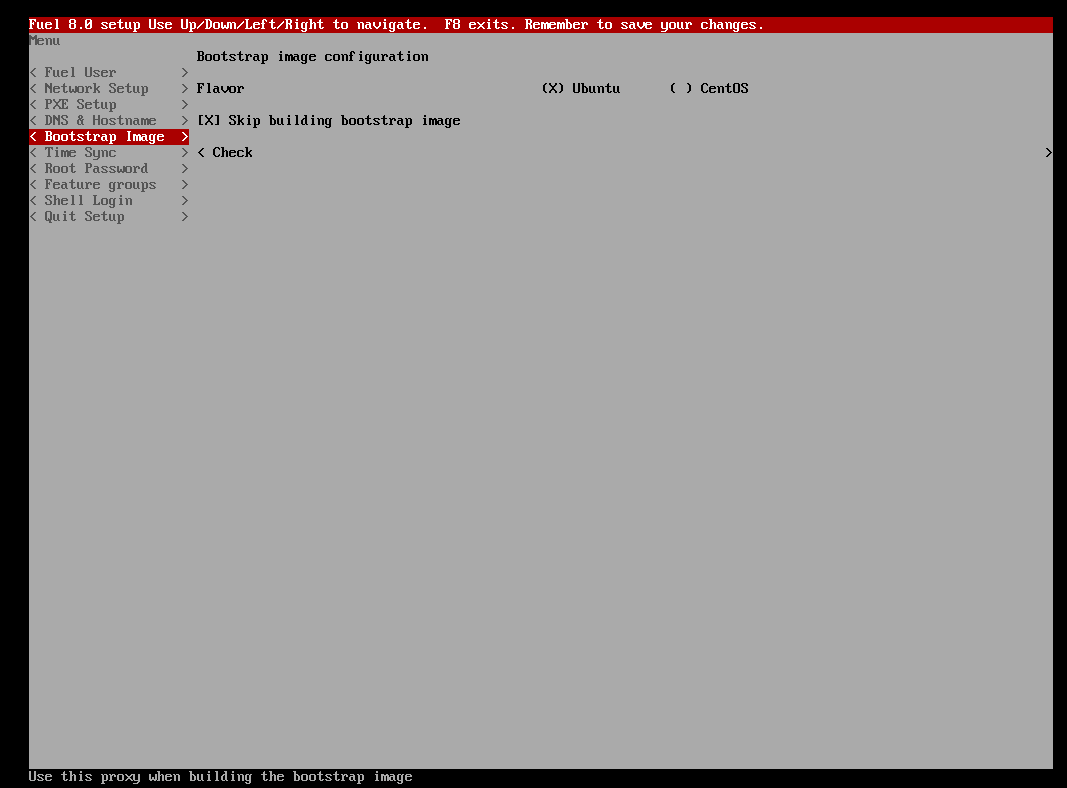
由于我已经下载好了bootstrap image,所以选择跳过build bootstrap image。如果不跳过的话,之后它会自动联网build到最新的bootstrap image,前提是master节点能够上网。

选择跳过
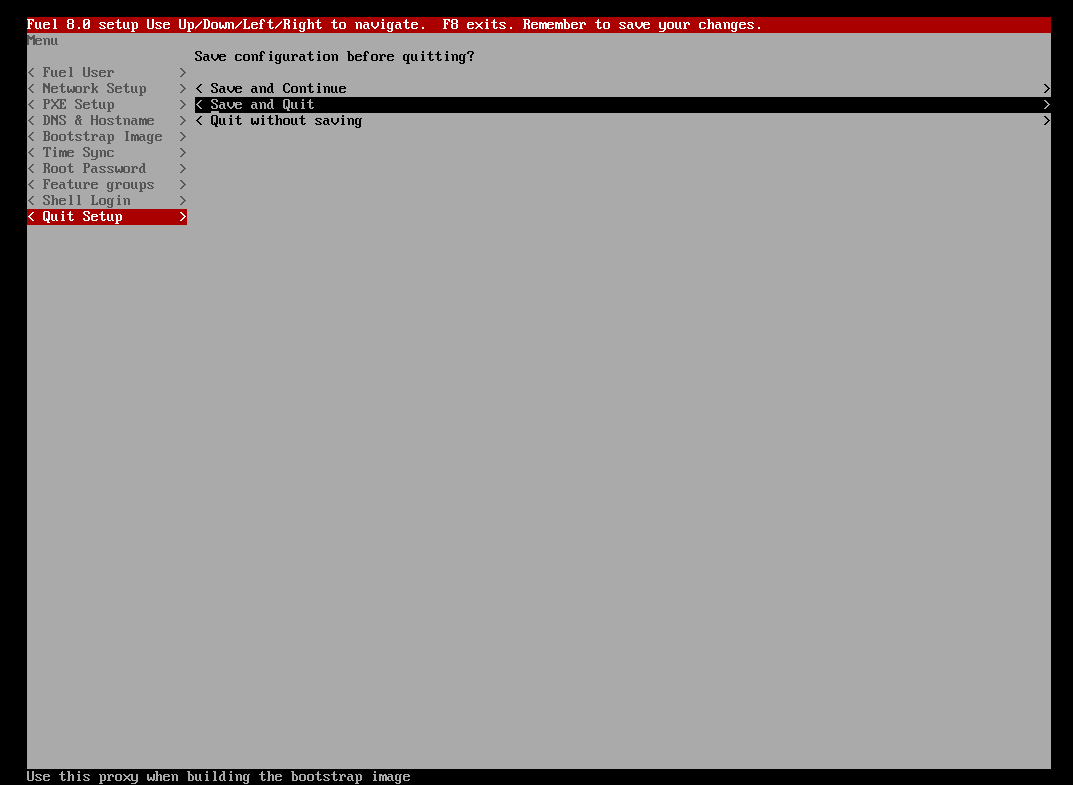
配置好之后,保存并退出,可以按F8,也可以像下面一样:
之后再等待安装完成,完成后是这个样子。
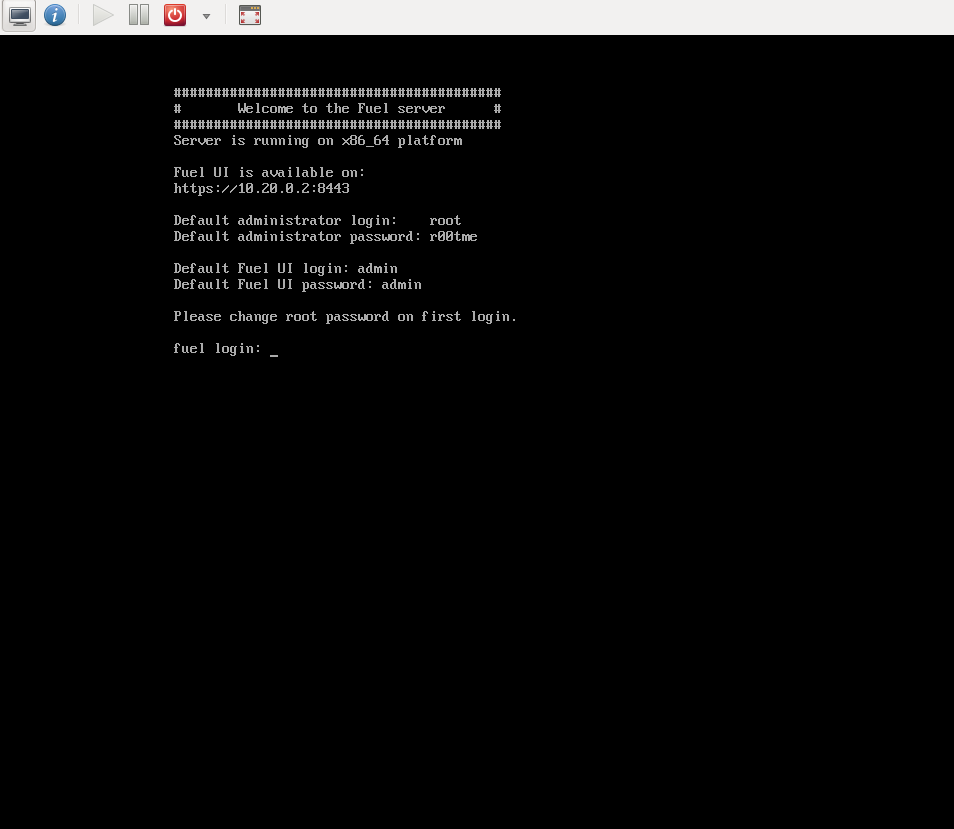
之后使用默认的用户名和密码登录,按照官方文档配置网络,具体配置命令参见官方文档,在这就不细说。主要是修改几张网卡的默认配置并使节点能够访问外网。
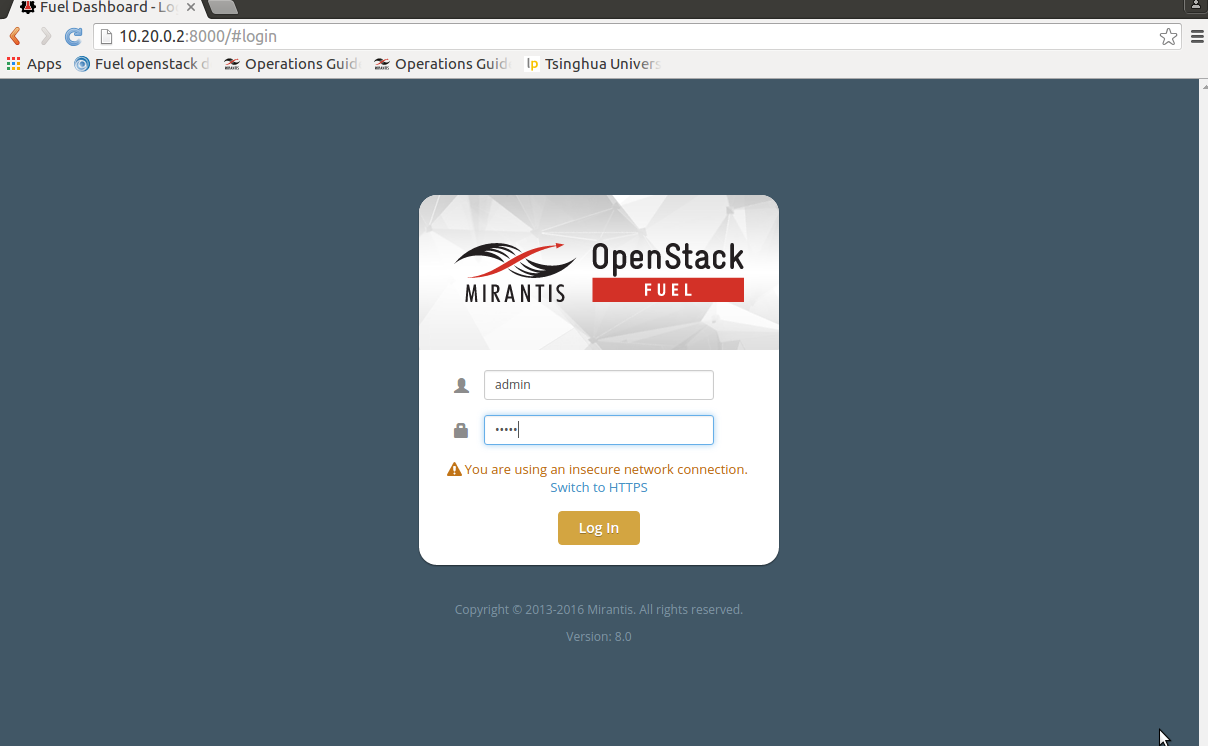
安装完成后可以通过提升的IP地址端口号以及用户名和密码登录到Fuel的管理界面。
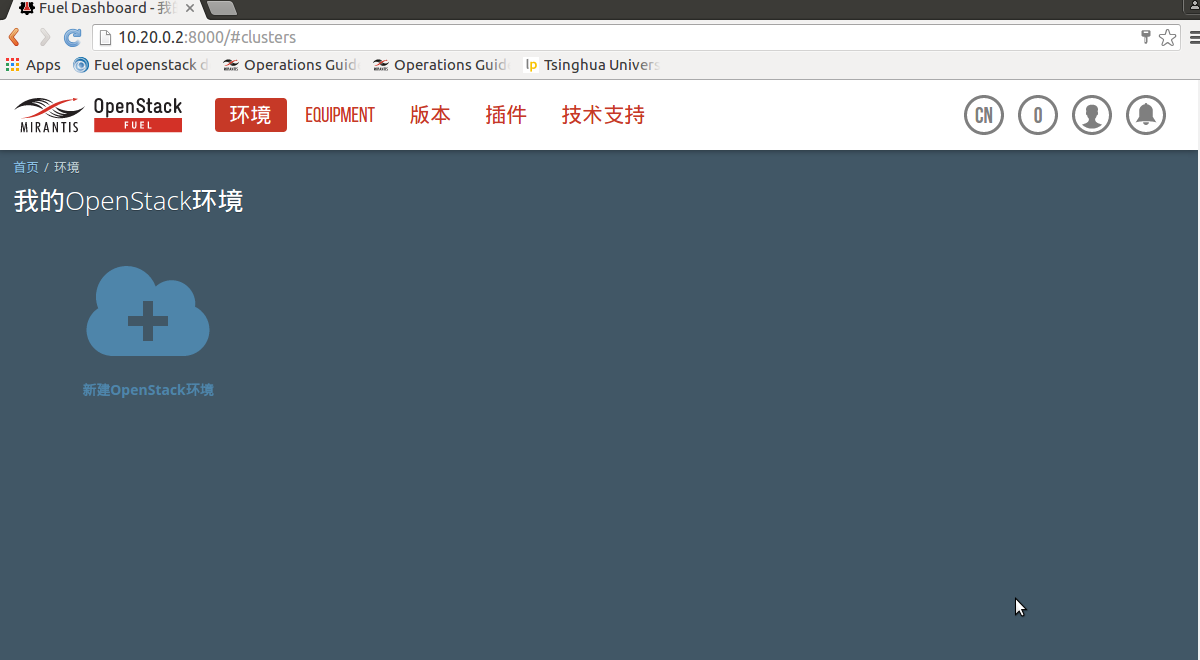
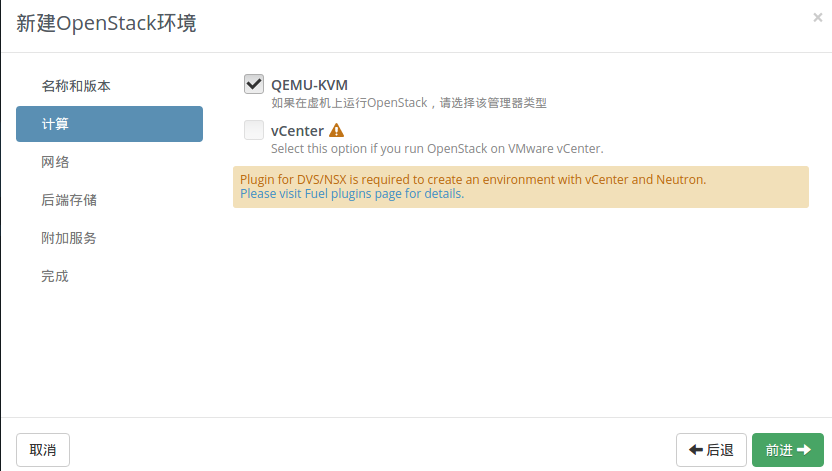
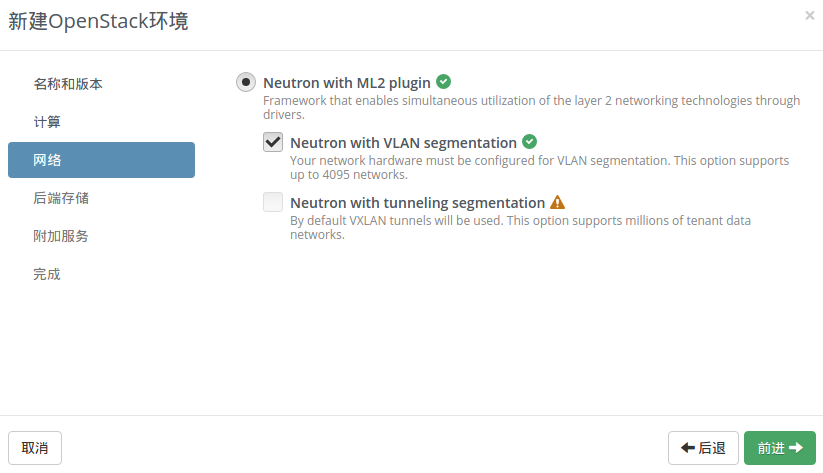
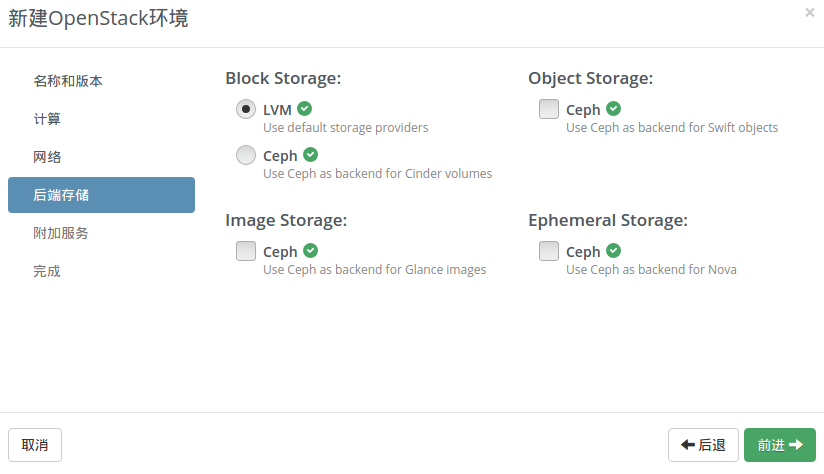
登陆后新建一个openstack环境,配置按自己要求来,我这基本走的都是默认
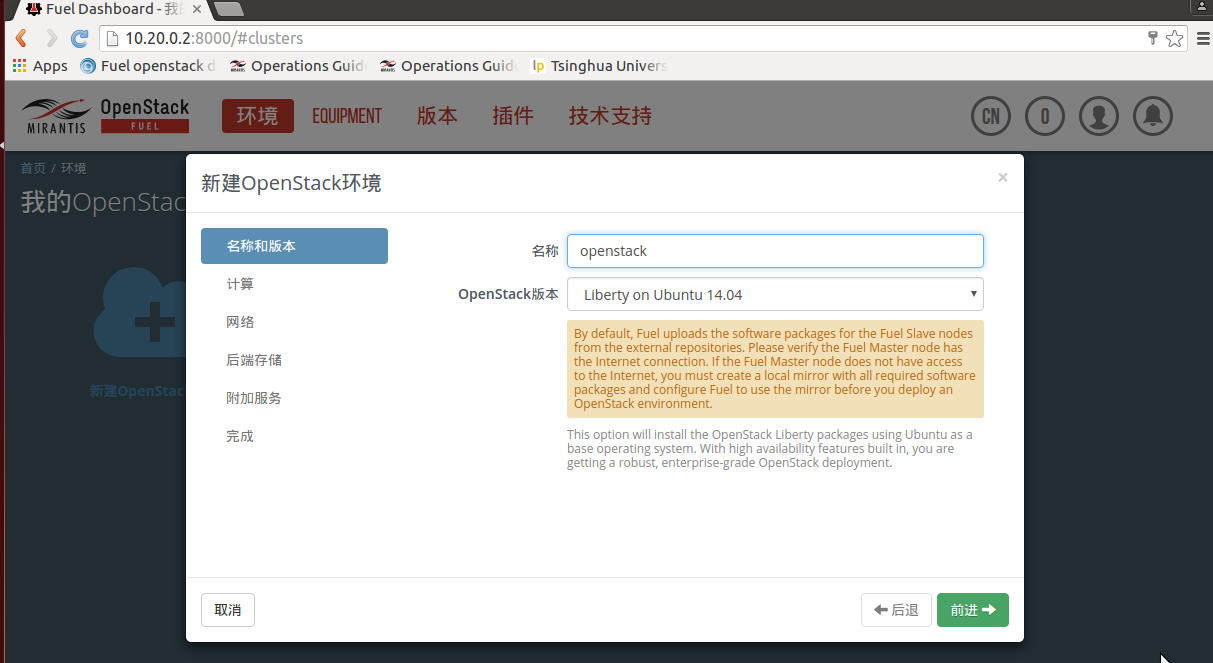
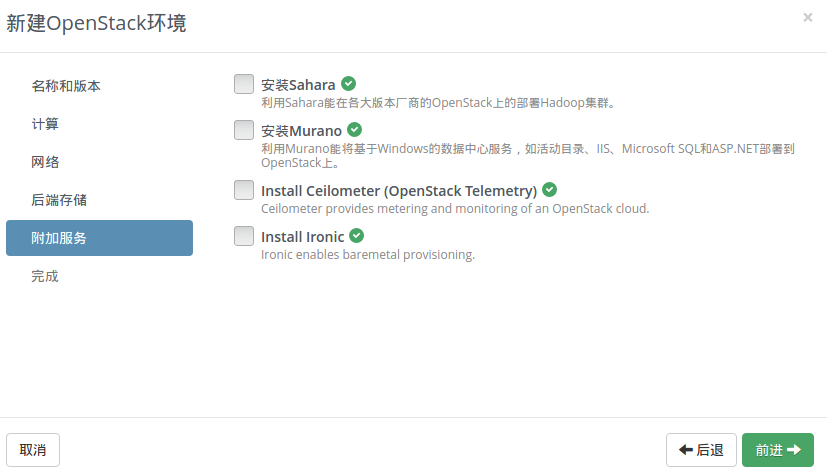
配置好后点击创建进行环境的创建
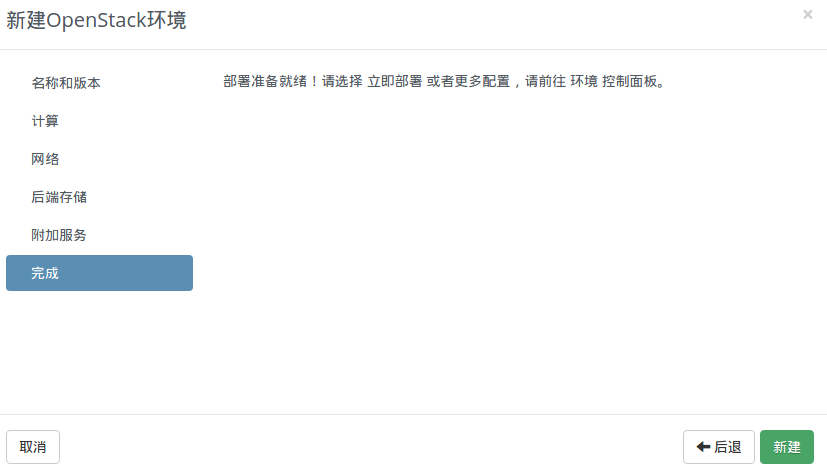
创建成功
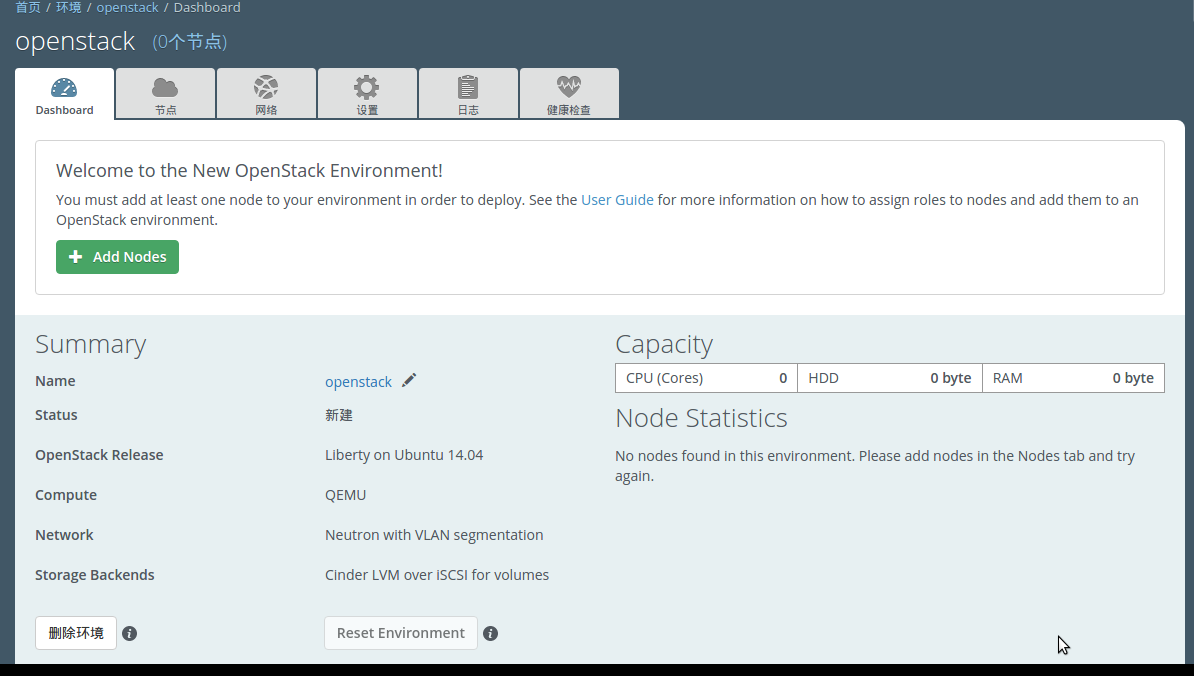
但是,刚才bootstrap build选择了跳过,所以需要手动导入。
此外,从6.1开始,Fuel的配置就离不开Repositories,要么联网安装,要么做本地源,联网安装的话实在太慢太慢了,我下载好了镜像,所以需要配置本地源。
(1).导入bootstrap image
[root@fuelhome]# ls
bootstrap.tar.gz mos8.mirrors.tar.gz
[root@fuelhome]# fuel-bootstrap list
+--------+------------+--------+
|uuid | label | status |
+--------+------------+--------+
|centos | deprecated | |
+--------+------------+--------+
[root@fuelhome]# fuel-bootstrap import bootstrap.tar.gz
Tryextract bootstrap.tar.gz to /tmp/tmpK7rXYE
Bootstrapimage 393ca81f-c5d0-4b4e-850e-f7f7267ed8a5 has been imported.
[root@fuelhome]# fuel-bootstrap list
+--------------------------------------+--------------------------------------+--------+
|uuid |label |status |
+--------------------------------------+--------------------------------------+--------+
|393ca81f-c5d0-4b4e-850e-f7f7267ed8a5 | 393ca81f-c5d0-4b4e-850e-f7f7267ed8a5| |
|centos |deprecated | |
+--------------------------------------+--------------------------------------+--------+
[root@fuelhome]# fuel-bootstrap activate 393ca81f-c5d0-4b4e-850e-f7f7267ed8a5
Startingnew HTTP connection (1): 10.20.0.2
Startingnew HTTP connection (1): 10.20.0.2
Startingnew HTTP connection (1): 10.20.0.2
Startingnew HTTP connection (1): 10.20.0.2
Bootstrapimage 393ca81f-c5d0-4b4e-850e-f7f7267ed8a5 has been activated.
[root@fuelhome]# fuel-bootstrap list
+--------------------------------------+--------------------------------------+--------+
|uuid |label |status |
+--------------------------------------+--------------------------------------+--------+
|393ca81f-c5d0-4b4e-850e-f7f7267ed8a5 | 393ca81f-c5d0-4b4e-850e-f7f7267ed8a5 |active |
|centos |deprecated | |
+--------------------------------------+--------------------------------------+--------+
(2)配置本地源
[root@fuel nailgun]# ls
bootstrap bootstraps centos docker dump extra-repos liberty-8.0 mos8.mirrors.tar.gz mos-centos targetimages ubuntu
[root@fuel nailgun]# tar -zxvf mos8.mirrors.tar.gz
[root@fuel nailgun]# ls
bootstrap bootstraps centos docker dump extra-repos liberty-8.0 mirrors mos8.mirrors.tar.gz mos-centos targetimages ubuntu
[root@fuel nailgun]# fuel-createmirror
This script is DEPRECATED. Please use fuel-mirrorutility!
Starting new HTTP connection (1): 10.20.0.2
Starting new HTTP connection (1): 10.20.0.2
Starting new HTTP connection (1): 10.20.0.2
Starting new HTTP connection (1): 10.20.0.2
.........
.........
.........
Starting new HTTP connection (1): 10.20.0.2
Starting new HTTP connection (1): 10.20.0.2
Starting new HTTP connection (1): 10.20.0.2
Starting new HTTP connection (1): 10.20.0.2
Updating the Cluster repositories...
Try to update the Cluster 'openstack'
Updating the default repositories...
Try to update the Release 'Liberty on Ubuntu 14.04'
Operations have been completed successfully.
这就终于完成了所有的准备工作,接下来可以开启slave节点部署openstack环境了。
启动控制节点和计算节点。
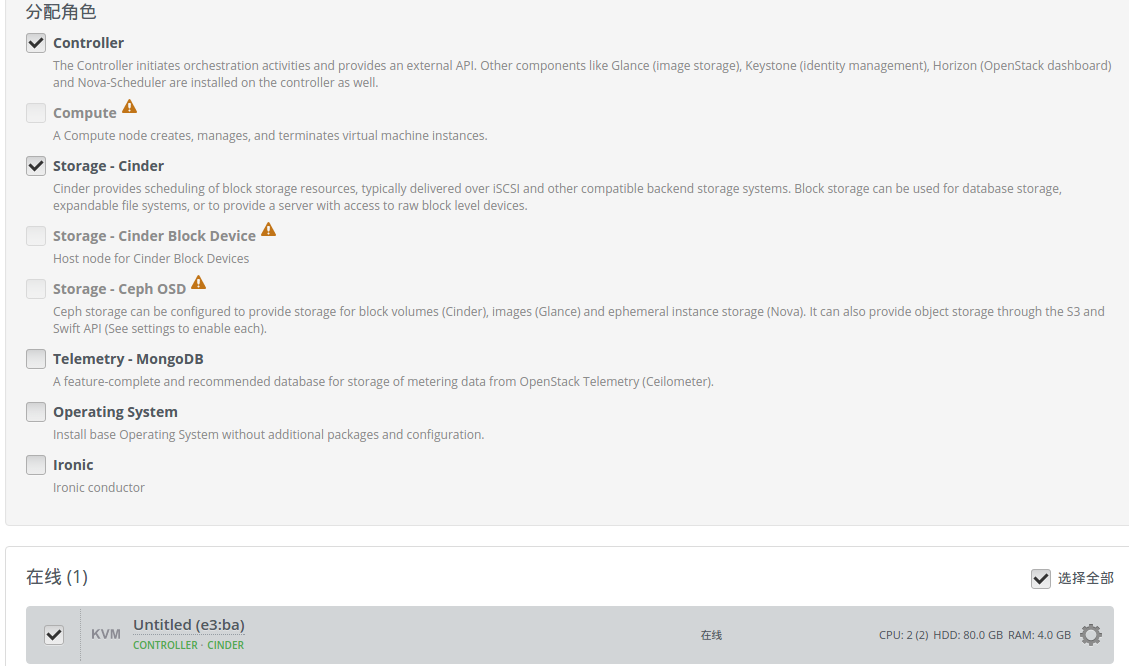
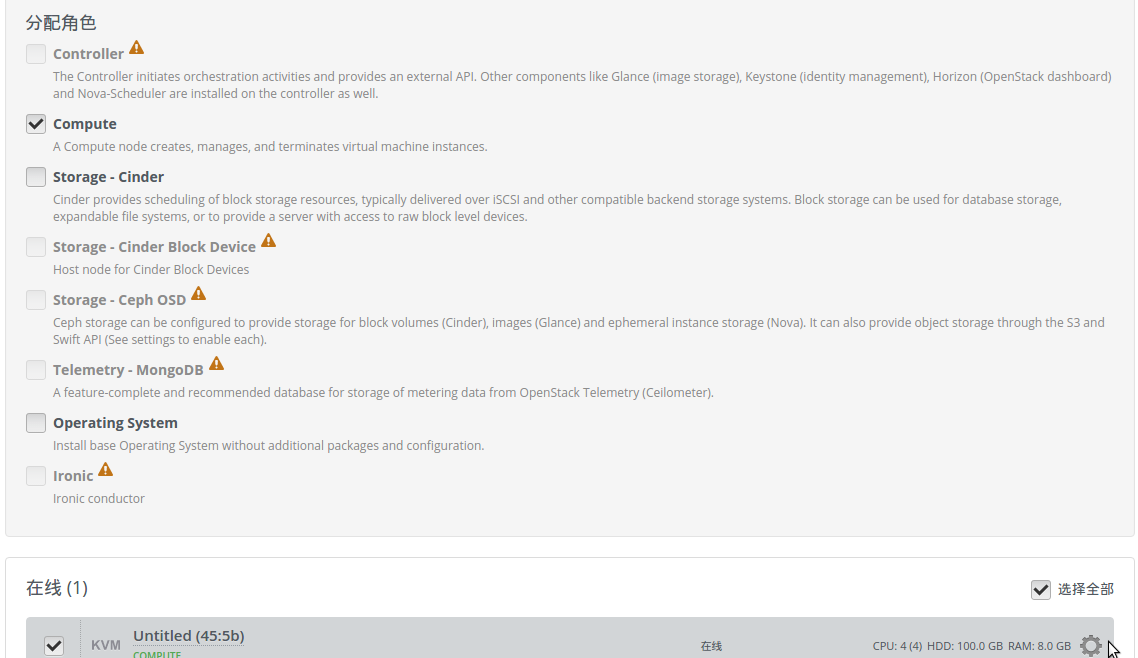
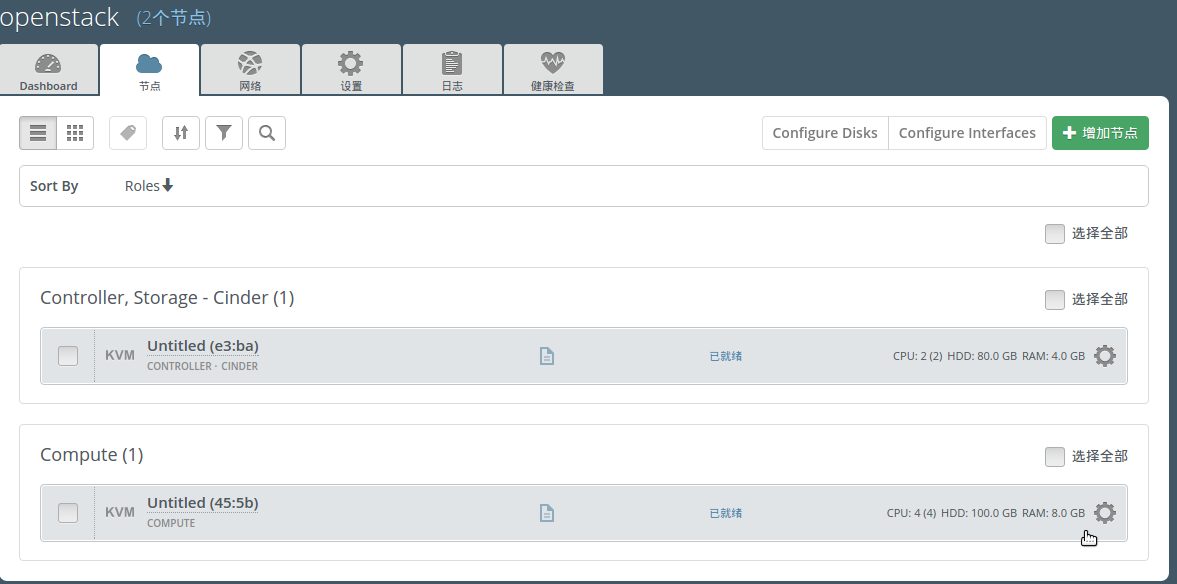
添加控制节点和计算节点
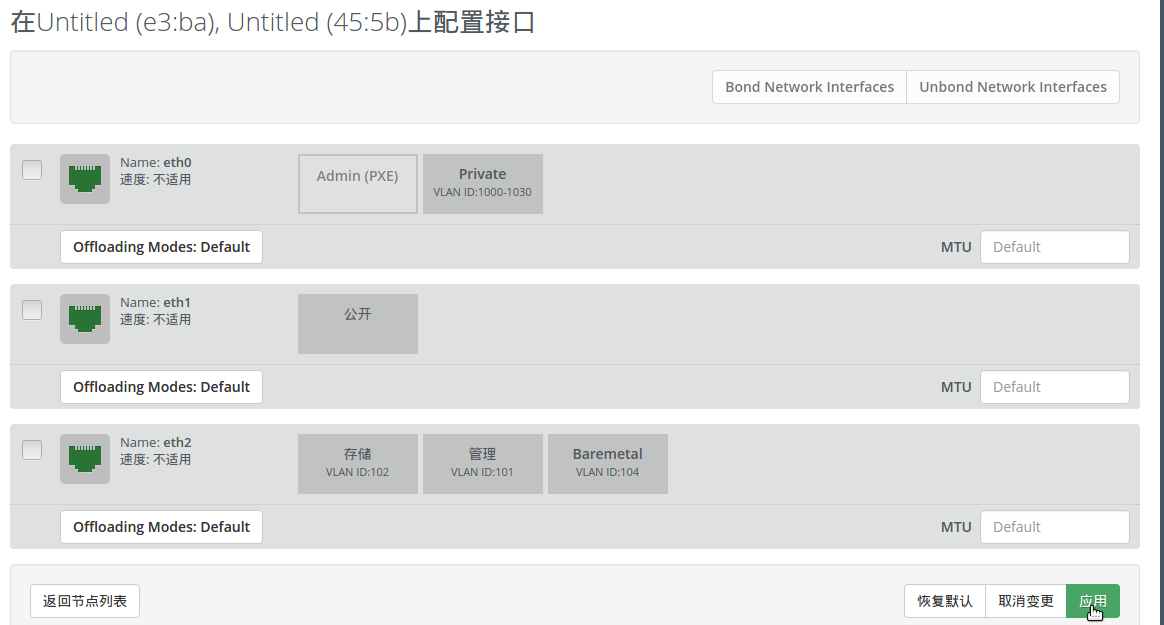
配置网卡
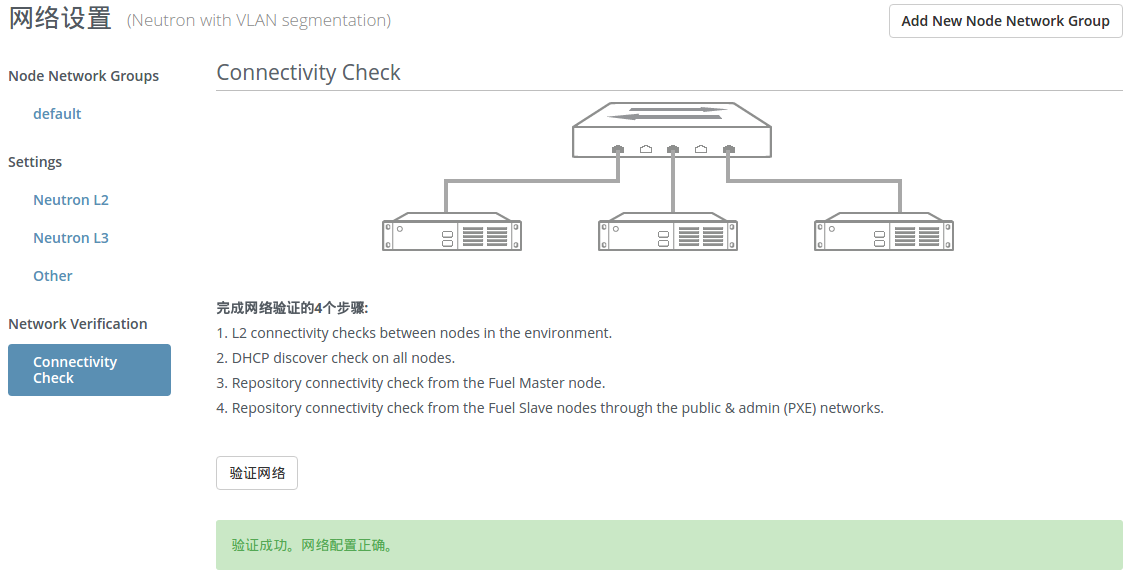
验证网络
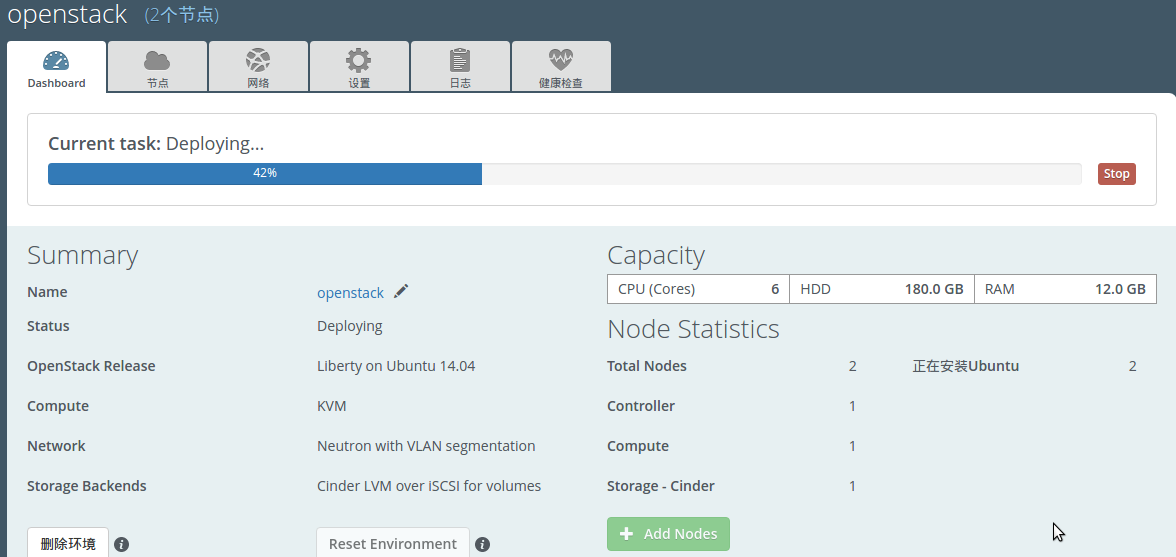
开始部署,这里的警告可以忽略,因为高可用要求至少三个controller,我这只有一个。

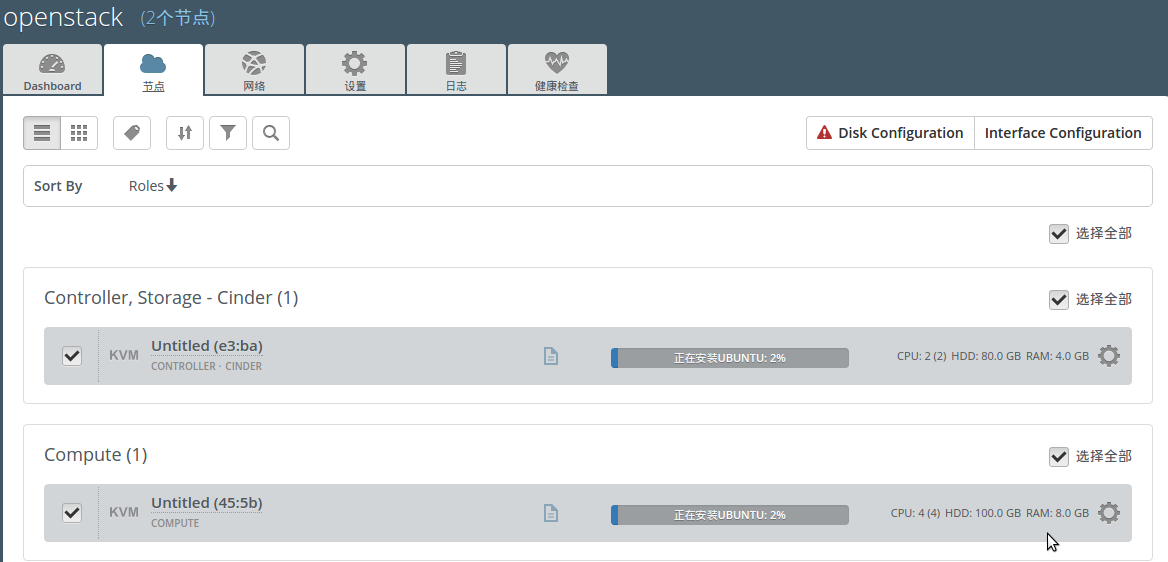
开始安装Ubuntu系统,接下来进入等待
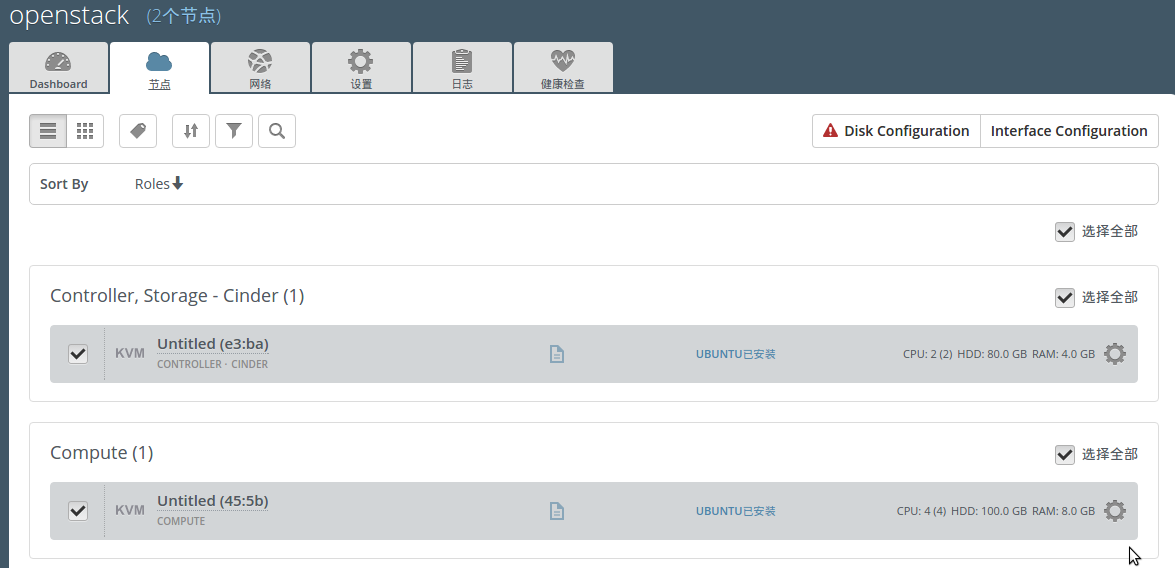
完成Ubuntu系统的安装
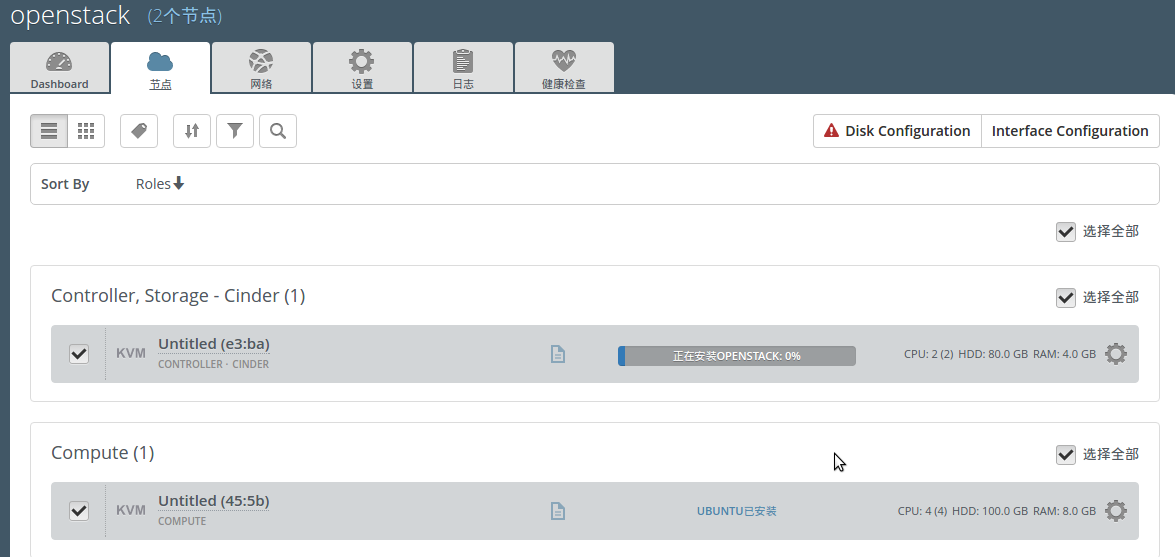
开始安装openstack
完成openstack的安装
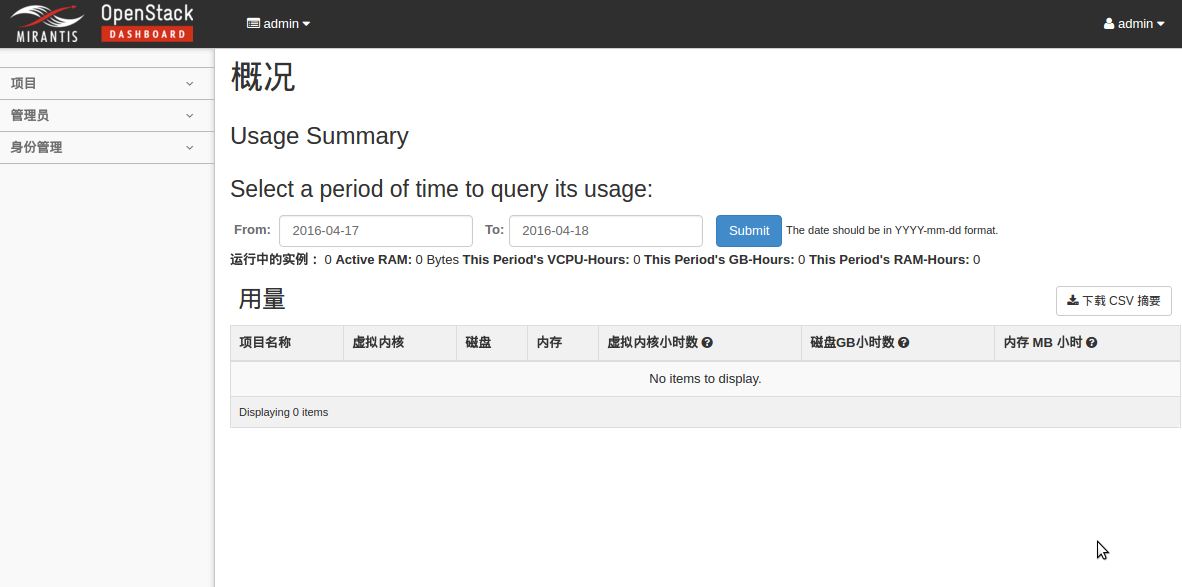
回到Dashboard,点击Horizon转到openstack horizon
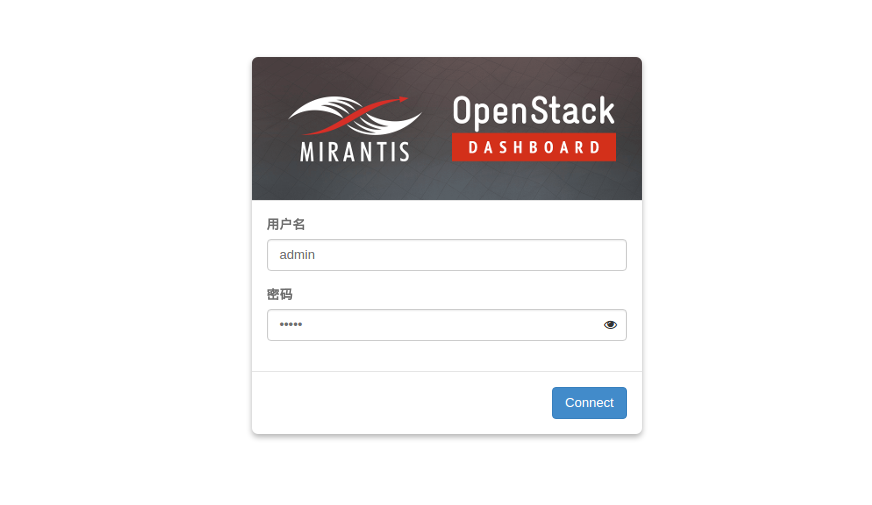
输入用户名密码登录

整个过程完成,接下来就可以尽情的使用了。
一、安装的大体流程:
Mirantisopenstack镜像下载地址:https://www.mirantis.com
2、硬件要求:
FuelMaster节点:
OS type:Linux
CPU:2virtualCPU cores
RAM:2048+MB
HDD:64Gdynamicallyallocated
Network:2Host-onlyAdapters,1 NAT Adapter
FuelSlave 节点
os type:Linux
CPU:2virtualCPU cores
RAM:2048+MB
HDD:3disks*64G,with dynamicallydisk expansion
Network:3Host-only Adaptersr
3、网络配置:
需要配置四张网卡
(1).net1----------host-only
IPv4:10.20.0.1
IPv4netmask:255.255.255.0
DHCP:disable
(2).net2----------host-only
IPv4:172.16.0.254
IPv4netmask:255.255.255.0
DHCP:disable
(3).net3----------host-only
IPv4:172.16.1.1
IPv4netmask:255.255.255.0
DHCP:disable
(4). net4----------nat
IPv4:192.168.122.1
IPv4netmask:255.255.255.0
DHCP:enable
具体可以参见我的配置文件:
net1.xml
<network>
<name>net1</name>
<uuid>4fd0dee2-4f4f-44b8-9795-2da597f0a1c0</uuid>
<bridgename='virbr2' stp='on' delay='0'/>
<macaddress='52:54:00:c7:49:f6'/>
<ipaddress='10.20.0.1' netmask='255.255.255.0'>
</ip>
</network>
net2.xml
<network>
<name>net2</name>
<uuid>ae479fe3-b9ef-47b0-8f61-9eb989f63fc6</uuid>
<bridgename='virbr3' stp='on' delay='0'/>
<macaddress='52:54:00:23:32:7d'/>
<ipaddress='172.16.0.254' netmask='255.255.255.0'>
</ip>
</network>
net3.xml
<network>
<name>net3</name>
<uuid>f6c1bb2e-d9b0-4f2e-82f4-4b5440f9eb13</uuid>
<bridgename='virbr4' stp='on' delay='0'/>
<macaddress='52:54:00:a5:19:e9'/>
<ipaddress='172.16.1.1' netmask='255.255.255.0'>
</ip>
</network>
nat.xml
<network>
<name>nat</name>
<uuid>20681267-0c50-4b54-8bc6-3c050af67603</uuid>
<forwarddev='p10p1' mode='nat'>
<interfacedev='p10p1'/>
</forward>
<bridgename='virbr1' stp='on' delay='0'/>
<macaddress='52:54:00:80:d0:9a'/>
<ipaddress='192.168.122.1' netmask='255.255.255.0'>
<dhcp>
<rangestart='192.168.122.128' end='192.168.122.254'/>
</dhcp>
</ip>
</network>
可以将这些xml文件拷到你的环境中,通过virsh命令创建及启动网络。
4、部署Fuel Master
在KVM中新建Master节点,按照上面的硬件要求,配置好网卡和其他硬件,然后安装。
例如我的网卡配置是这样的:
1.点击开始安装,启动Fuel虚拟机,选择第一项
master节点将会自动安装:
之后会自动重启,进入Fuel8.0的配置
由于我已经下载好了bootstrap image,所以选择跳过build bootstrap image。如果不跳过的话,之后它会自动联网build到最新的bootstrap image,前提是master节点能够上网。
选择跳过
配置好之后,保存并退出,可以按F8,也可以像下面一样:
之后再等待安装完成,完成后是这个样子。
之后使用默认的用户名和密码登录,按照官方文档配置网络,具体配置命令参见官方文档,在这就不细说。主要是修改几张网卡的默认配置并使节点能够访问外网。
安装完成后可以通过提升的IP地址端口号以及用户名和密码登录到Fuel的管理界面。
登陆后新建一个openstack环境,配置按自己要求来,我这基本走的都是默认
配置好后点击创建进行环境的创建
创建成功
但是,刚才bootstrap build选择了跳过,所以需要手动导入。
此外,从6.1开始,Fuel的配置就离不开Repositories,要么联网安装,要么做本地源,联网安装的话实在太慢太慢了,我下载好了镜像,所以需要配置本地源。
(1).导入bootstrap image
[root@fuelhome]# ls
bootstrap.tar.gz mos8.mirrors.tar.gz
[root@fuelhome]# fuel-bootstrap list
+--------+------------+--------+
|uuid | label | status |
+--------+------------+--------+
|centos | deprecated | |
+--------+------------+--------+
[root@fuelhome]# fuel-bootstrap import bootstrap.tar.gz
Tryextract bootstrap.tar.gz to /tmp/tmpK7rXYE
Bootstrapimage 393ca81f-c5d0-4b4e-850e-f7f7267ed8a5 has been imported.
[root@fuelhome]# fuel-bootstrap list
+--------------------------------------+--------------------------------------+--------+
|uuid |label |status |
+--------------------------------------+--------------------------------------+--------+
|393ca81f-c5d0-4b4e-850e-f7f7267ed8a5 | 393ca81f-c5d0-4b4e-850e-f7f7267ed8a5| |
|centos |deprecated | |
+--------------------------------------+--------------------------------------+--------+
[root@fuelhome]# fuel-bootstrap activate 393ca81f-c5d0-4b4e-850e-f7f7267ed8a5
Startingnew HTTP connection (1): 10.20.0.2
Startingnew HTTP connection (1): 10.20.0.2
Startingnew HTTP connection (1): 10.20.0.2
Startingnew HTTP connection (1): 10.20.0.2
Bootstrapimage 393ca81f-c5d0-4b4e-850e-f7f7267ed8a5 has been activated.
[root@fuelhome]# fuel-bootstrap list
+--------------------------------------+--------------------------------------+--------+
|uuid |label |status |
+--------------------------------------+--------------------------------------+--------+
|393ca81f-c5d0-4b4e-850e-f7f7267ed8a5 | 393ca81f-c5d0-4b4e-850e-f7f7267ed8a5 |active |
|centos |deprecated | |
+--------------------------------------+--------------------------------------+--------+
(2)配置本地源
[root@fuel nailgun]# ls
bootstrap bootstraps centos docker dump extra-repos liberty-8.0 mos8.mirrors.tar.gz mos-centos targetimages ubuntu
[root@fuel nailgun]# tar -zxvf mos8.mirrors.tar.gz
[root@fuel nailgun]# ls
bootstrap bootstraps centos docker dump extra-repos liberty-8.0 mirrors mos8.mirrors.tar.gz mos-centos targetimages ubuntu
[root@fuel nailgun]# fuel-createmirror
This script is DEPRECATED. Please use fuel-mirrorutility!
Starting new HTTP connection (1): 10.20.0.2
Starting new HTTP connection (1): 10.20.0.2
Starting new HTTP connection (1): 10.20.0.2
Starting new HTTP connection (1): 10.20.0.2
.........
.........
.........
Starting new HTTP connection (1): 10.20.0.2
Starting new HTTP connection (1): 10.20.0.2
Starting new HTTP connection (1): 10.20.0.2
Starting new HTTP connection (1): 10.20.0.2
Updating the Cluster repositories...
Try to update the Cluster 'openstack'
Updating the default repositories...
Try to update the Release 'Liberty on Ubuntu 14.04'
Operations have been completed successfully.
这就终于完成了所有的准备工作,接下来可以开启slave节点部署openstack环境了。
启动控制节点和计算节点。
添加控制节点和计算节点
配置网卡
验证网络
开始部署,这里的警告可以忽略,因为高可用要求至少三个controller,我这只有一个。
开始安装Ubuntu系统,接下来进入等待
完成Ubuntu系统的安装
开始安装openstack
完成openstack的安装
回到Dashboard,点击Horizon转到openstack horizon
输入用户名密码登录
整个过程完成,接下来就可以尽情的使用了。

相关文章推荐
- 学习笔记(三)UI开发之一
- LinkedBlockingQueue(lbq)阻塞队列
- request和response
- leetcode 63. Unique Paths II
- ue4 Skeletal Mesh编辑器
- UIButton 的edgeInsets研究
- UIEdgeInsets 说明
- iOS--错误集锦--Failed to instantiate the default view controller for UIMainStoryboardFile 'Main'
- NJUST1925 sequence(贪心+二分)
- 关于使用百度富文本编辑器UE重新加载数据的问题
- String、StringBuffer与StringBuilder之间区别
- UIScrollView 遇到的小坑
- hailstone sequence
- 南京理工大学校外赛sequence
- Code Sign error: No matching provisioning profile found: Your build settings specify a provisioni.
- hdu 5667 Sequence (矩阵快速幂)
- 十大滤波算法程序大全(Arduino精编无错版)
- Qt Creator needs a compiler set up to build. Configure a compiler in the kit options.解决
- [Trie树] BZOJ 1819 [JSOI]Word Query电子字典
- protobuf的Required,Optional,Repeated限定修饰符