AndroidUI之注册界面的实现分析
2016-04-07 21:23
627 查看
一:界面效果图

二:注册界面的布局
1、activity_string.xmlStep1:首先准备好图片资源和所需要的文字资源,如下图所示:
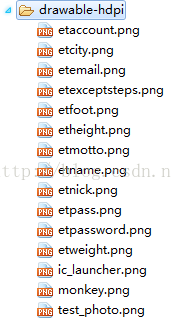
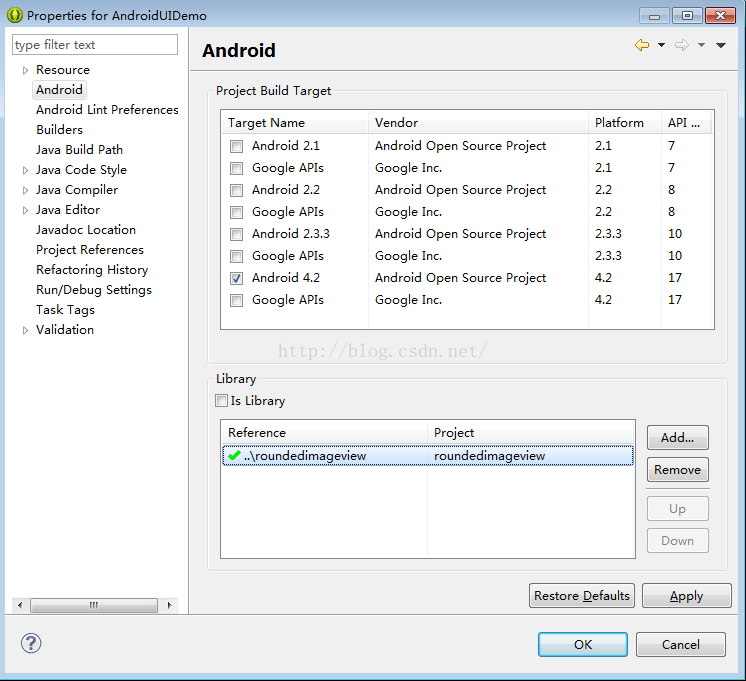
<string name="etAccountrHint">账号</string>
<string name="etNickHint">昵称</string>
<string name="etPasswordHint">密码</string>
<string name="etMotto">座右铭(不多于8个字)</string>
<string name="etEmail">邮箱(**@**.com)</string>
<string name="etCity">城市</string>
<string name="etStep">步长(cm)</string>
<string name="etHeight">身高(cm)</string>
<string name="etWeight">体重(kg)</string>
<string name="etExceptSteps">期望运动量(步/日)</string>
<string name="tvRegistFinish">哎,终于填完资料了,真不容易,谢谢亲的支持,么么哒</string>
<string name="title_activity_regist">RegistActivity</string>
<string name="btnregiste">注册</string>
Step2:由于注册界面内容很多,一屏幕显示不下,所以最外层使用ScrollView控件,当控件显示不开时会出现垂直方向的滚动条。ScrollView里面嵌入LinearLayout容器,第一个控件是使用了一个开源框架静态圆角图片,首先需要导入开源框架项目roundimageview容器,右击该项目,选择Bulid path->config bulid path->Android。发现该项目是作为Library存在的。
接下来右击当前的项目,选择Builld path->config build path->Android->Add,添加刚刚导入的开源框架库。
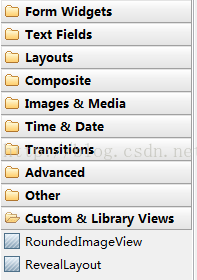
通过以上两步后,进入布局视图界面,点击Custom & Library Views组中的RoundedImageView组件中的Refresh按钮,就会发现多了一个自定义的RoundedImageView控件,使用方法同其他组件.
<com.makeramen.roundedimageview.RoundedImageView
xmlns:app="http://schemas.android.com/apk/res-auto"
android:id="@+id/roundImage_head"
android:layout_width="80dp"
android:layout_height="80dp"
android:layout_gravity="center_horizontal"
android:gravity="center_horizontal"
android:onClick="changePhoto"
android:src="@drawable/test_photo"
app:riv_border_color="#333333"
app:riv_border_width="3dip"
app:riv_corner_radius="10dip"
app:riv_mutate_background="true"
app:riv_oval="true" />下面的控件都是能够录入的常规信息的EditText控件。

常规信息下面的横线如何生成的呢?
<View
android:layout_width="match_parent"
android:layout_height="2dp"
android:background="@android:color/darker_gray" /> 最后注册按钮为了点击时具有水滴效果,在应用包下建立util子包,加入一个工具类RevealLayout,它同样是作为自定义组件可以直接拖过来用。
<cn.edu.bztc.walkersimulate.util.RevealLayout
android:layout_width="match_parent"
android:layout_height="wrap_content" >
<Button
android:layout_width="match_parent"
android:layout_height="wrap_content"
android:gravity="center"
android:background="@drawable/btn_shape"
android:layout_marginTop="5dp"
android:text="@string/btnregiste" >
</Button>
</cn.edu.bztc.walkersimulate.util.RevealLayout> 完整的布局代码如下所示:
<ScrollView xmlns:tools="http://schemas.android.com/tools"
android:layout_width="match_parent"
android:layout_height="match_parent"
android:background="@drawable/loginbg"
android:orientation="vertical" xmlns:android="http://schemas.android.com/apk/res/android">
<LinearLayout
android:layout_width="match_parent"
android:layout_height="wrap_content"
android:background="@drawable/loginbg"
android:orientation="vertical"
android:padding="10dp"
tools:context=".MainActivity"
>
<com.makeramen.roundedimageview.RoundedImageView
xmlns:app="http://schemas.android.com/apk/res-auto"
android:id="@+id/roundImage_head"
android:layout_width="80dp"
android:layout_height="80dp"
android:layout_gravity="center_horizontal"
android:gravity="center_horizontal"
android:onClick="changePhoto"
android:src="@drawable/test_photo"
app:riv_border_color="#333333"
app:riv_border_width="3dip"
app:riv_corner_radius="10dip"
app:riv_mutate_background="true"
app:riv_oval="true" />
<EditText
android:id="@+id/etAccount "
android:layout_width="match_parent"
android:layout_height="wrap_content"
android:layout_marginTop="5dp"
android:background="@android:drawable/edit_text"
android:drawableLeft="@drawable/etaccount"
android:ems="10"
android:hint="@string/etAccountrHint"
>
</EditText>
<EditText
android:id="@+id/etNick"
android:layout_width="match_parent"
android:layout_height="wrap_content"
android:background="@android:drawable/edit_text"
android:drawableLeft="@drawable/etnick"
android:ems="10"
android:hint="@string/etNickHint" />
<EditText
android:id="@+id/etPassword"
android:layout_width="match_parent"
android:layout_height="wrap_content"
android:background="@android:drawable/edit_text"
android:drawableLeft="@drawable/etpassword"
android:ems="10"
android:hint="@string/etPasswordHint"
android:inputType="textPassword" >
</EditText>
<EditText
android:id="@+id/etMotto"
android:layout_width="match_parent"
android:layout_height="wrap_content"
android:background="@android:drawable/edit_text"
android:drawableLeft="@drawable/etmotto"
android:ems="10"
android:hint="@string/etMotto">
</EditText>
<EditText
android:id="@+id/etEmail"
android:layout_width="match_parent"
android:layout_height="wrap_content"
android:background="@android:drawable/edit_text"
android:drawableLeft="@drawable/etemail"
android:ems="10"
android:hint="@string/etEmail"
android:inputType="textEmailAddress" >
</EditText>
<EditText
android:id="@+id/etCity"
android:layout_width="match_parent"
android:layout_height="wrap_content"
android:background="@android:drawable/edit_text"
android:drawableLeft="@drawable/etcity"
android:ems="10"
android:hint="@string/etCity" >
</EditText>
<View
android:layout_width="match_parent"
android:layout_height="2dp"
android:background="@android:color/darker_gray" />
<EditText
android:id="@+id/etfoot"
android:layout_width="match_parent"
android:layout_height="wrap_content"
android:layout_marginTop="5dp"
android:background="@android:drawable/edit_text"
android:drawableLeft="@drawable/etfoot"
android:ems="10"
android:hint="@string/etStep"
android:inputType="number" >
</EditText>
<EditText
android:id="@+id/etHeight"
android:layout_width="match_parent"
android:layout_height="wrap_content"
android:layout_marginTop="5dp"
android:background="@android:drawable/edit_text"
android:drawableLeft="@drawable/etheight"
android:ems="10"
android:hint="@string/etHeight"
android:inputType="number" >
</EditText>
<EditText
android:id="@+id/etWeight"
android:layout_width="match_parent"
android:layout_height="wrap_content"
android:layout_marginTop="5dp"
android:background="@android:drawable/edit_text"
android:drawableLeft="@drawable/etweight"
android:ems="10"
android:hint="@string/etWeight"
android:inputType="number" >
</EditText>
<EditText
android:id="@+id/etExceptSteps"
android:layout_width="match_parent"
android:layout_height="wrap_content"
android:layout_marginTop="5dp"
android:background="@android:drawable/edit_text"
android:drawableLeft="@drawable/etexceptsteps"
android:ems="10"
android:hint="@string/etExceptSteps"
android:inputType="number" >
</EditText>
<TextView
android:layout_width="match_parent"
android:layout_height="wrap_content"
android:layout_marginTop="5dp"
android:text="@string/tvRegistFinish" >
</TextView>
<cn.edu.bztc.walkersimulate.util.RevealLayout
android:layout_width="match_parent"
android:layout_height="wrap_content" >
<Button
android:layout_width="match_parent"
android:layout_height="wrap_content"
android:gravity="center"
android:background="@drawable/btn_shape"
android:layout_marginTop="5dp"
android:text="@string/btnregiste" >
</Button>
</cn.edu
a2bb
.bztc.walkersimulate.util.RevealLayout>
</LinearLayout>
</ScrollView>Step3:使用验证框架来完成验证
导入Android-Validator-maser开源框架库,按上述方法在当前应用中添加库


相关文章推荐
- 使用C++实现JNI接口需要注意的事项
- Android IPC进程间通讯机制
- Android Manifest 用法
- [转载]Activity中ConfigChanges属性的用法
- Android之获取手机上的图片和视频缩略图thumbnails
- Android之使用Http协议实现文件上传功能
- Android学习笔记(二九):嵌入浏览器
- android string.xml文件中的整型和string型代替
- i-jetty环境搭配与编译
- android之定时器AlarmManager
- android wifi 无线调试
- Android Native 绘图方法
- Android java 与 javascript互访(相互调用)的方法例子
- android 代码实现控件之间的间距
- android FragmentPagerAdapter的“标准”配置
- Android"解决"onTouch和onClick的冲突问题
- android:installLocation简析
- android searchView的关闭事件
- SourceProvider.getJniDirectories