Linux GRUB legacy
2016-04-05 19:28
417 查看
Linux GRUB
Linux GRUB单用户模式(密码破解)
救援模式
实例
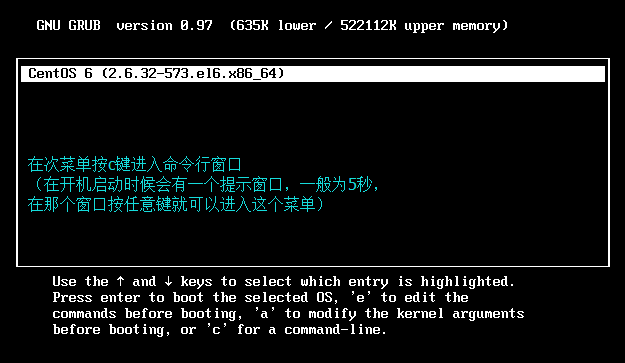
GRUB菜单
GRUB命令行接口
GRUB简介
GRUB 菜单组成
GRUB配置文件
GRUB安装及修复
GRUB单用户及救援模式
GRUB简介
了解grub之前,需要理解linux的启动流程,如果之前有对linux启动流程不了解的可以看:/article/11865611.htmlGRUB(GRand Unified Bootloader)统一引导加载器,即启动加载器。centos上的grub分为两个版本,分别是:centos 7默认采用grub2GRUB legacy(GRUB 0.1一般称为grub1)
GRUB 2(grub1.0一般称为grub2)
本文主要以grub legacy展开介绍
GRUB 菜单组成
GRUB菜单
介绍菜单之前,先带大家了解一下grub legacygrub legacy分为三个阶段:stage 1:mbr
stage1_5:mbr之后的扇区,作用是让stage1中的bootloader能识别stage2所在分区上的文件系统
stage2:磁盘分区()/boot/grub/)stage2及内核等通常放置于一个基本磁盘分区。
stage2的功用:1、提供菜单、并提供交互式接口
e:编辑模式,用于编辑菜单
c:命令模式,交互式接口
2、加载用户选择的内核或操作系统
允许传递参数给内核
可隐藏此菜单
3、为菜单提供了保护机制
为编辑菜单进行认证
未启用内核或操作系统进行认证
GRUB命令行接口
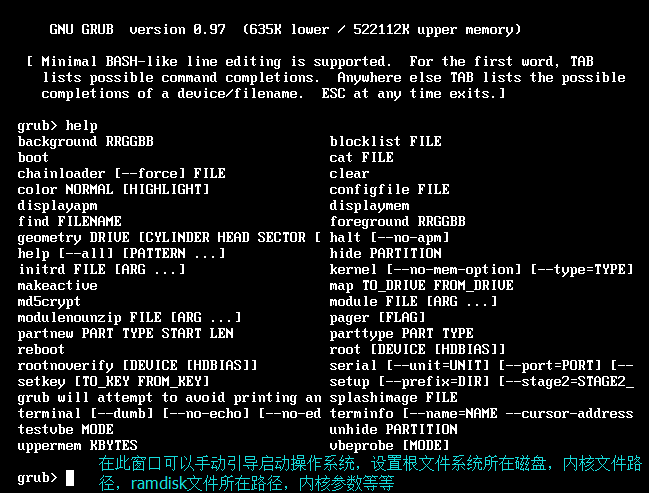
grub的命令行接口:help: 获取帮助列表
help KEYWORD: 详细帮助信息
find (hd#,#)/PATH/TO/SOMEFILE:查找文件
root (hd#,#)
kernel /PATH/TO/KERNEL_FILE:设定本次启动时用到的内核文件;额外还可以添加许多内核支持使用的cmdline参数;
例如:init=/path/to/init, selinux=0
initrd /PATH/TO/INITRAMFS_FILE: 设定为选定内核提供额外文件的ramdisk;
boot: 引导启动选定的内核;
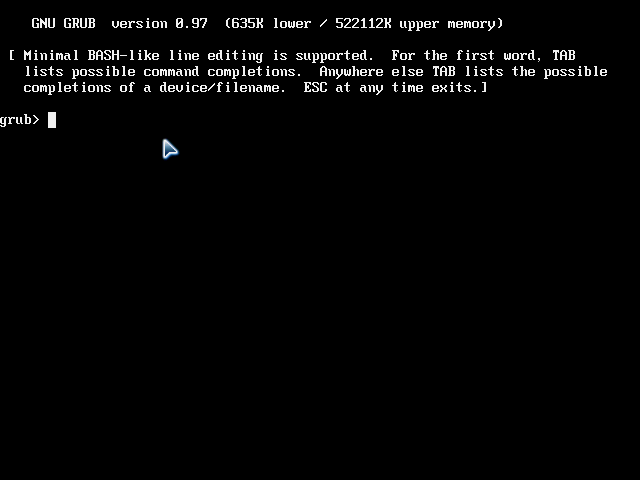
手动在grub命令行接口启动系统:
grub> root (hd#,#)
grub> kernel /vmlinuz-VERSION-RELEASE ro root=/dev/DEVICE
grub> initrd /initramfs-VERSION-RELEASE.img
grub> boot
GRUB配置文件
配置文件:/boot/grub/grub.conf配置项:default=#: 设定默认启动的菜单项;菜单项(title)编号从0开始;
timeout=#:指定菜单项等待选项选择的时长;
splashimage=指明菜单背景图片路径(hd#,#)/PATH/TO/XPM_PIC_FILE)
hiddenmenu:隐藏菜单;
password [–md5] STRING: 菜单编辑认证;
title TITLE:定义菜单项“标题”, 可出现多次;root (hd#,#):grub查找stage2及kernel文件所在设备分区;为grub的“根”;
kernel:启动的内核
initrd 内核匹配的ramfs文件;
password [–md5] STRING: 启动选定的内核或操作系统时进行认证;
加密密码可以使用:
grub-md5-crypt命令
GRUB安装及修复
安装修复:grub-install实例
注意:–root-directory必须指定boot所在的上一级目录#mount /dev/sdb1 /mnt/boot #grub-install --root-directory=/mnt /dev/sdb2 Probing devices to guess BIOS drives. This may take a long time. /dev/mapper/vg_centos6-lv_root does not have any corresponding BIOS drive. # ls /mnt/boot/ grub # ls /mnt/boot/grub/ device.map ffs_stage1_5 minix_stage1_5 stage2 xfs_stage1_5 e2fs_stage1_5 iso9660_stage1_5 reiserfs_stage1_5 ufs2_stage1_5 fat_stage1_5 jfs_stage1_5 stage1 vstafs_stage1_5安装修复:grub命令
# grub
Probing devices to guess BIOS drives. This may take a long time.

GNU GRUB  version 0.97  (640K lower / 3072K upper memory)

[ Minimal BASH-like line editing is supported.  For the first word, TAB
lists possible command completions.  Anywhere else TAB lists the possible
completions of a device/filename.]
grub> root (hd1,0)
root (hd1,0)
Filesystem type is ext2fs, partition type 0x83
grub> setup (hd1)
setup (hd1)
Checking if "/boot/grub/stage1" exists... no
Checking if "/grub/stage1" exists... yes
Checking if "/grub/stage2" exists... yes
Checking if "/grub/e2fs_stage1_5" exists... yes
Running "embed /grub/e2fs_stage1_5 (hd1)"...  27 sectors are embedded.
succeeded
Running "install /grub/stage1 (hd1) (hd1)1+27 p (hd1,0)/grub/stage2 /grub/grub.conf"... succeeded
Done.
GRUB单用户及救援模式
单用户模式(密码破解)
进入单用户模式:(1) 编辑grub菜单(选定要编辑的title,而后使用e命令);
(2) 在选定的kernel后附加
1, s, S或single都可以;
(3) 在kernel所在行,键入“b”命令;
救援模式
grub修复1、模拟破坏:(破坏前先备份)
dd if=/dev/sda of=/root/mbr.bak count=1 bs=512
dd if=/dev/zero of=/dev/sda count=1 bs=200
2、进入救援模式
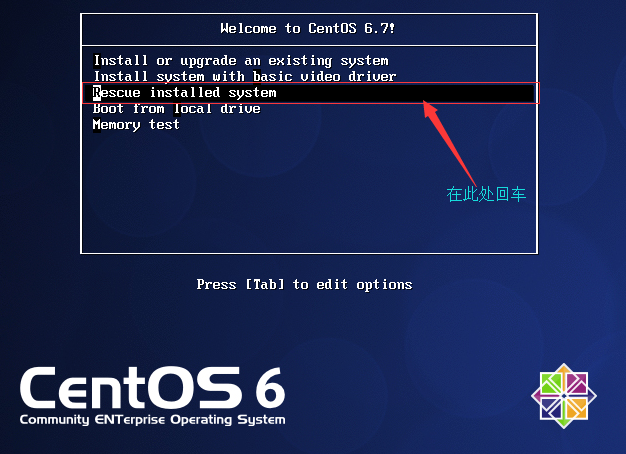
1、插入光盘进入救援模式
-方式1:点击Rescue installed system
方式2:按esc进入命令行
输入 linux rescue
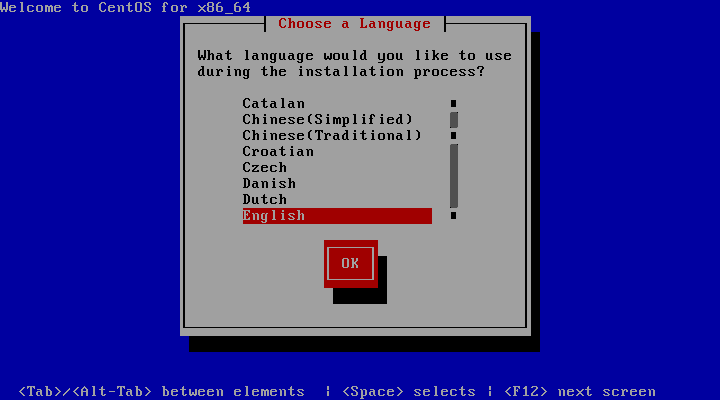
2、选择语言,键盘类型
3、选择是否使用语言
4、是否将当前系统的跟挂载至/mnt/sysimage下
Continue:继续
5、选择OK # 可以使用chroot /mnt/sysimage
6、选择shell start shell
7、切换跟,修复grub
# chroot /mnt/sysimage
# grub-install --root-directory=/ /dev/sda
# exit
# reboot
8、重启前拆除光盘
图解:
本文出自 “站在巨人肩膀上” 博客,请务必保留此出处http://xinzong.blog.51cto.com/10018904/1760625

相关文章推荐
- linux配置ftp服务器
- linux环境下的伪分布式的hadoop基本搭建
- 对Linux 七个运行级别的详解
- linux环境下的jdk安装配置
- 怎样配置vi编辑器
- corosync
- centos 安装 mongdb
- Scripts after the Linux server installation
- linux文件系统介绍
- I.MX6 Linux 自动获取AR1020 event input节点
- Linux文件重点概念
- Linux Web服务器网站故障分析常用的命令
- On linux start jenkins on specific port 80: java.net.SocketException: Permission denied
- Linux LVM 创建、删除、扩展
- linux开关机啪啪响(pop noise)的解决方案
- Linux Yum 安装JDK
- Linux内核分析作业 NO.7
- Linux中的TAB按一次不能出来命令,而按两次能出来所有那个首字母的词?
- CentOS 7.0安装配置Vsftp服务器
- linux系统优化脚本实现