Android CardView的使用
2016-03-28 14:41
344 查看
一.概述
CardView是support.v7包中的一个类,继承自FrameLayout,今天来看看如何使用。首先我们需要导入相关的库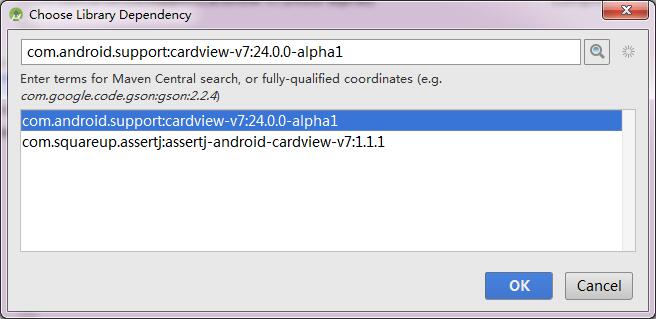
二.代码
布局文件:<RelativeLayout xmlns:android="http://schemas.android.com/apk/res/android" android:layout_width="match_parent" android:layout_height="match_parent" android:background="@android:color/holo_green_dark" xmlns:card_view="http://schemas.android.com/apk/res-auto" > <android.support.v7.widget.CardView android:id="@+id/card_view" android:layout_width="match_parent" android:layout_height="wrap_content" card_view:cardBackgroundColor="@android:color/white" android:layout_marginLeft="@dimen/activity_horizontal_margin" android:layout_marginRight="@dimen/activity_horizontal_margin" android:layout_marginTop="5dp" android:layout_marginBottom="5dp" card_view:cardCornerRadius="10dp" card_view:cardElevation="24dp"> <RelativeLayout android:layout_width="match_parent" android:layout_height="match_parent" android:paddingBottom="@dimen/activity_vertical_margin" android:paddingTop="@dimen/activity_vertical_margin" > <ImageView android:id="@+id/img" android:layout_width="match_parent" android:layout_height="wrap_content" android:src="@drawable/cat" android:layout_centerHorizontal="true" android:scaleType="fitCenter" /> <TextView android:id="@+id/text_desc" android:layout_width="wrap_content" android:layout_height="wrap_content" android:layout_below="@+id/img" android:layout_centerHorizontal="true" android:text="This is a card view" android:paddingLeft="@dimen/activity_horizontal_margin" android:paddingRight="@dimen/activity_horizontal_margin" /> </RelativeLayout> </android.support.v7.widget.CardView> <SeekBar android:layout_below="@+id/card_view" android:id="@+id/seek1" android:layout_marginTop="10dp" android:layout_width="150dp" android:layout_height="30dp" /> <SeekBar android:layout_below="@+id/seek1" android:id="@+id/seek2" android:layout_marginTop="10dp" android:layout_width="150dp" android:layout_height="30dp" /> </RelativeLayout>
首先我们引入了命名空间:
xmlns:card_view="http://schemas.android.com/apk/res-auto"
然后设置背景颜色为白色
card_view:cardBackgroundColor="@android:color/white"
设备边角的弧度以及阴影宽度
card_view:cardCornerRadius="10dp"
card_view:cardElevation="24dp"
public class CardViewActivity extends AppCompatActivity {
private CardView cardView;
private SeekBar seekBar1;
private SeekBar seekBar2;
@Override
protected void onCreate(Bundle savedInstanceState) {
super.onCreate(savedInstanceState);
setContentView(R.layout.activity_main);
cardView = (CardView) findViewById(R.id.card_view);
seekBar1 = (SeekBar) findViewById(R.id.seek1);
seekBar2 = (SeekBar) findViewById(R.id.seek2);
seekBar1.setOnSeekBarChangeListener(new SeekBar.OnSeekBarChangeListener() {
@Override
public void onProgressChanged(SeekBar seekBar, int progress, boolean fromUser) {
if(fromUser){
cardView.setCardElevation(progress);
}
}
@Override
public void onStartTrackingTouch(SeekBar seekBar) {
}
@Override
public void onStopTrackingTouch(SeekBar seekBar) {

}
});
seekBar2.setOnSeekBarChangeListener(new SeekBar.OnSeekBarChangeListener() {
@Override
public void onProgressChanged(SeekBar seekBar, int progress, boolean fromUser) {
if(fromUser){
cardView.setRadius(progress);
}
}
@Override
public void onStartTrackingTouch(SeekBar seekBar) {
}
@Override
public void onStopTrackingTouch(SeekBar seekBar) {
}
});
}
}
效果图

接下来我们用layer-list来实现一个类似的效果,先看效果图
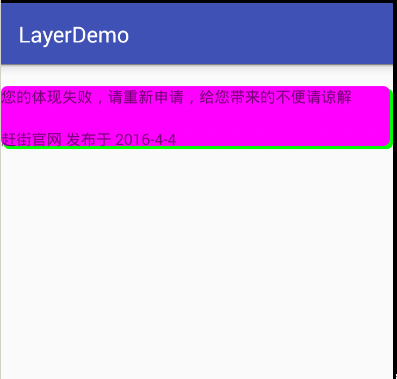
布局文件如下
<LinearLayout
xmlns:android="http://schemas.android.com/apk/res/android"
xmlns:tools="http://schemas.android.com/tools"
android:layout_width="match_parent"
android:layout_height="wrap_content"
android:background="@drawable/background"
android:orientation="vertical"
android:layout_marginTop="20dp"
tools:context="com.example.administrator.myapplication.MainActivity">

<TextView
android:id="@+id/textview"
android:text="您的体现失败,请重新申请,给您带来的不便请谅解"
android:layout_width="match_parent"
android:layout_height="wrap_content" />
<TextView
android:layout_marginTop="20dp"
android:text="赶街官网 发布于 2016-4-4"
android:layout_width="match_parent"
android:layout_height="wrap_content"/>
</LinearLayout>
重点在这个背景
<layer-list xmlns:android="http://schemas.android.com/apk/res/android">

<!-- 阴影部分 -->
<!-- 个人觉得更形象的表达:top代表下边的阴影高度,left代表右边的阴影宽度。其实也就是相对应的offset,solid中的颜色是阴影的颜色,也可以设置角度等等 -->
<item
android:left="2dp"
android:top="2dp">
<shape android:shape="rectangle" >

<gradient
android:angle="270"

android:endColor="#0F0"
android:startColor="#0F0" />

<corners
android:bottomLeftRadius="6dip"
android:bottomRightRadius="6dip"
android:topLeftRadius="6dip"
android:topRightRadius="6dip" />
</shape>
</item>

<!-- 背景部分 -->
<!-- 形象的表达:bottom代表背景部分在上边缘超出阴影的高度,right代表背景部分在左边超出阴影的宽度(相对应的offset) -->
<item
android:bottom="3dp"
android:right="3dp">
<shape android:shape="rectangle" >

<gradient
android:angle="270"
android:endColor="#FF00FF"
android:startColor="#FF00FF" />

<corners
android:bottomLeftRadius="6dip"
android:bottomRightRadius="6dip"
android:topLeftRadius="6dip"
android:topRightRadius="6dip" />
</shape>
</item>
</layer-list>

相关文章推荐
- Android5.1系统启动过程中启动有线网卡并为其分配静态IP地址
- Android 6.0 运行时权限处理
- Android中内容观察者的使用---- ContentObserver类详解
- android,不让edittext一进入页面就获取焦点
- Android侧滑结束当前页
- Android 调用系统的分享[完美实现同一时候分享图片和文字]
- Android学习之定时执行后台任务
- Android总结 - Menu
- Android快速入门
- [Android Studio] Gradle项目中添加JNI生成文件(.so文件)
- java.lang.ClassCastException: android.app.Application cannot be cast to
- android项目结构优化
- Android多线程编程方法及开启步骤
- Android Fragment 你应该知道的一切
- PhoneGap2.9.0本地将html打包成Android应用
- Android推送技术研究
- android studio编译异常处理
- android 自带 浏览器的默认标签
- android之html Unicode编码转汉字
- Android 开发环境搭建