使用include、merge、ViewStub优化布局
2016-03-25 09:33
489 查看
在布局优化中,Androi的官方提到了这三种布局include、merge、ViewStub下面我们对这三种布局的使用和注意事项进行说明:
效果如下:

假设我们有10个页面,那我们就要重复写十遍这样的代码?如果更改标题栏的样式呢?我们还要每个页面都修改一次?想想太可怕了。放心,include标签不会让你这么做的。接下来我们使用include标签来试试这个需求。
我们在Activity的布局中使用include标签来引用了title_layout,效果如下:
使用include注意事项:
include标签使用layout属性来指定要引用的布局,而不是android:layout属性。
在include标签中所有的android:layout_*都是有效的,前提是必须要写layout_width和layout_height两个属性。
可以使用其他属性。include 标签若指定了ID属性,而你的layout也定义了ID,则你的layout的ID会被覆盖
布局中可以包含两个相同的include标签,引用时可以使用如下方法解决
我们通过代码来演示一下:
layout_merge.xml
这是一个垂直的LinearLayout布局,这个布局将会被include引用到另外一个布局中。
activity_layout.xml
同样是一个垂直的LinearLayout布局,在这其中使用include标签引用了layout_merge布局,我们运行之后通过Hierarchy Viewer看一下布局的层次。
从图中我们看到,两个LinearLayout明显是冗余的,这个时候我们就可以使用merge标签来优化了。我们来具体操作一下。
我们只需要将layout_merge.xml的根布局LinearLayout改成merge即可,代码如下:
运行后,使用Hierarchy Viewer来查看布局层次如下:
我们可以看到少了一个LinearLayout。这就是merge的作用。
当使用include标签来添加一个根布局为merge标签的布局时,系统会忽略merge结点,并将其中的内容直接添加到include标签所在的布局中。
注意事项:
1.merge标签只能是一个文件的根结点,然后使用include标签在其他文件中引用带有merge标签的文件。
2.如果是activity的布局,并且根结点是FrameLayout的布局,也可以使用merge来替代FrameLayout。(因为我们activity的布局会被系统添加到id为content的FrameLayout中去)
我们这里使用上面的layout_merge.xml进行演示:
我们看到这儿LinearLayout中有两个TextView,在看看如何使用ViewStub:
这里有一个button和一个ViewStub,ViewStub标签使用android:layout属性来引用要延迟加载的布局。这里指定了inflatedId为layoutViewStub。
其中inflatedId就是新加载进来的view的id,如果需要获取这个view,就要用这个inflatedId,原来的id已经被取代了
在看看Java代码中的操作。
当调用inflate()函数的时候,ViewStub被引用的资源替代,并且返回引用的view。 这样程序可以直接得到引用的view而不用再次调用函数findViewById()来查找了。
需要注意的是ViewStub只能inflate一次,反复的inflate会报错:java.lang.IllegalStateException:ViewStub must have a non-null ViewGroup viewParent。
include 标签
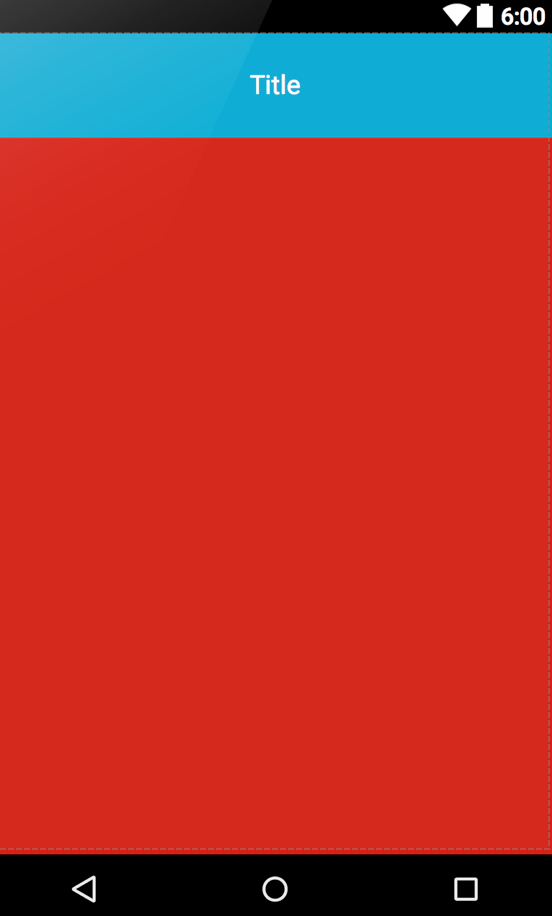
include标签是xml布局重用的利器,假设我们在做标题栏的时候,每个页面都会使用如下样式的标题栏:<?xml version="1.0" encoding="utf-8"?> <RelativeLayout xmlns:android="http://schemas.android.com/apk/res/android" android:layout_width="match_parent" android:layout_height="wrap_content"> <TextView android:id="@+id/tvTitle" android:layout_width="match_parent" android:layout_height="72dp" android:gravity="center" android:background="@android:color/holo_blue_dark" android:textColor="@android:color/white" android:textSize="18sp" android:text="Title"/> </RelativeLayout>
效果如下:
假设我们有10个页面,那我们就要重复写十遍这样的代码?如果更改标题栏的样式呢?我们还要每个页面都修改一次?想想太可怕了。放心,include标签不会让你这么做的。接下来我们使用include标签来试试这个需求。
<?xml version="1.0" encoding="utf-8"?>
<LinearLayout xmlns:android="http://schemas.android.com/apk/res/android"
android:layout_width="match_parent"
android:layout_height="match_parent"
android:orientation="vertical">

<include layout="@layout/title_layout"/>

<LinearLayout
android:layout_width="match_parent"
android:layout_height="match_parent"
android:background="@android:color/holo_red_dark">

</LinearLayout>
</LinearLayout>
我们在Activity的布局中使用include标签来引用了title_layout,效果如下:
使用include注意事项:
include标签使用layout属性来指定要引用的布局,而不是android:layout属性。
在include标签中所有的android:layout_*都是有效的,前提是必须要写layout_width和layout_height两个属性。
可以使用其他属性。include 标签若指定了ID属性,而你的layout也定义了ID,则你的layout的ID会被覆盖
布局中可以包含两个相同的include标签,引用时可以使用如下方法解决
View include1 = findViewById(R.id.include1);
View include2 = findViewById(R.id.include2);

TextView textView1 = (TextView) include1.findViewById(R.id.tvTitle);
TextView textView2 = (TextView) include2.findViewById(R.id.tvTitle);

textView1.setText("textView1");
textView2.setText("textView2");
merge 标签
merge标签在UI的结构优化中起着非常重要的作用,它可以删减多余的层级,优化UI。merge多用于替换FrameLayout或者当一个布局包含另一个时,merge标签消除视图层次结构中多余的视图组。例如你的主布局文件是垂直布局,引入了一个垂直布局的include,这是如果include布局使用的LinearLayout就没意义了,使用的话反而减慢你的UI表现。这时可以使用merge标签优化。我们通过代码来演示一下:
layout_merge.xml
<?xml version="1.0" encoding="utf-8"?>
<LinearLayout xmlns:android="http://schemas.android.com/apk/res/android"
android:layout_width="match_parent"
android:layout_height="match_parent"
android:orientation="vertical">

<TextView
android:layout_width="match_parent"
android:layout_height="wrap_content"
android:text="11111111111"/>

<TextView
android:layout_width="match_parent"
android:layout_height="wrap_content"
android:text="11111111111"/>

</LinearLayout>
这是一个垂直的LinearLayout布局,这个布局将会被include引用到另外一个布局中。
activity_layout.xml
<?xml version="1.0" encoding="utf-8"?>
<LinearLayout xmlns:android="http://schemas.android.com/apk/res/android"
android:layout_width="match_parent"
android:layout_height="match_parent"
android:orientation="vertical">

<include layout="@layout/layout_merge"/>

</LinearLayout>
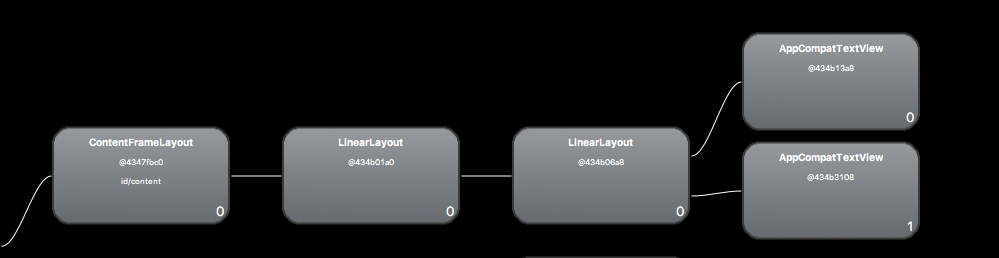
同样是一个垂直的LinearLayout布局,在这其中使用include标签引用了layout_merge布局,我们运行之后通过Hierarchy Viewer看一下布局的层次。
从图中我们看到,两个LinearLayout明显是冗余的,这个时候我们就可以使用merge标签来优化了。我们来具体操作一下。
我们只需要将layout_merge.xml的根布局LinearLayout改成merge即可,代码如下:
<?xml version="1.0" encoding="utf-8"?>
<merge xmlns:android="http://schemas.android.com/apk/res/android"
android:layout_width="match_parent"
android:layout_height="match_parent"
android:orientation="vertical">

<TextView
android:layout_width="match_parent"
android:layout_height="wrap_content"
android:text="11111111111"/>

<TextView
android:layout_width="match_parent"
android:layout_height="wrap_content"
android:text="11111111111"/>

</merge>
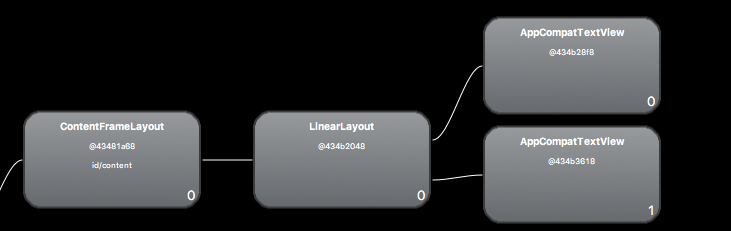
运行后,使用Hierarchy Viewer来查看布局层次如下:
我们可以看到少了一个LinearLayout。这就是merge的作用。
当使用include标签来添加一个根布局为merge标签的布局时,系统会忽略merge结点,并将其中的内容直接添加到include标签所在的布局中。
注意事项:
1.merge标签只能是一个文件的根结点,然后使用include标签在其他文件中引用带有merge标签的文件。
2.如果是activity的布局,并且根结点是FrameLayout的布局,也可以使用merge来替代FrameLayout。(因为我们activity的布局会被系统添加到id为content的FrameLayout中去)
ViewStud 标签
ViewStub标签最大的优点是当你需要时才会加载,使用他并不会影响UI初始化时的性能。各种不常用的布局想进度条、显示错误消息等可以使用ViewStub标签,以减少内存使用量,加快渲染速度。ViewStub 是一个不可见的,大小为0的View。ViewStub 标签使用如下:我们这里使用上面的layout_merge.xml进行演示:
<?xml version="1.0" encoding="utf-8"?>
<LinearLayout xmlns:android="http://schemas.android.com/apk/res/android"
android:layout_width="match_parent"
android:layout_height="match_parent"
android:orientation="vertical">

<TextView
android:id="@+id/textView1"
android:layout_width="wrap_content"
android:layout_height="wrap_content"
android:text="11111111111" />

<TextView
android:layout_width="wrap_content"
android:layout_height="wrap_content"
android:text="22222222" />

</LinearLayout>
我们看到这儿LinearLayout中有两个TextView,在看看如何使用ViewStub:
<?xml version="1.0" encoding="utf-8"?>
<LinearLayout xmlns:android="http://schemas.android.com/apk/res/android"
android:layout_width="match_parent"
android:layout_height="match_parent"
android:orientation="vertical">

<Button
android:id="@+id/btnShowViewStub"
android:layout_width="match_parent"
android:layout_height="wrap_content"
android:text="显示viewStub"/>

<ViewStub
android:id="@+id/viewStub"
android:layout_width="match_parent"
android:layout_height="match_parent"
android:inflatedId="@+id/layoutViewStub"
android:layout="@layout/layout_merge"/>

</LinearLayout>
这里有一个button和一个ViewStub,ViewStub标签使用android:layout属性来引用要延迟加载的布局。这里指定了inflatedId为layoutViewStub。
其中inflatedId就是新加载进来的view的id,如果需要获取这个view,就要用这个inflatedId,原来的id已经被取代了
在看看Java代码中的操作。
ViewStub viewStub;

@Override
protected void onCreate(Bundle savedInstanceState) {
super.onCreate(savedInstanceState);
setContentView(R.layout.activity_layout);

viewStub = (ViewStub) findViewById(R.id.viewStub);

findViewById(R.id.btnShowViewStub).setOnClickListener(new View.OnClickListener() {
@Override
public void onClick(View v) {
// 加载(显示)viewStub对应的布局,并接受返回的View对象
View view = viewStub.inflate();
// 获取返回View对象中的TextView1控件
TextView textView = (TextView) view.findViewById(R.id.textView1);
// 修改TextView文本
textView.setText("修改TextView1");
// 显示ViewStub中的内容,但是不会反回View对象
// viewStub.setVisibility(View.VISIBLE);
}
});

}
当调用inflate()函数的时候,ViewStub被引用的资源替代,并且返回引用的view。 这样程序可以直接得到引用的view而不用再次调用函数findViewById()来查找了。
需要注意的是ViewStub只能inflate一次,反复的inflate会报错:java.lang.IllegalStateException:ViewStub must have a non-null ViewGroup viewParent。

相关文章推荐
- 使用C++实现JNI接口需要注意的事项
- Android IPC进程间通讯机制
- Android Manifest 用法
- [转载]Activity中ConfigChanges属性的用法
- Android之获取手机上的图片和视频缩略图thumbnails
- Android之使用Http协议实现文件上传功能
- Android学习笔记(二九):嵌入浏览器
- android string.xml文件中的整型和string型代替
- i-jetty环境搭配与编译
- android之定时器AlarmManager
- android wifi 无线调试
- Android Native 绘图方法
- Android java 与 javascript互访(相互调用)的方法例子
- android 代码实现控件之间的间距
- android FragmentPagerAdapter的“标准”配置
- Android"解决"onTouch和onClick的冲突问题
- android:installLocation简析
- android searchView的关闭事件
- SourceProvider.getJniDirectories