Android入门教程 Fragment使用教程【实例讲解】
2016-03-17 22:42
627 查看
为什么要用Fragment
想象一个APP场景,我们开发了一个图书阅读的APP,希望这个APP能够同时在手机和平板上使用。众所周知,手机的屏幕小且为竖向,平板的屏幕大且为横向。如果我们开发的APP在界面方面完全一样,那么用户体验并非很好。另外,通过使用fragment能很好地提高组件复用性。
那么如何提高用户体验呢?
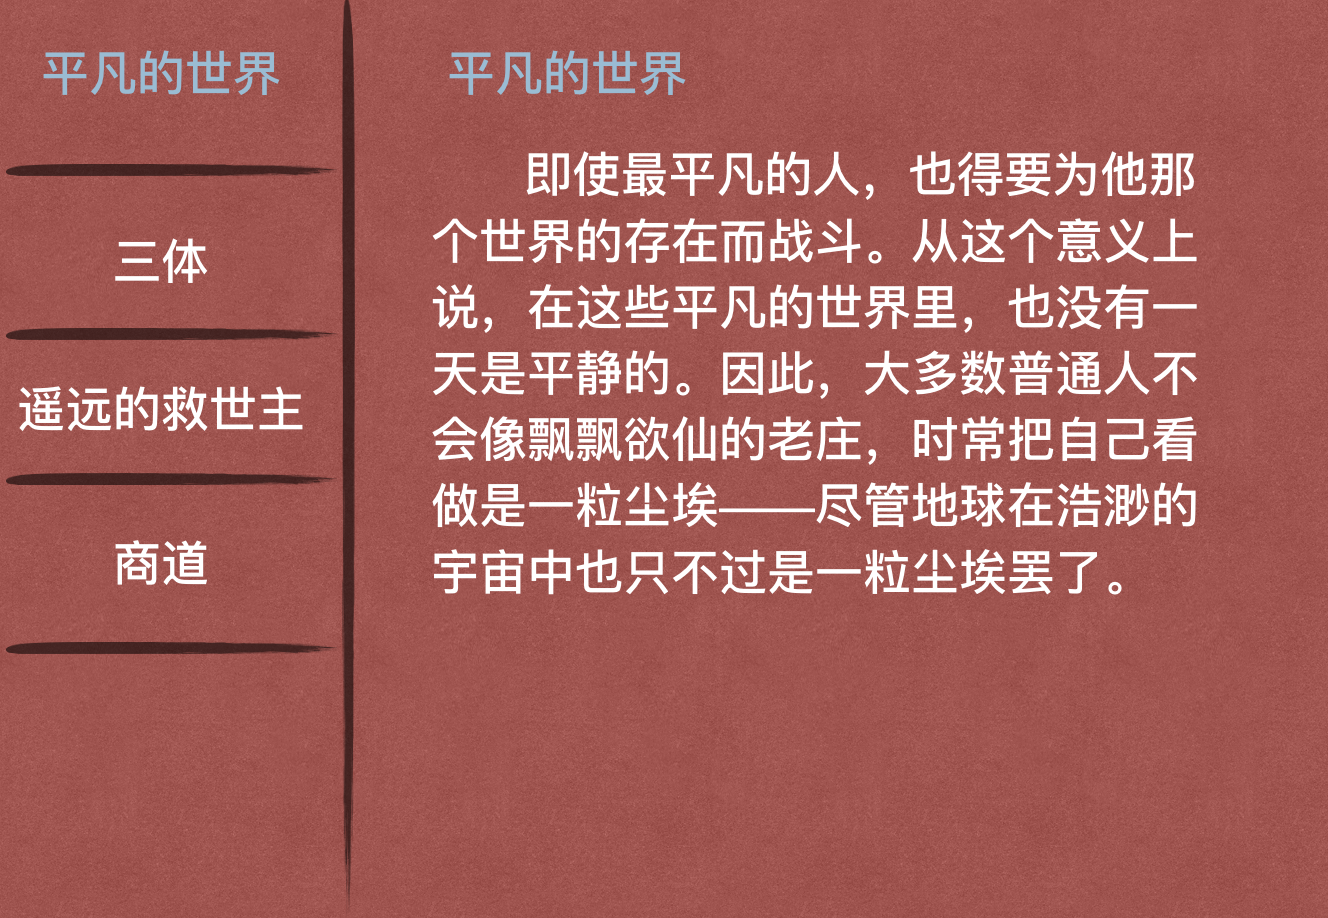
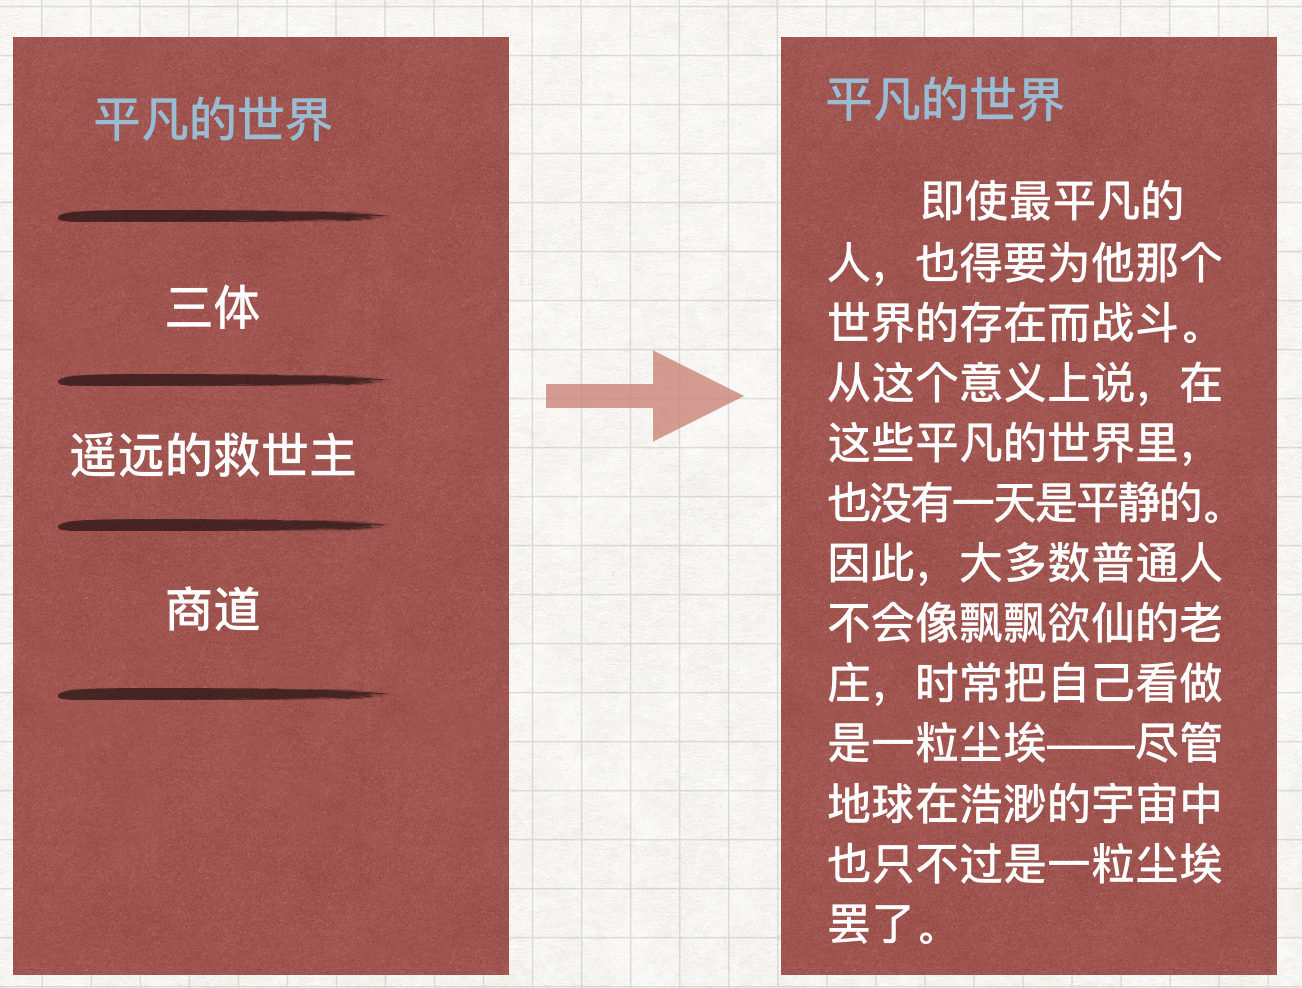
平板——左右布局
手机——单页布局
说得再多不如上图,请看图
主要知识点
自适应设计(屏幕兼容适配)Activity中如何“嵌入”Fragment
Activity如何与Fragment进行通信
如何构造Fragment
实例讲解
模拟一个读书Activity,需要用到
2个Activity——列表、详情2个Fragment——列表、详情
4个布局文件——列表页布局(手机)、详情页布局(手机)、列表页布局(平板)、列表详情布局(fragment)
1个资源文件——用于选择手机、平板时加载哪个布局文件
1个图书实体类
通过resource实现自适应加载布局文件(根据屏幕大小)
在res目录下新建values-large目录,在其中新建refs.xml<?xml version="1.0" encoding="utf-8"?> <resources> <item name="activity_book" type="layout">@layout/activity_book_twopane</item> </resources>
主界面Activity
public class BookActivity extends Activity implements Callbacks {
private boolean mTwoPane;

@Override
protected void onCreate(Bundle savedInstanceState) {
super.onCreate(savedInstanceState);
// 加载时会判断屏幕大小,大屏的会调用
setContentView(R.layout.activity_book);
if (findViewById(R.id.list_fragment) != null) {
// 实际加载了R.layout.activity_book_twopane
mTwoPane = true;
BookListFragment booklistFragment = (BookListFragment) getFragmentManager()
.findFragmentById(R.id.list_fragment);
//设置List的选中状态
booklistFragment.setActivateOnItemClick(true);
}
}

@Override
public void onItemSelected(Integer id) {
if (mTwoPane) {
// 创建Bundle准备向Fragment传数据
Bundle arguments = new Bundle();
arguments.putInt(BookDetailFragment.ITEM_ID, id);
// 创建详情页Fragment
BookDetailFragment detailFragment = new BookDetailFragment();
detailFragment.setArguments(arguments);
FragmentTransaction ft = getFragmentManager().beginTransaction();
ft.replace(R.id.detail_fragment, detailFragment);
ft.commit();
} else {
//小屏幕直接跳转新的Activity
Intent intent = new Intent(this, BookDetailActivity.class);
intent.putExtra(BookDetailFragment.ITEM_ID, id);
startActivity(intent);
}
}
}
列表页Fragment
public class BookListFragment extends ListFragment {
private Callbacks mCallBack;
public static ArrayList<BookEntity> bookList;

// 定义一个接口,该Fragment所在的Activity需要实现该接口
// 该Fragment将通过该接口与所在的Activity交互
public interface Callbacks {
public void onItemSelected(Integer id);
}

@Override
public void onCreate(Bundle savedInstanceState) {
super.onCreate(savedInstanceState);
setValueForBooklist();
List<String> bookNames = new ArrayList<>();
for (int i = 0;i<bookList.size();i++) {
bookNames.add(bookList.get(i).getTitle());
}
ArrayAdapter<String> adapter = new ArrayAdapter<String>(getActivity(), android.R.layout.simple_list_item_1,
android.R.id.text1, bookNames);
setListAdapter(adapter);
}

@Override
public void onAttach(Activity activity) {
super.onAttach(activity);
// 如果Activity没有实现Callbacks接口,抛出异常
if (!(activity instanceof Callbacks)) {
throw new IllegalStateException("BookListFragment所在的Activity必须实现Callbacks接口");
}
mCallBack = (Callbacks) activity;
}

// 当该Fragment从它所属的Activity中被删除时执行此方法
@Override
public void onDetach() {
super.onDetach();
mCallBack = null;
}

@Override
public void onListItemClick(ListView l, View v, int position, long id) {
super.onListItemClick(l, v, position, id);
mCallBack.onItemSelected(bookList.get(position).getId());
}
/**
* 设置ListView的选中状态
* @param itemClick
*/
public void setActivateOnItemClick(boolean itemClick) {
getListView().setChoiceMode(itemClick ? ListView.CHOICE_MODE_SINGLE : ListView.CHOICE_MODE_NONE);
}

private void setValueForBooklist() {
bookList = new ArrayList<>();
bookList.add(new BookEntity(1, "平凡的世界", "这是一个平凡的人改变命运的故事"));
bookList.add(new BookEntity(2, "三体", "一本让你重新认识宇宙、人生的书"));
bookList.add(new BookEntity(3, "遥远的救世主", "亲情、友情、爱情、创业、因缘、因果在此体现的淋漓尽致"));

}

}
详情页Activity
public class BookDetailActivity extends Activity {
@Override
protected void onCreate(Bundle savedInstanceState) {
super.onCreate(savedInstanceState);
setContentView(R.layout.activity_book_detail);
if (savedInstanceState == null) {
//为Fragment准备数据
Bundle args = new Bundle();
args.putInt(BookDetailFragment.ITEM_ID, getIntent().getIntExtra(BookDetailFragment.ITEM_ID, 0));
BookDetailFragment fragment = new BookDetailFragment();
//向Fragment传递数据
fragment.setArguments(args);
getFragmentManager().beginTransaction().add(R.id.detail_container, fragment).commit();
}
}
@Override
public boolean onOptionsItemSelected(MenuItem item) {
if(item.getItemId()==android.R.id.home){
Intent intent = new Intent(this,BookActivity.class);
intent.setFlags(Intent.FLAG_ACTIVITY_CLEAR_TOP);
startActivity(intent);
return true;
}
return super.onOptionsItemSelected(item);
}
}
详情页Fragment
public class BookDetailFragment extends Fragment{
public static final String ITEM_ID="item_id";
private BookEntity book;

@Override
public void onCreate(Bundle savedInstanceState) {
super.onCreate(savedInstanceState);
if(getArguments().containsKey(ITEM_ID)){
book = BookListFragment.bookList.get(getArguments().getInt(ITEM_ID)-1);
}
}

@Override
public View onCreateView(LayoutInflater inflater, ViewGroup container, Bundle savedInstanceState) {
View rootView = inflater.inflate(R.layout.fragment_book_detail, container,false);
if(book!=null){
TextView titleView = (TextView) rootView.findViewById(R.id.book_title_text);
titleView.setText(book.getTitle());
TextView descView = (TextView) rootView.findViewById(R.id.book_desc_text);
descView.setText(book.getDesc());
}
return rootView;
}
}
主界面布局文件activity_book.xml
<fragment xmlns:android="http://schemas.android.com/apk/res/android"
xmlns:tools="http://schemas.android.com/tools"
android:layout_width="match_parent"
android:layout_height="match_parent"
android:id="@+id/book_list_fragment"
android:name="com.yeapin.demo.fragment.BookListFragment"
tools:context="${relativePackage}.${activityClass}" >
</fragment>
平板模式主界面布局文件activity_book_twopane.xml
<LinearLayout xmlns:android="http://schemas.android.com/apk/res/android"
xmlns:tools="http://schemas.android.com/tools"
android:layout_width="match_parent"
android:layout_height="match_parent"
android:orientation="horizontal"
tools:context="${relativePackage}.${activityClass}" >

<fragment
android:id="@+id/list_fragment"
android:layout_width="0dp"
android:layout_height="match_parent"
android:layout_weight="1" />
<fragment
android:id="@+id/detail_fragment"
android:layout_width="0dp"
android:layout_height="match_parent"
android:layout_weight="3"
/>

</LinearLayout>
详情页布局文件activity_book_detail.xml
<FrameLayout xmlns:android="http://schemas.android.com/apk/res/android"
xmlns:tools="http://schemas.android.com/tools"
android:layout_width="match_parent"
android:layout_height="match_parent"
android:id="@+id/detail_container"
tools:context="${relativePackage}.${activityClass}" >

</FrameLayout>
详情页fragment布局文件 fragment_book_detail.xml
<LinearLayout xmlns:android="http://schemas.android.com/apk/res/android"
xmlns:tools="http://schemas.android.com/tools"
android:layout_width="match_parent"
android:layout_height="match_parent"
android:orientation="vertical"
tools:context="${relativePackage}.${activityClass}" >

<TextView
android:id="@+id/book_title_text"
android:layout_width="match_parent"
android:layout_height="wrap_content" />

<TextView
android:id="@+id/book_desc_text"
android:layout_width="match_parent"
android:layout_height="wrap_content" />

</LinearLayout>
总结
自适应设计是通过resource文件来实现Activity中通过FragmentTrasaction实现对Fragment的管理,并由此创建Fragment,通过replace()和commit()方法实现加载
Activity通过Bundle与Fragment进行通信、数据传递

相关文章推荐
- Android布局的小窍门?
- Web布局连载——两栏固定布局(五)
- 样式表CSS布局经验
- 在winform下实现左右布局多窗口界面的方法之续篇
- css网页布局中注意的几个问题小结
- DL.DT.DD实现左右的布局简单例子第1/2页
- 使用CSS框架布局的缺点和优点小结
- div+CSS网页布局的意义与副作用原因小结第1/2页
- 在winform下实现左右布局多窗口界面的方法
- Android编程之代码创建布局实例分析
- CSS顶级技巧大放送,div+css布局必知
- 用div实现像table一样的布局方法
- 精彩的Bootstrap案例分享 重点在注释!(选项卡、栅格布局)
- jQuery EasyUi实战教程之布局篇
- jQuery EasyUI 布局之动态添加tabs标签页
- jQuery Easyui实现左右布局
- android自定义RadioGroup可以添加多种布局的实现方法
- Android Fragment 基本了解(图文介绍)
- 瀑布流布局并自动加载实现代码
- Android代码实现图片和文字上下布局