FreeMarker与Spring MVC的结合应用
2016-03-08 17:01
465 查看
Freemarker是一种基于java的模板引擎。SpringMVC对FreeMarker进行一些配置的支持,能够利用Freemarker只关注表现层以及Spring MVC的三层分离的特点,向前端输出HTML代码,实现代码和页面完全的隔离。
在SpringMVC中使用FreeMarker需要在spring的配置文件中做配置,首先是在web.xml中配置SpringMVC的Servlet,如下:
然后在spring的配置文件applicationContext.xml中加入FreeMarker的配置:
其中templateLoaderPath是指定模板文件的位置,freemarkerSetting是对FreeMarker的配置,包括boolean和date时间的显示格式,比如可以设置date_format属性的值为yyyy-MM-ss,格式化格式采用SimpleDateFormat。更多的配置可以参考Configuration和Configurable的API。
最后一步是配置FreeMarker在SpringMVC里面的视图解析器,在freemarker-servlet.xml的文件中添加:
其中requestContextAttribute属性通过查看springmvc的mvc模板的源码得知,在FreeMarkerViewResolver的父类UrlBasedViewResolver中定义的:
设置requestContext对象的变量名的,这样每个页面都能取得这个对象了。
exposeSessionAttributes的属性设置源码如下:
更多属性设置可以参考spring的文档,这些属性对于velocity模板引擎也是通用的。
Controller代码如下,其中ModelAndView是org.springframework.web.servlet下的:
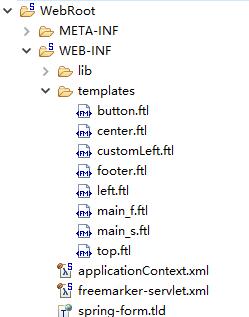
此处为体现了FreeMarker的使用,所以写了比较多的模块,在此只贴出文件位置图,其中main_f.ftl包含top.ftl、left.ftl和center.ftl,main_s.ftl包含top.ftl、customLeft.ftl和center.ftl:
正常访问下的效果图如下:
请求main_first.html:
请求main_second.html的效果图如下:
在SpringMVC中使用FreeMarker需要在spring的配置文件中做配置,首先是在web.xml中配置SpringMVC的Servlet,如下:
<?xml version="1.0" encoding="UTF-8"?>
<web-app xmlns:xsi="http://www.w3.org/2001/XMLSchema-instance" xmlns="http://xmlns.jcp.org/xml/ns/javaee" xsi:schemaLocation="http://xmlns.jcp.org/xml/ns/javaee http://xmlns.jcp.org/xml/ns/javaee/web-app_3_1.xsd" id="WebApp_ID" version="3.1">
<display-name>freemarker_springmvc</display-name>
<welcome-file-list>
<welcome-file>index.html</welcome-file>
</welcome-file-list>
<listener>
<listener-class>org.springframework.web.context.ContextLoaderListener</listener-class>
</listener>
<context-param>
<param-name>contextConfigLocation</param-name>
<param-value>WEB-INF/applicationContext.xml</param-value>
</context-param>
<servlet>
<servlet-name>freemarker</servlet-name>
<servlet-class>org.springframework.web.servlet.DispatcherServlet</servlet-class>
<load-on-startup>1</load-on-startup>
</servlet>
<servlet-mapping>
<servlet-name>freemarker</servlet-name>
<url-pattern>/*</url-pattern>
</servlet-mapping>
</web-app>
然后在spring的配置文件applicationContext.xml中加入FreeMarker的配置:
<!-- freemarker配置 -->
<bean id="freemarkerConfig"
class="org.springframework.web.servlet.view.freemarker.FreeMarkerConfigurer">
<property name="templateLoaderPath" value="/WEB-INF/templates" />
<property name="freemarkerSettings">
<props>
<prop key="template_update_delay">0</prop>
<prop key="default_encoding">UTF-8</prop>
</props>
</property>
</bean>
其中templateLoaderPath是指定模板文件的位置,freemarkerSetting是对FreeMarker的配置,包括boolean和date时间的显示格式,比如可以设置date_format属性的值为yyyy-MM-ss,格式化格式采用SimpleDateFormat。更多的配置可以参考Configuration和Configurable的API。
最后一步是配置FreeMarker在SpringMVC里面的视图解析器,在freemarker-servlet.xml的文件中添加:
<!-- 针对freemarker的视图配置项 -->
<bean id="viewResolver"
class="org.springframework.web.servlet.view.freemarker.FreeMarkerViewResolver">
<property name="cache" value="true" />
<property name="prefix" value="/" />
<property name="suffix" value=".ftl" />
<property name="contentType" value="text/html;charset=UTF-8" />
<property name="requestContextAttribute" value="request" /><!-- 定义request对象名称 -->
<property name="exposeSessionAttributes" value="true" /> <!-- 暴露session属性 -->
</bean>
其中requestContextAttribute属性通过查看springmvc的mvc模板的源码得知,在FreeMarkerViewResolver的父类UrlBasedViewResolver中定义的:
/**
* Set the name of the RequestContext attribute for all views.
* @param requestContextAttribute name of the RequestContext attribute
* @see AbstractView#setRequestContextAttribute
*/
public void setRequestContextAttribute(String requestContextAttribute) {
this.requestContextAttribute = requestContextAttribute;
}
设置requestContext对象的变量名的,这样每个页面都能取得这个对象了。
exposeSessionAttributes的属性设置源码如下:
/**
* Set whether all HttpSession attributes should be added to the
* model prior to merging with the template. Default is "false".
* @see AbstractTemplateView#setExposeSessionAttributes
*/
public void setExposeSessionAttributes(boolean exposeSessionAttributes) {
this.exposeSessionAttributes = exposeSessionAttributes;
}
更多属性设置可以参考spring的文档,这些属性对于velocity模板引擎也是通用的。
Controller代码如下,其中ModelAndView是org.springframework.web.servlet下的:
import org.springframework.stereotype.Controller;
import org.springframework.ui.Model;
import org.springframework.web.bind.annotation.RequestMapping;
import org.springframework.web.servlet.ModelAndView;

@Controller
public class TestController {

@RequestMapping("/mv")
public ModelAndView test(){
ModelAndView mv = new ModelAndView();
mv.setViewName("main_f");
mv.addObject("user", "bigbang");
return mv;
}
@RequestMapping("/main_first.html")
public String main_first(Model model){
model.addAttribute("user", "bigbang");
return "main_f";
}

@RequestMapping("/main_second.html")
public String main_second(Model model){
model.addAttribute("user", "bigbang");
return "main_s";
}

@RequestMapping("/anonymous.html")
public String test2(){
return "main_f";
}
}
此处为体现了FreeMarker的使用,所以写了比较多的模块,在此只贴出文件位置图,其中main_f.ftl包含top.ftl、left.ftl和center.ftl,main_s.ftl包含top.ftl、customLeft.ftl和center.ftl:
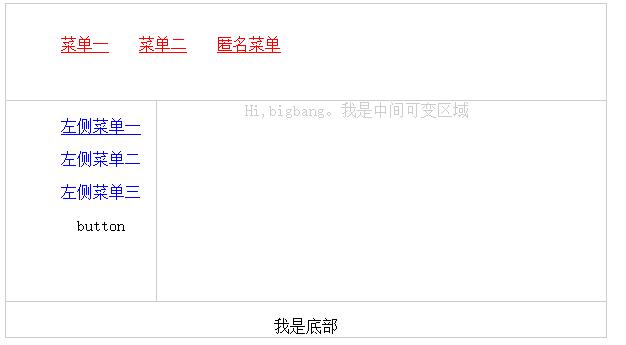
正常访问下的效果图如下:
请求main_first.html:
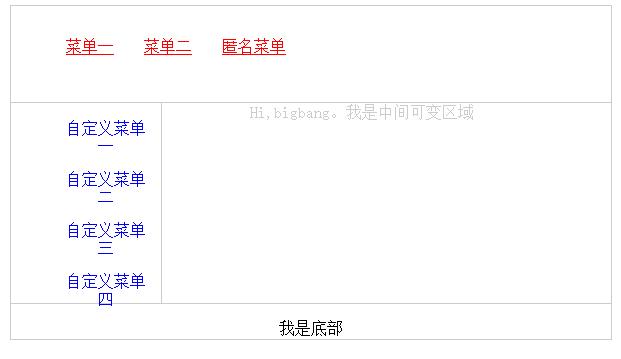
请求main_second.html的效果图如下:

相关文章推荐
- java并发编程:线程安全管理类--原子操作类--AtomicLongFieldUpdater<T>
- 抛出自定义异常,spring AOP事务不回滚的解决方案
- java并发编程:线程安全管理类--原子操作类--AtomicLongArray
- 如何在spring中读取properties配置文件里面的信息
- Java源码阅读之HashMap
- 第一周JAVA学习笔记(一)
- myeclipse操作相关
- java中的Comparator和Comparable的区别
- JDK的环境变量设置
- java并发编程:线程安全管理类--原子操作类--AtomicIntegerFieldUpdater<T>
- java ThreadPoolExecutor 自定义线程池优势
- (5)正则表达式——Java
- AS和Eclipse的快捷键
- java并发编程:线程安全管理类--原子操作类--AtomicIntegerArray
- 在aix环境中用java实现自动发邮件告警
- java的动态代理机制
- (1)获取网页源代码——Java
- AXIS2远程调用WebService示例(Eclipse+AXIS)
- JDK的环境变量设置
- java面向对象之向上转型和向下转型