实现Android应用自动更新
2016-03-02 10:27
501 查看
摘要: 应用程序总是不可能一次写好就终生不变的,相反,一般来说,应用程序都是会有一个更新换代的过程。为了让我们的程序使用者能及及时获知程序的更新,就需要我们提供应用自动更新功能。该博客主要记录了实现应用自动更新的过程。
一、自动更新实现流程
从服务器端获取最新应用的版本信息
从本地配置文件中读取本地应用的版本信息
比较服务端版本信息和本地版本信息,若服务器端的版本号大于本地的版本号,则转4,否则结束
弹框提示用户应用程序有更新的版本,询问是否需要下载,若是则转5,否则弹框消失,结束
从服务器端获取最新版应用程序,存于本地,并进行安装
二、自动更新实现过程
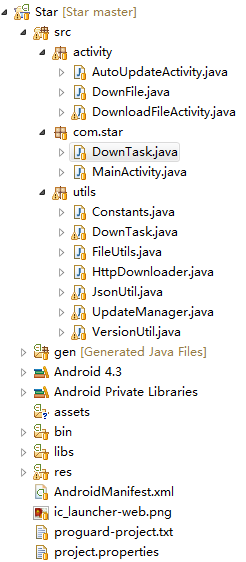
新建一个Android工程,如我的工程文件目录为:
在工程文件中新建一个activity,用于呈现自动更新提示对话框。如上图工程中的AutoUpdateActivity,该activity代码如下:
上面代码中的checkUpdate()函数包含了上述原理一中的1、2、3步,当if条件判断为真时,显示应用更新提示对话框,即调用showUpdateDilaog()方法,用户选择“下载”,则下载该应用程序,并进行更新(这部分为调用DownTask进行处理);
DownTask类代码如下:
FileUtils代码:
最后别忘了在manifest文件中添加相应的权限以及该activity
注意:Android不能在UI线程中进行比较耗时的操作,否则可能导致页面阻塞,甚至引发ANR错误(程序未响应),所以该示例中的下载操作放到一个异步任务中进行的,也可以采用工作线程的方式
一、自动更新实现流程
从服务器端获取最新应用的版本信息
从本地配置文件中读取本地应用的版本信息
比较服务端版本信息和本地版本信息,若服务器端的版本号大于本地的版本号,则转4,否则结束
弹框提示用户应用程序有更新的版本,询问是否需要下载,若是则转5,否则弹框消失,结束
从服务器端获取最新版应用程序,存于本地,并进行安装
二、自动更新实现过程
新建一个Android工程,如我的工程文件目录为:
在工程文件中新建一个activity,用于呈现自动更新提示对话框。如上图工程中的AutoUpdateActivity,该activity代码如下:
//一个用于呈现提示用于进行更新的页面
public class AutoUpdateActivity extends Activity {
private static final String TAG = "AutoUpdateActivity";    //日志打印标志
private static int localVersionCode, serverVersionCode = 0;   //本地和服务器端应用版本号
private String fileName, filePath;    //应用程序保存文件名和文件路径
private Context context;

@Override
protected void onCreate(Bundle savedInstanceState) {
super.onCreate(savedInstanceState);
//设置当前activity的布局文件,任意布局文件皆可
setContentView(R.layout.activity_auto_update);
context = this;
filePath = "Star";
}

@Override
protected void onResume() {
super.onResume();
// 检查是否需要进行版本更新,该函数必须在onResume或者onStart中调用,否则可能报错
checkUpdate();
}

// 检查是否有新的版本
private void checkUpdate() {

// 获取本地应用程序版本号
try {
localVersionCode = context.getPackageManager().getPackageInfo(
context.getPackageName(), 0).versionCode;
} catch (NameNotFoundException e) {
e.printStackTrace();
}

// 比较本地版本号与服务器端版本号,判断是否需要更新
if (getServerVersionCode() > localVersionCode) {
fileName = "Star.apk";
showUpdateDialog();
}
}

// 获取服务器端应用程序版本号
private int getServerVersionCode() {
RequestParams params = new RequestParams();
StringBuilder versionCode = new StringBuilder();
versionCode.append("{\"getVersionCode\"}");
params.put("param", versionCode.toString());

AsyncHttpClient client = new AsyncHttpClient();
//向服务器请求最新版本号的URL地址
String urlString = utils.Constants.SERVER_BASE_URL
+ utils.Constants.GET_VERSION_CODE;
client.post(urlString, params, new AsyncHttpResponseHandler() {
@Override
public void onSuccess(String response) {
serverVersionCode = Integer.parseInt(JsonUtil
.getResult(response));
}

@Override
public void onFailure(Throwable error, String content) {
serverVersionCode = 0;
Log.d(TAG, content + " ");
}
});
return serverVersionCode;
}

// 显示应用程序更新对话框
private void showUpdateDialog() {
//创建一个对话框
AlertDialog.Builder builder = new AlertDialog.Builder(context);
//设置对话框标题、显示信息等
builder.setTitle("版本更新").setMessage("Star有新版本啦,快下载体验吧~")
.setIcon(com.star.R.drawable.ic_update_dialog);
//设置对话框的响应按钮
builder.setPositiveButton("下载", new OnClickListener() {
@Override
public void onClick(DialogInterface dialog, int which) {
dialog.dismiss();
//DownTask是一个我自己写的AsyncTask类,用于下载最新版的应用程序
DownTask downTask = new DownTask(context, filePath, fileName);
downTask.execute(Constants.SERVER_BASE_URL
+ Constants.GET_NEW_VERSION);
}
});
builder.setNegativeButton("以后再说", new OnClickListener() {

@Override
public void onClick(DialogInterface dialog, int which) {
dialog.dismiss();    //对话框消失
}
});
builder.show();    //必须调用该函数,否则创建的对话框将不会显示
}
}
上面代码中的checkUpdate()函数包含了上述原理一中的1、2、3步,当if条件判断为真时,显示应用更新提示对话框,即调用showUpdateDilaog()方法,用户选择“下载”,则下载该应用程序,并进行更新(这部分为调用DownTask进行处理);
DownTask类代码如下:
//DownTask是通过一部任务进行应用下载的,也可以开启一个新的工作线程进行下载
public class DownTask extends AsyncTask<String, Integer, String> {
private static final String TAG = "DownTask";
private Context mContext;
private AlertDialog aDialog;
private String filePath;
private String fileName;

/**
* 构造函数
*
* @param ctx
* @param savePath
*            :下载资源保存路径
@param fileName
*            :下载资源保存文件名
*/
public DownTask(Context ctx, String savePath, String fileName) {
mContext = ctx;
filePath = savePath;
this.fileName = fileName;
}

@SuppressWarnings("unused")
@Override
protected String doInBackground(String... params) {
//FileUtils是自己写的一个文件工具
FileUtils fileUtil = new FileUtils();
String result = null;
File file;
try {
file = new File(fileUtil.getSDPATH() + filePath + "/" + fileName);
if (file.exists()) {
result = "File exist!";
Log.i(TAG, result);
} else {
fileUtil.createSDDir(filePath);
file.createNewFile();
URL url = new URL(params[0]);
HttpURLConnection urlConnection = (HttpURLConnection) url
.openConnection();
fileUtil.write2SDFromInput(filePath, fileName,
urlConnection.getInputStream());
if (file != null) {
result = "success";
} else {
result = "Fail";
}
}
} catch (IOException e1) {
e1.printStackTrace();
}
Log.i(TAG, result);
return result;
}

@Override
protected void onPostExecute(String result) {
Toast.makeText(mContext, "最新版Star已经下载好啦,赶快试用吧!",
Toast.LENGTH_LONG);
Log.i(TAG, "Finish download");
aDialog.dismiss();
installApk();
}

// 安装apk文件
private void installApk() {
File apkfile = new File(filePath + "/" + fileName);
if (!apkfile.exists()) {
return;
}

//调用安装应用程序的Intent
Intent i = new Intent(Intent.ACTION_VIEW);
i.setDataAndType(Uri.parse("file://" + apkfile.toString()),
"application/vnd.android.package-archive");
mContext.startActivity(i);
}

@Override
protected void onPreExecute() {
AlertDialog.Builder builder = new AlertDialog.Builder(mContext);
builder.setTitle("下载Star").setMessage("新版本下载中...")
.setIcon(R.drawable.ic_update_dialog).show();
aDialog = builder.create();
}
}
FileUtils代码:
public class FileUtils {
private String SDPATH;

private int FILESIZE = 4 * 1024;

public String getSDPATH() {
return SDPATH;
}

public FileUtils() {
// 得到当前外部存储设备的目录( /SDCARD )
SDPATH = Environment.getExternalStorageDirectory() + "/";
}

/**
* 在SD卡上创建文件
*
* @param fileName
* @return
* @throws IOException
*/
public File createSDFile(String fileName) throws IOException {
File file = new File(SDPATH + fileName);
file.createNewFile();
return file;
}

/**
* 在SD卡上创建目录
*
* @param dirName
* @return
*/
public File createSDDir(String dirName) {
File dir = new File(SDPATH + dirName);
dir.mkdir();
return dir;
}

/**
* 判断SD卡上的文件夹是否存在
*
* @param fileName
* @return
*/
public boolean isFileExist(String fileName) {
File file = new File(SDPATH + fileName);
return file.exists();
}

/**
* 将一个InputStream里面的数据写入到SD卡中
*
* @param path
* @param fileName
* @param input
* @return
*/
public File write2SDFromInput(String path, String fileName,
InputStream input) {
File file = null;
OutputStream output = null;
try {
createSDDir(path);
file = createSDFile(path + fileName);
output = new FileOutputStream(file);
byte[] buffer = new byte[FILESIZE];

int length;
while ((length = (input.read(buffer))) > 0) {
output.write(buffer, 0, length);
}
output.flush();
} catch (Exception e) {
e.printStackTrace();
} finally {
try {
output.close();
} catch (IOException e) {
e.printStackTrace();
}
}
return file;
}
}
最后别忘了在manifest文件中添加相应的权限以及该activity
<!-- 写SD卡的权限 -->
<uses-permission android:name="android.permission.WRITE_EXTERNAL_STORAGE"/>
<!--  网络权限 -->
<uses-permission android:name="android.permission.INTERNET"/>

<application
android:allowBackup="true"
android:icon="@drawable/ic_launcher"
android:label="@string/app_name"
android:theme="@style/AppTheme" >
<activity
android:name="activity.AutoUpdateActivity"
android:label="@string/app_name" >
<intent-filter>
<action android:name="android.intent.action.MAIN" />

<category android:name="android.intent.category.LAUNCHER" />
</intent-filter>
</activity>
</application>
注意:Android不能在UI线程中进行比较耗时的操作,否则可能导致页面阻塞,甚至引发ANR错误(程序未响应),所以该示例中的下载操作放到一个异步任务中进行的,也可以采用工作线程的方式

相关文章推荐
- 使用C++实现JNI接口需要注意的事项
- Android IPC进程间通讯机制
- Android Manifest 用法
- [转载]Activity中ConfigChanges属性的用法
- Android之获取手机上的图片和视频缩略图thumbnails
- Android之使用Http协议实现文件上传功能
- Android学习笔记(二九):嵌入浏览器
- android string.xml文件中的整型和string型代替
- i-jetty环境搭配与编译
- android之定时器AlarmManager
- android wifi 无线调试
- Android Native 绘图方法
- Android java 与 javascript互访(相互调用)的方法例子
- android 代码实现控件之间的间距
- android FragmentPagerAdapter的“标准”配置
- Android"解决"onTouch和onClick的冲突问题
- android:installLocation简析
- android searchView的关闭事件
- SourceProvider.getJniDirectories