自定义View之刻度盘
2016-03-02 00:07
495 查看
转载请注明出处:http://blog.csdn.net/Myleike/article/details/50776680
定义控件属性
在代码中获取属性值
重写onMeasure()方法(不是必须)
重写onDraw()方法
废话不多说,直接上代码
一、定义控件属性
res/values/attrs.xml
二、在代码中获取属性值
三、重写onMeasure()方法计算控件大小
初始化画笔
四、重写onDraw()方法绘制控件
我们还可以为他添加点击事件——重写onTouchEvent()
由于篇幅原因,这里只贴主要代码。要查看源码,请点击下载
转载请注明出处:http://blog.csdn.net/Myleike/article/details/50776680
很多时候android原生的控件都不能满足我们的需求,比如说我们要实现下面这个内存清理按钮: 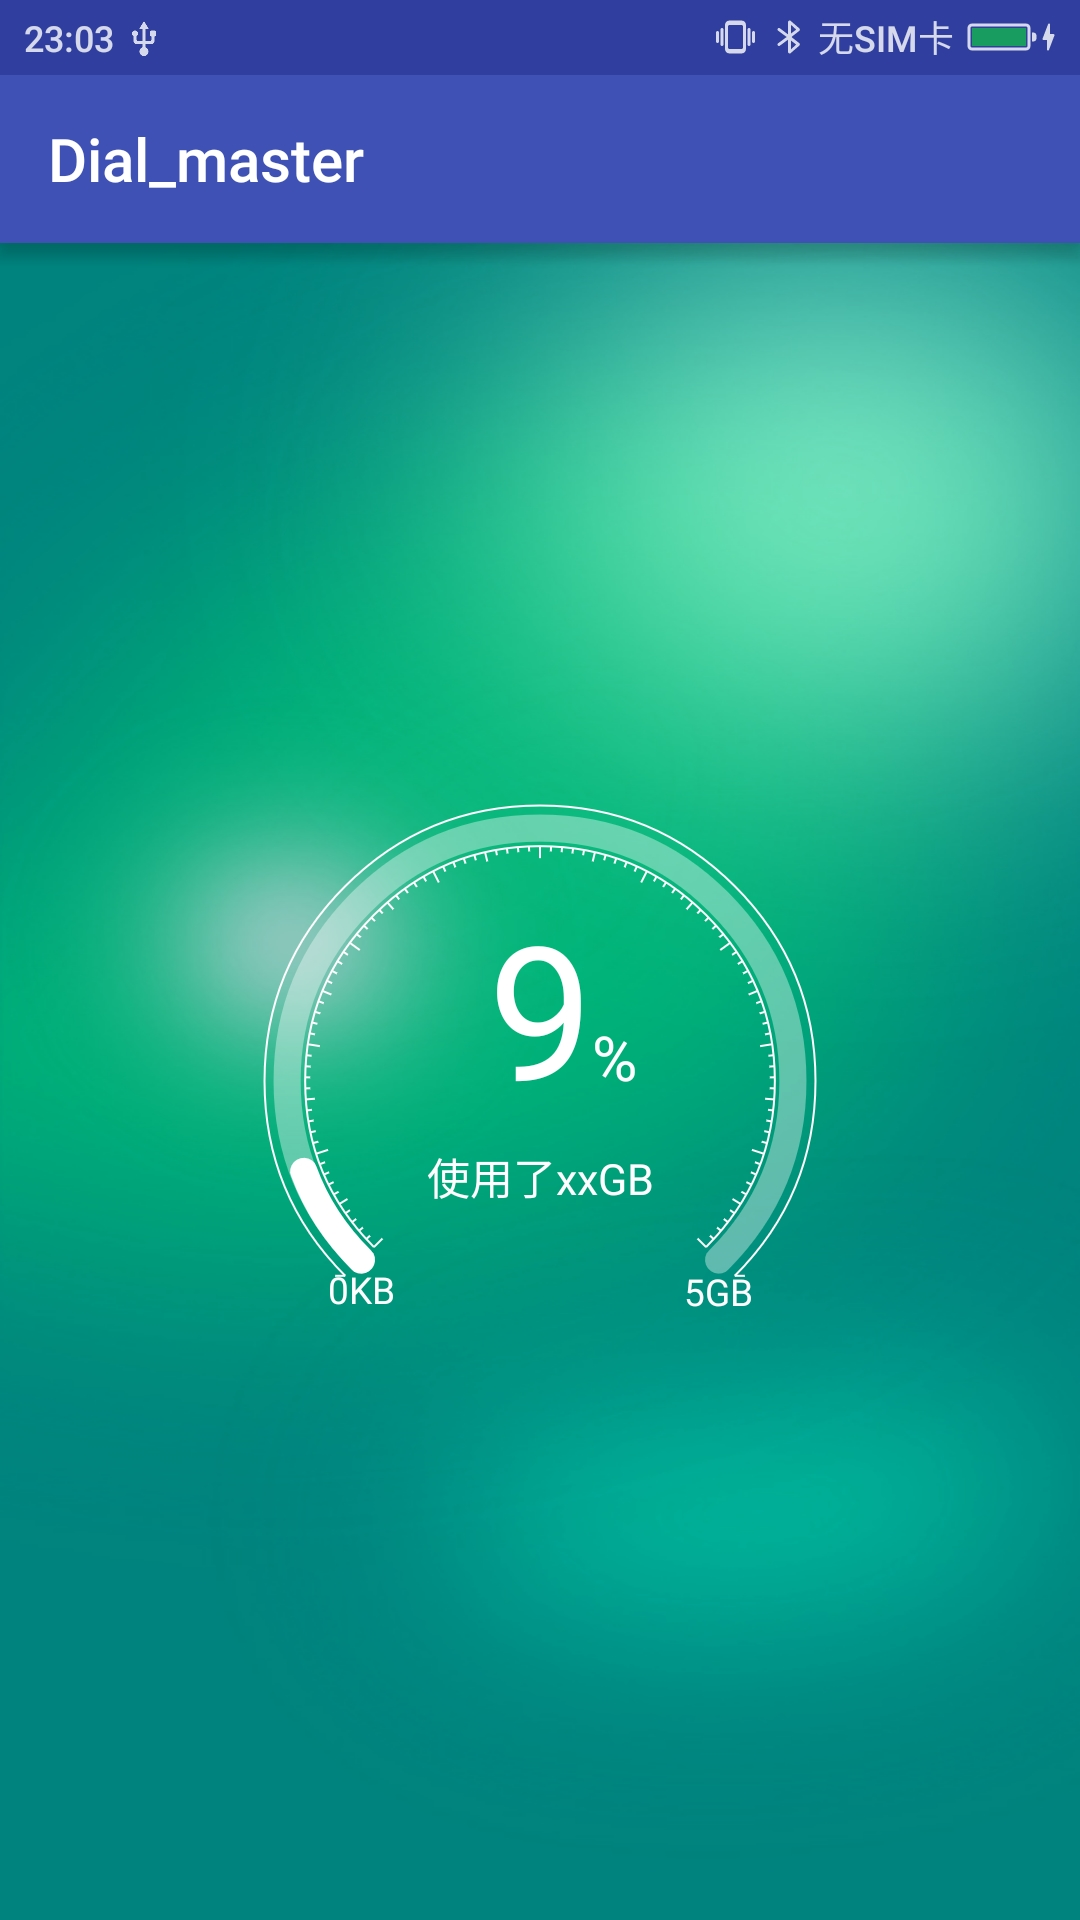 这时就需要我们自定义一个控件了。 自定义控件共需完成下面四个步骤:
定义控件属性
在代码中获取属性值
重写onMeasure()方法(不是必须)
重写onDraw()方法
废话不多说,直接上代码
一、定义控件属性
res/values/attrs.xml
<?xml version="1.0" encoding="utf-8"?>
<resources>
<declare-styleable name="DialView">
<attr name="padding" format="float"/>
<attr name="out_oval_color" format="color"/>
<attr name="bar_color" format="color"/>
<attr name="bar_background_color" format="color"/>
<attr name="graduation_color" format="color"/>
<attr name="progress" format="integer"/>
<attr name="context" format="string"/>
<attr name="min_size" format="string"/>
<attr name="max_size" format="string"/>
<attr name="text_color" format="color"/>
</declare-styleable>
</resources>
二、在代码中获取属性值
public DialView(Context context, AttributeSet attrs, int defStyle){
super(context, attrs, defStyle);
TypedArray typedArray = context.getTheme().obtainStyledAttributes(attrs, R.styleable.DialView, defStyle, 0);
padding = typedArray.getFloat(R.styleable.DialView_padding, 10);
outOvalColor = typedArray.getColor(R.styleable.DialView_out_oval_color, Color.WHITE);
barColor = typedArray.getColor(R.styleable.DialView_bar_color, Color.WHITE);
barBackgroundColor = typedArray.getColor(R.styleable.DialView_bar_background_color, 0x60ffffff);
graduationColor = typedArray.getColor(R.styleable.DialView_graduation_color, Color.WHITE);
progress = typedArray.getInt(R.styleable.DialView_progress, 0);
barContext = typedArray.getString(R.styleable.DialView_context);
minSize = typedArray.getString(R.styleable.DialView_min_size);
maxSize = typedArray.getString(R.styleable.DialView_max_size);
textColor = typedArray.getColor(R.styleable.DialView_text_color, Color.WHITE);
}
三、重写onMeasure()方法计算控件大小
@Override
protected void onMeasure(int widthMeasureSpec, int heightMeasureSpec) {
super.onMeasure(widthMeasureSpec, heightMeasureSpec);
//计算控件宽度
int sizeWidth = MeasureSpec.getSize(widthMeasureSpec);
//计算控件高度
int sizeHeight = MeasureSpec.getSize(heightMeasureSpec);
this.w = sizeWidth-padding*2;
this.h = sizeHeight - padding*2;
this.radius = w / 2 < h / 2 ? w / 2 : h / 2; // 计算半径
this.center = new Point(sizeWidth/2, sizeHeight/2);//计算圆心

this.outRadius = radius / 31 * 30.5F;//外圆半径
this.barRadius = radius / 31 * 28;//进度条半径
this.inRadius = radius / 31 * 26F;//内圆半径
initView();
}
初始化画笔
private void initView(){
Paint basePaint = new Paint();
basePaint.setAntiAlias(true);
basePaint.setStyle(Paint.Style.STROKE);

outOvalPaint = new Paint(basePaint);
outOvalPaint.setColor(outOvalColor);
outOvalPaint.setStrokeWidth(2);

barPaint = new Paint(basePaint);
barPaint.setColor(barColor);
//设置圆弧为圆端
barPaint.setStrokeCap(Paint.Cap.ROUND);
barPaint.setStrokeWidth(radius / 31 * 3);

graduationPaint = new Paint(basePaint);
graduationPaint.setColor(graduationColor);
graduationPaint.setStrokeWidth(2);

textPaint = new Paint(basePaint);
textPaint.setColor(textColor);
}
四、重写onDraw()方法绘制控件
@Override
protected void onDraw(Canvas canvas) {
super.onDraw(canvas);
Point liftStart = CustomViewMath.getPoint(center, outRadius, 315.0);
Point rightStart = CustomViewMath.getPoint(center, outRadius, 45.0);
// 绘制外圆弧
canvas.drawArc(creatRectF(outRadius), 135, 270, false, outOvalPaint);
//  绘制横线
canvas.drawLine(liftStart.x, liftStart.y, liftStart.x - 10,
liftStart.y, outOvalPaint);
canvas.drawLine(rightStart.x, rightStart.y, rightStart.x + 10,
rightStart.y, outOvalPaint);
//绘制进度条
barPaint.setColor(barColor);
canvas.drawArc(creatRectF(barRadius), 135, 270 * progress / 100,false,barPaint);
barPaint.setColor(barBackgroundColor);
canvas.drawArc(creatRectF(barRadius), 135, 270,false,barPaint);

// 绘制内圆弧
canvas.drawArc(creatRectF(inRadius), 135, 270, false, graduationPaint);
int length;
for (int i = 0; i < 101; i++) {
if (i % 10 == 0)
length = 12;
else if (i % 5 == 0)
length = 9;
else
length = 5;
Point start = CustomViewMath.getPoint(center, inRadius, (double) (315 - i * space));
Point stop = CustomViewMath.getPoint(center, inRadius - length, (double)(315 - i * space));
canvas.drawLine(start.x, start.y, stop.x, stop.y, graduationPaint);
}
/** 绘制百分比 */
textPaint.setTextSize(radius / 3 * 2);
float l = textPaint.measureText(progress + "");
canvas.drawText(progress + "", (getWidth() - l) / 2, getHeight() / 2, textPaint);

textPaint.setTextSize(radius / 9 * 2);
canvas.drawText("%", (getWidth() - l) / 2 + l, getHeight() / 2, textPaint);
/**绘制信息*/
if(barContext!=null&&!barContext.equals("")){
textPaint.setTextSize(radius / 13 * 2);
Paint.FontMetrics fm1 = textPaint.getFontMetrics();
float tl = textPaint.measureText(barContext);
canvas.drawText(barContext, (getWidth() - tl) / 2, getHeight() / 2 + (fm1.bottom-fm1.top)*2, textPaint);
}
//绘制数值范围
Point liftPoint = CustomViewMath.getPoint(center, barRadius, 315.0);
Point rightPoint = CustomViewMath.getPoint(center, barRadius, 45.0);
textPaint.setTextSize(radius / 15 * 2);
float minl = textPaint.measureText(minSize);
float maxl = textPaint.measureText(maxSize);
canvas.drawText(minSize, liftPoint.x - minl / 2, liftPoint.y + minl / 3
* 2, textPaint);
canvas.drawText(maxSize, rightPoint.x - maxl / 2, rightPoint.y + maxl
/ 3 * 2, textPaint);
}
我们还可以为他添加点击事件——重写onTouchEvent()
@Override
public boolean onTouchEvent(MotionEvent event) {
RectF rectF = creatRectF(radius);
if(isDown)  return true;
if (event.getX() > rectF.left && event.getX() < rectF.right && event.getY() > rectF.top && event.getY() < rectF.bottom) {
if (event.getAction() == MotionEvent.ACTION_UP) {
isDown = true;
//这里是一个回掉接口,我们可以通过实现他来做我们的操作
if (listener != null)
listener.onClick();
new Thread(new Runnable() {
@Override
public void run() {
Random random = new Random();
int n = random.nextInt(100)+1;
try {
while (progress > 0) {
progress--;
Thread.sleep(20);
Message msg = new Message();
msg.what = 1;
mhandler.sendMessage(msg);
}
while (progress < n) {
progress++;
Thread.sleep(20);
Message msg = new Message();
msg.what = 1;
mhandler.sendMessage(msg);
}
isDown = false;
}catch (Exception e){}
}
}).start();
}
}
return  true;
}由于篇幅原因,这里只贴主要代码。要查看源码,请点击下载
转载请注明出处:http://blog.csdn.net/Myleike/article/details/50776680

相关文章推荐
- 使用C++实现JNI接口需要注意的事项
- Android IPC进程间通讯机制
- Android Manifest 用法
- [转载]Activity中ConfigChanges属性的用法
- Android之获取手机上的图片和视频缩略图thumbnails
- Android之使用Http协议实现文件上传功能
- Android学习笔记(二九):嵌入浏览器
- android string.xml文件中的整型和string型代替
- i-jetty环境搭配与编译
- android之定时器AlarmManager
- android wifi 无线调试
- Android Native 绘图方法
- Android java 与 javascript互访(相互调用)的方法例子
- android 代码实现控件之间的间距
- android FragmentPagerAdapter的“标准”配置
- Android"解决"onTouch和onClick的冲突问题
- android:installLocation简析
- android searchView的关闭事件
- SourceProvider.getJniDirectories