UIKit框架(21)UITableView实现复杂单元格(二)
2016-03-01 14:56
609 查看
继续介绍第二种实现复杂单元格的方式 ---- 使用storyboard中的prototype cell
prototype Cell介绍
在storyboard或xib中使用tableView时,可以添加prototype cells,其好处是:
1)可以直接进行自定义cell的设置
2)通过设置cell的重用ID,在调用出队列方法时如果没有可重用的则创建一个新的
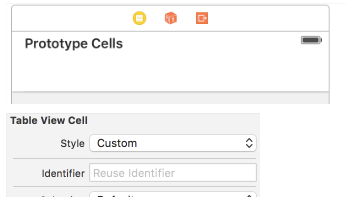
注:一个tableView中可以设计多个prototype cell,重用ID不同即可
使用prototype cell 设计tableView是最常用的一种方式!
使用prototype cell相比较于纯代码,可以简化两处编程
简化cell获取的代码
使用了prototype cell之后,从tableView的重用队列获取指定ID的cell,如果获取不出来,会自动创建一个相同ID的prototype cell的副本,不再需要alloc+init进行创建
简化cell的子视图设定
使用storyboard设计cell内部的子视图,也就是说不需要在代码中创建子视图并进行自动布局,这些工作全部可以在storyboard中快速完成。
也就是说,上篇文章中,介绍的1.2 1.3这两步不再需要
案例:模拟实现大众点评的首页
prototype cell是我们实现复杂tableView的一种快速开发手段
如实现如下截图的效果:

可以看到:
三个section,每个section中的cell样式不同及个数不同
第一个section:一个cell,scrollView,内部有很多按钮
第二个section:两个cell,活动信息cell
第三个section:很多个cell,产品信息cell
1)在storyboard设计出这三种cell

每种cell设定不同的ID
3)创建每个cell需要显示的数据模型类
4)每种cell分别关联UITableViewCell的子类
子类内部分别实现三步操作(见UIKit框架(21)UITableView实现复杂单元格(一))
5)控制器管理所有的数据模型并实现数据源、代理方法
案例扩展:加载更多
在最后一个section下面增加一个加载更多按钮

点击后,可以模拟一个简单的增加cell的操作
1)使用xib设计一个这个底部视图
2)关联一个UIView的子类并提供类方法快速创建
4)加载更多按钮被点击时,将点击产生这个时间通过代理传递给控制器
成为代理的操作在3)中已有
代理方法的实现:(简单模拟)
prototype Cell介绍
在storyboard或xib中使用tableView时,可以添加prototype cells,其好处是:
1)可以直接进行自定义cell的设置
2)通过设置cell的重用ID,在调用出队列方法时如果没有可重用的则创建一个新的
注:一个tableView中可以设计多个prototype cell,重用ID不同即可
使用prototype cell 设计tableView是最常用的一种方式!
使用prototype cell相比较于纯代码,可以简化两处编程
简化cell获取的代码
使用了prototype cell之后,从tableView的重用队列获取指定ID的cell,如果获取不出来,会自动创建一个相同ID的prototype cell的副本,不再需要alloc+init进行创建
//1.1 实现类方法,获取cell
+ (AMHeroCell *)cellWithTableView:(UITableView *)tableView
{
AMHeroCell * cell = [tableView dequeueReusableCellWithIdentifier:@"cell"];
return cell;
}
简化cell的子视图设定
使用storyboard设计cell内部的子视图,也就是说不需要在代码中创建子视图并进行自动布局,这些工作全部可以在storyboard中快速完成。
也就是说,上篇文章中,介绍的1.2 1.3这两步不再需要
案例:模拟实现大众点评的首页
prototype cell是我们实现复杂tableView的一种快速开发手段
如实现如下截图的效果:
可以看到:
三个section,每个section中的cell样式不同及个数不同
第一个section:一个cell,scrollView,内部有很多按钮
第二个section:两个cell,活动信息cell
第三个section:很多个cell,产品信息cell
1)在storyboard设计出这三种cell
每种cell设定不同的ID
3)创建每个cell需要显示的数据模型类
4)每种cell分别关联UITableViewCell的子类
子类内部分别实现三步操作(见UIKit框架(21)UITableView实现复杂单元格(一))
5)控制器管理所有的数据模型并实现数据源、代理方法
#pragma mark - tableView
- (NSInteger)numberOfSectionsInTableView:(UITableView *)tableView
{
return 3;
}
- (NSInteger)tableView:(UITableView *)tableView numberOfRowsInSection:(NSInteger)section
{
if (section == 0 ) {
return 1;
}
else if ( section == 1 ) {
return self.activityArray.count;
}
else if ( section == 2 ) {
return self.goodsArray.count;
}
else {
return 0;
}
}

- (UITableViewCell *)tableView:(UITableView *)tableView cellForRowAtIndexPath:(NSIndexPath *)indexPath
{
if ( indexPath.section == 0 ) {
return [AMFunctionSelectionCell cellWithTableView:tableView];
}
else if ( indexPath.section == 1 ) {
return [AMActivityCell cellWithTableView:tableView];
}
else if ( indexPath.section == 2 ) {
return [AMGoodsInfoCell cellWithTableView:tableView];
}
else {
return nil;
}
}

- (CGFloat)tableView:(UITableView *)tableView heightForRowAtIndexPath:(NSIndexPath *)indexPath
{
if ( indexPath.section == 0 ) {
return [AMFunctionSelectionCell cellHeight];
}
else if ( indexPath.section == 1 ) {
return [AMActivityCell cellHeight];
}
else if ( indexPath.section == 2 ) {
return [AMGoodsInfoCell cellHeight];
}
else {
return 0;
}
}
- (void)tableView:(UITableView *)tableView willDisplayCell:(UITableViewCell *)cell forRowAtIndexPath:(NSIndexPath *)indexPath
{
if ( indexPath.section == 0 ) {

}
else if ( indexPath.section == 1) {
((AMActivityCell*)cell).activityModel = self.activityArray[indexPath.row];
}
else if ( indexPath.section == 2 ) {
((AMGoodsInfoCell*)cell).goodsInfoModel = self.goodsArray[indexPath.row];
}
}
案例扩展:加载更多
在最后一个section下面增加一个加载更多按钮
点击后,可以模拟一个简单的增加cell的操作
1)使用xib设计一个这个底部视图
2)关联一个UIView的子类并提供类方法快速创建
+ (AMGoodsInfoFooterView *)view
{
return [[[NSBundle mainBundle] loadNibNamed:@"AMGoodinfoFooterView" owner:nil options:nil]lastObject];
}3)控制器实现tableView的数据源方法- (UIView *)tableView:(UITableView *)tableView viewForFooterInSection:(NSInteger)section
{
if ( section == 2 ) {
AMGoodsInfoFooterView * v = [AMGoodsInfoFooterView view];
v.delegate = self;
return v;
}
else {
return nil;
}
}
- (CGFloat)tableView:(UITableView *)tableView heightForFooterInSection:(NSInteger)section
{
if ( section == 2 ) {
return 40;
}
else {
return 5;
}
}
- (CGFloat)tableView:(UITableView *)tableView heightForHeaderInSection:(NSInteger)section
{
return 5;
} 说明:两处返回5的目的是让三个section之间的空隙不要太大4)加载更多按钮被点击时,将点击产生这个时间通过代理传递给控制器
//UIView子类提出代理协议并添加代理属性
@protocol AMGoodsInfoFooterViewDelegate <NSObject>
@optional
- (void) footerViewLoadMoreGoods;
@end
@interface AMGoodsInfoFooterView : UIView
+ (AMGoodsInfoFooterView *) view;
@property (nonatomic, weak) id<AMGoodsInfoFooterViewDelegate> delegate;
@end
5)控制器成为代理并实现代理方法
成为代理的操作在3)中已有
代理方法的实现:(简单模拟)
- (void)footerViewLoadMoreGoods
{
AMGoodsInfoModel * model = [[AMGoodsInfoModel alloc] init];
model.icon = self.goodsArray[0].icon;
model.goodTitle = @"东软食堂";
model.goodFooter = @"已售999999999";
model.goodDesc = @"吃了你就知道了";
model.priceValue = @"8";
[self.goodsArray addObject:model];

NSIndexSet * s = [NSIndexSet indexSetWithIndex:2];
[self.tableView reloadSections:s withRowAnimation:UITableViewRowAnimationLeft];
}

相关文章推荐
- 峰回路转,Firefox 浏览器即将重返 iOS 平台
- 峰回路转,Firefox 浏览器即将重返 iOS 平台
- 个人信息安全报告发布:有 APP 每分钟调用位置权限 1468 次
- 不可修补的 iOS 漏洞可能导致 iPhone 4s 到 iPhone X 永久越狱
- 下载量超过一亿的流行应用被发现含有恶意模块
- iOS 12.4 系统遭黑客破解,漏洞危及数百万用户
- 每日安全资讯:NSO,一家专业入侵 iPhone 的神秘公司
- [转][源代码]Comex公布JailbreakMe 3.0源代码
- 苹果与Siri的七年之痒:“宫斗”戏码不断上演
- APP添加CNZZ统计插件教程 Android版添加phonegap
- Android APP与媒体存储服务的交互
- java实现收藏名言语句台词的app
- 修改Android App样式风格的方法
- Android App数据格式Json解析方法和常见问题
- 讲解iOS开发中基本的定位功能实现
- iOS中定位当前位置坐标及转换为火星坐标的方法
- js判断客户端是iOS还是Android等移动终端的方法
- iOS应用中UISearchDisplayController搜索效果的用法
- IOS开发环境windows化攻略