第十八课:公告板与粒子2
2016-02-29 15:13
295 查看
翻译自:http://www.opengl-tutorial.org/intermediate-tutorials/billboards-particles/particles-instancing/
Particles / Instancing
粒子与实例化
Particles are very similar to 3D billboards. There are two major differences, though :粒子与3D公告板很相似。但他们有2处不同的地方:
there is usually a LOT of them
they move
the appear and die.
they are semi-transparent
通常粒子会很多
粒子会移动
粒子会出生于小时
他们通常是半透明的
Both of these difference come with problems. This tutorial will present ONE way to solve them; there are many other possibilities.
这边不同点都可能会导致问题。本文将会展示一种解决的方法,当然还有很多其他的解决方法。
Particles, lots of them !
粒子,好多啊!
The first idea to draw many particles would be to use the previous tutorial’s code, and call glDrawArrays once for each particle. This is a very bad idea, because this means that all your shiny GTX’ 512+ multiprocessors will all be dedicated to draw ONE quad(obviously, only one will be used, so that’s 99% efficiency loss). Then you will draw the second billboard, and it will be the same.
首先绘制很多粒子会用到之前文章的代码,然后为每个粒子调用glDrawArrays命令。这是一个糟糕的主意,因为这意味着你的512+个吊炸天的流处理器将专注于绘制一个四边形(显然,只有1个流处理器会被用到,然后99%以上的性能被浪费)。然后绘制下一个公告板时,继续浪费性能。
Clearly, we need a way to draw all particles at the same time.
显然,我们需要一个一次性绘制所有粒子的方法。
There are many ways to do this; here are three of them :
有很多方法能够达成以上要求,下面是其中的三种方法:
Generate a single VBO with all the particles in them. Easy, effective, works on all platforms.
Use geometry shaders. Not in the scope of this tutorial, mostly because 50% of the computers don’t support this.
Use instancing. Not available on ALL computers, but a vast majority of them.
生成一个简单的VBO,这个VBO包含了所有的粒子。简单,效率,在所有平台上都适用。
使用geometry shaders。不在本文谈论范围内,因为至少50%的计算机不支持这种方法。
使用instancing。并不是所有电脑都支持,但大多数电脑支持。
In this tutorial, we’ll use the 3rd option, because it is a nice balance between performance and availability, and on top of that, it’s easy to add support for the first method once this one works.
在本文中,我们使用第三种方法,因为这是一个性能与可行性相对均衡的方法,只要这个方法可能要对第一种方法做支持也是很简单的一件事情。
Instancing
实例化
“Instancing” means that we have a base mesh (in our case, a simple quad of 2 triangles), but many instances of this quad.实例化意味着我们有一个基础的mesh(在这里是一个简单的四边形,这个四边形由2个三角形组成),然后有这个四边形的许多实例。
Technically, it’s done via several buffers :
从技术上而言,它的成功应用需要用到多个缓存
Some of them describe the base mesh
Some of them describe the particularities of each instance of the base mesh.
一些缓存描述了基础网格。
一些缓存描述了基础网格的每个单独的实例。
You have many, many options on what to put in each buffer. In our simple case, we have :
你有许多方法来决定每个缓存中存放什么。
One buffer for the vertices of the mesh. No index buffer, so it’s 6 vec3, which make 2 triangles, which make 1 quad.
One buffer for the particles’ centers.
One buffer for the particles’ colors.
一个缓存用于存放网格的顶点。没有使用index buffer,所以是6个vec3,组成2个三角形,2个三角形组成一个四边形
一个缓存用于存放粒子的中心
一个缓存用于存放粒子的颜色
These are very standard buffers. They are created this way :
这些是标准的缓存,那么可以用这种方式创建:
1 // The VBO containing the 4 vertices of the particles.
2 // Thanks to instancing, they will be shared by all particles.
3 static const GLfloat g_vertex_buffer_data[] = {
4  -0.5f, -0.5f, 0.0f,
5  0.5f, -0.5f, 0.0f,
6  -0.5f, 0.5f, 0.0f,
7  0.5f, 0.5f, 0.0f,
8 };
9 GLuint billboard_vertex_buffer;
10 glGenBuffers(1, &billboard_vertex_buffer);
11 glBindBuffer(GL_ARRAY_BUFFER, billboard_vertex_buffer);
12 glBufferData(GL_ARRAY_BUFFER, sizeof(g_vertex_buffer_data), g_vertex_buffer_data, GL_STATIC_DRAW);
13
14 // The VBO containing the positions and sizes of the particles
15 GLuint particles_position_buffer;
16 glGenBuffers(1, &particles_position_buffer);
17 glBindBuffer(GL_ARRAY_BUFFER, particles_position_buffer);
18 // Initialize with empty (NULL) buffer : it will be updated later, each frame.
19 glBufferData(GL_ARRAY_BUFFER, MaxParticles * 4 * sizeof(GLfloat), NULL, GL_STREAM_DRAW);
20
21 // The VBO containing the colors of the particles
22 GLuint particles_color_buffer;
23 glGenBuffers(1, &particles_color_buffer);
24 glBindBuffer(GL_ARRAY_BUFFER, particles_color_buffer);
25 // Initialize with empty (NULL) buffer : it will be updated later, each frame.
26 glBufferData(GL_ARRAY_BUFFER, MaxParticles * 4 * sizeof(GLubyte), NULL, GL_STREAM_DRAW);
, which is as usual. They are updated this way :
通常,他们用这种方式来进来update:
1 // Update the buffers that OpenGL uses for rendering.
2 // There are much more sophisticated means to stream data from the CPU to the GPU,
3 // but this is outside the scope of this tutorial.
4 // http://www.opengl.org/wiki/Buffer_Object_Streaming 5
6 glBindBuffer(GL_ARRAY_BUFFER, particles_position_buffer);
7 glBufferData(GL_ARRAY_BUFFER, MaxParticles * 4 * sizeof(GLfloat), NULL, GL_STREAM_DRAW); // Buffer orphaning, a common way to improve streaming perf. See above link for details.
8 glBufferSubData(GL_ARRAY_BUFFER, 0, ParticlesCount * sizeof(GLfloat) * 4, g_particule_position_size_data);
9
10 glBindBuffer(GL_ARRAY_BUFFER, particles_color_buffer);
11 glBufferData(GL_ARRAY_BUFFER, MaxParticles * 4 * sizeof(GLubyte), NULL, GL_STREAM_DRAW); // Buffer orphaning, a common way to improve streaming perf. See above link for details.
12 glBufferSubData(GL_ARRAY_BUFFER, 0, ParticlesCount * sizeof(GLubyte) * 4, g_particule_color_data);
, which is as usual. Before render, they are bound this way :
通常,在渲染前,他们以这种方式绑定:
1 // 1rst attribute buffer : vertices
2 glEnableVertexAttribArray(0);
3 glBindBuffer(GL_ARRAY_BUFFER, billboard_vertex_buffer);
4 glVertexAttribPointer(
5  0, // attribute. No particular reason for 0, but must match the layout in the shader.
6  3, // size
7  GL_FLOAT, // type
8  GL_FALSE, // normalized?
9  0, // stride
10  (void*)0 // array buffer offset
11 );
12
13 // 2nd attribute buffer : positions of particles' centers
14 glEnableVertexAttribArray(1);
15 glBindBuffer(GL_ARRAY_BUFFER, particles_position_buffer);
16 glVertexAttribPointer(
17  1, // attribute. No particular reason for 1, but must match the layout in the shader.
18  4, // size : x + y + z + size => 4
19  GL_FLOAT, // type
20  GL_FALSE, // normalized?
21  0, // stride
22  (void*)0 // array buffer offset
23 );
24
25 // 3rd attribute buffer : particles' colors
26 glEnableVertexAttribArray(2);
27 glBindBuffer(GL_ARRAY_BUFFER, particles_color_buffer);
28 glVertexAttribPointer(
29  2, // attribute. No particular reason for 1, but must match the layout in the shader.
30  4, // size : r + g + b + a => 4
31  GL_UNSIGNED_BYTE, // type
32  GL_TRUE, // normalized? *** YES, this means that the unsigned char[4] will be accessible with a vec4 (floats) in the shader ***
33  0, // stride
34  (void*)0 // array buffer offset
35 );
, which is as usual. The difference comes when rendering. Instead of using glDrawArrays (or glDrawElements if your base mesh has an index buffer), you use glDrawArrraysInstanced / glDrawElementsInstanced, which is equivalent to calling glDrawArrays N times
(N is the last parameter, in our case ParticlesCount) :
通常,在渲染的时候会有一些不同。你使用glDrawArrraysInstanced / glDrawElementsInstanced替代glDrawArrays或glDrawElements,如果你的基础网格使用了index buffer。相当于调用了N次glDrawArrays(N代表粒子的数量ParticlesCount)
1 glDrawArraysInstanced(GL_TRIANGLE_STRIP, 0, 4, ParticlesCount);
Bue something is missing here. We didn’t tell OpenGL which buffer was for the base mesh, and which were for the different instances. This is done with glVertexAttribDivisor. Here’s the full commented code :
这里少了点东西。我们没有告知OpenGL那个缓存用于基础网格,那个用于不同的实例。这个用glVertexAttribDivisor来实现。以下是带注释的代码:
1 // These functions are specific to glDrawArrays*Instanced*.
2 // The first parameter is the attribute buffer we're talking about.
3 // The second parameter is the "rate at which generic vertex attributes advance when rendering multiple instances"
4 // http://www.opengl.org/sdk/docs/man/xhtml/glVertexAttribDivisor.xml 5 glVertexAttribDivisor(0, 0); // particles vertices : always reuse the same 4 vertices -> 0
6 glVertexAttribDivisor(1, 1); // positions : one per quad (its center) -> 1
7 glVertexAttribDivisor(2, 1); // color : one per quad -> 1
8
9 // Draw the particules !
10 // This draws many times a small triangle_strip (which looks like a quad).
11 // This is equivalent to :
12 // for(i in ParticlesCount) : glDrawArrays(GL_TRIANGLE_STRIP, 0, 4),
13 // but faster.
14 glDrawArraysInstanced(GL_TRIANGLE_STRIP, 0, 4, ParticlesCount);
As you can see, instancing is very versatile, because you can pass any integer as the AttribDivisor. For instance, with glVertexAttribDivisor(2, 10), each 10 subsequent instances will have the same color.
如你所见,实例化的用途广泛,因为你可以传任意整形作为AttribDivisor。例如,glVertexAttribDivisor(2, 10)每10个随后的实例将拥有相同的颜色。
What’s the point ?
要点是?
The point is that now, we only have to update a small buffer each frame (the center of the particles) and not a huge mesh. This is a x4 bandwidth gain !要点是,我们只需要每帧更新较少的缓存而不是大量的网格。你赢得了4倍的带宽!
Life and death
出生与销毁
On the contrary to most other objects in the scene, particles die and born at a very high rate. We need a decently fast way to get new particles and to discard them, something better than “new Particle()”.相较于场景中的其他对象,粒子的销毁和出生频率很高。我们需要一种像样的快速方法来获取新的粒子或者丢弃他们。
Creating new particles
创建新的粒子
For this, we will have a big particles container :我们需要一个大的粒子容器:
1 // CPU representation of a particle
2 struct Particle{
3 	glm::vec3 pos, speed;
4 	unsigned char r,g,b,a; // Color
5 	float size, angle, weight;
6 	float life; // Remaining life of the particle. if < 0 : dead and unused.
7
8 };
9
10 const int MaxParticles = 100000;
11 Particle ParticlesContainer[MaxParticles];
Now, we need a way to create new ones. This function searches linearly in ParticlesContainer, which should be an horrible idea, except that it starts at the last known place, so this function usually returns immediately :
现在,我们需要一个创建新粒子的方法。线性的搜索ParticlesContainer数组是一个糟糕的想法,除非他从已知的最后一个位置开始,这样函数能够立即返回。
1 int LastUsedParticle = 0;
2
3 // Finds a Particle in ParticlesContainer which isn't used yet.
4 // (i.e. life < 0);
5 int FindUnusedParticle(){
6
7     for(int i=LastUsedParticle; i<MaxParticles; i++){
8         if (ParticlesContainer[i].life < 0){
9             LastUsedParticle = i;
10             return i;
11         }
12     }
13
14     for(int i=0; i<LastUsedParticle; i++){
15         if (ParticlesContainer[i].life < 0){
16             LastUsedParticle = i;
17             return i;
18         }
19     }
20
21     return 0; // All particles are taken, override the first one
22 }
We can now fill ParticlesContainer[particleIndex] with interesting “life”, “color”, “speed” and “position” values. See the code for details, but you can do pretty much anything here. The only interesting bit is, how many particles should we generate each frame
? This is mostly application-dependant, so let’s say 10000 new particles per second (yes, it’s quite a lot) :
现在我们可以对ParticlesContainer[particleIndex]数组填充生命周期,颜色,速度位置等值。想请见代码,你还可以在这些做一些其他的操作。现在我们要关注每帧我们生成多少个粒子?绝大多数情况下这不同的应用会不一样,所以我们可以定每秒10000个新粒子。
1 int newparticles = (int)(deltaTime*10000.0);
except that you should probably clamp this to a fixed number :
你可以将它限定在一个固定值:
1 // Generate 10 new particule each millisecond,
2 // but limit this to 16 ms (60 fps), or if you have 1 long frame (1sec),
3 // newparticles will be huge and the next frame even longer.
4 int newparticles = (int)(deltaTime*10000.0);
5 if (newparticles > (int)(0.016f*10000.0))
6     newparticles = (int)(0.016f*10000.0);
Deleting old particles
删除老的粒子
There’s a trick, see below =)下面有技巧
The main simulation loop
主模拟循环
ParticlesContainer contains both active and “dead” particles, but the buffer that we send to the GPU needs to have only living particles.So we will iterate on each particle, check if it is alive, if it must die, and if everything is allright, add some gravity, and finally copy it in a GPU-specific buffer.
ParticlesContainer包含了活跃和非活跃的粒子,但我们发送给GPU的缓存中都是活跃的粒子。
所以我们会遍历每个粒子,检查它是否是活跃的,如果一切都正常,添加一点重力,然后拷贝到GPU的指定buffer中。
1 // Simulate all particles
2 int ParticlesCount = 0;
3 for(int i=0; i<MaxParticles; i++){
4
5 Particle& p = ParticlesContainer[i]; // shortcut
6
7 if(p.life > 0.0f){
8
9 // Decrease life
10 p.life -= delta;
11 if (p.life > 0.0f){
12
13 // Simulate simple physics : gravity only, no collisions
14 p.speed += glm::vec3(0.0f,-9.81f, 0.0f) * (float)delta * 0.5f;
15 p.pos += p.speed * (float)delta;
16 p.cameradistance = glm::length2( p.pos - CameraPosition );
17 //ParticlesContainer[i].pos += glm::vec3(0.0f,10.0f, 0.0f) * (float)delta;
18
19 // Fill the GPU buffer
20 g_particule_position_size_data[4*ParticlesCount+0] = p.pos.x;
21 g_particule_position_size_data[4*ParticlesCount+1] = p.pos.y;
22 g_particule_position_size_data[4*ParticlesCount+2] = p.pos.z;
23
24 g_particule_position_size_data[4*ParticlesCount+3] = p.size;
25
26 g_particule_color_data[4*ParticlesCount+0] = p.r;
27 g_particule_color_data[4*ParticlesCount+1] = p.g;
28 g_particule_color_data[4*ParticlesCount+2] = p.b;
29 g_particule_color_data[4*ParticlesCount+3] = p.a;
30
31 }else{
32 // Particles that just died will be put at the end of the buffer in SortParticles();
33 p.cameradistance = -1.0f;
34 }
35
36 ParticlesCount++;
37
38 }
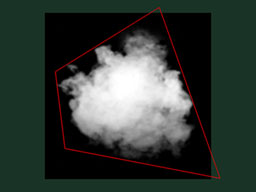
39 }This is what you get. Almost there, but there’s a problem…
Sorting
排序
As explained in Tutorial 10, you need to sort semi-transparentobjects from back to front for the blending to be correct.
如教程10中所述,为了正确显示混合,你需要对半透明的对象从后到前做排序
1 void SortParticles(){
2     std::sort(&ParticlesContainer[0], &ParticlesContainer[MaxParticles]);
3 }
Now, std::sort needs a function that can tell whether a Particle must be put before or after another Particle in the container. This can be done with Particle::operator< :
现在,std::sort需要一个函数来告知它某个粒子是否需要放置在粒子容器中某个粒子之前或之后。这可以用Particle::operator<来实现:
1 // CPU representation of a particle
2 struct Particle{
3
4 ...
5
6 bool operator<(Particle& that){
7 // Sort in reverse order : far particles drawn first.
8 return this->cameradistance > that.cameradistance;
9 }
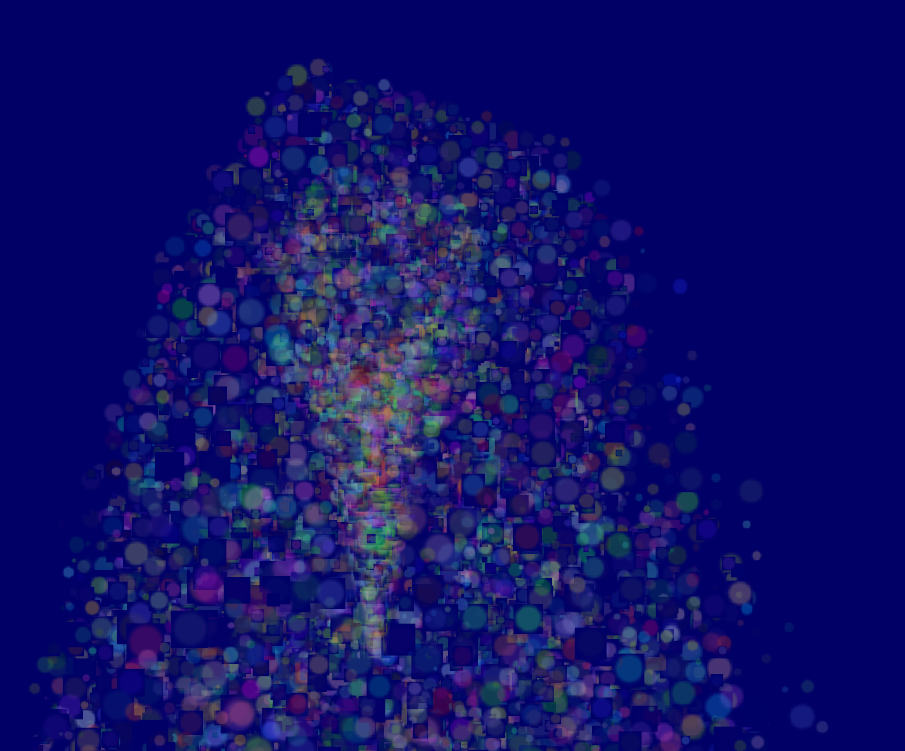
10 };This will make ParticleContainer be sorted, and the particles now display correctly*:
它会对ParticleContainer进行排序,然后粒子就能正确显示了:
Going further
深入了解
Animated particles
粒子动画
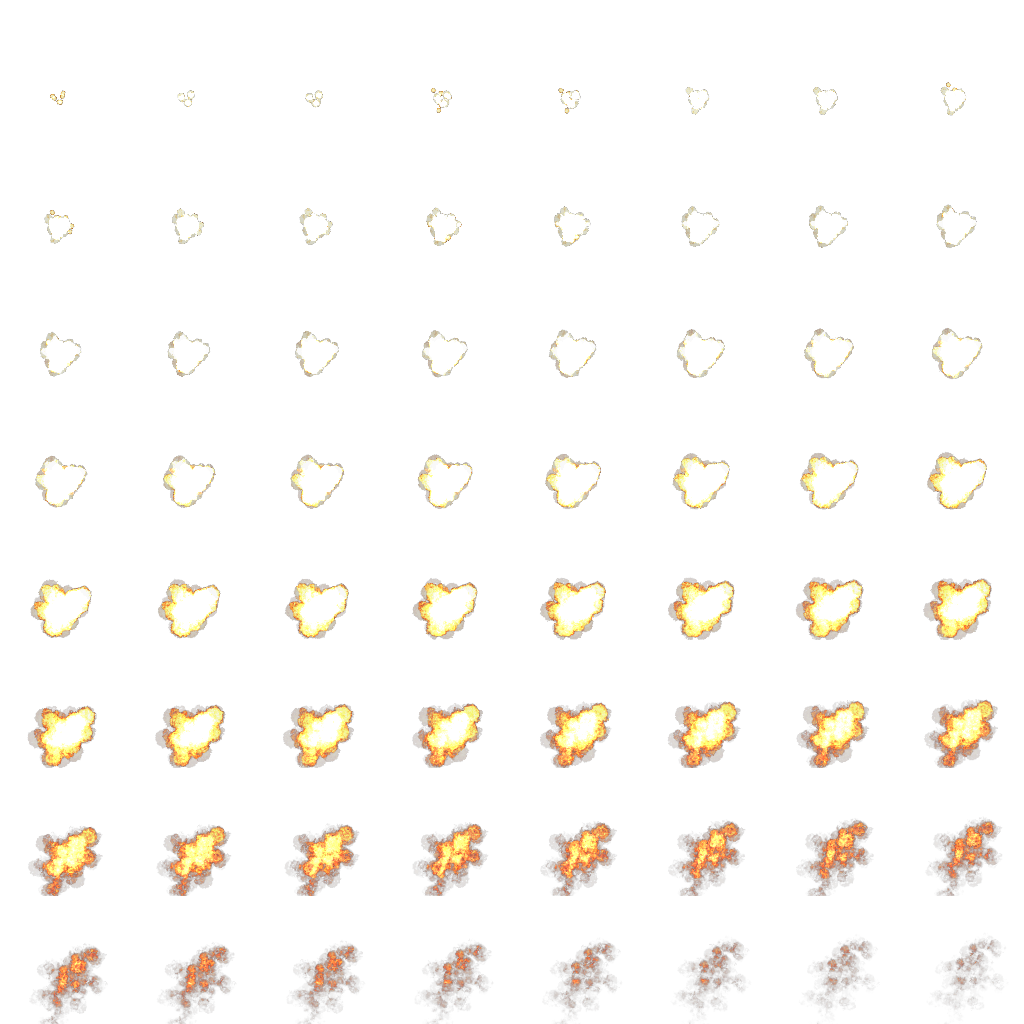
You can animate your particles’ texture with a texture atlas. Send the age of each particle along with the position, and in the shaders, compute the UVs like we did for the 2Dfont tutorial. A texture atlas looks like this :
你可以使用纹理图集来做粒子动画。在粒子的不同阶段传不同的uv坐标到shader中。
Handling several particle systems
处理几个粒子系统
If you need more than one particle system, you have two options : either use a single ParticleContainer, or one per system.如何你需要多个粒子系统,你有2个方法:要么使用一个ParticleContainer或者每个粒子系统使用一个ParticleContainer。
If you have a single container for ALL particles, then you will be able to sort them perfectly. The main drawback is that you’ll have to use the same texture for all particles, which is a big problem. This can be solved by using a texture atlas (one big texture
with all your different textures on it, just use different UVs), but it’s not really handy to edit and use.
如果你对所有的粒子使用一个ParticleContainer,那你可以完美的对所有粒子进行排序。缺点是你会对所有的粒子使用相同的纹理,这会是一个问题。这可以由使用纹理图集来解决(问题图集就是一张大的纹理,你不同的纹理都存放在里面,然后使用其中的不同uv坐标),但是它不易使用和编辑。
If you have one container per particle system, on the other hand, particles will only be sorted inside these containers : if two particle sytems overlap, artefacts will start to appear. Depending on your application, this might not be a problem.
如果你对每个ParticleContainer使用一个粒子系统,从另一方面来讲。粒子会在每个系统内进行排序:如果2个粒子系统重叠了,人工痕迹会非常明显。基于不同的应用,这有可能不算是一个问题。
Of course, you can also use some kind of hybrid system with several particle systems, each with a (small and manageable) atlas.
当然,你也可以使用某种混合系统来处理多个粒子系统,每个系统都有一个小的可管理的图集。
Smooth particles
You’ll notice very soon a common artifact : when your particle intersect some geometry, the limit becomes very visible and ugly :
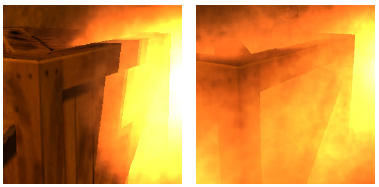
(image from http://www.gamerendering.com/2009/09/16/soft-particles/ )
A common technique to solve this is to test if the currently-drawn fragment is near the Z-Buffer. If so, the fragment is faded out.
However, you’ll have to sample the Z-Buffer, which is not possible with the “normal” Z-Buffer. You need to render your scene in a render
target. Alternatively, you can copy the Z-Buffer from one framebuffer to another with glBlitFramebuffer.
http://developer.download.nvidia.com/whitepapers/2007/SDK10/SoftParticles_hi.pdf
Improving fillrate
提高填充率
One of the most limiting factor in modern GPUs is fillrate : the amount of fragments (pixels) it can write in the 16.6ms allowed to get 60 FPS.This is a problem, because particles typically need a LOT of fillrate, since you can re-draw the same fragment 10 times, each time with another particle; and if you don’t do that, you get the same artifacts as above.
Amongst all the fragments that are written, many are completely useless : these on the border. Your particle textures are often completely transparent on the edges, but the particle’s mesh will still draw them - and update the color buffer with exactly the
same value than before.
This small utility computes a mesh (the one you’re supposed to draw with glDrawArraysInstanced() ) that tightly fits your texture :
http://www.humus.name/index.php?page=Cool&ID=8 . Emil Person’s site has plenty of other
fascinating articles, too.
Particle physics
At some point, you’ll probably want your particles to interact some more with your world. In particular, particles could rebound on the ground.You could simply launch a raycast for each particle, between the current position and the future one; we learnt to do this in the Picking
tutorials. But this is extremely expensive, you just can’t to this for each particle, each frame.
Depending on your application, you can either approximate your geometry with a set of planes and do the raycast on these planes only; Or, you can use real raycast, but cache the results and approximate nearby collisions with the cache (or, you can do both).
A completely different technique is to use the existing Z-Buffer as a very rough approximation of the (visible) geometry, and collide particles on this. This is “good enough” and fast, but you’ll have to do all your simulation on the GPU, since you can’t access
the Z-Buffer on the CPU (at least not fast), so it’s way more complicated.
Here are a few links about these techniques :
http://www.altdevblogaday.com/2012/06/19/hack-day-report/
http://www.gdcvault.com/search.php#&category=free&firstfocus=&keyword=Chris+Tchou’s%2BHalo%2BReach%2BEffects&conference_id=
GPU Simulation
As said above, you can simulate the particles’ movements completely on the GPU. You will still have to manage your particle’s lifecycle on the CPU - at least to spawn them.You have many options to do this, and none in the scope of this tutorial ; I’ll just give a few pointers.
Use Transform Feedback. It allows you to store the outputs of a vertex shader in a GPU-side VBO. Store the new positions in this VBO, and next frame, use this VBO as the starting point, and store the new position in the former
VBO.
Same thing but without Transform Feedback: encode your particles’ positions in a texture, and update it with Render-To-Texture.
Use a General-Purpose GPU library : CUDA or OpenCL, which have interoperability functions with OpenGL.
Use a Compute Shader. Cleanest solution, but only available on very recent GPUs.
Note that for simplicity, in this implementation, ParticleContainer is sorted after updating the GPU buffers. This makes the particles not exactly sorted (there is a one-frame delay), but it’s
not really noticeable. You can fix it by splitting the main loop in 2 : Simulate, Sort, and update.

相关文章推荐
- java学习笔记-抽象类abstract与接口interface
- 从HTTP GET和POST的区别说起(面试心得)
- Struts,Hibernate,spring工作机制
- IntelliJ Idea 常用快捷键 列表(实战终极总结!!!!)
- JSP之request对象
- H5单页面架构:requirejs + angular + angular-route
- 详解Android中App的启动界面Splash的编写方法
- 如何使用robots.txt及其详解
- 纯CSS3属性animation实现的打字效果
- java server
- 第十八课:公告板与粒子1
- Maven常用仓库地址以及手动添加jar包到仓库
- caffe实现Alexnet网络结构(利用自己的数据)
- 2016.2.29
- Qt5中文显示乱码问题
- JavaScript字符串类型时间转换为日期类型比较
- 【ED距离】使用Python求编辑距离
- Tomcat配置https环境(Windows+Linux)
- 幂等性 个人理解及应用
- 如何在没有安装安卓环境的mac os上装adb环境.