SpringMVC学习笔记-续
2016-02-04 11:06
465 查看
SpringMVC国际化
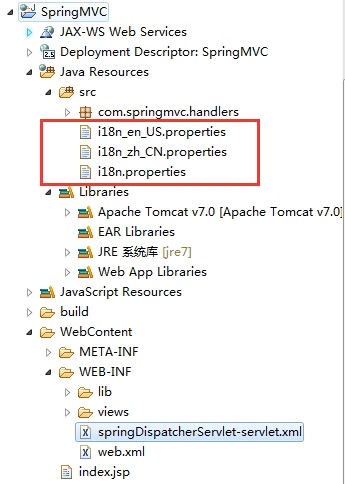
资源文件如图所示。使用fmt标签,提前引入jstl的两个jar包。
i18n.properties内容如下
[code=as3;toolbar:false">i18n.username=Username
i18n.password=Passwordi18n.username=Username
i18n.password=Password<%@ taglib uri="http://java.sun.com/jsp/jstl/fmt" prefix="fmt"%>
<!-- 引入jstl库 -->
<fmt:message key="i18n.username"></fmt:message><br/>
<fmt:message key="i18n.password"></fmt:message><br/>@Component
public class HelloView implements View{
@Override
public String getContentType() {
return "text/html";
}
@Override
public void render(Map<String, ?> model, HttpServletRequest request,
HttpServletResponse response) throws Exception {
response.getWriter().print("Hello view, time:" + new Date());
}
} @RequestMapping("/testView")
public String testView() {
System.out.println("testView");
return "helloView";
} @RequestMapping("/testRedirect")
public String testRedirect() {
System.out.println("testRedirect");
return "redirect:/index.jsp";
} <!-- 配置启动Spring IOC容器的Listner -->
<context-param>
<param-name>contextConfigLocation</param-name>
<param-value>classpath:beans.xml</param-value>
</context-param>
<listener>
<listener-class>org.springframework.web.context.ContextLoaderListener</listener-class>
</listener>
<!-- 配置springDispatcherServlet -->
<servlet>
<servlet-name>springDispatcherServlet</servlet-name>
<servlet-class>org.springframework.web.servlet.DispatcherServlet</servlet-class>
<init-param>
<param-name>contextConfigLocation</param-name>
<param-value>classpath:springMVC.xml</param-value>
</init-param>
<load-on-startup>1</load-on-startup>
</servlet>
<servlet-mapping>
<servlet-name>springDispatcherServlet</servlet-name>
<url-pattern>/</url-pattern>
</servlet-mapping>

相关文章推荐
- SpringMVC学习笔记-Hello world
- sbt构建scala工程并导入scala-eclipse开发spark
- Spring4学习笔记-SpringJDBC基本操作(补充)
- Java连接Sql数据库经常用到的操作
- WebService学习笔记-添加拦截器到基于Spring的Webservice
- WebService学习笔记-使用CXF编写基于Spring的Webservice
- Mybatis学习笔记-Mybatis与Spring的整合
- java Map集合框架之HashMap
- Spring4学习笔记-Spring4整合Hibernate4
- Spring4学习笔记-Spring4整合Struts2(基于配置文件的方式)
- Spring4学习笔记-声明式事务(基于配置文件的方式)
- Spring4学习笔记-声明式事务(基于注解的方式)
- Spring4学习笔记-JDBC
- Spring4学习笔记-AOP(基于配置文件的方式)
- Spring4学习笔记-AOP(基于注解的方式)
- Spring4学习笔记-AOP前传之动态代理
- Spring4学习笔记-泛型依赖注入
- Spring4学习笔记
- Java对象与xml文件互转
- Java读取接口数据并保存到数据库