SpringMVC学习笔记-Hello world
2016-02-04 11:06
627 查看
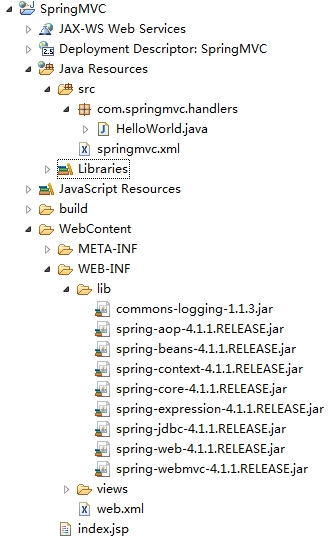
项目结构如图
web.xml配置拦截
[code=xml;toolbar:false"><?xml version="1.0" encoding="UTF-8"?>
<web-app xmlns:xsi="http://www.w3.org/2001/XMLSchema-instance"
xmlns="http://java.sun.com/xml/ns/javaee" xmlns:web="http://java.sun.com/xml/ns/javaee/web-app_2_5.xsd"
xsi:schemaLocation="http://java.sun.com/xml/ns/javaee http://java.sun.com/xml/ns/javaee/web-app_2_5.xsd"
id="WebApp_ID" version="2.5">
<!-- 配置springDispatcherServlet -->
<servlet>
<servlet-name>springDispatcherServlet</servlet-name>
<servlet-class>org.springframework.web.servlet.DispatcherServlet</servlet-class>
<init-param>
<param-name>contextConfigLocation</param-name>
<param-value>classpath:springmvc.xml</param-value>
</init-param>
<load-on-startup>1</load-on-startup>
</servlet>
<servlet-mapping>
<servlet-name>springDispatcherServlet</servlet-name>
<url-pattern>/</url-pattern>
</servlet-mapping>
</web-app>package com.springmvc.handlers;
import org.springframework.stereotype.Controller;
import org.springframework.web.bind.annotation.RequestMapping;
@Controller
public class HelloWorld {
/**
* 使用@RequestMapping注解来映射请求URL
* 返回值会用过视图解析器解析为实际的物理视图
* InternalResourceViewResolver视图解析器会做如下解析
* prefix+returnVal+后缀得到实际的物理视图,然后做转发操作
* WEN-INF/views/success.jsp
* @return
*/
@RequestMapping("/helloworld")
public String hello() {
System.out.println("Hello world!!!");
return "success";
}
}<?xml version="1.0" encoding="UTF-8"?>
<web-app xmlns:xsi="http://www.w3.org/2001/XMLSchema-instance"
xmlns="http://java.sun.com/xml/ns/javaee" xmlns:web="http://java.sun.com/xml/ns/javaee/web-app_2_5.xsd"
xsi:schemaLocation="http://java.sun.com/xml/ns/javaee http://java.sun.com/xml/ns/javaee/web-app_2_5.xsd"
id="WebApp_ID" version="2.5">
<!-- 配置springDispatcherServlet -->
<servlet>
<servlet-name>springDispatcherServlet</servlet-name>
<servlet-class>org.springframework.web.servlet.DispatcherServlet</servlet-class>
<!--
也可以使用spring默认的配置方式来写配置文件
默认的配置文件为:/WEB-INF/<servlet-name>-servlet.xml
-->
<!--
<init-param>
<param-name>contextConfigLocation</param-name>
<param-value>classpath:springmvc.xml</param-value>
</init-param>
-->
<load-on-startup>1</load-on-startup>
</servlet>
<servlet-mapping>
<servlet-name>springDispatcherServlet</servlet-name>
<url-pattern>/</url-pattern>
</servlet-mapping>
</web-app>

相关文章推荐
- sbt构建scala工程并导入scala-eclipse开发spark
- Spring4学习笔记-SpringJDBC基本操作(补充)
- Java连接Sql数据库经常用到的操作
- WebService学习笔记-添加拦截器到基于Spring的Webservice
- WebService学习笔记-使用CXF编写基于Spring的Webservice
- Mybatis学习笔记-Mybatis与Spring的整合
- java Map集合框架之HashMap
- Spring4学习笔记-Spring4整合Hibernate4
- Spring4学习笔记-Spring4整合Struts2(基于配置文件的方式)
- Spring4学习笔记-声明式事务(基于配置文件的方式)
- Spring4学习笔记-声明式事务(基于注解的方式)
- Spring4学习笔记-JDBC
- Spring4学习笔记-AOP(基于配置文件的方式)
- Spring4学习笔记-AOP(基于注解的方式)
- Spring4学习笔记-AOP前传之动态代理
- Spring4学习笔记-泛型依赖注入
- Spring4学习笔记
- Java对象与xml文件互转
- Java读取接口数据并保存到数据库
- Java高级应用