iOS 简单的贝塞尔(UIBezierPath)曲线使用
2016-02-01 17:40
543 查看
在iOS中绘制矢量图或者路径的时候通常会用到 UIBezierPath ,它在 UIKit 中,是CoreGraphics对path的封装。使用 UIBezierPath ,可以绘制直线、椭圆、多边形和贝塞尔曲线等。
UIBezierPath 是对 CGPathRef 的封装。创建矢量图形时,拆解成一或多条线段,拼接起来,每条线段的终点都是下一条线段的起点。
具体地:
创建一个 UIBezierPath 对象
用 moveToPoint: 设置初始线段的起点
添加线段,定义一或多个子路径
修改 UIBezierPath 的绘图相关的属性,比如stroke path的属性 lineWidth 和 lineJoinStyle ,
filled path的属性 usesEvenOddFillRule
如果是矩形或者椭圆之类的特殊图形,可以不用第2步。
(简单的说 需要一个起点然后添加连线(addLineToPoint-直线,addQuadCurveToPoint-椭圆)或者其他的)
UIBezierPath 包含了几个特殊形状的类方法,很容易使用。
除了这些闭合的特殊路径,也有一些方法用来添加子路径。
UIBezierPath 封装了 CGPathRef ,它提供了 CGPath 属性使我们可以获取底层的path。
如果我们还希望修改封装的path,有两种方法。一种是完全用CoreGraphics的函数修改,另一种是混用CoreGraphics和 UIBezierPath 的方法。
UIBezierPath主要是画出形状(或画出一个图形的路径path),他可以配合其他的layer使用(CAShapeLayer,CAGradientLayer等)layer可以添加动画
所以结合起来更强大
例如:创建一个简单的弧形
-(UIBezierPath *)confighPathY:(CGFloat)y X:(CGFloat)x
{
CGFloat width =self.frame.size.width;
[self.movePathremoveAllPoints];
[self.movePathmoveToPoint:CGPointMake(0,0)];
[self.movePathaddLineToPoint:CGPointMake(width,0)];
[self.movePathaddQuadCurveToPoint:CGPointMake(0,0)controlPoint:CGPointMake(width
/2.0 + x<width/2.0?(-x/2.0):(x), y)];
return
self.movePath;
}
-(UIBezierPath *)movePath
{
if (_movePath ==nil)
{
_movePath = [UIBezierPathbezierPath];
}
return_movePath;
}
创建好路径之后 结合 Layer
// 创建一个shapeLayer
CAShapeLayer *layer = [CAShapeLayerlayer];
layer.frame = showView.bounds;
// 与showView的frame一致
layer.strokeColor = [UIColor greenColor].CGColor;
// 边缘线的颜色
layer.fillColor = [UIColor clearColor].CGColor;
// 闭环填充的颜色
layer.lineCap = kCALineCapSquare;
// 边缘线的类型
layer.path = [selfconfighPathY:200 X:100].CGPath;
// 从贝塞尔曲线获取到形状
layer.lineWidth = 4.0f; //线条宽度
layer.strokeStart = 0.0f;
layer.strokeEnd = 0.1f;
// 将layer添加进图层
[showView.layer addSublayer:layer];
整合一些简单的动画 (路径self.movePath
到 self.originPath的动画)
-(void)animation
{
CABasicAnimation *morph = [CABasicAnimationanimationWithKeyPath:@"path"];
morph.duration =
0.5;
morph.fromValue = (__bridgeid_Nullable)(self.movePath.CGPath);
morph.toValue = (__bridgeid_Nullable)(self.originPath.CGPath);
//移动后位置保持结束后的状态
morph.fillMode=kCAFillModeForwards;
morph.removedOnCompletion =NO;
[self.shapeLayeraddAnimation:morphforKey:nil];
}
(以上的代码不是连贯的 只是说明一下场景)
===以上知识大致讲解完毕接来下就是上代码===================
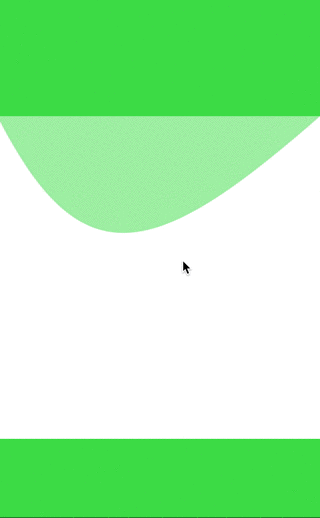
我们自定义一个view,根据手势滑动 让曲线跟着移动
GIF效果图:
一下是源代码:
.h
.m
VC调用:
使用UIBezierPath的方法
UIBezierPath 是对 CGPathRef 的封装。创建矢量图形时,拆解成一或多条线段,拼接起来,每条线段的终点都是下一条线段的起点。具体地:
创建一个 UIBezierPath 对象
用 moveToPoint: 设置初始线段的起点
添加线段,定义一或多个子路径
修改 UIBezierPath 的绘图相关的属性,比如stroke path的属性 lineWidth 和 lineJoinStyle ,
filled path的属性 usesEvenOddFillRule
如果是矩形或者椭圆之类的特殊图形,可以不用第2步。
(简单的说 需要一个起点然后添加连线(addLineToPoint-直线,addQuadCurveToPoint-椭圆)或者其他的)
绘制各类矢量图形
UIBezierPath 包含了几个特殊形状的类方法,很容易使用。// 创建矩形 + (UIBezierPath *)bezierPathWithRect:(CGRect)rect // 创建圆角矩形 + (UIBezierPath *)bezierPathWithRoundedRect:(CGRect)rect cornerRadius:(CGFloat)cornerRadius // 创建矩形内切圆 + (UIBezierPath *)bezierPathWithOvalInRect:(CGRect)rect // 创建弧形 + (UIBezierPath *)bezierPathWithArcCenter:(CGPoint)center radius:(CGFloat)radius startAngle:(CGFloat)startAngle endAngle:(CGFloat)endAngle clockwise:(BOOL)clockwise
除了这些闭合的特殊路径,也有一些方法用来添加子路径。
// 添加直线
- (void)addLineToPoint:(CGPoint)point

// 添加弧形线段
- (void)addArcWithCenter:(CGPoint)center radius:(CGFloat)radius startAngle:(CGFloat)startAngle endAngle:(CGFloat)endAngle clockwise:(BOOL)clockwise

// 添加二阶贝塞尔曲线
- (void)addQuadCurveToPoint:(CGPoint)endPoint controlPoint:(CGPoint)controlPoint

// 添加三阶贝塞尔曲线
- (void)addCurveToPoint:(CGPoint)endPoint controlPoint1:(CGPoint)controlPoint1 controlPoint2:(CGPoint)controlPoint2
UIBezierPath 封装了 CGPathRef ,它提供了 CGPath 属性使我们可以获取底层的path。
如果我们还希望修改封装的path,有两种方法。一种是完全用CoreGraphics的函数修改,另一种是混用CoreGraphics和 UIBezierPath 的方法。
UIBezierPath主要是画出形状(或画出一个图形的路径path),他可以配合其他的layer使用(CAShapeLayer,CAGradientLayer等)layer可以添加动画
所以结合起来更强大
例如:创建一个简单的弧形
-(UIBezierPath *)confighPathY:(CGFloat)y X:(CGFloat)x
{
CGFloat width =self.frame.size.width;
[self.movePathremoveAllPoints];
[self.movePathmoveToPoint:CGPointMake(0,0)];
[self.movePathaddLineToPoint:CGPointMake(width,0)];
[self.movePathaddQuadCurveToPoint:CGPointMake(0,0)controlPoint:CGPointMake(width
/2.0 + x<width/2.0?(-x/2.0):(x), y)];
return
self.movePath;
}
-(UIBezierPath *)movePath
{
if (_movePath ==nil)
{
_movePath = [UIBezierPathbezierPath];
}
return_movePath;
}
创建好路径之后 结合 Layer
// 创建一个shapeLayer
CAShapeLayer *layer = [CAShapeLayerlayer];
layer.frame = showView.bounds;
// 与showView的frame一致
layer.strokeColor = [UIColor greenColor].CGColor;
// 边缘线的颜色
layer.fillColor = [UIColor clearColor].CGColor;
// 闭环填充的颜色
layer.lineCap = kCALineCapSquare;
// 边缘线的类型
layer.path = [selfconfighPathY:200 X:100].CGPath;
// 从贝塞尔曲线获取到形状
layer.lineWidth = 4.0f; //线条宽度
layer.strokeStart = 0.0f;
layer.strokeEnd = 0.1f;
// 将layer添加进图层
[showView.layer addSublayer:layer];
整合一些简单的动画 (路径self.movePath
到 self.originPath的动画)
-(void)animation
{
CABasicAnimation *morph = [CABasicAnimationanimationWithKeyPath:@"path"];
morph.duration =
0.5;
morph.fromValue = (__bridgeid_Nullable)(self.movePath.CGPath);
morph.toValue = (__bridgeid_Nullable)(self.originPath.CGPath);
//移动后位置保持结束后的状态
morph.fillMode=kCAFillModeForwards;
morph.removedOnCompletion =NO;
[self.shapeLayeraddAnimation:morphforKey:nil];
}
(以上的代码不是连贯的 只是说明一下场景)
===以上知识大致讲解完毕接来下就是上代码===================
我们自定义一个view,根据手势滑动 让曲线跟着移动
GIF效果图:
一下是源代码:
.h
//
//  CADisplayView.h
//  SearchVCDemo
//
//  Created by Programmer two on 16/1/16.
//  Copyright © 2016年 linpeng. All rights reserved.
//

#import <UIKit/UIKit.h>

// 16进制转颜色
#define UIColorFromRGB(rgbValue)            [UIColor colorWithRed:((float)((rgbValue & 0xFF0000) >> 16))/255.0 green:((float)((rgbValue & 0xFF00) >> 8))/255.0 blue:((float)(rgbValue & 0xFF))/255.0 alpha:1.0]
#define kMAINGREEN  UIColorFromRGB(0x3CDC46)

@interface CADisplayView : UIView
@property (nonatomic,strong) CADisplayLink *displayLink;
@property (nonatomic,) CFTimeInterval beginTime;
@end
.m
//
//  CADisplayView.m
//  SearchVCDemo
//
//  Created by Programmer two on 16/1/16.
//  Copyright © 2016年 linpeng. All rights reserved.
//

#import "CADisplayView.h"

@interface CADisplayView()
@property (nonatomic,strong) CAShapeLayer *shapeLayer;
@property (nonatomic,strong) UIBezierPath *movePath,*originPath;
@end
@implementation CADisplayView
CGFloat x;
CGFloat y;

-(void)touchesMoved:(NSSet<UITouch *> *)touches withEvent:(UIEvent *)event
{
CGPoint point = [touches.anyObject locationInView:self];
x = point.x;
y = point.y;
[self setNeedsDisplayView];
}
-(void)touchesEnded:(NSSet<UITouch *> *)touches withEvent:(UIEvent *)event
{
y = 0;
[self animation];
}

-(UIBezierPath *)confighPathY:(CGFloat)y X:(CGFloat)x
{
CGFloat width = self.frame.size.width;
[self.movePath removeAllPoints];
[self.movePath moveToPoint:CGPointMake(0,0)];
[self.movePath addLineToPoint:CGPointMake(width, 0)];
[self.movePath addQuadCurveToPoint:CGPointMake(0, 0) controlPoint:CGPointMake(width /2.0 + x<width/2.0?(-x/2.0):(x), y)];
return self.movePath;
}
-(void)animation
{
CABasicAnimation *morph = [CABasicAnimation animationWithKeyPath:@"path"];
morph.duration = 0.5;
morph.fromValue = (__bridge id _Nullable)(self.movePath.CGPath);
morph.toValue = (__bridge id _Nullable)(self.originPath.CGPath);
//移动后位置保持结束后的状态
morph.fillMode=kCAFillModeForwards;
morph.removedOnCompletion = NO;

[self.shapeLayer addAnimation:morph forKey:nil];
}
//刷新path
-(void)setNeedsDisplayView
{
//除移之前的
[self.shapeLayer removeFromSuperlayer];

self.shapeLayer = [CAShapeLayer layer];
self.shapeLayer.frame = CGRectMake(0, 0, self.frame.size.width, self.frame.size.height);//设置shapeLayer的尺寸和位置
self.shapeLayer.fillColor = [kMAINGREEN colorWithAlphaComponent:0.5].CGColor;//填充颜色为ClearColor
//设置线条的宽度和颜色
self.shapeLayer.lineWidth = 1.0f;
self.shapeLayer.strokeColor = [UIColor clearColor].CGColor;
//让贝塞尔曲线与CAShapeLayer产生联系
self.shapeLayer.path = [self confighPathY:y X:x].CGPath;
//添加并显示
[self.layer addSublayer:self.shapeLayer];
}

/* 调试发现在drawRect里面处理很耗内存
-(void)drawRect:(CGRect)rect
{
//除移之前的
[self.shapeLayer removeFromSuperlayer];

self.shapeLayer = [CAShapeLayer layer];
self.shapeLayer.frame = CGRectMake(0, 0, rect.size.width, rect.size.height);//设置shapeLayer的尺寸和位置
self.shapeLayer.fillColor = [kMAINGREEN colorWithAlphaComponent:0.5].CGColor;//填充颜色为ClearColor
//设置线条的宽度和颜色
self.shapeLayer.lineWidth = 1.0f;
self.shapeLayer.strokeColor = [UIColor clearColor].CGColor;
//让贝塞尔曲线与CAShapeLayer产生联系
self.shapeLayer.path = [self confighPathY:y X:x].CGPath;
//添加并显示
[self.layer addSublayer:self.shapeLayer];
}
*/

-(UIBezierPath *)movePath
{
if (_movePath == nil)
{
_movePath = [UIBezierPath bezierPath];
}
return _movePath;
}
-(UIBezierPath *)originPath
{
if (_originPath == nil)
{
CGFloat width = self.frame.size.width;
_originPath = [UIBezierPath bezierPath];
[_originPath moveToPoint:CGPointMake(0,0)];
[_originPath addLineToPoint:CGPointMake(width, 0)];
[_originPath addQuadCurveToPoint:CGPointMake(0, 0) controlPoint:CGPointMake(width /2.0 + x<width/2.0?(-x/2.0):(x), 0)];
}
return _originPath;
}

@end
VC调用:
int w = self.view.frame.size.width;
CADisplayView *v1 = [[CADisplayView alloc] initWithFrame:CGRectMake((self.view.frame.size.width - w)/2.0, 200, w, w)];
[v1 setBackgroundColor:[UIColor whiteColor]];
[self.view addSubview:v1];

相关文章推荐
- iOS UIPageControl使用
- Vue有坑慎入
- No DEFAULT or UI configuration directive found!
- setValuesForKeysWithDictionary forUndefinedKey
- android ui设计
- Incorrect string value: '\xE4\xBC\x9A\xE5\x91\x98' for column 'recipient' at row 1
- ThreadPoolExecutor线程池解析与BlockingQueue的三种实现
- Liferay开发实战(2):Service Builder生成持久化层,及开发服务层
- Android中View的requestLayout()与invalidate()方法的理解
- EasyUI 中GridView 满足某条件 改变行的背景色
- UIImagePickerController简单使用
- 【Volley核心类分析】RequestQueue(一)
- UIButton 的所有点击事件及状态总结
- NGUI部分组件
- MPU(Memory Protection Units) 《ARM System Developer's Guide》Chapter-13
- iOS 之 [UIScreen mainScreen].scale
- myBatis抛出异常Result Maps collection already contains value ...
- NSURLRequestCachePolicy 缓存策略
- poj1679 The Unique MST(次小生成树)
- iOS编程——经过UUID和KeyChain来代替Mac地址实现iOS设备的唯一标示(OC版)