基于openfire+smack开发Android即时聊天应用[一]-用户注册、登陆、修改密码、注销等
2016-01-26 11:55
543 查看
1.开发准备
在官网上下载最新的Smack开发包,我下载的是smack4.1.4版本的,导入相应的jar包即可开始开发工作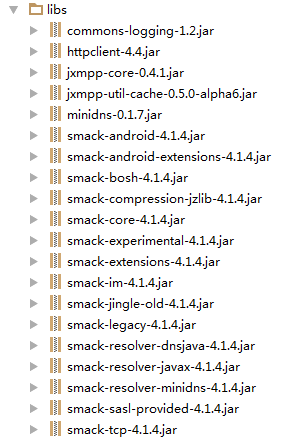
注意:导入Smack4.1.x包后,需要导入额外的第三方jar包
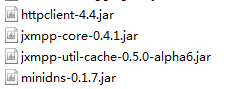
第三方jar包下载地址:
2.Openfire服务连接(连接服务器)
public class XMPPUtil {

//openfire服务器地址
private static String host = "222.195.xxx.xxx";
private static int port = 5222;
//openfire服务器名称
private static String serviceName = "openfireName";

//连接服务器
public static XMPPTCPConnection getXMPPConnection(Context ctx) {

SmackConfiguration.DEBUG = true;
XMPPTCPConnectionConfiguration.Builder configBuilder = XMPPTCPConnectionConfiguration.builder();
//设置服务器IP地址
configBuilder.setHost(host);
//设置服务器端口
configBuilder.setPort(port);
//设置服务器名称
configBuilder.setServiceName(serviceName);
//设置开启调试
configBuilder.setDebuggerEnabled(true);
//设置开启压缩,可以节省流量
configBuilder.setCompressionEnabled(true);

//SSL认证
try {
SSLContext sc = SSLContext.getInstance("TLS");
MemorizingTrustManager mtm = new MemorizingTrustManager(ctx);
sc.init(null, new X509TrustManager[]{mtm}, new java.security.SecureRandom());
configBuilder.setCustomSSLContext(sc);
configBuilder.setHostnameVerifier(
mtm.wrapHostnameVerifier(new org.apache.http.conn.ssl.StrictHostnameVerifier()));
} catch (NoSuchAlgorithmException|KeyManagementException e) {
e.printStackTrace();
}

XMPPTCPConnection connection = new XMPPTCPConnection(configBuilder.build());

connection.addConnectionListener(new ConnectionListener() {
@Override
public void connected(XMPPConnection xmppConnection) {
Log.e("connect","connected");
}

@Override
public void authenticated(XMPPConnection xmppConnection, boolean b) {
Log.e("connect","authenticated");
}

@Override
public void connectionClosed() {
Log.e("connect","connectionClosed");
}

@Override
public void connectionClosedOnError(Exception e) {
Log.e("connect","connectionClosedOnError");
}

@Override
public void reconnectionSuccessful() {
Log.e("connect","reconnectionSuccessful");
}

@Override
public void reconnectingIn(int i) {
Log.e("connect","reconnectionIn: "+i);
}

@Override
public void reconnectionFailed(Exception e) {
Log.e("connect","reconnectionFailed");
}
});

try {
connection.connect();
} catch (SmackException | IOException | XMPPException e) {
e.printStackTrace();
return null;
}
return connection;
}
}代码中的SSL认证可以参考:openfire之SSL认证
3.登录openfire服务器
public static boolean login(Context ctx, String username, String password) {
XMPPTCPConnection connection = getXMPPConnection(ctx);
if (connection == null)
{
Log.e("login","connection == null");
return false;
}
try {
connection.login(username, password);
return true;
} catch (XMPPException|SmackException|IOException e) {
e.printStackTrace();
Log.e("login","login failure");
return false;
}
}
4.用户注册
public Boolean registerUser(String username,String password)
{
try {
XMPPTCPConnection connection = XMPPUtil.getXMPPConnection(this);
if (connection == null)
{
try {
connection.connect();
} catch (SmackException | IOException | XMPPException e) {
e.printStackTrace();
}
Log.e("connect","连接服务器失败!");
}

AccountManager.getInstance(connection).createAccount(username,password);
finish();
return true;
}
catch (SmackException.NoResponseException | XMPPException.XMPPErrorException |
SmackException.NotConnectedException e)
{
Log.e("register", "注册失败!");
return false;
}
}
5.修改账号密码
protected boolean isConnected()
{
if (connection == null)
{
return false;
}
if (!connection.isConnected())
{
try {
connection.connect();
return true;
} catch (SmackException e) {
e.printStackTrace();
} catch (IOException e) {
e.printStackTrace();
} catch (XMPPException e) {
e.printStackTrace();
}
}
return true;
}
/**
* 修改密码
* @param newpassword 新密码
* @return
*/
public boolean changePassword(String newpassword) {
if(!isConnected()) {
return false;
}
try {
AccountManager.getInstance(connection).changePassword(newpassword);
return true;
} catch (NoResponseException | XMPPErrorException | NotConnectedException e) {
Log.e(TAG, "密码修改失败", e);
return false;
}
}

相关文章推荐
- CentOS 6部署Openfire 扩展平台聊天功能。
- centos 安装openfire
- 使用openfire,spark,fastpath webchat搭建在线咨询服务详细图文解说
- openfire 虚拟内存
- Ubuntu12.04(64bit)上部署编译运行Openfire+Spark环境
- 在Openfire源码中添加自己的插件
- openfire整合现有系统用户
- 简单练手源码:openfire+smack创建会议室和创建群
- Strophe + BOSH + Openfire 配置实例
- ubuntu装spark openfire
- openfire用eclipse编译
- Lineage2 PK And Griefing Guide
- OPENFIRE+MYSQL5.6安装中遇见Specified key was too long; max key length is 767 bytes openfire处理办法
- 仿Tomcat应用隔离机制开发Openfire插件隔离功能笔记
- openfire和spark安装(遇到的问题点详解)
- jitsi-android 编译,视频聊天
- 一个简单的openfire+smack的学习分享
- 安装完openfire登录管理控制提示
- openfire资源