仿QQ主界面Fragment简单应用
2016-01-12 13:05
465 查看
仿QQ主界面Fragment简单应用
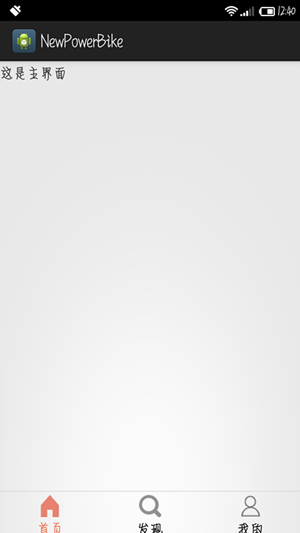
什么是Fragment,Fragment的产生与生命周期相信大家都很清楚,不清楚的网上也可以查到,一查一大堆,在此,笔者就不再啰嗦了,开始进入正题,编写实例。想做出的效果图如下:
在activity_main.xml中的代码为:
<RelativeLayout
android:layout_width="match_parent"
android:layout_height="match_parent"
xmlns:android="http://schemas.android.com/apk/res/android"
>

<FrameLayout
android:id="@+id/container"
android:layout_width="match_parent"
android:layout_height="match_parent"
android:layout_above="@+id/view"
/>
<View android:id="@+id/view"
android:layout_width="match_parent"
android:layout_height="1dp"
android:background="@color/back_gray"
android:layout_above="@+id/mainpage_rg"
/>
<RadioGroup
android:id="@+id/mainpage_rg"
android:layout_width="match_parent"
android:paddingTop="4dp"
android:layout_height="50dp"
android:layout_alignParentBottom="true"
android:orientation="horizontal"
>
<RadioButton android:id="@+id/home_rb"
android:layout_width="wrap_content"
android:layout_height="match_parent"
android:checked="true"
android:drawableTop="@drawable/selector_mainpage"
android:button="@null"
android:layout_weight="1"
android:gravity="center_horizontal"
android:textColor="@drawable/itemcolor"
android:textSize="14sp"
android:text="首页"
android:onClick="mainPageFragment"
/>
<RadioButton android:id="@+id/find_rb"
android:layout_width="wrap_content"
android:layout_height="match_parent"
android:drawableTop="@drawable/selector_find"
android:button="@null"
android:layout_weight="1"
android:textColor="@drawable/itemcolor"
android:gravity="center_horizontal"
android:textSize="14sp"
android:text="发现"
android:onClick="findFragment"
/>
<RadioButton android:id="@+id/person_rb"
android:layout_width="wrap_content"
android:layout_height="match_parent"
android:drawableTop="@drawable/selector_info"
android:button="@null"
android:layout_weight="1"
android:textColor="@drawable/itemcolor"
android:gravity="center_horizontal"
android:textSize="14sp"
android:text="我的"
android:onClick="infoFragment"
/>
</RadioGroup>
</RelativeLayout>
在res下新建一个drawable文件夹,在文件夹里新建selector_find.xml,selector_info.xml,selector_mainpage.xml,itemcolor.xml。
在itemcolor.xml文件中的代码为:
<?xml version="1.0" encoding="utf-8"?>
<selector xmlns:android="http://schemas.android.com/apk/res/android" >
<item android:state_checked="true" android:color="#ED7050"/>
<!-- not selected -->
<item android:state_checked="false" android:color="#000000"/>

</selector>
在selector_find.xml中的代码为:
<?xml version="1.0" encoding="utf-8"?>
<selector xmlns:android="http://schemas.android.com/apk/res/android" >
<item android:state_checked="true" android:drawable="@drawable/cb_icon_find_selected"/>
<item android:state_pressed="true" android:drawable="@drawable/cb_icon_find_selected"/>
<item android:drawable="@drawable/cb_icon_find_normal"/>

</selector>
在selector_info.xml中的代码为:
<?xml version="1.0" encoding="utf-8"?>
<selector xmlns:android="http://schemas.android.com/apk/res/android" >
<item android:state_checked="true" android:drawable="@drawable/cb_icon_info_selector_pressed"/>
<item android:state_pressed="true" android:drawable="@drawable/cb_icon_info_selector_pressed"/>
<item android:drawable="@drawable/cb_icon_info_selector_normal"/>

</selector>
在selector_mainpage.xml中的代码为:
<?xml version="1.0" encoding="utf-8"?>
<selector xmlns:android="http://schemas.android.com/apk/res/android" >
<item android:state_checked="true" android:drawable="@drawable/cb_icon_discover_selected"/>
<item android:state_pressed="true" android:drawable="@drawable/cb_icon_discover_selected"/>
<item android:drawable="@drawable/cb_icon_discover_normal"></item>

</selector>
主界面MainActivity中的代码为:
package com.yds.newpowerbike.activity;

import com.yds.newpowerbike.R;
import com.yds.newpowerbike.fragment.FindFragment;
import com.yds.newpowerbike.fragment.HomeFragment;
import com.yds.newpowerbike.fragment.InfoFragment;

import android.app.Activity;
import android.app.Fragment;
import android.os.Bundle;
import android.view.View;

public class MainActivity extends Activity {
private Fragment fragment[] = new Fragment[3];
@Override
protected void onCreate(Bundle savedInstanceState) {
super.onCreate(savedInstanceState);
setContentView(R.layout.activity_main);

fragment[0] = new HomeFragment();
fragment[1] = new FindFragment();
fragment[2] = new InfoFragment();

getFragmentManager().beginTransaction()
.add(R.id.container, fragment[0])
.add(R.id.container, fragment[1])
.add(R.id.container, fragment[2]).commit();

mainPageFragment(null);
}
public void mainPageFragment(View view){
getFragmentManager().beginTransaction()
.hide(fragment[1])
.hide(fragment[2])
.show(fragment[0]).commit();
}
public void findFragment(View view){
getFragmentManager().beginTransaction()
.hide(fragment[0])
.hide(fragment[2])
.show(fragment[1]).commit();
}
public void infoFragment(View view){
getFragmentManager().beginTransaction()
.hide(fragment[1])
.hide(fragment[0])
.show(fragment[2]).commit();
}
}
然后分别创建HomeFragment,FindFragment,InfoFragmen三个java文件。里面的内容随自己想要的效果来添加。
如HomeFragment代码为:
package com.yds.newpowerbike.fragment;

import com.yds.newpowerbike.R;

import android.app.Fragment;
import android.os.Bundle;
import android.view.LayoutInflater;
import android.view.View;
import android.view.ViewGroup;

public class HomeFragment extends Fragment {
@Override
public View onCreateView(LayoutInflater inflater, ViewGroup container,
Bundle savedInstanceState) {
// TODO Auto-generated method stub
super.onCreateView(inflater, container, savedInstanceState);
return inflater.inflate(R.layout.fragment_home, container,false);
}
}
其它的都是细枝末节,在此就不再赘述,若有不懂,可以下载以下代码:
http://download.csdn.net/detail/u013293125/9400616

相关文章推荐
- 使用C++实现JNI接口需要注意的事项
- Android IPC进程间通讯机制
- Android Manifest 用法
- [转载]Activity中ConfigChanges属性的用法
- Android之获取手机上的图片和视频缩略图thumbnails
- Android之使用Http协议实现文件上传功能
- Android学习笔记(二九):嵌入浏览器
- android string.xml文件中的整型和string型代替
- i-jetty环境搭配与编译
- android之定时器AlarmManager
- android wifi 无线调试
- Android Native 绘图方法
- Android java 与 javascript互访(相互调用)的方法例子
- android 代码实现控件之间的间距
- android FragmentPagerAdapter的“标准”配置
- Android"解决"onTouch和onClick的冲突问题
- android:installLocation简析
- android searchView的关闭事件
- SourceProvider.getJniDirectories