RedHat6.4系统下LAMP环境的搭建---(源码包编译安装)---v1.0
2016-01-05 13:58
861 查看
一:配置本地yum源 :--目录
作者:李文轩座右铭:一个愿意为理想奋斗终生的人!
联系QQ:838997384
网站地址:www.74cto.com
说明:本篇安装的系统版本RedHat6.4(64位),如果不按照我的版本安装,可能会出现错误
1 创建一个文件夹用于存放挂载光盘的文件
mkdir /mnt/cdrom
2 将光驱挂载在创建的文件夹中
mount /dev/cdrom /mnt/cdrom
3 当然我们也可以设置为开机自动挂载光驱:
用vi编辑/etc/rc.local文件,因为在系统启动过程中,完成初始化脚本的执行后,会执行这个脚本文件添加命令如下:
 vi /etc/rc.local
mount /dev/cdrom /mnt/cdrom                #后面挂载点可以自己选择
4 配置本地yum源的文件:
vi /etc/yum.repos.d/rhel-source.repo        #配置本地yum源的文件
[rhel-source]
name=Redhat                                  #设置本地yum源的名称
baseurl=file:///mnt/cdrom/Server             #设置本地yum源的地址
enabled=1                                    #1代表启用本地yum源   0则表示禁用
gpgcheck=1
5 查看可用的本地yum源:
yum repolist
显示如下:
[root@Chris ~]#  yum repolist
Loaded plugins: product-id, security, subscription-manager
This system is not registered to Red Hat Subscription Management. You can use subscription-manager to register.
rhel-source                                                                | 3.9 kB     00:00 ...
repo id                                         repo name                                   status
rhel-source                                     Redhat                                      3,648
repolist: 3,648
到了这里就表示本地yum源配置完成!
(一)httpd(源码包安装)
作者:李文轩座右铭:一个愿意为理想奋斗终生的人!
联系QQ:838997384
网站地址:www.74cto.com
说明:本篇安装的软件版本为httpd-2.2.4.tar.bz2 ,如果不按照我的版本安装,可能会出现错误
安装准备:
1 安装htppd软件所依赖的软件包yum -y install gcc gcc-c++ pcre pcre-devel apr apr-devel apr-util apr-util-devel zlib zlib-devel openssl openssl-devel lrzsz perl perl-devel
安装完成显示如下:
Installed:
apr.x86_64 0:1.3.9-5.el6_2                    apr-devel.x86_64 0:1.3.9-5.el6_2
apr-util.x86_64 0:1.3.9-3.el6_0.1             apr-util-devel.x86_64 0:1.3.9-3.el6_0.1
gcc.x86_64 0:4.4.7-3.el6                      gcc-c++.x86_64 0:4.4.7-3.el6
openssl-devel.x86_64 0:1.0.0-27.el6           pcre-devel.x86_64 0:7.8-6.el6
zlib-devel.x86_64 0:1.2.3-29.el6

Dependency Installed:
cloog-ppl.x86_64 0:0.15.7-1.2.el6                 cpp.x86_64 0:4.4.7-3.el6
cyrus-sasl-devel.x86_64 0:2.1.23-13.el6_3.1       db4-cxx.x86_64 0:4.7.25-17.el6
db4-devel.x86_64 0:4.7.25-17.el6                  expat-devel.x86_64 0:2.0.1-11.el6_2
glibc-devel.x86_64 0:2.12-1.107.el6               glibc-headers.x86_64 0:2.12-1.107.el6
kernel-headers.x86_64 0:2.6.32-358.el6            keyutils-libs-devel.x86_64 0:1.4-4.el6
krb5-devel.x86_64 0:1.10.3-10.el6                 libcom_err-devel.x86_64 0:1.41.12-14.el6
libselinux-devel.x86_64 0:2.0.94-5.3.el6          libsepol-devel.x86_64 0:2.0.41-4.el6
libstdc++-devel.x86_64 0:4.4.7-3.el6              mpfr.x86_64 0:2.4.1-6.el6
openldap-devel.x86_64 0:2.4.23-31.el6             ppl.x86_64 0:0.10.2-11.el6
2 检查安装apache软件所需的软件包是否全部安装完成
[root@localhost ~]# rpm -q gcc gcc-c++ pcre pcre-devel apr apr-devel apr-util apr-util-devel zlib zlib-devel openssl openssl-devel lrzsz perl perl-devel
gcc-4.4.7-11.el6.x86_64
gcc-c++-4.4.7-11.el6.x86_64
pcre-7.8-6.el6.x86_64
pcre-devel-7.8-6.el6.x86_64
apr-1.3.9-5.el6_2.x86_64
apr-devel-1.3.9-5.el6_2.x86_64
apr-util-1.3.9-3.el6_0.1.x86_64
apr-util-devel-1.3.9-3.el6_0.1.x86_64
zlib-1.2.3-29.el6.x86_64
zlib-devel-1.2.3-29.el6.x86_64
openssl-1.0.1e-30.el6.x86_64
openssl-devel-1.0.1e-30.el6.x86_64
lrzsz-0.12.20-27.1.el6.x86_64
perl-5.10.1-136.el6.x86_64
perl-devel-5.10.1-136.el6.x86_64
一共为12个软件包 如果都安装完成则表示可以对apache源码进行编译安装,
下面我来给大家简单的介绍这个软件依赖包的作用
gcc              软件编译器,用来编译软件的时候使用                             (必装)
gcc-c++               让ggc软件编译器支持编译c++程序语言                        (必装)
pcre              是一个用C语言编写的正则表达式函数库                            (必装)
pcre-devel            pcre软件包的使用库                         (必装)
apr               Apache可移植运行库,用来支持apache软件跨平台安装使用的。      (必装)
apr-devel             apr软件包的使用库                                               (必装)
apr-util              apr软件工具包                         (必装)
apr-util-devel        apr软件工具包库                                                 (必装)
zlib               提供数据压缩用的函式库,用来压缩传输网页文件的                   (建议安装)
zlib-devel            zlib软件包的使用库                                 (建议安装)
openssl               是一个强大的安全套接字层密码库,用来增强apache服务器安全的       (建议安装)
openssl-devel         openssl软件的使用库                                              (建议安装)
开始编译安装httpd-2.2.4.tar.bz23
上传httpd-2.2.4.tar.bz2文件到指定目录[root@Chris ~]# ll | grep httpd-2.2.4.tar.bz2 -rw-r--r--. 1 root root 4930375 11月 21 21:34 httpd-2.2.4.tar.bz2
4 解压httpd-2.2.4.tar.bz2压缩文件
[root@Chris ~]# tar xf httpd-2.2.4.tar.bz2
5 cd到解压httpd文件夹中,并查看解压的文件
[root@Chris ~]# cd httpd-2.2.4
[root@Chris httpd-2.2.4]# ls
ABOUT_APACHE      buildconf      emacs-style     LAYOUT        NOTICE            server
acinclude.m4      CHANGES        httpd.dsp       libhttpd.dsp  NWGNUmakefile     srclib
Apache.dsw        config.layout  httpd.spec      LICENSE       os                support
apachenw.mcp.zip  configure      include         Makefile.in   README            test
build             configure.in   INSTALL         Makefile.win  README.platforms  VERSIONING
BuildBin.dsp      docs           InstallBin.dsp  modules       ROADMAP
6 开始使用./configure命令编译安装apache软件源码包。对即将安装的软件进行配置,检查当前的环境是否满足要安装软件的依赖关系
./configure参数:
[root@Chris httpd-2.2.4]# ./configure --prefix=/usr/local/apache --sysconfdir=/etc/httpd --enable-deflate --enable-expires --enable-headers --enable-modules=most --enable-so --enable--module-ssl --enable-cgi --enable-cgid --enable-rewrite --enable-modules=most --enable-mpms-shared=most --with-mpm=worker --with-zlib
编译参数详解:
./configure \
#常见参数:
–-enable-module=so \                             #/打开 so 模块,so 模块是用来提 DSO 支持的 apache 核心模块
--prefix=/usr/local/apache \                     #指定Apache服务的安装路径
--sysconfdir=/etc/httpd \                        #设置Apache配置文件路径
--enable-deflate \                               #支持网页压缩
--enable-expires \                               #支持 HTTP 控制
-–enable-rewrite=shared                          #支持 URL 重写
--enable-headers \
-–enable-cache \                                 #支持缓存
–-enable-file-cache \                            #支持文件缓存
--enable-mem-cache \                             #支持记忆缓存
–-enable-disk-cache \                            #支持磁盘缓存
–-enable-static-support \                        #支持静态连接(默认为动态连接)
–-enable-static-htpasswd \                       #使用静态连接编译 htpasswd – 管理用于基本认证的用户文件
–-enable-static-htdigest \                       #使用静态连接编译 htdigest – 管理用于摘要认证的用户文件
–-enable-static-rotatelogs \                     #使用静态连接编译 rotatelogs – 滚动 Apache 日志的管道日志程序
–-enable-static-logresolve \                     #使用静态连接编译 logresolve – 解析 Apache 日志中的IP地址为主机名
–-enable-static-htdbm \                          #使用静态连接编译 htdbm – 操作 DBM 密码数据库
–-enable-static-ab \                             #使用静态连接编译 ab – Apache HTTP 服务器性能测试工具
–-enable-static-checkgid \                       #使用静态连接编译 checkgid
–-enable-authn-dbm=shared                        #对动态数据库进行操作。Rewrite时需要。
--enable-modules=most \
--enable-so \
--enable--module-ssl \
--enable-cgi \
--enable-cgid \
--enable-rewrite \
--enable-modules=most \
--enable-mpms-shared=most \
--with-mpm=worker \                             #让apache以worker方式运行
--with-zlib
–-disable-cgid                                  #禁止用一个外部 CGI 守护进程执行CGI脚本
–-disable-cgi                                   #禁止编译 CGI 版本的 PHP
–-disable-userdir                               #禁止用户从自己的主目录中提供页面

#用于apr的configure脚本的选项:
验证./configure软件配置检查是否成功!如果输入echo $?命令 输出的显示为0 那么就表示源码配置检查通过,则可以进行下一步安装
[root@Chris httpd-2.2.4]# echo $?
0
7 apache源码包检查通过以后,下面我就开始进行编译安装啦!
[root@Chris httpd-2.2.4]# make && make install
输入命令以后可能要等待一段时候,我们最后输入echo $?命令 输出的显示为0 则表示安装完成!
[root@Chris httpd-2.2.4]# echo $?
0
8 源码安装完成以后,开启apache服务
[root@Chris httpd-2.2.4]# /usr/local/apache/bin/apachectl start
httpd: apr_sockaddr_info_get() failed for Chris
httpd: Could not reliably determine the server's fully qualified domain name, using 127.0.0.1 for ServerName
[root@Chris httpd-2.2.4]#
通过查看端口,查看apache服务器是否开启成功
[root@Chris httpd-2.2.4]# netstat -ltnp |grep :80
tcp        0      0 :::80                       :::*                        LISTEN      16640/httpd
开启Apache服务器的防火墙的80端口
9 开启系统防火墙的80端口,使外网的人可以访问[root@Chris httpd-2.2.4]# iptables -t filter -I INPUT -p tcp --dport 80 -j ACCEPT
保存当前的防火墙配置
[root@Chris httpd-2.2.4]# /etc/rc.d/init.d/iptables save
iptables:将防火墙规则保存到 /etc/sysconfig/iptables:[确定]
[root@Chris httpd-2.2.4]#
重启防火墙服务使配置生效
[root@Chris httpd-2.2.4]# service iptables restart
iptables:清除防火墙规则:[确定]
iptables:将链设置为政策 ACCEPT:filter [确定]
iptables:正在卸载模块:[确定]
iptables:应用防火墙规则:[确定]
关闭SeLinux(生产环境不建议关闭)
10 Linux系统中的selinux功能可能会影响我们对于网站服务器的配置,所以为了方便大家的实验,建议关闭[root@Chris ~]# vi /etc/selinux/config
注释:#SELINUX=enforcing
添加:SELINUX=disabled
最终修改后显示结果如下:
[root@Chris ~]# vi /etc/selinux/config

# This file controls the state of SELinux on the system.
# SELINUX= can take one of these three values:
#     enforcing - SELinux security policy is enforced.
#     permissive - SELinux prints warnings instead of enforcing.
#     disabled - No SELinux policy is loaded.
#SELINUX=enforcing
SELINUX=disabled
# SELINUXTYPE= can take one of these two values:
#     targeted - Targeted processes are protected,
#     mls - Multi Level Security protection.
SELINUXTYPE=targeted
保存退出即可!到了这里我们就把selinux给禁用啦。
现在查看apache服务是否启动
[root@Chris ~]# netstat -ltnp | grep :80
tcp        0      0 :::80                       :::*                        LISTEN      1665/httpd
创建启动脚本设置Apache服务开机自动启动
12 现在我们需要在/etc/init.d目录下创建一个httpd的文件启动脚本[root@Chris ~]# vi /etc/init.d/httpd
我们把脚本的内容复制进去:其中config: /etc/httpd/conf/httpd.conf表示apache配置文件路径,pidfile: /var/run/httpd.pid 代表httpd.pid文件路径,我们前面有设置过。
#!/bin/bash
#
# httpd        Startup script for the Apache HTTP Server
#
# chkconfig: - 85 15
# description: Apache is a World Wide Web server.  It is used to serve \
#           HTML files and CGI.
# processname: httpd
# config: /etc/httpd/conf/httpd.conf
# config: /etc/sysconfig/httpd
# pidfile: /var/run/httpd.pid

# Source function library.
. /etc/rc.d/init.d/functions

if [ -f /etc/sysconfig/httpd ]; then
. /etc/sysconfig/httpd
fi

# Start httpd in the C locale by default.
HTTPD_LANG=${HTTPD_LANG-"C"}

# This will prevent initlog from swallowing up a pass-phrase prompt if
# mod_ssl needs a pass-phrase from the user.
INITLOG_ARGS=""

# Set HTTPD=/usr/sbin/httpd.worker in /etc/sysconfig/httpd to use a server
# with the thread-based "worker" MPM; BE WARNED that some modules may not
# work correctly with a thread-based MPM; notably PHP will refuse to start.

# Path to the apachectl script, server binary, and short-form for messages.
apachectl=/usr/local/apache/bin/apachectl
httpd=${HTTPD-/usr/local/apache/bin/httpd}
prog=httpd
pidfile=${PIDFILE-/var/run/httpd.pid}
lockfile=${LOCKFILE-/var/lock/subsys/httpd}
RETVAL=0

start() {
echo -n $"Starting $prog: "
LANG=$HTTPD_LANG daemon --pidfile=${pidfile} $httpd $OPTIONS
RETVAL=$?
echo
[ $RETVAL = 0 ] && touch ${lockfile}
return $RETVAL
}

stop() {
echo -n $"Stopping $prog: "
killproc -p ${pidfile} -d 10 $httpd
RETVAL=$?
echo
[ $RETVAL = 0 ] && rm -f ${lockfile} ${pidfile}
}
reload() {
echo -n $"Reloading $prog: "
if ! LANG=$HTTPD_LANG $httpd $OPTIONS -t >&/dev/null; then
RETVAL=$?
echo $"not reloading due to configuration syntax error"
failure $"not reloading $httpd due to configuration syntax error"
else
killproc -p ${pidfile} $httpd -HUP
RETVAL=$?
fi
echo
}

# See how we were called.
case "$1" in
start)
start
;;
stop)
stop
;;
status)
status -p ${pidfile} $httpd
RETVAL=$?
;;
restart)
stop
start
;;
condrestart)
if [ -f ${pidfile} ] ; then
stop
start
fi
;;
reload)
reload
;;
graceful|help|configtest|fullstatus)
$apachectl $@
RETVAL=$?
;;
*)
echo $"Usage: $prog {start|stop|restart|condrestart|reload|status|fullstatus|graceful|help|configtest}"
exit 1
esac

exit $RETVAL
13 我们需要授权刚刚创建的脚本文件具有执行权限。
[root@Chris ~]# chmod +x /etc/rc.d/init.d/httpd
[root@Chris ~]#
14 我们将刚刚创建的脚本加入的开机启动项中
[root@Chris ~]# chkconfig --add httpd
查看一下,脚本文件是否被加入开机启动项中
[root@Chris ~]# chkconfig |grep httpd
httpd           0:关闭  1:关闭  2:关闭  3:关闭  4:关闭  5:关闭  6:关闭
15 我们已经将脚本加入开机启动项中,现在设置脚本开机自动启动
[root@Chris ~]# chkconfig httpd on
[root@Chris ~]#
16 查看apache服务是否已经加入开机启动项:
[root@Chris ~]# chkconfig | grep httpd
显示如下:
[root@Chris ~]# chkconfig | grep httpd
httpd           0:关闭  1:关闭  2:启用  3:启用  4:启用  5:启用  6:关闭
上面显示2-5都是启用状态就表示apache服务器已经可以开机自动启动啦!
17 最后我们需要重新启动一下系统测试一下apache服务是否已经开机自动启动,输入reboot命令重启系统
[root@Chris ~]# reboot
Broadcast message from root@Chris
(/dev/pts/0) at 23:15 ...
The system is going down for reboot NOW!
[root@Chris ~]# netstat -ltnp |grep :80
tcp        0      0 :::80                       :::*                        LISTEN      1574/httpd
设置httpd的PATH路径
18 当我们在命令行输入httpd命令的时候系统给我们输出的信息是没有这个命令。[root@Chris httpd-2.2.4]# httpd -bash: httpd: command not found
那是因为系统找不到关于httpd命令的PATH路径,这时就需要我们来设置一下Apache命令的PATH路径啦!我们来编辑/etc/profile.d/httpd.sh文件
[root@Chris ~]# vi /etc/profile.d/httpd.sh

export PATH=$PATH:/usr/local/apache/bin
#指定安装路径
~
我们克隆一个会话使刚刚的配置文件生效。输入测试:echo $PATH
[root@Chris ~]#  echo $PATH
/usr/lib64/qt-3.3/bin:/usr/local/sbin:/usr/local/bin:/sbin:/bin:/usr/sbin:/usr/bin:/usr/local/apache/bin:/root/bin
输入命令httpd -t测试一下语法命令:
[root@Chris ~]# httpd -t
httpd: apr_sockaddr_info_get() failed for Chris
httpd: Could not reliably determine the server's fully qualified domain name, using 127.0.0.1 for ServerName
Syntax OK
我们来查看一下Apache已经安装的模块
[root@Chris ~]# httpd -M
httpd: apr_sockaddr_info_get() failed for Chris
httpd: Could not reliably determine the server's fully qualified domain name, using 127.0.0.1 for ServerName
Loaded Modules:
core_module (static)
authn_file_module (static)
authn_dbm_module (static)
authn_anon_module (static)
authn_dbd_module (static)
authn_default_module (static)
authz_host_module (static)
authz_groupfile_module (static)
authz_user_module (static)
authz_dbm_module (static)
authz_owner_module (static)
authz_default_module (static)
auth_basic_module (static)
auth_digest_module (static)
dbd_module (static)
dumpio_module (static)
ext_filter_module (static)
include_module (static)
filter_module (static)
deflate_module (static)
log_config_module (static)
logio_module (static)
env_module (static)
expires_module (static)
headers_module (static)
ident_module (static)
setenvif_module (static)
mpm_worker_module (static)
http_module (static)
mime_module (static)
dav_module (static)
status_module (static)
autoindex_module (static)
asis_module (static)
info_module (static)
cgid_module (static)
cgi_module (static)
dav_fs_module (static)
vhost_alias_module (static)
negotiation_module (static)
dir_module (static)
imagemap_module (static)
actions_module (static)
speling_module (static)
userdir_module (static)
alias_module (static)
rewrite_module (static)
so_module (static)
Syntax OK
到了这里我们的PATH路径就设置完毕啦!
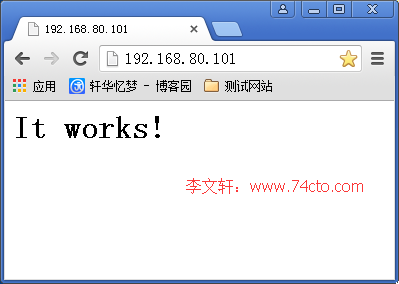
19 我们打开浏览器就可以看到apache服务默认的网页信息啦!
Apache服务无法访问的排除故障的方法:
1 通过查看端口判断apache服务是否启动完成
[root@Chris ~]# lsof -i :80
COMMAND  PID   USER   FD   TYPE DEVICE SIZE/OFF NODE NAME
httpd   1546   root    4u  IPv6  10831      0t0  TCP *:http (LISTEN)
httpd   1557 daemon    4u  IPv6  10831      0t0  TCP *:http (LISTEN)
httpd   1558 daemon    4u  IPv6  10831      0t0  TCP *:http (LISTEN)
httpd   1559 daemon    4u  IPv6  10831      0t0  TCP *:http (LISTEN)
2 通过查看系统进程判断apache服务是否启动完成
方法1:[root@Chris ~]# ps -ef | grep httpd root 1546 1 0 17:17 ? 00:00:00 /usr/local/apache/bin/httpd daemon 1556 1546 0 17:17 ? 00:00:00 /usr/local/apache/bin/httpd daemon 1557 1546 0 17:17 ? 00:00:00 /usr/local/apache/bin/httpd daemon 1558 1546 0 17:17 ? 00:00:00 /usr/local/apache/bin/httpd daemon 1559 1546 0 17:17 ? 00:00:00 /usr/local/apache/bin/httpd root 1762 1741 0 17:19 pts/0 00:00:00 grep httpd
方法2:
[root@Chris ~]# netstat -ltnp | grep httpd
tcp        0      0 :::80                       :::*                        LISTEN      1546/httpd
3 检查iptables防火墙和selinux是否关闭
(1)/etc/init.d/iptables stop 关闭防火墙(生产环境是不允许关闭防火墙的,请配置防火墙允许80端口访问:)配置防火墙允许80端口访问:
[root@Chris ~]# iptables -t filter -I INPUT -p tcp --dport 80 -j ACCEPT
将当前的防火墙配置保存到配置文件中
[root@Chris ~]# /etc/rc.d/init.d/iptables save
重启防火墙服务生效
[root@Chris ~]# service iptables restart
iptables:清除防火墙规则:[确定]
iptables:将链设置为政策 ACCEPT:filter [确定]
iptables:正在卸载模块:[确定]
iptables:应用防火墙规则:[确定]
(2)检查selinux是否关闭,将#SELINUX=enforcing注释,并在下一行添加SELINUX=disabled
[root@Chris ~]# vi /etc/selinux/config

# This file controls the state of SELinux on the system.
# SELINUX= can take one of these three values:
#     enforcing - SELinux security policy is enforced.
#     permissive - SELinux prints warnings instead of enforcing.
#     disabled - No SELinux policy is loaded.
#SELINUX=enforcing
SELINUX=disabled
# SELINUXTYPE= can take one of these two values:
#     targeted - Targeted processes are protected,
#     mls - Multi Level Security protection.
SELINUXTYPE=targeted
4.检查本地的服务是否正常
[root@Chris ~]# wget 192.168.80.101
--2016-01-07 17:26:50--  http://192.168.80.101/ 正在连接 192.168.80.101:80... 已连接。
已发出 HTTP 请求,正在等待回应... 200 OK
长度:44 [text/html]
正在保存至: “index.html”

100%[===================================================================================>] 44          --.-K/s   in 0s

2016-01-07 17:26:50 (6.15 MB/s) - 已保存 “index.html” [44/44])
5.使用命令访问网站测试
[root@Chris ~]# curl 192.168.80.101
<html><body><h1>It works!</h1></body></html>[root@Chris ~]#
6 关于Apache模块是否安装的问题,查看已经安装的模块,若所需模块未安装的话,那么请安装所需模块
[root@Chris ~]# /usr/local/apache/bin/apachectl -l
Compiled in modules:
core.c
mod_authn_file.c
mod_authn_dbm.c
mod_authn_anon.c
mod_authn_dbd.c
mod_authn_default.c
mod_authz_host.c
mod_authz_groupfile.c
mod_authz_user.c
mod_authz_dbm.c
mod_authz_owner.c
mod_authz_default.c
mod_auth_basic.c
mod_auth_digest.c
mod_dbd.c
mod_dumpio.c
mod_ext_filter.c
mod_include.c
mod_filter.c
mod_deflate.c
mod_log_config.c
mod_logio.c
mod_env.c
mod_expires.c
mod_headers.c
mod_ident.c
mod_setenvif.c
worker.c
http_core.c
mod_mime.c
mod_dav.c
mod_status.c
mod_autoindex.c
mod_asis.c
mod_info.c
mod_cgid.c
mod_cgi.c
mod_dav_fs.c
mod_vhost_alias.c
mod_negotiation.c
mod_dir.c
mod_imagemap.c
mod_actions.c
mod_speling.c
mod_userdir.c
mod_alias.c
mod_rewrite.c
mod_so.c
MySQL--(源码包安装)
作者:李文轩座右铭:一个愿意为理想奋斗终生的人!
联系QQ:838997384
网站地址:www.74cto.com
说明:本篇安装的软件版本为mysql-5.1.62.tar.gz,如果不按照我的版本安装,可能会出现错误
安装准备:
20 我们需要yum安装一下mysql软件所依赖的软件包yum -y install bison ncurses ncurses-devel
安装完成显示如下:
Installed:
bison.x86_64 0:2.4.1-5.el6                            ncurses-devel.x86_64 0:5.7-3.20090208.el6

Complete!
21 检查一下Mysql所依赖的软件包是否都已经安装完成,如果为安装完成请一定要安装
[root@Chris ~]# rpm -q bison ncurses-devel ncurses
bison-2.4.1-5.el6.x86_64
ncurses-devel-5.7-3.20090208.el6.x86_64
ncurses-5.7-3.20090208.el6.x86_64
22 请将Mysql的源码包上传的服务器的指定目录下解压
[root@Chris ~]# ll |grep mysql-5.1
drwxrwxrwx  32 7155 wheel     4096 3月   2 2012 mysql-5.1.62
-rw-r--r--   1 root root  24503313 11月 21 21:39 mysql-5.1.62.tar.gz
?[root@Chris ~]# tar xf mysql-5.1.62.tar.gz
[root@Chris ~]# ll |grep mysql-5.1.62
drwxrwxrwx  32 7155 wheel     4096 3月   2 2012 mysql-5.1.62
-rw-r--r--   1 root root  24503313 11月 21 21:39 mysql-5.1.62.tar.gz
开始安装MySQL数据库
23 cd到mysql的目录进行./configure安装前的参数检查[root@Chris ~]# cd mysql-5.1.62 [root@Chris mysql-5.1.62]#
./configure参数
./configure \
--prefix=/usr/local/mysql \
--with-unix-socket-path=/usr/local/mysql/tmp/mysql.sock \
--localstatedir=/usr/local/mysql/data \
--enable-assemnler \
--enable-thread-safe-client \
--with-mysqld-user=mysql \
--with-big-tables \
--with-pthread \
--with-extra-charsets=complex \
--with-readline \
--with-ssl \
--with-embedded-server \
--with-plugins=partition,innobase \
--with-mysqld-ldflags=-all-static \
--with-client-ldflags=-all-static \
--without-debug \
--enable-assembler \
--enable-local-infile

参数说明:
./configure \
--prefix=/usr/local/mysql \     #设定mysql的安装路径
--with-unix-socket-path=/usr/local/mysql/tmp/mysql.sock \   #指定mysql.sock文件的存放目录
--localstatedir=/usr/local/mysql/data \     #设置mysql数据文件的存放位置
--enable-assemnler \    #运行使用汇编模式(优化性能)
--enable-thread-safe-client \   #以线程方式编译客户端
--with-mysqld-user=mysql \      #指定mysql运行的系统用户
--with-big-tables \
--with-pthread \                #强制使用pthread编译数据库
--with-extra-charsets=complex \
--with-readline \
--with-ssl \
--with-embedded-server \
--with-plugins=partition,innobase \
--with-mysqld-ldflags=-all-static \     #服务器使用静态库(优化性能)
--with-client-ldflags=-all-static \     #客户端使用静态库(优化性能)
--without-debug \                      #使用非debug模式
--enable-assembler \
--enable-local-infile
去去去
./configure \
--prefix=/usr/local/mysql \
--with-unix-socket-path=/usr/local/mysql/tmp/mysql.sock \
--localstatedir=/usr/local/mysql/data \
--enable-assemnler \
--enable-thread-safe-client \
--with-mysqld-user=mysql \
--with-big-tables \
--with-pthread \
--with-extra-charsets=complex \
--with-readline \
--with-ssl \
--with-embedded-server \
--with-plugins=partition,innobase \
--with-mysqld-ldflags=-all-static \
--with-client-ldflags=-all-static \
--without-debug \
--enable-assembler \
--enable-local-infile
正确显示如下:
Thank you for choosing MySQL!

Remember to check the platform specific part of the reference manual
for hints about installing MySQL on your platform.
Also have a look at the files in the Docs directory.
输入echo $?命令查看检查是否通过,若为0则通过
[root@Chris mysql-5.1.62]# echo $?
0
24 现在来对Mysql源码包进行编译安装。make && make install
[root@Chris mysql-5.1.62]# make && make install
经过漫长的等待以后(大约十多分钟.......)正确显示如下:
libtool: install: /usr/bin/install -c mysqlmanager /usr/local/mysql/libexec/mysqlmanager
make[3]: Nothing to be done for `install-data-am'.
make[3]: Leaving directory `/root/mysql-5.1.62/server-tools/instance-manager'
make[2]: Leaving directory `/root/mysql-5.1.62/server-tools/instance-manager'
make[1]: Leaving directory `/root/mysql-5.1.62/server-tools'
Making install in win
make[1]: Entering directory `/root/mysql-5.1.62/win'
make[2]: Entering directory `/root/mysql-5.1.62/win'
make[2]: Nothing to be done for `install-exec-am'.
make[2]: Nothing to be done for `install-data-am'.
make[2]: Leaving directory `/root/mysql-5.1.62/win'
make[1]: Leaving directory `/root/mysql-5.1.62/win'
[root@Chris mysql-5.1.62]#
输入echo $?命令查看检查是否通过,若为0则通过
[root@Chris mysql-5.1.62]# echo $?
0
到了这里我们的MySQL数据库就安装完成,下面我来教大家如果来配置MySQL数据库
MySQL数据库初始化配置
注意:在CentOS 6.4版操作系统的最小安装完成后,在/etc目录下会存在一个my.cnf,需要将此文件更名为其他的名字,如:/etc/my.cnf.bak,否则,该文件会干扰源码安装的MySQL的正确配置,造成无法启动。在使用"yum update"更新系统后,需要检查下/etc目录下是否会多出一个my.cnf,如果多出,将它重命名成别的。否则,MySQL将使用这个配置文件启动,可能造成无法正常启动等问题。
为了预防上面的情况发生,我们提前将my.cnf更改为my.cnf.bak(这一步很重要,关系到下面能不能启动mysql服务)
[root@localhost ~]# mv /etc/my.cnf /etc/my.cnf.bak
25 创建一个用来管理Mysql数据库的用户,并设置权限不让这个用户登录
[root@Chris ~]# groupadd -r -g 306 mysql
#创建mysql组
[root@Chris ~]# useradd -g 306 -r -u 306 mysql
#创建mysql用户并将其加入mysql用户组
查看刚刚创建的mysql用户
[root@Chris ~]# id mysql
uid=306(mysql) gid=306(mysql) 组=306(mysql)
26 我们需要创建一个专门的目录来存放MySQL的数据,我们在/usr/local/mysql目录下创建一个data目录
[root@Chris ~]# mkdir /usr/local/mysql/data
#创建mysql数据存放目录
27 给mysql安装目录下的所有文件进行授权,将所有者改为mysql用户
[root@Chris ~]# chown -R mysql.mysql /usr/local/mysql/*
正确显示如下:
[root@Chris ~]# ll /usr/local/mysql
总用量 36
drwxr-xr-x  2 mysql mysql 4096 1月   7 18:18 bin
drwxr-xr-x  2 mysql mysql 4096 1月   7 18:33 data
drwxr-xr-x  2 mysql mysql 4096 1月   7 18:18 docs
drwxr-xr-x  3 mysql mysql 4096 1月   7 18:18 include
drwxr-xr-x  3 mysql mysql 4096 1月   7 18:18 lib
drwxr-xr-x  2 mysql mysql 4096 1月   7 18:18 libexec
drwxr-xr-x 10 mysql mysql 4096 1月   7 18:18 mysql-test
drwxr-xr-x  5 mysql mysql 4096 1月   7 18:18 share
drwxr-xr-x  5 mysql mysql 4096 1月   7 18:18 sql-bench
28 现在开始对数据库进行初始化操作。我们需要先进入mysql的安装路径,这里一定不要弄错啦!
[root@Chris mysql-5.1.62]# cd /usr/local/mysql/
[root@Chris mysql]# pwd
/usr/local/mysql
[root@Chris mysql]# pwd
/usr/local/mysql
[root@Chris mysql]# bin/mysql_install_db --user=mysql --datadir=/usr/local/mysql/data
#初始化mysql数据库

--user=mysql  指定初始化数据的用户

--datadir=/mydata/data  指定数据的存放位置
正确的显示如下:出现下面的信息就表示我们初始化数据库成功
[root@Chris mysql]# bin/mysql_install_db --user=mysql --datadir=/usr/local/mysql/data
WARNING: The host 'Chris' could not be looked up with resolveip.
This probably means that your libc libraries are not 100 % compatible
with this binary MySQL version. The MySQL daemon, mysqld, should work
normally with the exception that host name resolving will not work.
This means that you should use IP addresses instead of hostnames
when specifying MySQL privileges !
Installing MySQL system tables...
OK
Filling help tables...
OK

To start mysqld at boot time you have to copy
support-files/mysql.server to the right place for your system

PLEASE REMEMBER TO SET A PASSWORD FOR THE MySQL root USER !
To do so, start the server, then issue the following commands:

/usr/local/mysql/bin/mysqladmin -u root password 'new-password'
/usr/local/mysql/bin/mysqladmin -u root -h Chris password 'new-password'

Alternatively you can run:
/usr/local/mysql/bin/mysql_secure_installation

which will also give you the option of removing the test
databases and anonymous user created by default.  This is
strongly recommended for production servers.

See the manual for more instructions.

You can start the MySQL daemon with:
cd /usr/local/mysql ; /usr/local/mysql/bin/mysqld_safe &

You can test the MySQL daemon with mysql-test-run.pl
cd /usr/local/mysql/mysql-test ; perl mysql-test-run.pl

Please report any problems with the /usr/local/mysql/bin/mysqlbug script!
但是我们怎么知道数据到底有没有初始化完成呢? 当我们完成数据库初始化的步骤以后就会创建两个默认的数据库,存放在我们刚刚创建的数据库数据存放目录
[root@Chris mysql]# ll /usr/local/mysql/data
总用量 8
drwx------ 2 mysql root 4096 1月   7 18:46 mysql
drwx------ 2 mysql root 4096 1月   7 18:46 test
当我们看着上上面的两个文件则表示数据库初始化真正的完成啦!
但是我们需要完善一下数据库的服务启动方式,因为现在我们是无法使用service mysql start命令启动mysql服务的
[root@Chris mysql]# service mysql start
mysql: 未被识别的服务
创建MySQL数据库开机自动启动脚本
29 现在开始创建MySQL开机自动启动脚本。我们需要先进入mysql-5.1.62源码包路径,这里一定不要弄错啦![root@Chris ~]# cd mysql-5.1.62 [root@Chris mysql-5.1.62]#pwd
/root/mysql-5.1.62
30 我们需要将mysql-5.1.62源码包中support-files目录中的mysql.server文件拷贝到/etc/init.d目录下,并重命名为mysql
[root@Chris mysql-5.1.62]# cp support-files/mysql.server /etc/init.d/mysql
[root@Chris mysql-5.1.62]# ll /etc/rc.d/init.d/ | grep mysql
-rw-r--r--  1 root root 12303 1月   7 19:00 mysql
31 为我们刚刚创建的脚本文件mysql授权具有执行的权限。
[root@Chris mysql-5.1.62]# chmod +x /etc/init.d/mysql
[root@Chris mysql-5.1.62]# ll /etc/rc.d/init.d/ | grep mysql
-rwxr-xr-x  1 root root 12303 1月   7 19:00 mysql
32 将mysql脚本文件加入到开机启动项
[root@Chris mysql-5.1.62]# chkconfig --add mysql
[root@Chris mysql-5.1.62]# chkconfig | grep mysql
mysql           0:关闭  1:关闭  2:启用  3:启用  4:启用  5:启用  6:关闭
设置脚本文件开机自动启动
[root@Chris mysql-5.1.62]# chkconfig mysql on
33 这时我们就可以使用sevice mysql start命令来启动mysql数据库啦!但是在这之前我们需要编辑一下刚刚的脚本文件,为他指定mysql的安装路径与mysql数据的存放路径
[root@Chris mysql-5.1.62]# vi /etc/init.d/mysql
# If you change base dir, you must also change datadir. These may get
# overwritten by settings in the MySQL configuration files.

basedir=/usr/local/mysql/
#指定mysql安装位置
datadir=/usr/local/mysql/data/
#指定mysql数据库数据存放位置
34 现在我们来启动一下mysql数据库服务,看看能否启动
假如出现以下错误:
[root@Chris mysql-5.1.62]# service mysql start
Starting MySQL.Manager of pid-file quit without updating file.[失败]
PS:那是因为没有找到mysql安装目录下的对应的PID文件,请一定要检查一下刚刚编辑的脚本文件是否与我上面设置的一样,还有就是检查你的安装路径与数据的存放路径是否正确
正确的启动显示如下:
PHP参数详解:
[root@lnmp01 tools]# tar xf php-5.3.27.tar.gzß解压压缩包
[root@lnmp01 tools]# cd php-5.3.27 ß进入php安装目录
./configure ß编译参数
–prefix=/application/php5.3.27 ß指定php的安装路径为/application/php5.3.27
–with-mysql=/application/mysql/
ß需要指定mysql的安装路径,安装PHP需要的MySQL相关内容。当然如果没有MySQL软件包,也可以不单独安装,这样的情况可使用–with-mysql=mysqlnd替代–with-mysql=/application/mysql,因为PHP软件里面已经自带连接MySQL的客户端工具。
–with-iconv-dir=/usr/local/libiconv ßlibiconv库,各种字符集间的转换
–with-freetype-dir ß打开对freetype字体库支持
–with-jpeg-dir ß打开对jpeg图片的支持
–with-png-dir ß打开对png图片的支持
–with-zlib ß打开zlib库的支持,用于http压缩传输
–with-libxml-dir=/usr ß打开libxml2库的支持
–enable-xml ß
–disable-rpath ß关闭额外的运行库文件
–enable-safe-mode ß打开安全模式
–enable-bcmath ß打开图片大小调整,用zabbix监控时会用到该模块
–enable-shmop ß
–enable-sysvsem ß使用sysv信号机制,则打开此选项
–enable-inline-optimization ß优化线程
–with-curl ß打开curl浏览工具的支持
–with-curlwrappers ß运维curl工具打开url流
–enable-mbregex ß
–enable-mbstring ß支持mbstring
–with-mcrypt ß编码函数库
–with-gd ß打开gd库的支持
–enable-gd-native-ttf ß支持TrueType字符串函数库
–with-openssl ßopenssl的支持,加密传输时用到
–with-mhash ßmhash算法的扩展
–enable-pcntl ßfreeTDS需要用到,可能是链接mssql
–enable-sockets ß打开sockets支持
–with-xmlrpc ß打开xml-rpc的c语言
–enable-zip ß打开对zip的支持
–enable-soap ßsoap模块的扩展
–enable-short-tags ß开始和标记函数
–enable-zend-multibyte ß支持zend的多字节
–enable-static ß生成静态链接库
–with-xsl ß打开XSLT文件支持,扩展libXML2库,需要libxslt软件
–enable-ftp ß打开ftp的支持
–enable-fpm ß表示激活PHP-FPM方式服务,即FactCGI方式运行PHP服务。
–with-fpm-user=www ß指定PHP-FPM进程管理的用户为www,此处最好和Nginx服务用户统一。
–with-fpm-group=www ß指定PHP-FPM进程管理用户组为www,此处最好和Nginx服务用户组统一。
[root@lnmp01 php]# ln -s /application/mysql/lib/libmysqlclient.so.18 /usr/lib64/ ß软链接
[root@lnmp01 php]# touch ext/phar/phar.phar ß创建php安装需要文件
[root@lnmp01 php]# make && make install ß编译安装
[root@lnmp01 php]# ln -s /application/php5.3.27/ /application/php ß链接去版本(方便升级及后续维护)
[root@lnmp01 php]# cp /application/tools/php-5.3.27/php.ini-production /application/php/lib/php.ini ß拷贝php.ini需要配置文件
[root@lnmp01 php]# cp /application/php/etc/php-fpm.conf.default /application/php/etc/php-fpm.conf ß拷贝php-fpm配置文件
[root@lnmp01 php]# /application/php/sbin/php-fpm ß启动php-fpm
亲们!未完待续......................作者正在努力写作中

相关文章推荐
- 关于Tablayout的一些备注【个人】
- Insertion Sort List
- 数据库(oracle)常用查询,去年年底时间,当年年初时间,日月年时间格式
- 多例(Multiton)模式
- linux下vi编辑器backspace不能正确删除文字
- Java SE 第十六讲----方法重载
- shell环境变量
- 19e平台研发中心招聘---高级Java工程师
- netty http
- NLP常用工具
- 2016 年开发者应该掌握的十个 Postgres 技巧
- 好消息:PostgreSQL逻辑复制功能发布
- Java设计模式之模板方法模式在android中的实例
- GitHub优秀的Android 开源项目(二)
- JavaScript拾漏之变量作用域
- Java 设计模式:Singleton
- IAR 单步调试很慢
- intellij 配制 maven spring mvc
- Oracle 查看表空间剩余与创建空间语法
- css-html