Webservise的使用(C#创建,Android调用)
2015-11-24 14:30
537 查看
从想学习webservice到调试通过,共花费了2天的时间。在网上查找了许多资料,参照别人的范例,修改自己的程序,途中遇到了很多乱七八糟的问题,根据问题一一解决,快要崩溃的时候,终于还是调试通过了,收获甚多。使用工具(VS2010,eclipse),win7操作系统
①、添加一个类DBOperation(用于操作数据库)
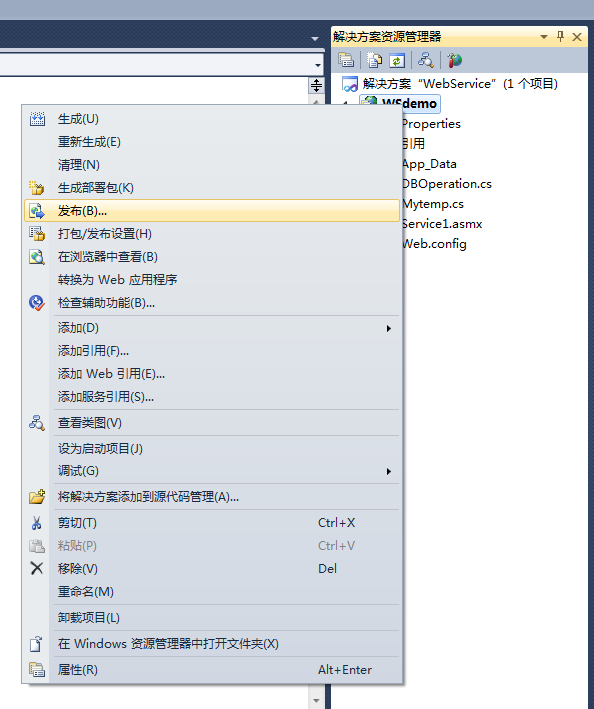
②、修改Service1.asmx
按F5可以测试程序是否正确,将在浏览器页面显示,也包括相关操作。至此C#中webservice编程就完成了。
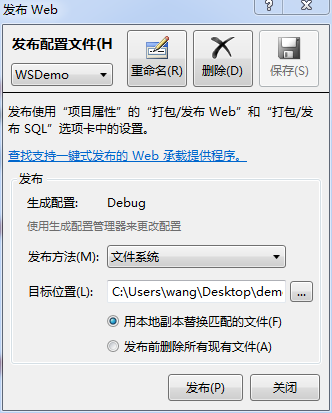
配置文件名可修改。发布方法选择“文件系统”,目标位置选择 想要存放文档的位置。
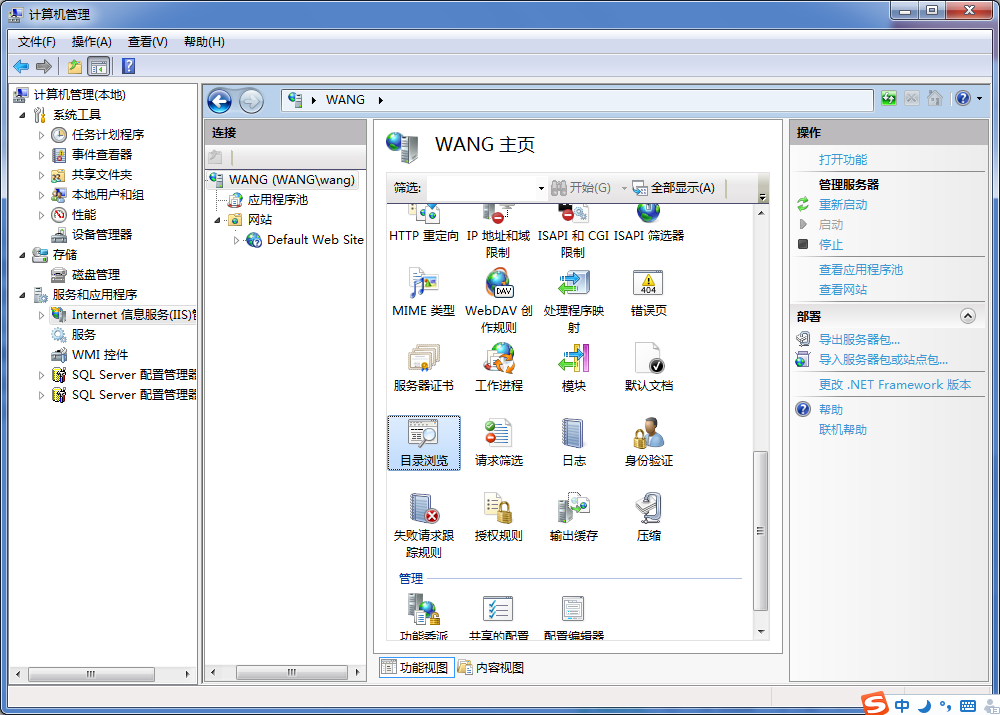
2、计算机右键属性->管理->Internet信息服务(IIS)管理器
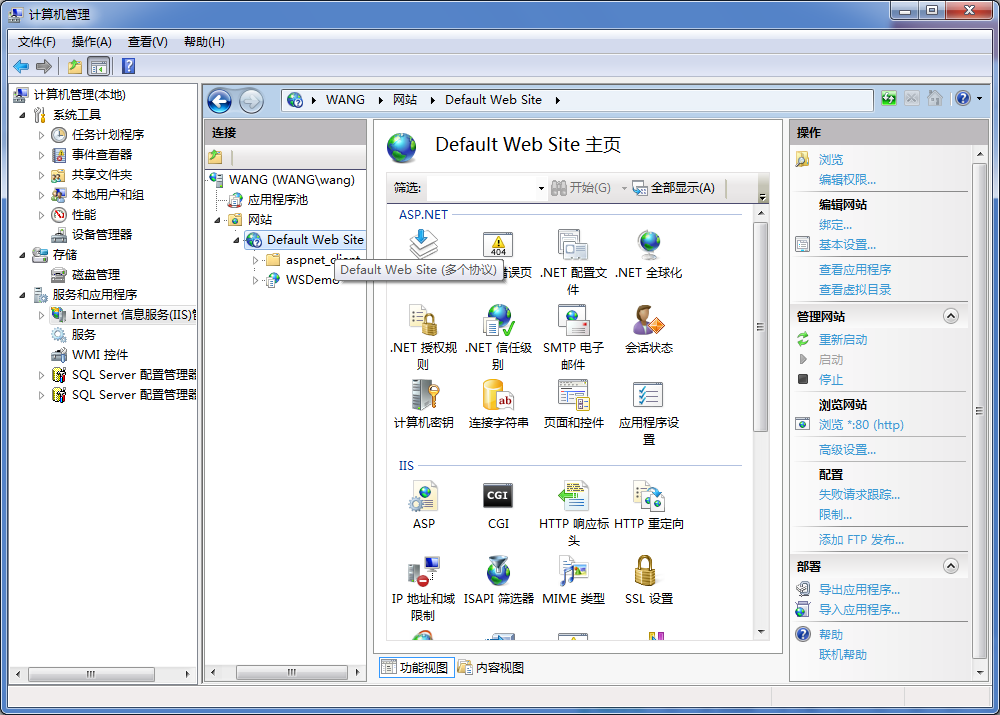
3、右键点击Default Web Site,选择添加应用程序
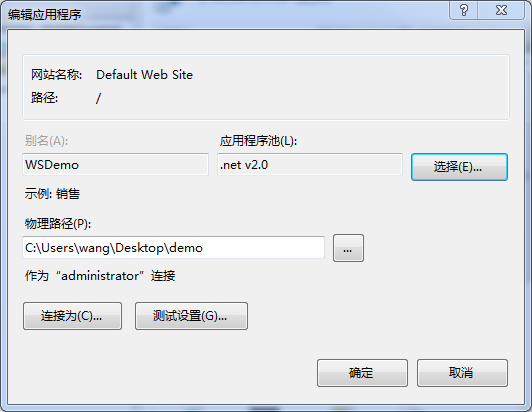
①别名随意取,②物理路径选择上面发布的路径,③应用程序池根据情况选择。(我的程序中是.net 2.0,4.0的没法使用,有待考究。方法:在Internet信息服务(IIS)管理器中能看到一个应用程序池,选择添加应用程序池,名称自取,选择.net 2.0或者4.0。)④连接为,选择特定用户,设置。一般设置为administrator(如果没有找到此账号,请在计算机用户中启用此账号,不懂的就百度吧,不细说了),密码自设(一般admin)。⑤点击测试设置,如果都显示绿色打勾,则表示设置正确了。⑥双击目录浏览,并在右边点击启用。
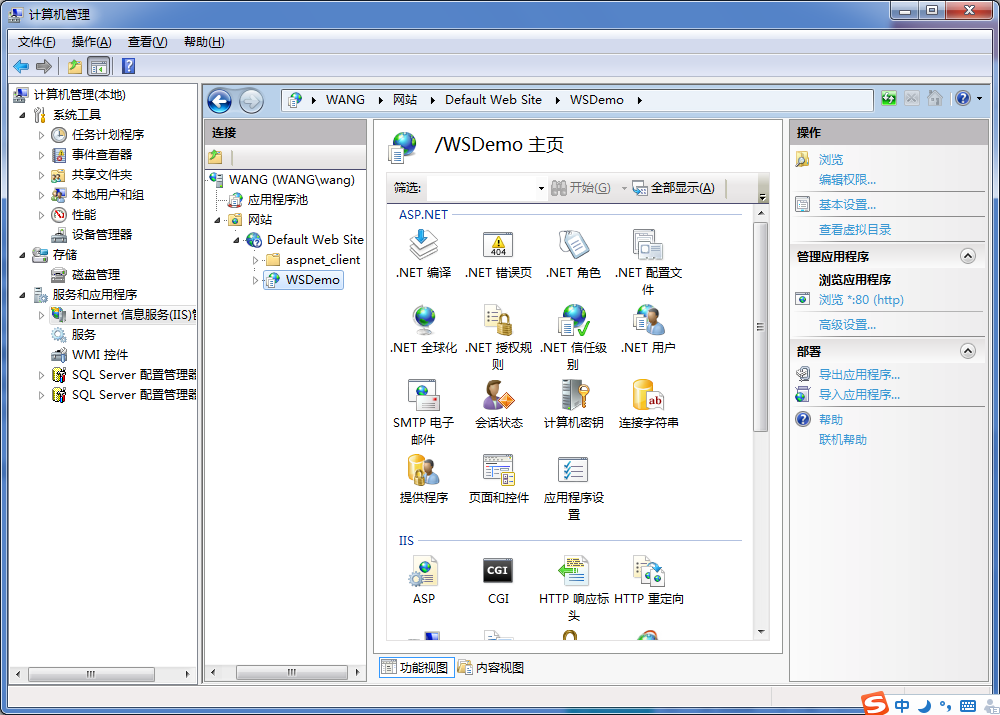
最后,打开添加的应用程序,在窗体右边有个“浏览*:80(http)”,点击看能否进入网页。
4、修改服务器的防火墙。控制面板\系统和安全\Windows 防火墙\允许的程序 其中万维网HTTP都选中允许,如果此方法还不行,则关闭所有的防火墙。
5、web.config文件中的
2、使用eclipse编程
添加一个类MyWebServiceHelper负责webservice通信(暂时只测试了删除工位信息功能,所以只贴出来删除功能的代码)
在主线程中调用MyWebServiceHelper及其方法。其中需要注意的是Android4.0以后HTTP通信需要调用多线程。可以在onCreate中添加一段代码,如下
3、最后运行程序,看是否能否正确
首先 – 使用C#创建一个webservice(主要是想操作SQLSERVER数据库)
1.添加项目 ASP.NET Web服务应用程序①、添加一个类DBOperation(用于操作数据库)
using System;
using System.Collections.Generic;
using System.Linq;
using System.Web;
using System.Data.SqlClient;

namespace WSdemo
{
/// <summary>
/// 一个操作数据库的类,所有对SQLServer的操作都写在这个类中,使用的时候实例化一个然后直接调用就可以
/// </summary>
public class DBOperation : IDisposable
{
public static SqlConnection sqlCon;  //用于连接数据库

//将下面的引号之间的内容换成上面记录下的属性中的连接字符串
private String ConServerStr = @"Data Source=XX\XX;Initial Catalog=WSDT;Persist Security Info=True;User ID=sa;Password=******";

//默认构造函数
public DBOperation()
{
if (sqlCon == null)
{
sqlCon = new SqlConnection();
sqlCon.ConnectionString = ConServerStr;
sqlCon.Open();
}
}

//关闭/销毁函数,相当于Close()
public void Dispose()
{
if (sqlCon != null)
{
sqlCon.Close();
sqlCon = null;
}
}

/// <summary>
/// 获取某一工位信息
/// </summary>
/// <param name="mypos">工位</param>
/// <returns></returns>
public List<string> selectInfor(string mypos)
{
List<string> list = new List<string>();

try
{
string sql = "select * from mytemp where mypos='"+mypos+"'";
SqlCommand cmd = new SqlCommand(sql, sqlCon);
SqlDataReader reader = cmd.ExecuteReader();

while (reader.Read())
{
string str=reader[0].ToString();
str=str+","+reader[1].ToString();
list.Add(str);
}

reader.Close();
cmd.Dispose();

}
catch (Exception)
{

}
return list;
}

/// <summary>
/// 向数据库中插入一条信息(只能用基本类型)
/// </summary>
/// <param name="value">信息数据</param>
/// <returns></returns>
public bool insertInfo(string value)
{
string[] strmt = value.Split(',');
if (strmt.Length != 2)
{
return false;
}
try
{
string sql = "insert into mytemp(mypos,state) values(@mypos,@state)";
SqlCommand cmd = new SqlCommand(sql, sqlCon);
cmd.Parameters.Add(new SqlParameter("mypos", strmt[0]));
cmd.Parameters.Add(new SqlParameter("state", strmt[1]));
cmd.ExecuteNonQuery();
cmd.Dispose();

return true;
}
catch (Exception)
{
return false;
}
}

/// <summary>
/// 删除某工位的信息
/// </summary>
/// <param name="mypos">工位</param>
/// <returns></returns>
public bool deleteInfo(string  mypos)
{
try
{
string sql = "delete from mytemp where mypos='" + mypos+"'";
SqlCommand cmd = new SqlCommand(sql, sqlCon);
cmd.ExecuteNonQuery();
cmd.Dispose();

return true;
}
catch (Exception)
{
return false;
}
}
}
}
②、修改Service1.asmx
using System;
using System.Collections.Generic;
using System.Linq;
using System.Web;
using System.Web.Services;

namespace WSdemo
{
/// <summary>
/// Service1 的摘要说明
/// </summary>
[WebService(Namespace = "http://webservice.service.com/")]
//命名空间可修改,这个在调用时需要用到,需要保持一致
[WebServiceBinding(ConformsTo = WsiProfiles.BasicProfile1_1)]
[System.ComponentModel.ToolboxItem(false)]
// 若要允许使用 ASP.NET AJAX 从脚本中调用此 Web 服务,请取消对下行的注释。
// [System.Web.Script.Services.ScriptService]
public class Service1 : System.Web.Services.WebService
{
DBOperation dbOperation = new DBOperation();

//[WebMethod]
//public string HelloWorld()
//{
//    return "Hello World";
//}

[WebMethod(Description = "获取一个工位的所有信息")]
public List<string> selectInfor(string mypos)
{
return dbOperation.selectInfor(mypos);
}

[WebMethod(Description = "增加一条工位测试信息")]
public bool insertInfo(string mt)
{
return dbOperation.insertInfo(mt);
}

[WebMethod(Description = "删除一条工位信息")]
public bool deleteInfo(string mypos)
{
return dbOperation.deleteInfo(mypos);
}
}
}
按F5可以测试程序是否正确,将在浏览器页面显示,也包括相关操作。至此C#中webservice编程就完成了。
下面将发布部署webservice到服务器中(测试用本机作为服务器)
配置文件名可修改。发布方法选择“文件系统”,目标位置选择 想要存放文档的位置。
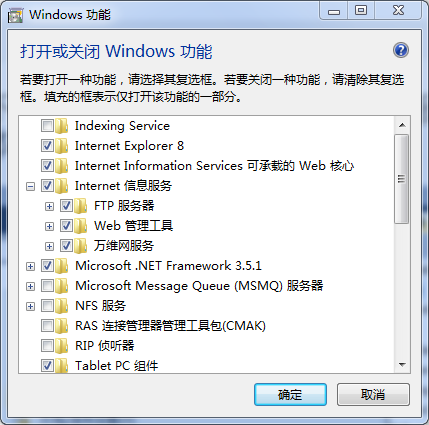
配置IIS
1、控制面板->程序->打开或关闭windows功能,Internet信息服务全部选中。2、计算机右键属性->管理->Internet信息服务(IIS)管理器
3、右键点击Default Web Site,选择添加应用程序
①别名随意取,②物理路径选择上面发布的路径,③应用程序池根据情况选择。(我的程序中是.net 2.0,4.0的没法使用,有待考究。方法:在Internet信息服务(IIS)管理器中能看到一个应用程序池,选择添加应用程序池,名称自取,选择.net 2.0或者4.0。)④连接为,选择特定用户,设置。一般设置为administrator(如果没有找到此账号,请在计算机用户中启用此账号,不懂的就百度吧,不细说了),密码自设(一般admin)。⑤点击测试设置,如果都显示绿色打勾,则表示设置正确了。⑥双击目录浏览,并在右边点击启用。
最后,打开添加的应用程序,在窗体右边有个“浏览*:80(http)”,点击看能否进入网页。
4、修改服务器的防火墙。控制面板\系统和安全\Windows 防火墙\允许的程序 其中万维网HTTP都选中允许,如果此方法还不行,则关闭所有的防火墙。
5、web.config文件中的
Android调用webservice
1、首先下载一个第三方包ksoap2,并在项目中构建路径(引用包)2、使用eclipse编程
添加一个类MyWebServiceHelper负责webservice通信(暂时只测试了删除工位信息功能,所以只贴出来删除功能的代码)
package com.example.webservice;
import java.io.IOException;
import java.util.ArrayList;
import java.util.List;

import org.ksoap2.SoapEnvelope;
import org.ksoap2.serialization.SoapObject;
import org.ksoap2.serialization.SoapSerializationEnvelope;
import org.xmlpull.v1.XmlPullParserException;
import org.ksoap2.transport.HttpTransportSE;;
public class MyWebServiceHelper {
// WSDL文档中的命名空间
private static final String NameSpace = "http://webservice.service.com/";

// WSDL文档中的URL
private static final String URL = "http://192.168.0.114/WSDemo/Service1.asmx";
// 需要调用的方法名(获得Myervices中的helloWorld方法)

//需要调用的方法名(获得Myervices中的login方法)
private static final String methodName_select="selectInfor";
private static final String methodName_insert="insertInfo";
private static final String methodName_delete="deleteInfo";
String soapAction =  "http://webservice.service.com/";

public boolean deleteInfo(String mypos){
// 指定WebService的命名空间和调用的方法名
SoapObject request =new SoapObject(NameSpace,methodName_delete);
// 设置需调用WebService接口需要传入的参数mypos
request.addProperty("mypos", mypos);
// 生成调用WebService方法的SOAP请求信息,并指定SOAP的版本
SoapSerializationEnvelope envelope = new SoapSerializationEnvelope(
SoapEnvelope.VER12);

// 设置是否调用的是dotNet开发的WebService
envelope.dotNet = true;
// 等价于envelope.bodyOut = request;
envelope.setOutputSoapObject(request);
HttpTransportSE httpTranstation = new HttpTransportSE(URL);
try {
soapAction =  "http://webservice.service.com/deleteInfo";
// 调用WebService
httpTranstation.call(soapAction, envelope);
// 获取返回的数据
SoapObject soapObject = (SoapObject) envelope.getResponse();
//等价于SoapObject soapObject = (SoapObject) envelope.bodyIn;
// 获取返回的结果
// String result = soapObject.getProperty(0).toString();
//如果获取的是个集合,就对它进行下面的操作
if(soapObject.getName()=="anyType") {
//遍历Web Service获得的集合
return true;
}
} catch (Exception e) {
e.printStackTrace();
}
return false;
}
在主线程中调用MyWebServiceHelper及其方法。其中需要注意的是Android4.0以后HTTP通信需要调用多线程。可以在onCreate中添加一段代码,如下
public void onCreate(Bundle savedInstanceState)
{
super.onCreate(savedInstanceState);
setContentView(R.layout.activity_main);
StrictMode.ThreadPolicy policy=new StrictMode.ThreadPolicy.Builder().permitAll().build();
StrictMode.setThreadPolicy(policy);
}
3、最后运行程序,看是否能否正确

相关文章推荐
- 分享微信开发Html5轻游戏中的几个坑
- 使用C++实现JNI接口需要注意的事项
- Android IPC进程间通讯机制
- Android Manifest 用法
- [转载]Activity中ConfigChanges属性的用法
- Android之获取手机上的图片和视频缩略图thumbnails
- Android之使用Http协议实现文件上传功能
- Android学习笔记(二九):嵌入浏览器
- android string.xml文件中的整型和string型代替
- i-jetty环境搭配与编译
- android之定时器AlarmManager
- android wifi 无线调试
- Android Native 绘图方法
- Android java 与 javascript互访(相互调用)的方法例子
- android 代码实现控件之间的间距
- android FragmentPagerAdapter的“标准”配置
- Android"解决"onTouch和onClick的冲突问题
- android:installLocation简析