ViewSwitcher和TextSwithcher打造不一样的视觉效果
2015-11-20 10:09
323 查看
今天介绍两个控件,分别是ViewSwithcher和TextSwitcher。
ViewSwitcher的效果是切换两个view,效果类似ViewPager,不过还是推荐使用ViewPager,其功能更强大,但还是稍微介绍下。
先来看下效果:

public class ViewSwitcherActivity extends Activity {
// 定义一个常量,用于显示每屏显示的应用程序数
public static final int NUMBER_PER_SCREEN = 12;
// 代表应用程序的内部类,
public static class DataItem {
// 应用程序名称
public String dataName;
// 应用程序图标
public Drawable drawable;
}
// 保存系统所有应用程序的List集合
private ArrayList<DataItem> items = new ArrayList<DataItem>();
// 记录当前正在显示第几屏的程序
private int screenNo = -1;
// 保存程序所占的总屏数
private int screenCount;
ViewSwitcher switcher;
// 创建LayoutInflater对象
LayoutInflater inflater;
@Override
public void onCreate(Bundle savedInstanceState) {
super.onCreate(savedInstanceState);
setContentView(R.layout.main);
inflater = LayoutInflater.from(ViewSwitcherActivity.this);
// 创建一个包含40个元素的List集合,用于模拟包含40个应用程序
for (int i = 0; i < 40; i++) {
String label = "" + i;
Drawable drawable = getResources().getDrawable(
R.mipmap.ic_launcher);
DataItem item = new DataItem();
item.dataName = label;
item.drawable = drawable;
items.add(item);
}
// 计算应用程序所占的总屏数。
// 如果应用程序的数量能整除NUMBER_PER_SCREEN,除法的结果就是总屏数。
// 如果不能整除,总屏数应该是除法的结果再加1。
screenCount = items.size() % NUMBER_PER_SCREEN == 0 ?
items.size() / NUMBER_PER_SCREEN :
items.size() / NUMBER_PER_SCREEN + 1;
switcher = (ViewSwitcher) findViewById(R.id.viewSwitcher);
switcher.setFactory(new ViewSwitcher.ViewFactory() {
// 实际上就是返回一个GridView组件
@Override
public View makeView() {
// 加载R.layout.slidelistview组件,实际上就是一个GridView组件。
return inflater.inflate(R.layout.slidelistview, null);
}
});
// 页面加载时先显示第一屏。
next(null);
}
public void next(View v) {
if (screenNo < screenCount - 1) {
screenNo++;
// 为ViewSwitcher的组件显示过程设置动画
switcher.setInAnimation(this, R.anim.slide_in_right);
// 为ViewSwitcher的组件隐藏过程设置动画
switcher.setOutAnimation(this, R.anim.slide_out_left);
// 控制下一屏将要显示的GridView对应的 Adapter
((GridView) switcher.getNextView()).setAdapter(adapter);
// 点击右边按钮,显示下一屏,也可通过手势检测实现显示下一屏.
switcher.showNext();
}
}
public void prev(View v) {
if (screenNo > 0) {
screenNo--;
// 为ViewSwitcher的组件显示过程设置动画
switcher.setInAnimation(this, android.R.anim.slide_in_left);
// 为ViewSwitcher的组件隐藏过程设置动画
switcher.setOutAnimation(this, android.R.anim.slide_out_right);
// 控制下一屏将要显示的GridView对应的 Adapter
((GridView) switcher.getNextView()).setAdapter(adapter);
// 点击左边按钮,显示上一屏,也可通过手势检测实现显示上一屏.
switcher.showPrevious();
}
}
// 该BaseAdapter负责为每屏显示的GridView提供列表项
private BaseAdapter adapter = new BaseAdapter() {
@Override
public int getCount() {
// 如果已经到了最后一屏,且应用程序的数量不能整除NUMBER_PER_SCREEN
if (screenNo == screenCount - 1
&& items.size() % NUMBER_PER_SCREEN != 0) {
// 最后一屏显示的程序数为应用程序的数量对NUMBER_PER_SCREEN求余
return items.size() % NUMBER_PER_SCREEN;
}
// 否则每屏显示的程序数量为NUMBER_PER_SCREEN
return NUMBER_PER_SCREEN;
}
@Override
public DataItem getItem(int position) {
// 根据screenNo计算第position个列表项的数据
return items.get(screenNo * NUMBER_PER_SCREEN + position);
}
@Override
public long getItemId(int position) {
return position;
}
@Override
public View getView(int position
, View convertView, ViewGroup parent) {
View view = convertView;
if (convertView == null) {
// 加载R.layout.labelicon布局文件
view = inflater.inflate(R.layout.labelicon, null);
}
// 获取R.layout.labelicon布局文件中的ImageView组件,并为之设置图标
ImageView imageView = (ImageView)
view.findViewById(R.id.imageview);
imageView.setImageDrawable(getItem(position).drawable);
// 获取R.layout.labelicon布局文件中的TextView组件,并为之设置文本
TextView textView = (TextView)
view.findViewById(R.id.textview);
textView.setText(getItem(position).dataName);
return view;
}
};
}
main.xml:
<RelativeLayout
xmlns:android="http://schemas.android.com/apk/res/android"
android:layout_width="fill_parent"
android:layout_height="fill_parent">
<!-- 定义一个ViewSwitcher组件 -->
<ViewSwitcher
android:id="@+id/viewSwitcher"
android:layout_width="fill_parent"
android:layout_height="fill_parent" />
<!-- 定义滚动到上一屏的按钮 -->
<Button
android:id="@+id/button_prev"
android:layout_width="wrap_content"
android:layout_height="wrap_content"
android:layout_alignParentBottom="true"
android:layout_alignParentLeft="true"
android:onClick="prev"
android:text="(" />
<!-- 定义滚动到下一屏的按钮 -->
<Button
android:id="@+id/button_next"
android:layout_width="wrap_content"
android:layout_height="wrap_content"
android:layout_alignParentBottom="true"
android:layout_alignParentRight="true"
android:onClick="next"
android:text=")" />
</RelativeLayout>
slidelistview.xml:
<?xml version="1.0" encoding="utf-8"?>
<GridView
xmlns:android="http://schemas.android.com/apk/res/android"
android:layout_width="match_parent"
android:numColumns="4"
android:layout_height="match_parent">
</GridView>slide_in_right.xml:
<?xml version="1.0" encoding="utf-8"?>
<set xmlns:android="http://schemas.android.com/apk/res/android">
<!-- 设置从右边拖进来的动画
android:duration指定动画持续时间 -->
<translate
android:fromXDelta="100%p"
android:toXDelta="0"
android:duration="@android:integer/config_mediumAnimTime" />
</set>
slide_out_left.xml:
<?xml version="1.0" encoding="utf-8"?>
<set xmlns:android="http://schemas.android.com/apk/res/android">
<!-- 设置从左边拖出去的动画
android:duration指定动画持续时间 -->
<translate
android:fromXDelta="0"
android:toXDelta="-100%p"
android:duration="@android:integer/config_mediumAnimTime" />
</set>
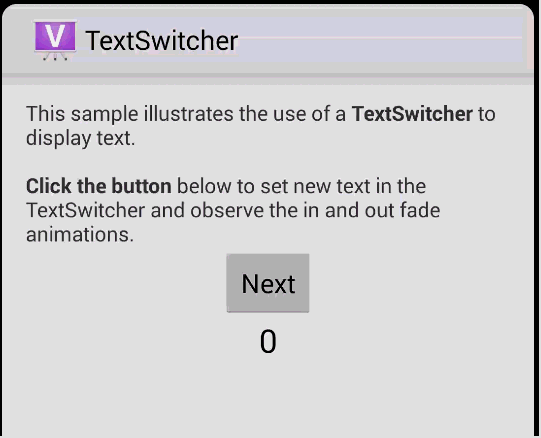
接下来是TextSwitcher,其实现的效果是这样的:
代码如下:
public class MainActivity extends Activity {
private TextSwitcher mSwitcher;
private int mCounter = 0;
@Override
protected void onCreate(Bundle savedInstanceState) {
super.onCreate(savedInstanceState);
setContentView(R.layout.sample_main);
// Get the TextSwitcher view from the layout
mSwitcher = (TextSwitcher) findViewById(R.id.switcher);
// Set the factory used to create TextViews to switch between.
mSwitcher.setFactory(mFactory);
/*
* Set the in and out animations. Using the fade_in/out animations
* provided by the framework.
*/
Animation in = AnimationUtils.loadAnimation(this,
android.R.anim.fade_in);
Animation out = AnimationUtils.loadAnimation(this,
android.R.anim.fade_out);
mSwitcher.setInAnimation(in);
mSwitcher.setOutAnimation(out);
/*
* Setup the 'next' button. The counter is incremented when clicked and
* the new value is displayed in the TextSwitcher. The change of text is
* automatically animated using the in/out animations set above.
*/
Button nextButton = (Button) findViewById(R.id.button);
nextButton.setOnClickListener(new View.OnClickListener() {
@Override
public void onClick(View v) {
mCounter++;
mSwitcher.setText(String.valueOf(mCounter));
}
});
// Set the initial text without an animation
mSwitcher.setCurrentText(String.valueOf(mCounter));
}
/**
* The {@link android.widget.ViewSwitcher.ViewFactory} used to create {@link android.widget.TextView}s that the
* {@link android.widget.TextSwitcher} will switch between.
*/
private ViewFactory mFactory = new ViewFactory() {
@Override
public View makeView() {
// Create a new TextView
TextView t = new TextView(MainActivity.this);
t.setGravity(Gravity.TOP | Gravity.CENTER_HORIZONTAL);
t.setTextAppearance(MainActivity.this, android.R.style.TextAppearance_Large);
return t;
}
};
}sample_main.xml:
<!--
Copyright 2013 The Android Open Source Project
Licensed under the Apache License, Version 2.0 (the "License");
you may not use this file except in compliance with the License.
You may obtain a copy of the License at
http://www.apache.org/licenses/LICENSE-2.0
Unless required by applicable law or agreed to in writing, software
distributed under the License is distributed on an "AS IS" BASIS,
WITHOUT WARRANTIES OR CONDITIONS OF ANY KIND, either express or implied.
See the License for the specific language governing permissions and
limitations under the License.
-->
<LinearLayout xmlns:android="http://schemas.android.com/apk/res/android"
xmlns:tools="http://schemas.android.com/tools"
android:id="@+id/LinearLayout1"
android:layout_width="match_parent"
android:layout_height="match_parent"
android:layout_gravity="top|center_horizontal"
android:gravity="center_horizontal"
android:orientation="vertical"
android:paddingBottom="@dimen/activity_vertical_margin"
android:paddingLeft="@dimen/activity_horizontal_margin"
android:paddingRight="@dimen/activity_horizontal_margin"
android:paddingTop="@dimen/activity_vertical_margin"
tools:context=".MainActivity" >
<TextView
android:layout_width="wrap_content"
android:layout_height="wrap_content"
android:text="@string/intro" />
<Button
android:id="@+id/button"
android:layout_width="wrap_content"
android:layout_height="wrap_content"
android:text="@string/next" />
<TextSwitcher
android:id="@+id/switcher"
android:layout_width="match_parent"
android:layout_height="wrap_content"/>
</LinearLayout>
ViewSwitcher的效果是切换两个view,效果类似ViewPager,不过还是推荐使用ViewPager,其功能更强大,但还是稍微介绍下。
先来看下效果:
public class ViewSwitcherActivity extends Activity {
// 定义一个常量,用于显示每屏显示的应用程序数
public static final int NUMBER_PER_SCREEN = 12;
// 代表应用程序的内部类,
public static class DataItem {
// 应用程序名称
public String dataName;
// 应用程序图标
public Drawable drawable;
}
// 保存系统所有应用程序的List集合
private ArrayList<DataItem> items = new ArrayList<DataItem>();
// 记录当前正在显示第几屏的程序
private int screenNo = -1;
// 保存程序所占的总屏数
private int screenCount;
ViewSwitcher switcher;
// 创建LayoutInflater对象
LayoutInflater inflater;
@Override
public void onCreate(Bundle savedInstanceState) {
super.onCreate(savedInstanceState);
setContentView(R.layout.main);
inflater = LayoutInflater.from(ViewSwitcherActivity.this);
// 创建一个包含40个元素的List集合,用于模拟包含40个应用程序
for (int i = 0; i < 40; i++) {
String label = "" + i;
Drawable drawable = getResources().getDrawable(
R.mipmap.ic_launcher);
DataItem item = new DataItem();
item.dataName = label;
item.drawable = drawable;
items.add(item);
}
// 计算应用程序所占的总屏数。
// 如果应用程序的数量能整除NUMBER_PER_SCREEN,除法的结果就是总屏数。
// 如果不能整除,总屏数应该是除法的结果再加1。
screenCount = items.size() % NUMBER_PER_SCREEN == 0 ?
items.size() / NUMBER_PER_SCREEN :
items.size() / NUMBER_PER_SCREEN + 1;
switcher = (ViewSwitcher) findViewById(R.id.viewSwitcher);
switcher.setFactory(new ViewSwitcher.ViewFactory() {
// 实际上就是返回一个GridView组件
@Override
public View makeView() {
// 加载R.layout.slidelistview组件,实际上就是一个GridView组件。
return inflater.inflate(R.layout.slidelistview, null);
}
});
// 页面加载时先显示第一屏。
next(null);
}
public void next(View v) {
if (screenNo < screenCount - 1) {
screenNo++;
// 为ViewSwitcher的组件显示过程设置动画
switcher.setInAnimation(this, R.anim.slide_in_right);
// 为ViewSwitcher的组件隐藏过程设置动画
switcher.setOutAnimation(this, R.anim.slide_out_left);
// 控制下一屏将要显示的GridView对应的 Adapter
((GridView) switcher.getNextView()).setAdapter(adapter);
// 点击右边按钮,显示下一屏,也可通过手势检测实现显示下一屏.
switcher.showNext();
}
}
public void prev(View v) {
if (screenNo > 0) {
screenNo--;
// 为ViewSwitcher的组件显示过程设置动画
switcher.setInAnimation(this, android.R.anim.slide_in_left);
// 为ViewSwitcher的组件隐藏过程设置动画
switcher.setOutAnimation(this, android.R.anim.slide_out_right);
// 控制下一屏将要显示的GridView对应的 Adapter
((GridView) switcher.getNextView()).setAdapter(adapter);
// 点击左边按钮,显示上一屏,也可通过手势检测实现显示上一屏.
switcher.showPrevious();
}
}
// 该BaseAdapter负责为每屏显示的GridView提供列表项
private BaseAdapter adapter = new BaseAdapter() {
@Override
public int getCount() {
// 如果已经到了最后一屏,且应用程序的数量不能整除NUMBER_PER_SCREEN
if (screenNo == screenCount - 1
&& items.size() % NUMBER_PER_SCREEN != 0) {
// 最后一屏显示的程序数为应用程序的数量对NUMBER_PER_SCREEN求余
return items.size() % NUMBER_PER_SCREEN;
}
// 否则每屏显示的程序数量为NUMBER_PER_SCREEN
return NUMBER_PER_SCREEN;
}
@Override
public DataItem getItem(int position) {
// 根据screenNo计算第position个列表项的数据
return items.get(screenNo * NUMBER_PER_SCREEN + position);
}
@Override
public long getItemId(int position) {
return position;
}
@Override
public View getView(int position
, View convertView, ViewGroup parent) {
View view = convertView;
if (convertView == null) {
// 加载R.layout.labelicon布局文件
view = inflater.inflate(R.layout.labelicon, null);
}
// 获取R.layout.labelicon布局文件中的ImageView组件,并为之设置图标
ImageView imageView = (ImageView)
view.findViewById(R.id.imageview);
imageView.setImageDrawable(getItem(position).drawable);
// 获取R.layout.labelicon布局文件中的TextView组件,并为之设置文本
TextView textView = (TextView)
view.findViewById(R.id.textview);
textView.setText(getItem(position).dataName);
return view;
}
};
}
main.xml:
<RelativeLayout
xmlns:android="http://schemas.android.com/apk/res/android"
android:layout_width="fill_parent"
android:layout_height="fill_parent">
<!-- 定义一个ViewSwitcher组件 -->
<ViewSwitcher
android:id="@+id/viewSwitcher"
android:layout_width="fill_parent"
android:layout_height="fill_parent" />
<!-- 定义滚动到上一屏的按钮 -->
<Button
android:id="@+id/button_prev"
android:layout_width="wrap_content"
android:layout_height="wrap_content"
android:layout_alignParentBottom="true"
android:layout_alignParentLeft="true"
android:onClick="prev"
android:text="(" />
<!-- 定义滚动到下一屏的按钮 -->
<Button
android:id="@+id/button_next"
android:layout_width="wrap_content"
android:layout_height="wrap_content"
android:layout_alignParentBottom="true"
android:layout_alignParentRight="true"
android:onClick="next"
android:text=")" />
</RelativeLayout>
slidelistview.xml:
<?xml version="1.0" encoding="utf-8"?>
<GridView
xmlns:android="http://schemas.android.com/apk/res/android"
android:layout_width="match_parent"
android:numColumns="4"
android:layout_height="match_parent">
</GridView>slide_in_right.xml:
<?xml version="1.0" encoding="utf-8"?>
<set xmlns:android="http://schemas.android.com/apk/res/android">
<!-- 设置从右边拖进来的动画
android:duration指定动画持续时间 -->
<translate
android:fromXDelta="100%p"
android:toXDelta="0"
android:duration="@android:integer/config_mediumAnimTime" />
</set>
slide_out_left.xml:
<?xml version="1.0" encoding="utf-8"?>
<set xmlns:android="http://schemas.android.com/apk/res/android">
<!-- 设置从左边拖出去的动画
android:duration指定动画持续时间 -->
<translate
android:fromXDelta="0"
android:toXDelta="-100%p"
android:duration="@android:integer/config_mediumAnimTime" />
</set>
接下来是TextSwitcher,其实现的效果是这样的:
代码如下:
public class MainActivity extends Activity {
private TextSwitcher mSwitcher;
private int mCounter = 0;
@Override
protected void onCreate(Bundle savedInstanceState) {
super.onCreate(savedInstanceState);
setContentView(R.layout.sample_main);
// Get the TextSwitcher view from the layout
mSwitcher = (TextSwitcher) findViewById(R.id.switcher);
// Set the factory used to create TextViews to switch between.
mSwitcher.setFactory(mFactory);
/*
* Set the in and out animations. Using the fade_in/out animations
* provided by the framework.
*/
Animation in = AnimationUtils.loadAnimation(this,
android.R.anim.fade_in);
Animation out = AnimationUtils.loadAnimation(this,
android.R.anim.fade_out);
mSwitcher.setInAnimation(in);
mSwitcher.setOutAnimation(out);
/*
* Setup the 'next' button. The counter is incremented when clicked and
* the new value is displayed in the TextSwitcher. The change of text is
* automatically animated using the in/out animations set above.
*/
Button nextButton = (Button) findViewById(R.id.button);
nextButton.setOnClickListener(new View.OnClickListener() {
@Override
public void onClick(View v) {
mCounter++;
mSwitcher.setText(String.valueOf(mCounter));
}
});
// Set the initial text without an animation
mSwitcher.setCurrentText(String.valueOf(mCounter));
}
/**
* The {@link android.widget.ViewSwitcher.ViewFactory} used to create {@link android.widget.TextView}s that the
* {@link android.widget.TextSwitcher} will switch between.
*/
private ViewFactory mFactory = new ViewFactory() {
@Override
public View makeView() {
// Create a new TextView
TextView t = new TextView(MainActivity.this);
t.setGravity(Gravity.TOP | Gravity.CENTER_HORIZONTAL);
t.setTextAppearance(MainActivity.this, android.R.style.TextAppearance_Large);
return t;
}
};
}sample_main.xml:
<!--
Copyright 2013 The Android Open Source Project
Licensed under the Apache License, Version 2.0 (the "License");
you may not use this file except in compliance with the License.
You may obtain a copy of the License at
http://www.apache.org/licenses/LICENSE-2.0
Unless required by applicable law or agreed to in writing, software
distributed under the License is distributed on an "AS IS" BASIS,
WITHOUT WARRANTIES OR CONDITIONS OF ANY KIND, either express or implied.
See the License for the specific language governing permissions and
limitations under the License.
-->
<LinearLayout xmlns:android="http://schemas.android.com/apk/res/android"
xmlns:tools="http://schemas.android.com/tools"
android:id="@+id/LinearLayout1"
android:layout_width="match_parent"
android:layout_height="match_parent"
android:layout_gravity="top|center_horizontal"
android:gravity="center_horizontal"
android:orientation="vertical"
android:paddingBottom="@dimen/activity_vertical_margin"
android:paddingLeft="@dimen/activity_horizontal_margin"
android:paddingRight="@dimen/activity_horizontal_margin"
android:paddingTop="@dimen/activity_vertical_margin"
tools:context=".MainActivity" >
<TextView
android:layout_width="wrap_content"
android:layout_height="wrap_content"
android:text="@string/intro" />
<Button
android:id="@+id/button"
android:layout_width="wrap_content"
android:layout_height="wrap_content"
android:text="@string/next" />
<TextSwitcher
android:id="@+id/switcher"
android:layout_width="match_parent"
android:layout_height="wrap_content"/>
</LinearLayout>

相关文章推荐
- Adnroid中消除ImageButton默认背景
- android 中如何限制 EditText 最大输入字符数
- js和jQuery的区别和联系 localstorage 和sessionstorage的区别
- Angularjs快速入门(一)
- 微软算法100道题-----:在一个字符串中找到第一个只出现一次的字符
- SQL_多条记录中取最大日期的记录
- 异步载入资源
- AFX_MANAGE_STATE(AfxGetStaticModuleState());
- 程序员的福利:Android_JNI整套视频分享
- Kafka Java API 之Producer源码解析
- thinkphp里面的路径问题
- TestNG - @Parameters 传递外部参数 对比 @Dataprovider
- MFC笔记2
- .NET Core 和 ASP.NET 5 RC1 发布
- Ubuntu系统配置日志/var/log/message
- Swift 实现单例模式Singleton pattern的三种方法
- 依据图片路径下载文件转base64编码
- JSP页面<%@ ...%>是 什么意思
- C++ 学习(类的继承,派生)
- 黑马程序员——Java基础语法(二)---流程控制与函数