从零学Android(二)、创建一个简单的用户界面
2015-11-03 15:20
691 查看
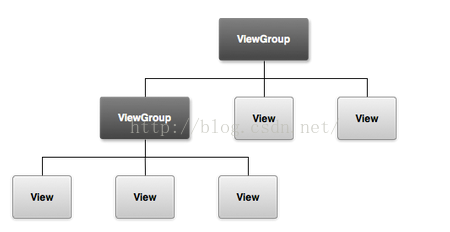
Android app的图形用户界面是由View和ViewGroup的子类对象构成。View对象一般是UI组件,比如按钮Button或者文本域TextView。而ViewGroup对象则是一些不可见的View容器,它定义了View怎么被摆放,比如用表格形式或者列表形式摆放。
Android定义了一个XML词汇表,词汇表中的词汇对应着View和ViewGroup的子类,所以我们可以使用这个词汇表中的UI元素来组成我们的UI界面。一般界面的组成如下图:
创建一个LinearLayout
首先,打开之前创建项目时候生成的res/layout/activity_my.xml,并且将它的内容编写如下:
另外2个属性
更多的布局属性可以查看官方文档
加入一个文本域
创建好一个View容器--LinearLayout之后,我们就可以向这个容器中添加一些View组件了。这里我们添加一个EditText。
⒈设置它的id为@+id/edit_message。id属性代表这个View组件,所以在用一个layout布局文件中,不能出现相同的id值。
⒉定义
⒊通过hint属性定义一个默认值,这个值就是一个名为edit_message的字符串。
添加完文本域后activity_my.xml的文件如下:
在res/values/[b]strings.xml中添加字符串资源[/b]
编辑res/values/strings.xml文件,并且加入我们需要用到的字符串资源,如下:
这里我们加入了2个字符串资源,它们的名字分别为 edit_message 和 btn_send。其中的edit_message 在添加文本域的时候,已经作为hint属性的默认值使用过了(当然资源是共享的,可以重复利用)。而btn_send我们会用于下面要添加的按钮上。
加入一个按钮
与加入文本域EditText类似,加入一个按钮,我们需要使用Button元素。同样我们设置按钮的
<LinearLayout
xmlns:android="http://schemas.android.com/apk/res/android"
android:layout_width="match_parent"
android:layout_height="match_parent"
android:orientation="horizontal"
>
<EditText android:id="@+id/edit_message"
android:layout_width="wrap_content"
android:layout_height="wrap_content"
android:hint="@string/edit_message" />
<Button
android:id="@+id/btn_send"
android:layout_width="wrap_content"
android:layout_height="wrap_content"
android:text="@string/btn_send"/>
</LinearLayout>这个时候,我们可以通过Android
studio看看当前activity_my.xml的页面效果,选中下方的Design选项即可:
这时候一个简单的UI界面就完成了。这个时候,我们需要考虑到,如果用户在文本域EditText中输入很长一段文本,页面显示效果会怎么样?
额... 按钮被挤压得不成样子了,这个时候我们需要在保证按钮能正常显示之余,让文本域占据最大的长度(也就是剩余的宽度)。我们可以通过在LinearLayout中使用
总宽度L - 第一个View宽度L - 第二个View宽度L = -L)下所占的比例,默认权重值为0。如果你希望进一步了解权重的含义点击这里
现在我们改写一下文本域的属性,我们设置它的android:layout_weight属性值为1,由于没有其它的View设置权重,这里1就相当于占据剩余的全部。另外,将它本身的宽度属性设置成0dp。我们再看看activity_my.xml的最终代码以及对应的UI效果:<?xml version="1.0" encoding="utf-8"?>
<LinearLayout
xmlns:android="http://schemas.android.com/apk/res/android"
android:layout_width="match_parent"
android:layout_height="match_parent"
android:orientation="horizontal"
>
<EditText android:id="@+id/edit_message"
android:layout_width="0dp"
android:layout_weight="1"
android:layout_height="wrap_content"
android:hint="@string/edit_message" />
<Button
android:id="@+id/btn_send"
android:layout_width="wrap_content"
android:layout_height="wrap_content"
android:text="@string/btn_send"/>
</LinearLayout>
这样UI显示就正常了.. 也不需要再担心用户输入内容过长导致按钮被挤压变形。
Android定义了一个XML词汇表,词汇表中的词汇对应着View和ViewGroup的子类,所以我们可以使用这个词汇表中的UI元素来组成我们的UI界面。一般界面的组成如下图:
创建一个LinearLayout
首先,打开之前创建项目时候生成的res/layout/activity_my.xml,并且将它的内容编写如下:
<?xml version="1.0" encoding="utf-8"?> <LinearLayout xmlns:android="http://schemas.android.com/apk/res/android" android:layout_width="match_parent" android:layout_height="match_parent" android:orientation="horizontal" > </LinearLayout>LinearLayout是ViewGroup的子类,可以通过
android:orientation属性来指定水平方向或者垂直方向摆放其下的View。而且每一个在LinearLayout里面的View会按照它们在XML文件中出现的先后循序显示在界面上。
另外2个属性
android:layout_width和
android:layout_height是每个View必须指定的属性,它们用来表示View的大小。由于LinearLayout是整个布局的根View,它通过设置
android:layout_width和
android:layout_height取值为
"match_parent"使得LinearLayout的大小占满整个屏幕。这个取值表示这个View要匹配满父View的宽高。
更多的布局属性可以查看官方文档
加入一个文本域
创建好一个View容器--LinearLayout之后,我们就可以向这个容器中添加一些View组件了。这里我们添加一个EditText。
⒈设置它的id为@+id/edit_message。id属性代表这个View组件,所以在用一个layout布局文件中,不能出现相同的id值。
⒉定义
android:layout_width和
android:layout_height属性值为wrap_content。wrap_content的含义就是包裹内容。也就是内容占据多少的宽高,这个文本域组件的宽高也随之变化。
⒊通过hint属性定义一个默认值,这个值就是一个名为edit_message的字符串。
添加完文本域后activity_my.xml的文件如下:
<?xml version="1.0" encoding="utf-8"?>
<LinearLayout
xmlns:android="http://schemas.android.com/apk/res/android"
android:layout_width="match_parent"
android:layout_height="match_parent"
android:orientation="horizontal"
>

<EditText android:id="@+id/edit_message"
android:layout_width="wrap_content"
android:layout_height="wrap_content"
android:hint="@string/edit_message" />

</LinearLayout>
在res/values/[b]strings.xml中添加字符串资源[/b]
编辑res/values/strings.xml文件,并且加入我们需要用到的字符串资源,如下:
<resources>
<string name="app_name">MyFirstProject</string>
<string name="action_settings">Settings</string>

<string name="edit_message">这个是hint属性的默认值</string>
<string name="btn_send">发送消息</string>
</resources>
这里我们加入了2个字符串资源,它们的名字分别为 edit_message 和 btn_send。其中的edit_message 在添加文本域的时候,已经作为hint属性的默认值使用过了(当然资源是共享的,可以重复利用)。而btn_send我们会用于下面要添加的按钮上。
加入一个按钮
与加入文本域EditText类似,加入一个按钮,我们需要使用Button元素。同样我们设置按钮的
android:layout_width和
android:layout_height属性值为wrap_content。同时,我们通过
android:text属性设置按钮的文本显示,这里我们设置它的值为btn_send也就是在strings.xml文件中定义的字符串。并且给这个Button加上一个id属性为btn_send。修改后的activity_my.xml内容如下:<?xml version="1.0" encoding="utf-8"?>
<LinearLayout
xmlns:android="http://schemas.android.com/apk/res/android"
android:layout_width="match_parent"
android:layout_height="match_parent"
android:orientation="horizontal"
>
<EditText android:id="@+id/edit_message"
android:layout_width="wrap_content"
android:layout_height="wrap_content"
android:hint="@string/edit_message" />
<Button
android:id="@+id/btn_send"
android:layout_width="wrap_content"
android:layout_height="wrap_content"
android:text="@string/btn_send"/>
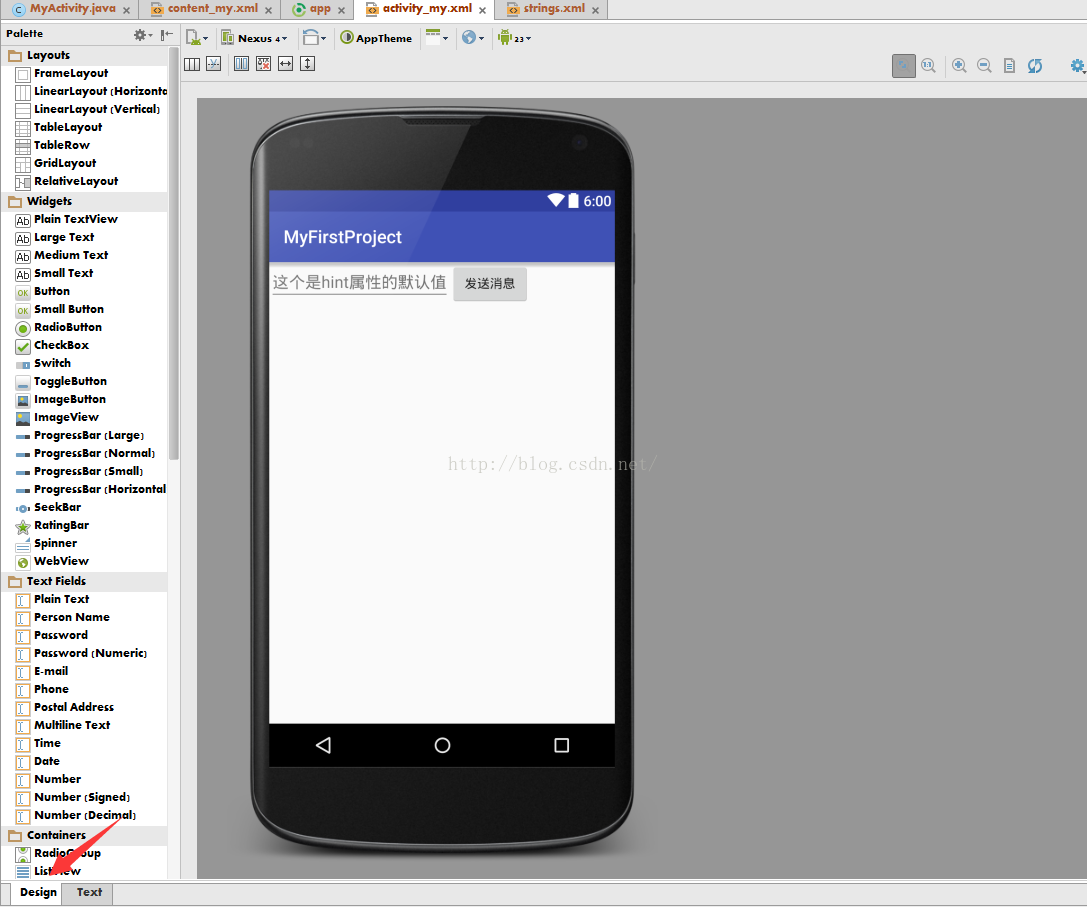
</LinearLayout>这个时候,我们可以通过Android
studio看看当前activity_my.xml的页面效果,选中下方的Design选项即可:
这时候一个简单的UI界面就完成了。这个时候,我们需要考虑到,如果用户在文本域EditText中输入很长一段文本,页面显示效果会怎么样?
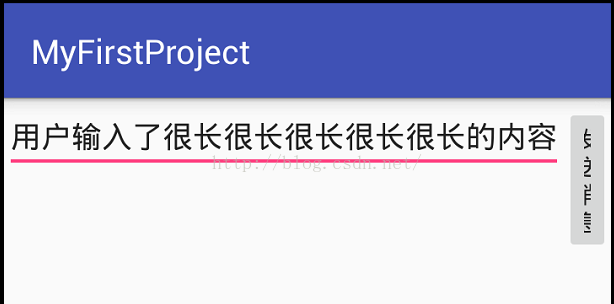
额... 按钮被挤压得不成样子了,这个时候我们需要在保证按钮能正常显示之余,让文本域占据最大的长度(也就是剩余的宽度)。我们可以通过在LinearLayout中使用
android:layout_weight属性来实现我们想要的效果。
android:layout_weight属性称为
权重,权重的取值是一个整数,它用于指定当前View在剩余空间(剩余空间可能为负数,比如父容器LinearLayout宽度为L,2个View都是match_parent,这个时候剩余空间是
总宽度L - 第一个View宽度L - 第二个View宽度L = -L)下所占的比例,默认权重值为0。如果你希望进一步了解权重的含义点击这里
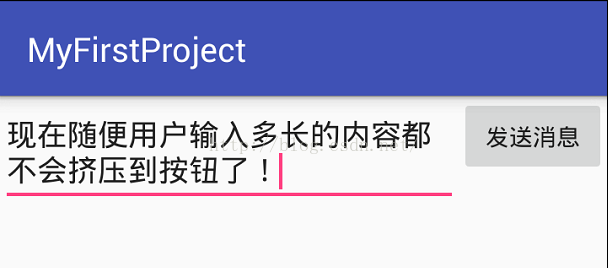
现在我们改写一下文本域的属性,我们设置它的android:layout_weight属性值为1,由于没有其它的View设置权重,这里1就相当于占据剩余的全部。另外,将它本身的宽度属性设置成0dp。我们再看看activity_my.xml的最终代码以及对应的UI效果:<?xml version="1.0" encoding="utf-8"?>
<LinearLayout
xmlns:android="http://schemas.android.com/apk/res/android"
android:layout_width="match_parent"
android:layout_height="match_parent"
android:orientation="horizontal"
>
<EditText android:id="@+id/edit_message"
android:layout_width="0dp"
android:layout_weight="1"
android:layout_height="wrap_content"
android:hint="@string/edit_message" />
<Button
android:id="@+id/btn_send"
android:layout_width="wrap_content"
android:layout_height="wrap_content"
android:text="@string/btn_send"/>
</LinearLayout>
这样UI显示就正常了.. 也不需要再担心用户输入内容过长导致按钮被挤压变形。

相关文章推荐
- 使用C++实现JNI接口需要注意的事项
- Android IPC进程间通讯机制
- Android Manifest 用法
- [转载]Activity中ConfigChanges属性的用法
- Android之获取手机上的图片和视频缩略图thumbnails
- Android之使用Http协议实现文件上传功能
- Android学习笔记(二九):嵌入浏览器
- android string.xml文件中的整型和string型代替
- i-jetty环境搭配与编译
- android之定时器AlarmManager
- android wifi 无线调试
- Android Native 绘图方法
- Android java 与 javascript互访(相互调用)的方法例子
- android 代码实现控件之间的间距
- android FragmentPagerAdapter的“标准”配置
- Android"解决"onTouch和onClick的冲突问题
- android:installLocation简析
- android searchView的关闭事件
- SourceProvider.getJniDirectories