动画特效十四:手风琴效果
2015-10-23 12:08
549 查看
本人录制技术视频地址:https://edu.csdn.net/lecturer/1899 欢迎观看。
在讲解JQuery特效的时候,我介绍过 手风琴效果; 这一节我讲解一下在iOS中的实现效果;相对于JQuery版本的动画,iOS中考虑的东西要多的多,先看看最终的效果图。

大家也许看到这个实现效果,就会立刻想到 UITableView的 Grouped;但是UITableView的 Grouped效果有一个缺陷,就是呈现UI之前,数据源必须事先准备好:即已经知道了展开header之后里面Cell的个数。但是,本例中的需求是,点击header展开的数据是从网络加载而来,因此不知道展开内容的个数及高度!
实现思路:
1. 先根据网络数据,加载头部列表。
注意到HeaderView有两种状态:关闭的时候显示灰色文字效果及箭头向下;展开的时候显示红色文字效果及箭头向上,左侧还是有一个指示按钮。所以我们可以通过自定义HeaderView,然后实现状态的切换。自定义的HeaderView命名为UpdateDetailHeaderView。
1)xib设计图:

可以看出,在xib中一次性将展开和关闭时候的元素全部添加进来,只是默认情况下,红色高亮的元素处于隐藏状态。
2)UpdateDetailHeaderView的h文件的定义如下:
@interface UpdateDetailHeaderView : UIView
@property (nonatomic, copy) NSString *name;
@property (nonatomic, copy) NSString *specialid;
@property (nonatomic, assign) NSInteger section;
@property (nonatomic, assign, getter=isOpen) BOOL open;
+ (instancetype)headerView;
@end
name属性就是显示的title;specialid属性,当点击UpdateDetailHeaderView的时候,会将这个值传递给具体展开的cell用来获取cell的数据;section属性用来标识这个UpdateDetailHeaderView是UITableView中的第几个; open属性用来标示UpdateDetailHeaderView是否处于展开状态。3)UpdateDetailHeaderView的m文件的实现如下:
#import "UpdateDetailHeaderView.h"
@interface UpdateDetailHeaderView()
@property (weak, nonatomic) IBOutlet UILabel *bookTitle;
@property (weak, nonatomic) IBOutlet UIImageView *leftIndicatorImageView;
@property (weak, nonatomic) IBOutlet UIImageView *rightIndicatorDownImageView;
@property (weak, nonatomic) IBOutlet UIImageView *rightIndicatorUpImageView;
@end
@implementation UpdateDetailHeaderView
+ (instancetype)headerView {
return [[[NSBundle mainBundle] loadNibNamed:@"UpdateDetailHeaderView" owner:nil options:nil] lastObject];
}
- (void)setName:(NSString *)name {
_name = [name copy];
self.bookTitle.text = name;
}
- (void)setOpen:(BOOL)open {
_open = open;
if (open) {
self.leftIndicatorImageView.hidden = NO;
self.bookTitle.textColor = RGB(251, 0, 0);
self.rightIndicatorDownImageView.hidden = YES;
self.rightIndicatorUpImageView.hidden = NO;
} else {
self.leftIndicatorImageView.hidden = YES;
self.bookTitle.textColor = RGB(102, 102, 102);
self.rightIndicatorDownImageView.hidden = NO;
self.rightIndicatorUpImageView.hidden = YES;
}
}
@end
这里重写open的set属性,就可以方便的实现了UpdateDetailHeaderView状态的切换。
4)在主控制器中书写代码,显示所有头部内容:
4-1)主控制器中定义的属性:
@property (weak, nonatomic) IBOutlet UITableView *tableView;
/*the information of tableview's header section*/
@property (nonatomic, strong) NSMutableArray *updateHeaderItems;updateHeaderItems数组中存放的就是UpdateDetailHeaderView头部数据信息,这里采用懒加载的方式;
- (NSMutableArray *)updateHeaderItems {
if (!_updateHeaderItems) {
_updateHeaderItems = [NSMutableArray array];
}
return _updateHeaderItems;
}
4-2)初始化代码:
- (void)viewDidLoad {
[super viewDidLoad];
[self initTableView];
[self loadHeaderData];
}
- (void)initTableView {
self.tableView.delegate = self;
self.tableView.dataSource = self;
self.tableView.separatorStyle = UITableViewCellSeparatorStyleNone;
}
- (void)loadHeaderData {
NSArray *cachedHeaderData = [ComicCacheManager cachedBookCitySpecialBigBookInfo];
if (cachedHeaderData.count) {
[self.updateHeaderItems removeAllObjects];
[self.updateHeaderItems addObjectsFromArray:cachedHeaderData];
[self.tableView reloadData];
}
NSMutableDictionary *params = [NSMutableDictionary dictionary];
[params setObject:@"1" forKey:@"retype"];
__weak typeof(self) wself = self;
[NetHTTPServer requestWithURLString:@"header_datasource_api" params:params httpMethod:@"GET" completeBlock:^(id result,NSString * error) {
if (error) {
[[CLMsgBox sharedInstance] showHUDTextOnly:kNetWorkErrorStr duration:1.2 inView:wself.view];
return ;
}
if ([result isKindOfClass:[NSDictionary class]] && [result count]) {
[wself.updateHeaderItems removeAllObjects];
NSDictionary *info = (NSDictionary *)result;
NSArray *items = [info objectForKey:@"specials"];
[wself.updateHeaderItems addObjectsFromArray:items];
[wself.tableView reloadData];
[ComicCacheManager cachedBookCitySpecialBigBook:wself.updateHeaderItems];
}
}];
}4-3)调用UITableView的代理方法,显示数据。
- (NSInteger)numberOfSectionsInTableView:(UITableView *)tableView {
return self.updateHeaderItems.count;
}
- (UIView *)tableView:(UITableView *)tableView viewForHeaderInSection:(NSInteger)section {
UpdateDetailHeaderView *headerView = self.headerViewsDict[@(section)];
if (!headerView) {
headerView = [UpdateDetailHeaderView headerView];
NSDictionary *dict = self.updateHeaderItems[section];
headerView.name = [dict strValue:@"name"];
headerView.specialid = [dict strValue:@"specialid"];
headerView.section = section;
self.headerViewsDict[@(section)] = headerView;
UITapGestureRecognizer *tapRecognizer = [[UITapGestureRecognizer alloc] initWithTarget:self action:@selector(tapHeader:)];
[headerView addGestureRecognizer:tapRecognizer];
}
return headerView;
}
- (CGFloat)tableView:(UITableView *)tableView heightForHeaderInSection:(NSInteger)section {
return 33;
}
- (void)tapHeader:(UITapGestureRecognizer *)tap {
UpdateDetailHeaderView *headerView = (UpdateDetailHeaderView *)tap.view;
headerView.open = !headerView.isOpen;
NSArray *items = self.updateContents[@(headerView.section)];
// if there are some items for "scetion", it means that it needn't to load content data again, otherwise, it need send network request and save data into updateContents dictionary.
if (items) {
[self.tableView reloadData];
} else {
[self loadContentDataWithHeaderView:headerView];
}
}
- (void)loadContentDataWithHeaderView:(UpdateDetailHeaderView *)headerView {
NSMutableDictionary *params = [NSMutableDictionary dictionary];
[params setObject:headerView.specialid forKey:@"special"];
[MBProgressHUD showMessage:@"数据加载中..." toView:self.view];
__weak typeof(self) wself = self;
[NetHTTPServer requestWithURLString:@"cell_datasource_api" params:params httpMethod:@"POST" completeBlock:^(id result,NSString * error) {
if (error) {
[MBProgressHUD hideHUDForView:wself.view];
[[CLMsgBox sharedInstance] showHUDTextOnly:kNetWorkErrorStr duration:1.2 inView:wself.view];
return ;
}
if ([result isKindOfClass:[NSDictionary class]] && [result count]) {
[MBProgressHUD hideHUDForView:wself.view];
NSDictionary *info = (NSDictionary *)result;
NSArray *comicslist = [info objectForKey:@"comicsList"];
NSMutableArray *items = [NSMutableArray array];
for (NSDictionary *dict in comicslist) {
UpdateDetailContentItem *item = [[UpdateDetailContentItem alloc] initWithDict:dict];
[items addObject:item];
}
wself.updateContents[@(headerView.section)] = items;
[wself calcHeightWithSection:headerView.section itemCount:comicslist.count];
[wself.tableView reloadData];
}
}];
}
headerViewDict这个字典就用来保存section与UpdateDetailHeaderView对应关系的字典;定义如下:
@property (nonatomic, strong) NSMutableDictionary *headerViewsDict;
- (NSMutableDictionary *)headerViewsDict {
if (!_headerViewsDict) {
_headerViewsDict = [NSMutableDictionary dictionary];
}
return _headerViewsDict;
}
tapHeader手势点击事件,headerView.open = !headerView.isOpen; 这句代码就实现了UpdateDetailHeaderView状态切换的效果。
updateContents这个字典用来保存section与cell中存放的数据集合;定义如下:
@property (nonatomic, strong) NSMutableDictionary *updateContents;
- (NSMutableDictionary *)updateContents {
if (!_updateContents) {
_updateContents = [NSMutableDictionary dictionary];
}
return _updateContents;
}
tapHeader手势点击事件, 判断items有没有值这一细节;如果有值,说明已经点击过了UpdateDetailHeaderView,并且为Cell中需要呈现的九宫格加载了网络数据,此时就不需要加载数据了,直接刷新表格就可以;否则的话,为cell加载网络数据,并且为updateContents保存相关的数据信息。
2. 根据网络数据,加载九宫格数据。
为UITableView注册cell,所以在initTableView方法中追加如下代码:
[self.tableView registerNib:[UINib nibWithNibName:@"UpdateDetailContentCell" bundle:nil] forCellReuseIdentifier:updateDetailCellIdentifier];
自定义Cell为UpdateDetailContentCell,由于Cell中呈现的是九宫格数据,所以很容易想到使用UICollectionView作为cell的子View。
1)UpdateDetailContentCell的结构设计图:
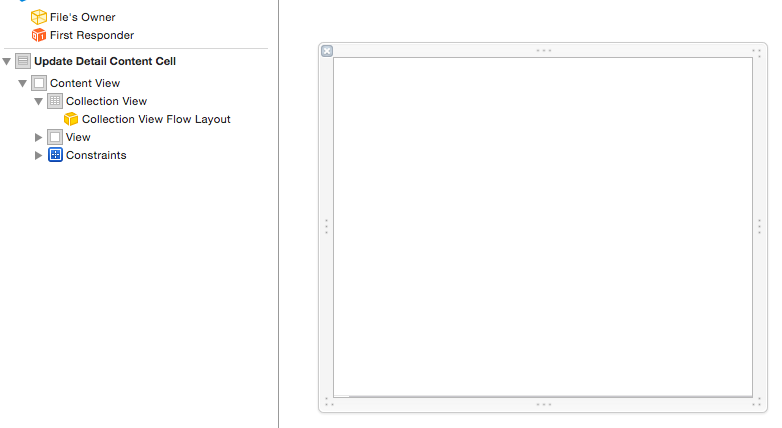
2)UpdateDetailContentCell中的h文件和m文件的代码如下:
@interface UpdateDetailContentCell : UITableViewCell
@property (nonatomic, strong) NSArray *items;
@end
#import "UpdateDetailContentCell.h"
#import "UpdateSingleCell.h"
#import "UpdateDetailContentItem.h"
@interface UpdateDetailContentCell()<UICollectionViewDataSource, UICollectionViewDelegate>
@property (weak, nonatomic) IBOutlet UICollectionView *collectionView;
@end
@implementation UpdateDetailContentCell
static NSString *const singleIdentifier = @"UpdateSingleCell";
#pragma mark - init views
- (void)awakeFromNib {
self.collectionView.dataSource = self;
self.collectionView.delegate = self;
self.collectionView.scrollEnabled = NO;
[self.collectionView registerNib:[UINib nibWithNibName:@"UpdateSingleCell" bundle:nil] forCellWithReuseIdentifier:singleIdentifier];
}
#pragma mark - assign layout for collection view
- (void)setItems:(NSArray *)items {
_items = items;
NSInteger column = 3;
CGFloat margin = 10;
CGFloat itemWidth = (kFBaseWidth - (column + 1) * margin) / column;
CGFloat ratio = 254.0 / 190.0;
CGFloat itemHeight = itemWidth * ratio;
UICollectionViewFlowLayout *layout = (UICollectionViewFlowLayout *)self.collectionView.collectionViewLayout;
layout.itemSize = CGSizeMake(itemWidth, itemHeight + 30);
layout.sectionInset = UIEdgeInsetsMake(margin, margin, margin, margin);
layout.minimumLineSpacing = margin;
}
#pragma mark - collection view delegate / datasource
- (NSInteger)collectionView:(UICollectionView *)collectionView numberOfItemsInSection:(NSInteger)section {
return self.items.count;
}
- (UICollectionViewCell *)collectionView:(UICollectionView *)collectionView cellForItemAtIndexPath:(NSIndexPath *)indexPath {
UpdateSingleCell *cell = (UpdateSingleCell *)[collectionView dequeueReusableCellWithReuseIdentifier:singleIdentifier forIndexPath:indexPath];
cell.item = self.items[indexPath.item];
return cell;
}
- (void)collectionView:(UICollectionView *)collectionView didSelectItemAtIndexPath:(NSIndexPath *)indexPath {
UpdateDetailContentItem *item = self.items[indexPath.item];
}
@end
这里的代码就实现了九宫格效果,我就不做解释了;如果想详细了解UICollectionView如果实现九宫格效果,请参照我以前写的一篇博客:UICollectionView详解一:基本介绍。
3)将这个九宫格显示到主控制器的TableView中。
实现这一个需要注意两点:
3-1)需要事先计算好cell的高度;
这个高度是在加载cell数据的calcHeightWithSection方法中已经计算好,并且保存在了updateContentHeight这个字典中,updateContentHeight这个字典的大致定义如下:
@property (nonatomic, strong) NSMutableDictionary *updateContentHeight;
- (NSMutableDictionary *)updateContentHeight {
if (!_updateContentHeight) {
_updateContentHeight = [NSMutableDictionary dictionary];
}
return _updateContentHeight;
}
3-2)每个UpdateDetailHeaderView对应的cell的个数不是0个(不显示九宫格)就是1个(显示九宫格)。
准备完毕后,再次实现tableview的代理方法,用来展示九宫格数据:
- (NSInteger)tableView:(UITableView *)tableView numberOfRowsInSection:(NSInteger)section {
UpdateDetailHeaderView *headerView = self.headerViewsDict[@(section)];
// if the value of isOpen is "YES", that means it need expand the detail content for header view, however, all of the detail contents present in one cell, so the return value is 1, otherwise the return value is 0.
return headerView.isOpen ? 1 : 0;
}
- (UITableViewCell *)tableView:(UITableView *)tableView cellForRowAtIndexPath:(NSIndexPath *)indexPath {
UpdateDetailContentCell *cell = [tableView dequeueReusableCellWithIdentifier:updateDetailCellIdentifier];
__weak typeof(self) weakSelf = self;
cell.updateDetailBlock = ^(NSString *bigBookId){
if (weakSelf.detailVCBlock) {
weakSelf.detailVCBlock(bigBookId);
}
};
NSArray *items = self.updateContents[@(indexPath.section)];
cell.items = items;
return cell;
}
- (CGFloat)tableView:(UITableView *)tableView heightForRowAtIndexPath:(NSIndexPath *)indexPath {
NSNumber *number = self.updateContentHeight[@(indexPath.section)];
return number.floatValue;
}
在讲解JQuery特效的时候,我介绍过 手风琴效果; 这一节我讲解一下在iOS中的实现效果;相对于JQuery版本的动画,iOS中考虑的东西要多的多,先看看最终的效果图。
大家也许看到这个实现效果,就会立刻想到 UITableView的 Grouped;但是UITableView的 Grouped效果有一个缺陷,就是呈现UI之前,数据源必须事先准备好:即已经知道了展开header之后里面Cell的个数。但是,本例中的需求是,点击header展开的数据是从网络加载而来,因此不知道展开内容的个数及高度!
实现思路:
1. 先根据网络数据,加载头部列表。
注意到HeaderView有两种状态:关闭的时候显示灰色文字效果及箭头向下;展开的时候显示红色文字效果及箭头向上,左侧还是有一个指示按钮。所以我们可以通过自定义HeaderView,然后实现状态的切换。自定义的HeaderView命名为UpdateDetailHeaderView。
1)xib设计图:
可以看出,在xib中一次性将展开和关闭时候的元素全部添加进来,只是默认情况下,红色高亮的元素处于隐藏状态。
2)UpdateDetailHeaderView的h文件的定义如下:
@interface UpdateDetailHeaderView : UIView
@property (nonatomic, copy) NSString *name;
@property (nonatomic, copy) NSString *specialid;
@property (nonatomic, assign) NSInteger section;
@property (nonatomic, assign, getter=isOpen) BOOL open;
+ (instancetype)headerView;
@end
name属性就是显示的title;specialid属性,当点击UpdateDetailHeaderView的时候,会将这个值传递给具体展开的cell用来获取cell的数据;section属性用来标识这个UpdateDetailHeaderView是UITableView中的第几个; open属性用来标示UpdateDetailHeaderView是否处于展开状态。3)UpdateDetailHeaderView的m文件的实现如下:
#import "UpdateDetailHeaderView.h"
@interface UpdateDetailHeaderView()
@property (weak, nonatomic) IBOutlet UILabel *bookTitle;
@property (weak, nonatomic) IBOutlet UIImageView *leftIndicatorImageView;
@property (weak, nonatomic) IBOutlet UIImageView *rightIndicatorDownImageView;
@property (weak, nonatomic) IBOutlet UIImageView *rightIndicatorUpImageView;
@end
@implementation UpdateDetailHeaderView
+ (instancetype)headerView {
return [[[NSBundle mainBundle] loadNibNamed:@"UpdateDetailHeaderView" owner:nil options:nil] lastObject];
}
- (void)setName:(NSString *)name {
_name = [name copy];
self.bookTitle.text = name;
}
- (void)setOpen:(BOOL)open {
_open = open;
if (open) {
self.leftIndicatorImageView.hidden = NO;
self.bookTitle.textColor = RGB(251, 0, 0);
self.rightIndicatorDownImageView.hidden = YES;
self.rightIndicatorUpImageView.hidden = NO;
} else {
self.leftIndicatorImageView.hidden = YES;
self.bookTitle.textColor = RGB(102, 102, 102);
self.rightIndicatorDownImageView.hidden = NO;
self.rightIndicatorUpImageView.hidden = YES;
}
}
@end
这里重写open的set属性,就可以方便的实现了UpdateDetailHeaderView状态的切换。
4)在主控制器中书写代码,显示所有头部内容:
4-1)主控制器中定义的属性:
@property (weak, nonatomic) IBOutlet UITableView *tableView;
/*the information of tableview's header section*/
@property (nonatomic, strong) NSMutableArray *updateHeaderItems;updateHeaderItems数组中存放的就是UpdateDetailHeaderView头部数据信息,这里采用懒加载的方式;
- (NSMutableArray *)updateHeaderItems {
if (!_updateHeaderItems) {
_updateHeaderItems = [NSMutableArray array];
}
return _updateHeaderItems;
}
4-2)初始化代码:
- (void)viewDidLoad {
[super viewDidLoad];
[self initTableView];
[self loadHeaderData];
}
- (void)initTableView {
self.tableView.delegate = self;
self.tableView.dataSource = self;
self.tableView.separatorStyle = UITableViewCellSeparatorStyleNone;
}
- (void)loadHeaderData {
NSArray *cachedHeaderData = [ComicCacheManager cachedBookCitySpecialBigBookInfo];
if (cachedHeaderData.count) {
[self.updateHeaderItems removeAllObjects];
[self.updateHeaderItems addObjectsFromArray:cachedHeaderData];
[self.tableView reloadData];
}
NSMutableDictionary *params = [NSMutableDictionary dictionary];
[params setObject:@"1" forKey:@"retype"];
__weak typeof(self) wself = self;
[NetHTTPServer requestWithURLString:@"header_datasource_api" params:params httpMethod:@"GET" completeBlock:^(id result,NSString * error) {
if (error) {
[[CLMsgBox sharedInstance] showHUDTextOnly:kNetWorkErrorStr duration:1.2 inView:wself.view];
return ;
}
if ([result isKindOfClass:[NSDictionary class]] && [result count]) {
[wself.updateHeaderItems removeAllObjects];
NSDictionary *info = (NSDictionary *)result;
NSArray *items = [info objectForKey:@"specials"];
[wself.updateHeaderItems addObjectsFromArray:items];
[wself.tableView reloadData];
[ComicCacheManager cachedBookCitySpecialBigBook:wself.updateHeaderItems];
}
}];
}4-3)调用UITableView的代理方法,显示数据。
- (NSInteger)numberOfSectionsInTableView:(UITableView *)tableView {
return self.updateHeaderItems.count;
}
- (UIView *)tableView:(UITableView *)tableView viewForHeaderInSection:(NSInteger)section {
UpdateDetailHeaderView *headerView = self.headerViewsDict[@(section)];
if (!headerView) {
headerView = [UpdateDetailHeaderView headerView];
NSDictionary *dict = self.updateHeaderItems[section];
headerView.name = [dict strValue:@"name"];
headerView.specialid = [dict strValue:@"specialid"];
headerView.section = section;
self.headerViewsDict[@(section)] = headerView;
UITapGestureRecognizer *tapRecognizer = [[UITapGestureRecognizer alloc] initWithTarget:self action:@selector(tapHeader:)];
[headerView addGestureRecognizer:tapRecognizer];
}
return headerView;
}
- (CGFloat)tableView:(UITableView *)tableView heightForHeaderInSection:(NSInteger)section {
return 33;
}
- (void)tapHeader:(UITapGestureRecognizer *)tap {
UpdateDetailHeaderView *headerView = (UpdateDetailHeaderView *)tap.view;
headerView.open = !headerView.isOpen;
NSArray *items = self.updateContents[@(headerView.section)];
// if there are some items for "scetion", it means that it needn't to load content data again, otherwise, it need send network request and save data into updateContents dictionary.
if (items) {
[self.tableView reloadData];
} else {
[self loadContentDataWithHeaderView:headerView];
}
}
- (void)loadContentDataWithHeaderView:(UpdateDetailHeaderView *)headerView {
NSMutableDictionary *params = [NSMutableDictionary dictionary];
[params setObject:headerView.specialid forKey:@"special"];
[MBProgressHUD showMessage:@"数据加载中..." toView:self.view];
__weak typeof(self) wself = self;
[NetHTTPServer requestWithURLString:@"cell_datasource_api" params:params httpMethod:@"POST" completeBlock:^(id result,NSString * error) {
if (error) {
[MBProgressHUD hideHUDForView:wself.view];
[[CLMsgBox sharedInstance] showHUDTextOnly:kNetWorkErrorStr duration:1.2 inView:wself.view];
return ;
}
if ([result isKindOfClass:[NSDictionary class]] && [result count]) {
[MBProgressHUD hideHUDForView:wself.view];
NSDictionary *info = (NSDictionary *)result;
NSArray *comicslist = [info objectForKey:@"comicsList"];
NSMutableArray *items = [NSMutableArray array];
for (NSDictionary *dict in comicslist) {
UpdateDetailContentItem *item = [[UpdateDetailContentItem alloc] initWithDict:dict];
[items addObject:item];
}
wself.updateContents[@(headerView.section)] = items;
[wself calcHeightWithSection:headerView.section itemCount:comicslist.count];
[wself.tableView reloadData];
}
}];
}
headerViewDict这个字典就用来保存section与UpdateDetailHeaderView对应关系的字典;定义如下:
@property (nonatomic, strong) NSMutableDictionary *headerViewsDict;
- (NSMutableDictionary *)headerViewsDict {
if (!_headerViewsDict) {
_headerViewsDict = [NSMutableDictionary dictionary];
}
return _headerViewsDict;
}
tapHeader手势点击事件,headerView.open = !headerView.isOpen; 这句代码就实现了UpdateDetailHeaderView状态切换的效果。
updateContents这个字典用来保存section与cell中存放的数据集合;定义如下:
@property (nonatomic, strong) NSMutableDictionary *updateContents;
- (NSMutableDictionary *)updateContents {
if (!_updateContents) {
_updateContents = [NSMutableDictionary dictionary];
}
return _updateContents;
}
tapHeader手势点击事件, 判断items有没有值这一细节;如果有值,说明已经点击过了UpdateDetailHeaderView,并且为Cell中需要呈现的九宫格加载了网络数据,此时就不需要加载数据了,直接刷新表格就可以;否则的话,为cell加载网络数据,并且为updateContents保存相关的数据信息。
2. 根据网络数据,加载九宫格数据。
为UITableView注册cell,所以在initTableView方法中追加如下代码:
[self.tableView registerNib:[UINib nibWithNibName:@"UpdateDetailContentCell" bundle:nil] forCellReuseIdentifier:updateDetailCellIdentifier];
自定义Cell为UpdateDetailContentCell,由于Cell中呈现的是九宫格数据,所以很容易想到使用UICollectionView作为cell的子View。
1)UpdateDetailContentCell的结构设计图:
2)UpdateDetailContentCell中的h文件和m文件的代码如下:
@interface UpdateDetailContentCell : UITableViewCell
@property (nonatomic, strong) NSArray *items;
@end
#import "UpdateDetailContentCell.h"
#import "UpdateSingleCell.h"
#import "UpdateDetailContentItem.h"
@interface UpdateDetailContentCell()<UICollectionViewDataSource, UICollectionViewDelegate>
@property (weak, nonatomic) IBOutlet UICollectionView *collectionView;
@end
@implementation UpdateDetailContentCell
static NSString *const singleIdentifier = @"UpdateSingleCell";
#pragma mark - init views
- (void)awakeFromNib {
self.collectionView.dataSource = self;
self.collectionView.delegate = self;
self.collectionView.scrollEnabled = NO;
[self.collectionView registerNib:[UINib nibWithNibName:@"UpdateSingleCell" bundle:nil] forCellWithReuseIdentifier:singleIdentifier];
}
#pragma mark - assign layout for collection view
- (void)setItems:(NSArray *)items {
_items = items;
NSInteger column = 3;
CGFloat margin = 10;
CGFloat itemWidth = (kFBaseWidth - (column + 1) * margin) / column;
CGFloat ratio = 254.0 / 190.0;
CGFloat itemHeight = itemWidth * ratio;
UICollectionViewFlowLayout *layout = (UICollectionViewFlowLayout *)self.collectionView.collectionViewLayout;
layout.itemSize = CGSizeMake(itemWidth, itemHeight + 30);
layout.sectionInset = UIEdgeInsetsMake(margin, margin, margin, margin);
layout.minimumLineSpacing = margin;
}
#pragma mark - collection view delegate / datasource
- (NSInteger)collectionView:(UICollectionView *)collectionView numberOfItemsInSection:(NSInteger)section {
return self.items.count;
}
- (UICollectionViewCell *)collectionView:(UICollectionView *)collectionView cellForItemAtIndexPath:(NSIndexPath *)indexPath {
UpdateSingleCell *cell = (UpdateSingleCell *)[collectionView dequeueReusableCellWithReuseIdentifier:singleIdentifier forIndexPath:indexPath];
cell.item = self.items[indexPath.item];
return cell;
}
- (void)collectionView:(UICollectionView *)collectionView didSelectItemAtIndexPath:(NSIndexPath *)indexPath {
UpdateDetailContentItem *item = self.items[indexPath.item];
}
@end
这里的代码就实现了九宫格效果,我就不做解释了;如果想详细了解UICollectionView如果实现九宫格效果,请参照我以前写的一篇博客:UICollectionView详解一:基本介绍。
3)将这个九宫格显示到主控制器的TableView中。
实现这一个需要注意两点:
3-1)需要事先计算好cell的高度;
这个高度是在加载cell数据的calcHeightWithSection方法中已经计算好,并且保存在了updateContentHeight这个字典中,updateContentHeight这个字典的大致定义如下:
@property (nonatomic, strong) NSMutableDictionary *updateContentHeight;
- (NSMutableDictionary *)updateContentHeight {
if (!_updateContentHeight) {
_updateContentHeight = [NSMutableDictionary dictionary];
}
return _updateContentHeight;
}
3-2)每个UpdateDetailHeaderView对应的cell的个数不是0个(不显示九宫格)就是1个(显示九宫格)。
准备完毕后,再次实现tableview的代理方法,用来展示九宫格数据:
- (NSInteger)tableView:(UITableView *)tableView numberOfRowsInSection:(NSInteger)section {
UpdateDetailHeaderView *headerView = self.headerViewsDict[@(section)];
// if the value of isOpen is "YES", that means it need expand the detail content for header view, however, all of the detail contents present in one cell, so the return value is 1, otherwise the return value is 0.
return headerView.isOpen ? 1 : 0;
}
- (UITableViewCell *)tableView:(UITableView *)tableView cellForRowAtIndexPath:(NSIndexPath *)indexPath {
UpdateDetailContentCell *cell = [tableView dequeueReusableCellWithIdentifier:updateDetailCellIdentifier];
__weak typeof(self) weakSelf = self;
cell.updateDetailBlock = ^(NSString *bigBookId){
if (weakSelf.detailVCBlock) {
weakSelf.detailVCBlock(bigBookId);
}
};
NSArray *items = self.updateContents[@(indexPath.section)];
cell.items = items;
return cell;
}
- (CGFloat)tableView:(UITableView *)tableView heightForRowAtIndexPath:(NSIndexPath *)indexPath {
NSNumber *number = self.updateContentHeight[@(indexPath.section)];
return number.floatValue;
}

相关文章推荐
- jQuery中实现动画效果的基本操作介绍
- 图片的左右移动,js动画效果实现代码
- 实现动画效果核心方式的js代码
- javascript 通用loading动画效果实例代码
- IOS等待时动画效果的实现
- UITableView 实现汽车品牌(demo)
- UITableView 基本使用方法总结
- jQuery Easing 动画效果扩展
- iPhone动画效果
- UITableView一些易混属性和方法
- UITableView的详细讲解
- (转)UITableViewController重要配置方法和Delegate
- UITableView详细用法,UITableView指南,UITableView详细教程
- ios隐藏uitableview下面多余的tableview的线条
- UICollectionView 代理方法
- css3样式表制作鼠标滑过导航条淡进淡出效果
- 定制UITableViewCell的事件响应处理
- ios关于tableView的重用
- IOS UITableView 实现LOL数据展示
- UIView和CALayer的区别