Android 5.0动画(一)
2015-10-11 11:31
447 查看
先来说说android5.0中新增加的动画:
Touch feedback(触摸反馈)
Reveal effect(揭露效果)
Activity transitions(Activity转换效果)
Curved motion(曲线运动)
View state changes(视图状态改变)
Animate Vector Drawables(可绘制矢量动画)
接下来便按个介绍:
1-Touch feedback(触摸反馈)
最最明显的就是波纹动画了。当使用了Material主题之后,波纹动画会自动安装到所有的控件上面。当然,我们也可以设置了:
上面的第一种是设置波纹有边界,第二种是设置波纹超出边界。
这个动画还是比较简单的。
Reveal effect(揭露效果)
这个是啥意思呢。就是在控件要出现的时候,从某个点开始,慢慢的向周围扩散出现。听起来是不是有点像第一种动画。这里我就来说说他们的不同点,这种动画在刚开始的时候,视图是没呈现出来的,而第一种是呈现出来的。这就是区别,来个揭露效果的gif图(盗一张去)图片来源

如何使用?
从上面的使用来看,这个和我们以前的动画,使用起来没什么区别。
参数介绍:(把源码拿过来)
Activity Transitions(Activity转换效果)
要求使用Material主题
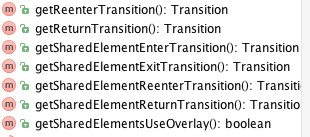
种类: 提供两种Transition类型:
1.Enter(进入):进入一个Activity的效果
2.Exit(退出):退出一个Activity的效果
3.reenter(从新进去)
4.return
普通的Transition
explode:从场景的中心移入或移出
silde:从场景的边缘移入或 移出
fade:调整透明度产生渐变效果
Shared Elements Transition 共享元素转换: 作用就是共享两个activity中共同的元素,
在android5.0下支持如下效果:
使用方法:
1.先允许使用
在xml中设置
上面 的那个@transition/tran 是个啥玩意。
在AS中,我们创建transition的XML文件就会在res下面生成transition的文件夹。

我们看下tran.xml
属性我也写出来的,重复的没写,无非就是时间,顺序,插值器,延迟等什么的。
或者在代码中设置
我们看下Window类的方法中提供了哪些

2.代码中设置动画
好。这种动画就介绍到这里
Curved motion(曲线运动)
在Material设计中的动画,依赖于曲线的时间插入值和空间运动模式。在android5.0(api21)及以上,可以自定义动画时间曲线和曲线运动模式。PathInterpolator类是一个新的基于贝塞尔曲线或路径对象的插入器。
系统提供了三种基本的曲线,XML资源:@interpolator/fast_out_linear_in.xml
@interpolator/fast_out_slow_in.xml
@interpolator/linear_out_slow_in.xml
我们可以看看系统的xml文件。
在src/interpolator下面
插入器指定了一个1 x1正方形运动曲线,它使用(0,0)为锚点,(1,1)为控制点。
…
在代码中我们可以这样
也可以这样
这是用了ObjectAnimator新增加的构造方法。
这个path是个什么玩意
path The
这个path就是前面2个值变化的’路线’。
Animate View State Changes 视图状态改变动画
使用方法;
1.代码中用:指定android:stateListAnimator=”@drawable/statechange” 属性
我们看看statechange.xml文件
一目了然。。
2.在代码中用
当你的主题继承了Material主题,按钮默认拥有了z动画。为了避免这种行为在你的按钮,设置android:stateListAnimator属性值为null。
AnimatedStateListDrawable 创建图片以显示关联view的状态改变动画。
res/drawable/
剩下的 下次再来说。。。
Touch feedback(触摸反馈)
Reveal effect(揭露效果)
Activity transitions(Activity转换效果)
Curved motion(曲线运动)
View state changes(视图状态改变)
Animate Vector Drawables(可绘制矢量动画)
接下来便按个介绍:
1-Touch feedback(触摸反馈)
最最明显的就是波纹动画了。当使用了Material主题之后,波纹动画会自动安装到所有的控件上面。当然,我们也可以设置了:
android:background="?android:attr/selectableItemBackground"
android:background="?android:attr/selectableItemBackgroundBorderless"
上面的第一种是设置波纹有边界,第二种是设置波纹超出边界。
android:colorAccent:设置checkbox等控件的选中颜色
这个动画还是比较简单的。
Reveal effect(揭露效果)
这个是啥意思呢。就是在控件要出现的时候,从某个点开始,慢慢的向周围扩散出现。听起来是不是有点像第一种动画。这里我就来说说他们的不同点,这种动画在刚开始的时候,视图是没呈现出来的,而第一种是呈现出来的。这就是区别,来个揭露效果的gif图(盗一张去)图片来源
如何使用?
Animator animator = ViewAnimationUtils.createCircularReveal(Circularbutton,
Circularbutton.getWidth()/2,
Circularbutton.getHeight()/2,
Circularbutton.getWidth(),0);
animator.setInterpolator(new AccelerateDecelerateInterpolator());
animator.setDuration(5000);
animator.start();
从上面的使用来看,这个和我们以前的动画,使用起来没什么区别。
参数介绍:(把源码拿过来)
@param view The View will be clipped to the animating circle.
* @param centerX The x coordinate of the center of the animating circle, relative to
*                <code>view</code>.
* @param centerY The y coordinate of the center of the animating circle, relative to
*                <code>view</code>.
* @param startRadius The starting radius of the animating circle.
* @param endRadius The ending radius of the animating circle.
Activity Transitions(Activity转换效果)
要求使用Material主题
种类: 提供两种Transition类型:
1.Enter(进入):进入一个Activity的效果
2.Exit(退出):退出一个Activity的效果
3.reenter(从新进去)
4.return
普通的Transition
explode:从场景的中心移入或移出
silde:从场景的边缘移入或 移出
fade:调整透明度产生渐变效果
Shared Elements Transition 共享元素转换: 作用就是共享两个activity中共同的元素,
在android5.0下支持如下效果:
changeBounds 改变目标实体的布局边界
changeClipBounds 裁剪目标视图边界
changeTransform  改变目标视图的缩放比例和旋转角度
changeImageTransfrom 改变目标图片的大小和缩放比例
使用方法:
1.先允许使用
在xml中设置
<resources>

<!-- Base application theme. -->
<style name="AppTheme" parent="android:Theme.Material">
<!-- Customize your theme here. -->
<item name="android:listDivider">@drawable/diver</item>
<!--
是否开启tranition动画
-->
<item name="android:windowContentTransitions">true</item>
<!--
activity transition动画
-->
<item name="android:windowEnterTransition">@transition/tran</item>
<item name="android:windowExitTransition"></item>
<item name="android:windowReenterTransition"></item>
<item name="android:windowReturnTransition"></item>

<!--
共享元素切换动画
-->
<item name="android:windowSharedElementEnterTransition"></item>
<item name="android:windowSharedElementExitTransition"></item>
<item name="android:windowSharedElementReenterTransition"></item>
<item name="android:windowSharedElementReturnTransition"></item>
</style>
</resources>
上面 的那个@transition/tran 是个啥玩意。
在AS中,我们创建transition的XML文件就会在res下面生成transition的文件夹。
我们看下tran.xml
<?xml version="1.0" encoding="utf-8"?>
<transitionSet xmlns:android="http://schemas.android.com/apk/res/android">
<explode android:duration="300"
android:interpolator="@android:interpolator/accelerate_decelerate"
android:matchOrder="0"
android:startDelay="100"
/>
<changeBounds
/>
<changeTransform
android:reparent="false"
android:reparentWithOverlay="false"/>
<changeClipBounds
/>
<changeImageTransform
/>
<slide />
<fade />

</transitionSet>
属性我也写出来的,重复的没写,无非就是时间,顺序,插值器,延迟等什么的。
或者在代码中设置
getWindow().requestFeature(Window.FEATURE_CONTENT_TRANSITIONS);
super.onCreate(savedInstanceState);
setContentView(R.layout.activity_main);
getWindow().setEnterTransition(new Slide());
getWindow().setExitTransition(new Explode());
getWindow().setSharedElementEnterTransition(new Fade());
getWindow().setSharedElementExitTransition(new ChangeBounds());
/**
* 还可以设置其他种类
*/
我们看下Window类的方法中提供了哪些
2.代码中设置动画
Intent intent = new Intent(MainActivity.this,AnimationActivity.class);
/**
* 启动一般的transition
*/
startActivity(intent, ActivityOptions.makeSceneTransitionAnimation(MainActivity.this).toBundle());
/**
* 启动一个共享元素
*/
startActivity(intent,ActivityOptions.makeSceneTransitionAnimation(MainActivity.this,image,"sharename").toBundle());
/**
* 启动多个共享的transition
*/
ActivityOptions options=  ActivityOptions.makeSceneTransitionAnimation(MainActivity.this,
Pair.create(image, "image"),
Pair.create(paletteImage, "paletteImage"));
startActivity(intent,options.toBundle());
好。这种动画就介绍到这里
Curved motion(曲线运动)
在Material设计中的动画,依赖于曲线的时间插入值和空间运动模式。在android5.0(api21)及以上,可以自定义动画时间曲线和曲线运动模式。PathInterpolator类是一个新的基于贝塞尔曲线或路径对象的插入器。
系统提供了三种基本的曲线,XML资源:@interpolator/fast_out_linear_in.xml
@interpolator/fast_out_slow_in.xml
@interpolator/linear_out_slow_in.xml
我们可以看看系统的xml文件。
在src/interpolator下面
<?xml version="1.0" encoding="utf-8"?>
<!--
~ Copyright (C) 2014 The Android Open Source Project
~
~ Licensed under the Apache License, Version 2.0 (the "License");
~ you may not use this file except in compliance with the License.
~ You may obtain a copy of the License at
~
~      http://www.apache.org/licenses/LICENSE-2.0 ~
~ Unless required by applicable law or agreed to in writing, software
~ distributed under the License is distributed on an "AS IS" BASIS,
~ WITHOUT WARRANTIES OR CONDITIONS OF ANY KIND, either express or implied.
~ See the License for the specific language governing permissions and
~ limitations under the License
-->

<pathInterpolator xmlns:android="http://schemas.android.com/apk/res/android"
android:controlX1="0.4"
android:controlY1="0"
android:controlX2="1"
android:controlY2="1"/>
插入器指定了一个1 x1正方形运动曲线,它使用(0,0)为锚点,(1,1)为控制点。
…
在代码中我们可以这样
animator.setInterpolator(new PathInterpolator(0.4f,0f,1f,1f));
也可以这样
ObjectAnimator mAnimator;
mAnimator = ObjectAnimator.ofFloat(view, View.X, View.Y, path);
...
mAnimator.start();
这是用了ObjectAnimator新增加的构造方法。
public static ObjectAnimator ofFloat(Object target, String xPropertyName, String yPropertyName,
Path path) {
PathKeyframes keyframes = KeyframeSet.ofPath(path);
PropertyValuesHolder x = PropertyValuesHolder.ofKeyframes(xPropertyName,
keyframes.createXFloatKeyframes());
PropertyValuesHolder y = PropertyValuesHolder.ofKeyframes(yPropertyName,
keyframes.createYFloatKeyframes());
return ofPropertyValuesHolder(target, x, y);
}
这个path是个什么玩意
path The
Pathto animate values along.
这个path就是前面2个值变化的’路线’。
Animate View State Changes 视图状态改变动画
使用方法;
1.代码中用:指定android:stateListAnimator=”@drawable/statechange” 属性
我们看看statechange.xml文件
<?xml version="1.0" encoding="utf-8"?>
<selector xmlns:android="http://schemas.android.com/apk/res/android">

<item android:state_pressed="true">
<set>
<objectAnimator
android:propertyName="translationZ"
android:duration="200"
android:valueTo="2dp"
android:valueType="floatType"/>
<!--
其他的
-->
</set>
</item>
</selector>
一目了然。。
2.在代码中用
button1.setStateListAnimator(AnimatorInflater.loadStateListAnimator(this,R.drawable.statechange));
当你的主题继承了Material主题,按钮默认拥有了z动画。为了避免这种行为在你的按钮,设置android:stateListAnimator属性值为null。
AnimatedStateListDrawable 创建图片以显示关联view的状态改变动画。
res/drawable/
<?xml version="1.0" encoding="utf-8"?>
<animated-selector xmlns:android="http://schemas.android.com/apk/res/android">

<item
android:id="@+id/pressed"
android:drawable="@mipmap/ic_launcher"
android:state_pressed="true"/>
<item
android:id="@+id/focus"
android:drawable="@mipmap/ic_launcher"
android:state_focused="true"/>
<!--
other
-->
<transition
android:fromId="@id/pressed"
android:toId="@id/focus">
<animation-list>
<item android:duration="20" android:drawable="@drawable/diver"></item>
<!--
other items
-->
</animation-list>
</transition>

</animated-selector>
剩下的 下次再来说。。。

相关文章推荐
- 使用C++实现JNI接口需要注意的事项
- Android IPC进程间通讯机制
- Android Manifest 用法
- [转载]Activity中ConfigChanges属性的用法
- Android之获取手机上的图片和视频缩略图thumbnails
- Android之使用Http协议实现文件上传功能
- Android学习笔记(二九):嵌入浏览器
- android string.xml文件中的整型和string型代替
- i-jetty环境搭配与编译
- android之定时器AlarmManager
- android wifi 无线调试
- Android Native 绘图方法
- Android java 与 javascript互访(相互调用)的方法例子
- android 代码实现控件之间的间距
- android FragmentPagerAdapter的“标准”配置
- Android"解决"onTouch和onClick的冲突问题
- android:installLocation简析
- android searchView的关闭事件
- SourceProvider.getJniDirectories