JS+DIV+CSS排版布局实现美观的选项卡效果
2015-10-10 10:42
941 查看
本文实例讲述了JS+DIV+CSS排版布局实现美观的选项卡效果。分享给大家供大家参考。具体如下:
这是一个基于JavaScript的简单选项卡代码,陪新手练习一下Div+CSS排版的技巧,本选项卡可以继续美化修饰完善,选项卡在目前在众多网站上应用广泛,确实是一个很不错的网页布局方法。
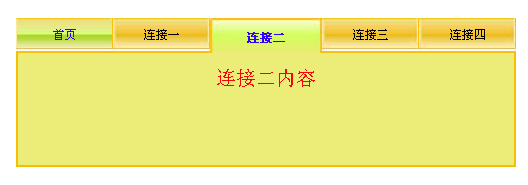
运行效果截图如下:
在线演示地址如下:
http://demo.jb51.net/js/2015/js-div-css-pbbj-nav-demo/
具体代码如下:
<!DOCTYPE html PUBLIC "-//W3C//DTD XHTML 1.0 Transitional//EN"
"http://www.w3.org/TR/xhtml1/DTD/xhtml1-transitional.dtd">
<html xmlns="http://www.w3.org/1999/xhtml">
<head>
<meta http-equiv="Content-Type" content="text/html; charset=gb2312" />
<title>DIV CSS排版</title>
<style type="text/css">
<!--
body,ul{margin:0; padding:0; list-style:none; font:12px "宋体";}
.test {
width:500px;
margin:20px auto;
height:150px;
background:url("images/9zrgo3.jpg") repeat-x 0 33px;
}
.test ul li {
float:left;
padding:2px 1px 6px 1px;
background: url("images/11abdrs.jpg") no-repeat 0 0;
}
.test ul li a {
color:#000;
width:95px;
text-decoration:none;
display:block;
height:27px;
line-height:31px;
text-align:center;
overflow:hidden;
}
.test ul li a:hover{
color:#30F;
background:#FFF url("images/2vi1df8.jpg") repeat-x 0 0px;
}
.test ul li.yes {padding:0;border:none;}
.test ul li.yes a {
color:#30F;
width:112px;
height:35px;
line-height:40px;
display:block;
font-weight:bold;
margin-bottom:-5px;
background: url("images/27zgcqc.jpg") no-repeat 0px 0;
overflow:hidden;
}
.content {
line-height:50px;
text-align:center;
font-size:20px;
color:red;
height:112px;
border:#F8BE05 2px solid;
border-top:none;
clear:both;
background:#ECED78;
}
.no { display:none;}
-->
</style>
<script type="text/javascript" language="javascript">
function test_item(n){
var menu = document.getElementById("menu");
var menuli = menu.getElementsByTagName("li");
for(var i = 0; i< menuli.length;i++){
menuli[i].className= "";
menuli
.className="yes";
document.getElementById("test"+ i).className = "no";
document.getElementById("test"+ n).className = "content";
}
}
</script>
</head>
<body>
<div class="test">
<ul id="menu">
<li class="yes" onclick="javascript:test_item(0);"><a href="#" onfocus="this.blur()">首页</a></li>
<li onclick="javascript:test_item(1);"><a href="#" onfocus="this.blur()">连接一</a></li>
<li onclick="javascript:test_item(2);"><a href="#" onfocus="this.blur()">连接二</a></li>
<li onclick="javascript:test_item(3);"><a href="#" onfocus="this.blur()">连接三</a></li>
<li onclick="javascript:test_item(4);"><a href="#" onfocus="this.blur()">连接四</a></li>
</ul>
<div class="content" id="test0">
首页内容
</div>
<div id="test1" class="no">
连接一内容
</div>
<div id="test2" class="no">
连接二内容
</div>
<div id="test3" class="no">
连接三内容
</div>
<div id="test4" class="no">
连接四内容
</div>
</div>
</body>
</html>
希望本文所述对大家的JavaScript程序设计有所帮助。
您可能感兴趣的文章:

相关文章推荐
- Extjs4.0 最新最全视频教程
- Javascript中toFixed方法的改进
- 5个常见可用性错误和解决方案
- js可突破windows弹退效果代码
- JSP脚本漏洞面面观
- 使用BAT一句话命令实现快速合并JS、CSS
- js显示当前星期的起止日期的脚本
- 爆炸式的JS圆形浮动菜单特效代码
- js select常用操作控制代码
- 从jsp发送动态图像
- 原生js结合html5制作小飞龙的简易跳球
- js 页面模块自由拖动实例
- js实现小鱼吐泡泡在页面游动特效
- js 提交和设置表单的值
- PHP VBS JS 函数 对照表
- PHP+JS实现大规模数据提交的方法
- 仿51JOB的地区选择效果(可选择多个地区)
- js身份证验证超强脚本
- C#与js实现去除textbox文本框里面重复记录的方法
- 原生js和jQuery写的网页选项卡特效对比