AndroidUI 引导页面的使用
2015-10-03 12:14
489 查看
一个应用程序都少不了欢迎页面和引导页面,本文主要讲如何制作一个引页面;
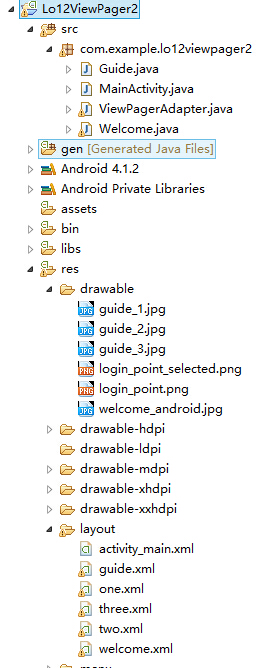
首页所有的目录结构:
新建Welcome引导页面和Activity:
<RelativeLayout xmlns:android="http://schemas.android.com/apk/res/android"
xmlns:tools="http://schemas.android.com/tools"
android:layout_width="fill_parent"
android:layout_height="fill_parent"
tools:context=".MainActivity" >
<ImageView android:layout_width="fill_parent"
android:layout_height="fill_parent"
android:background="@drawable/welcome_android"/>
</RelativeLayout>
然后是引导页面和引导页面的activity:
guide.xml:
<RelativeLayout xmlns:android="http://schemas.android.com/apk/res/android"
xmlns:tools="http://schemas.android.com/tools"
android:layout_width="fill_parent"
android:layout_height="fill_parent"
tools:context=".MainActivity" >
<android.support.v4.view.ViewPager
android:layout_width="fill_parent"
android:layout_height="fill_parent"
android:id="@+id/viewPager1"
android:background="#00000000">
</android.support.v4.view.ViewPager>
<!-- 引导页面导航按钮 -->
<LinearLayout
android:layout_width="fill_parent"
android:layout_height="wrap_content"
android:gravity="center_horizontal"
android:orientation="horizontal"
android:layout_alignParentBottom="true">
<ImageView android:id="@+id/iv1"
android:layout_width="wrap_content"
android:layout_height="wrap_content"
android:src="@drawable/login_point_selected"/>
<ImageView android:id="@+id/iv2"
android:layout_width="wrap_content"
android:layout_height="wrap_content"
android:src="@drawable/login_point"/>
<ImageView android:id="@+id/iv3"
android:layout_width="wrap_content"
android:layout_height="wrap_content"
android:src="@drawable/login_point"/>
</LinearLayout>
</RelativeLayout>
one.xml
<LinearLayout xmlns:android="http://schemas.android.com/apk/res/android"
xmlns:tools="http://schemas.android.com/tools"
android:layout_width="fill_parent"
android:layout_height="fill_parent"
tools:context=".MainActivity" >
<ImageView android:layout_width="fill_parent"
android:layout_height="fill_parent"
android:background="@drawable/guide_1"/>
</LinearLayout>
two.xml:
<RelativeLayout xmlns:android="http://schemas.android.com/apk/res/android"
xmlns:tools="http://schemas.android.com/tools"
android:layout_width="fill_parent"
android:layout_height="fill_parent"
tools:context=".MainActivity" >
<ImageView android:layout_width="fill_parent"
android:layout_height="fill_parent"
android:background="@drawable/guide_2"/>
</RelativeLayout>
trhee.xml
<RelativeLayout xmlns:android="http://schemas.android.com/apk/res/android"
xmlns:tools="http://schemas.android.com/tools"
android:layout_width="fill_parent"
android:layout_height="fill_parent"
tools:context=".MainActivity" >
<ImageView android:layout_width="fill_parent"
android:layout_height="fill_parent"
android:background="@drawable/guide_3"/>
<LinearLayout android:layout_width="fill_parent"
android:layout_height="wrap_content"
android:gravity="center_horizontal"
android:orientation="horizontal"
android:layout_alignParentBottom="true">
<!-- 进入主页面按钮 -->
<Button android:id="@+id/btnStart"
android:layout_width="wrap_content"
android:layout_height="wrap_content"
android:text="开始"/>
</LinearLayout>
</RelativeLayout>
Guide acitvity:
import java.util.ArrayList;
import java.util.List;
import android.app.Activity;
import android.content.Intent;
import android.os.Bundle;
import android.support.v4.view.ViewPager;
import android.support.v4.view.ViewPager.OnPageChangeListener;
import android.view.LayoutInflater;
import android.view.View;
import android.view.View.OnClickListener;
import android.widget.Button;
import android.widget.ImageView;
//引导页面
//1.实现引导页面三张引导图通过左右滑动屏幕可以实现切换
//2.在引导页面下面添加导航条,滑动过程中,让当前页面的导航条处于选中状态
//3.在引导页面的最后一个页面添加进入主页面按钮,点击按钮进入主页面
public class Guide extends Activity implements OnPageChangeListener {
private List<View> views;
private ViewPagerAdapter vpa;
private ViewPager vp;
private ImageView[] ivs;
private int[] ids=new int[]{R.id.iv1,R.id.iv2,R.id.iv3};
@Override
protected void onCreate(Bundle savedInstanceState) {
super.onCreate(savedInstanceState);
setContentView(R.layout.guide);
initViews();
initIvs();
}
private void initViews(){
//通过LayoutInflater 加载三个引导页面
LayoutInflater inflater=LayoutInflater.from(this);
views=new ArrayList<View>();
views.add(inflater.inflate(R.layout.one, null));
views.add(inflater.inflate(R.layout.two, null));
views.add(inflater.inflate(R.layout.three, null));
vpa=new ViewPagerAdapter(views, this);
vp=(ViewPager)findViewById(R.id.viewPager1);
vp.setAdapter(vpa);
//为ViewPager设置监听事件
vp.setOnPageChangeListener(this);
//点击第三个页面的开始按钮,进入主页面
Button btn=(Button) views.get(2).findViewById(R.id.btnStart);
btn.setOnClickListener(new OnClickListener() {
@Override
public void onClick(View v) {
Intent i=new Intent(Guide.this,MainActivity.class);
startActivity(i);
finish();
}
});
}
// 加载导航条的ImageView
private void initIvs(){
ivs=new ImageView[views.size()];
for(int i=0;i<views.size();i++){
ivs[i]=(ImageView)findViewById(ids[i]);
}
}
@Override
public void onPageScrollStateChanged(int arg0) {
}
@Override
public void onPageScrolled(int arg0, float arg1, int arg2) {
}
// ViewPager监听事件,当ViewPager页面改变的时候,设置当前导航条的状态为选中状态
@Override
public void onPageSelected(int arg0) {
for(int i=0;i<ids.length;i++){
if(arg0==i){
ivs[i].setImageResource(R.drawable.login_point_selected);
}else{
ivs[i].setImageResource(R.drawable.login_point);
}
}
}
}
ViewPagerAdapter 容器:
import java.util.List;
import android.content.Context;
import android.support.v4.view.PagerAdapter;
import android.support.v4.view.ViewPager;
import android.view.View;
// 继承自PagerAdapter,并且实现添加引导页和移除引导页的方法
public class ViewPagerAdapter extends PagerAdapter{
private List<View> views;
private Context context;
public ViewPagerAdapter(List<View> views,Context context){
this.views=views;
this.context=context;
}
@Override
public Object instantiateItem(View container, int position) {
((ViewPager)container).addView(views.get(position));
return views.get(position);
}
@Override
public void destroyItem(View container, int position, Object object) {
((ViewPager)container).removeView(views.get(position));
}
@Override
public int getCount() {
return views.size();
}
@Override
public boolean isViewFromObject(View arg0, Object arg1) {
return (arg0==arg1);
}
}
最后设置AndroidManifest.xml:
<activity
android:name="com.example.lo12viewpager2.MainActivity"
android:label="@string/app_name" >
</activity>
<activity
android:name="com.example.lo12viewpager2.Guide"
android:label="@string/app_name" >
</activity>
<activity
android:name="com.example.lo12viewpager2.Welcome"
android:label="@string/app_name" >
<intent-filter>
<action android:name="android.intent.action.MAIN" />
<category android:name="android.intent.category.LAUNCHER" />
</intent-filter>
</activity>
效果:

首页所有的目录结构:
新建Welcome引导页面和Activity:
<RelativeLayout xmlns:android="http://schemas.android.com/apk/res/android"
xmlns:tools="http://schemas.android.com/tools"
android:layout_width="fill_parent"
android:layout_height="fill_parent"
tools:context=".MainActivity" >
<ImageView android:layout_width="fill_parent"
android:layout_height="fill_parent"
android:background="@drawable/welcome_android"/>
</RelativeLayout>
import android.app.Activity;
import android.content.Intent;
import android.content.SharedPreferences;
import android.content.SharedPreferences.Editor;
import android.os.Bundle;
import android.os.Handler;
import android.os.Message;

//进入APP后的第一个欢迎页面
//欢迎页面实现如果是首次运行APP的话,将页面延时2秒后,跳转到到引导页,如果不是第一次加载的话
//则跳到主页面
public class Welcome extends Activity {

private Boolean isFirstIn=false;
private static final int GO_HOME=1000;
private static final int GO_GUIDE=1001;
private static final int TIME=2000;
@Override
protected void onCreate(Bundle savedInstanceState) {
super.onCreate(savedInstanceState);
setContentView(R.layout.welcome);
init();
}

private void init(){
SharedPreferences shared=getSharedPreferences("rock", MODE_PRIVATE);
//getBoolean 第二个参数defValue:如果Key在shared中不存在的话返回defValue
isFirstIn=shared.getBoolean("isFirstIn", true);
if(!isFirstIn){
// 延时2秒发送消息
myHandelr.sendEmptyMessageDelayed(GO_HOME, TIME);
}else{
//首次加载,保存加载记录并跳转到引导页
myHandelr.sendEmptyMessageDelayed(GO_GUIDE, TIME);
Editor editor=shared.edit();
editor.putBoolean("isFirstIn", false);
editor.commit();
}

}

//消息的处理者,handler负责将需要传递的信息封装成Message,通过调用handler对象的obtainMessage()来实现;
//将消息传递给Looper,这是通过handler对象的sendMessage()来实现的
private Handler myHandelr=new Handler(){
@Override
public void handleMessage(Message msg) {
switch (msg.what) {
case GO_HOME:
goHome();
break;
case GO_GUIDE:
goGuide();
break;
}
}
};
private void goGuide() {
Intent i=new Intent(Welcome.this,Guide.class);
startActivity(i);
finish();
}
private void goHome() {
Intent i=new Intent(Welcome.this,MainActivity.class);
startActivity(i);
finish();
}
}
然后是引导页面和引导页面的activity:
guide.xml:
<RelativeLayout xmlns:android="http://schemas.android.com/apk/res/android"
xmlns:tools="http://schemas.android.com/tools"
android:layout_width="fill_parent"
android:layout_height="fill_parent"
tools:context=".MainActivity" >
<android.support.v4.view.ViewPager
android:layout_width="fill_parent"
android:layout_height="fill_parent"
android:id="@+id/viewPager1"
android:background="#00000000">
</android.support.v4.view.ViewPager>
<!-- 引导页面导航按钮 -->
<LinearLayout
android:layout_width="fill_parent"
android:layout_height="wrap_content"
android:gravity="center_horizontal"
android:orientation="horizontal"
android:layout_alignParentBottom="true">
<ImageView android:id="@+id/iv1"
android:layout_width="wrap_content"
android:layout_height="wrap_content"
android:src="@drawable/login_point_selected"/>
<ImageView android:id="@+id/iv2"
android:layout_width="wrap_content"
android:layout_height="wrap_content"
android:src="@drawable/login_point"/>
<ImageView android:id="@+id/iv3"
android:layout_width="wrap_content"
android:layout_height="wrap_content"
android:src="@drawable/login_point"/>
</LinearLayout>
</RelativeLayout>
one.xml
<LinearLayout xmlns:android="http://schemas.android.com/apk/res/android"
xmlns:tools="http://schemas.android.com/tools"
android:layout_width="fill_parent"
android:layout_height="fill_parent"
tools:context=".MainActivity" >
<ImageView android:layout_width="fill_parent"
android:layout_height="fill_parent"
android:background="@drawable/guide_1"/>
</LinearLayout>
two.xml:
<RelativeLayout xmlns:android="http://schemas.android.com/apk/res/android"
xmlns:tools="http://schemas.android.com/tools"
android:layout_width="fill_parent"
android:layout_height="fill_parent"
tools:context=".MainActivity" >
<ImageView android:layout_width="fill_parent"
android:layout_height="fill_parent"
android:background="@drawable/guide_2"/>
</RelativeLayout>
trhee.xml
<RelativeLayout xmlns:android="http://schemas.android.com/apk/res/android"
xmlns:tools="http://schemas.android.com/tools"
android:layout_width="fill_parent"
android:layout_height="fill_parent"
tools:context=".MainActivity" >
<ImageView android:layout_width="fill_parent"
android:layout_height="fill_parent"
android:background="@drawable/guide_3"/>
<LinearLayout android:layout_width="fill_parent"
android:layout_height="wrap_content"
android:gravity="center_horizontal"
android:orientation="horizontal"
android:layout_alignParentBottom="true">
<!-- 进入主页面按钮 -->
<Button android:id="@+id/btnStart"
android:layout_width="wrap_content"
android:layout_height="wrap_content"
android:text="开始"/>
</LinearLayout>
</RelativeLayout>
Guide acitvity:
import java.util.ArrayList;
import java.util.List;
import android.app.Activity;
import android.content.Intent;
import android.os.Bundle;
import android.support.v4.view.ViewPager;
import android.support.v4.view.ViewPager.OnPageChangeListener;
import android.view.LayoutInflater;
import android.view.View;
import android.view.View.OnClickListener;
import android.widget.Button;
import android.widget.ImageView;
//引导页面
//1.实现引导页面三张引导图通过左右滑动屏幕可以实现切换
//2.在引导页面下面添加导航条,滑动过程中,让当前页面的导航条处于选中状态
//3.在引导页面的最后一个页面添加进入主页面按钮,点击按钮进入主页面
public class Guide extends Activity implements OnPageChangeListener {
private List<View> views;
private ViewPagerAdapter vpa;
private ViewPager vp;
private ImageView[] ivs;
private int[] ids=new int[]{R.id.iv1,R.id.iv2,R.id.iv3};
@Override
protected void onCreate(Bundle savedInstanceState) {
super.onCreate(savedInstanceState);
setContentView(R.layout.guide);
initViews();
initIvs();
}
private void initViews(){
//通过LayoutInflater 加载三个引导页面
LayoutInflater inflater=LayoutInflater.from(this);
views=new ArrayList<View>();
views.add(inflater.inflate(R.layout.one, null));
views.add(inflater.inflate(R.layout.two, null));
views.add(inflater.inflate(R.layout.three, null));
vpa=new ViewPagerAdapter(views, this);
vp=(ViewPager)findViewById(R.id.viewPager1);
vp.setAdapter(vpa);
//为ViewPager设置监听事件
vp.setOnPageChangeListener(this);
//点击第三个页面的开始按钮,进入主页面
Button btn=(Button) views.get(2).findViewById(R.id.btnStart);
btn.setOnClickListener(new OnClickListener() {
@Override
public void onClick(View v) {
Intent i=new Intent(Guide.this,MainActivity.class);
startActivity(i);
finish();
}
});
}
// 加载导航条的ImageView
private void initIvs(){
ivs=new ImageView[views.size()];
for(int i=0;i<views.size();i++){
ivs[i]=(ImageView)findViewById(ids[i]);
}
}
@Override
public void onPageScrollStateChanged(int arg0) {
}
@Override
public void onPageScrolled(int arg0, float arg1, int arg2) {
}
// ViewPager监听事件,当ViewPager页面改变的时候,设置当前导航条的状态为选中状态
@Override
public void onPageSelected(int arg0) {
for(int i=0;i<ids.length;i++){
if(arg0==i){
ivs[i].setImageResource(R.drawable.login_point_selected);
}else{
ivs[i].setImageResource(R.drawable.login_point);
}
}
}
}
ViewPagerAdapter 容器:
import java.util.List;
import android.content.Context;
import android.support.v4.view.PagerAdapter;
import android.support.v4.view.ViewPager;
import android.view.View;
// 继承自PagerAdapter,并且实现添加引导页和移除引导页的方法
public class ViewPagerAdapter extends PagerAdapter{
private List<View> views;
private Context context;
public ViewPagerAdapter(List<View> views,Context context){
this.views=views;
this.context=context;
}
@Override
public Object instantiateItem(View container, int position) {
((ViewPager)container).addView(views.get(position));
return views.get(position);
}
@Override
public void destroyItem(View container, int position, Object object) {
((ViewPager)container).removeView(views.get(position));
}
@Override
public int getCount() {
return views.size();
}
@Override
public boolean isViewFromObject(View arg0, Object arg1) {
return (arg0==arg1);
}
}
最后设置AndroidManifest.xml:
<activity
android:name="com.example.lo12viewpager2.MainActivity"
android:label="@string/app_name" >
</activity>
<activity
android:name="com.example.lo12viewpager2.Guide"
android:label="@string/app_name" >
</activity>
<activity
android:name="com.example.lo12viewpager2.Welcome"
android:label="@string/app_name" >
<intent-filter>
<action android:name="android.intent.action.MAIN" />
<category android:name="android.intent.category.LAUNCHER" />
</intent-filter>
</activity>
效果:

相关文章推荐
- AndroidUI 引导页面的使用
- Ant之build.xml详解
- UIPickerView组件的使用之随机点菜系统(一)——利用AutoResizing进行屏幕适配,拖线进行实现
- 34. Search for a Range (Array; Divide-and-Conquer)
- 关于[UIColor clearColor] 与控件的属性:alpha
- Property 'sqlSessionFactory' or 'sqlSessionTemplate' are required
- ZOJ 3349 Special Subsequence
- UVa694 - The Collatz Sequence:Time limit exceeded
- qemu guest agent安装研究
- OC学习笔记之Foundation框架NSNumber、NSValue和NSDate(转)
- Repeated DNA Sequences
- HDU 1159 & POJ 1458 Common Subsequence(LCS 最长公共子序列O(nlogn))
- ucGUI学习笔记之对话框
- 128. Longest Consecutive Sequence (List, Queue)
- iOS的实时搜索:UISearchBar与UISearchController
- UI:修改模拟器类型、多线程理解
- UVALive 6432 Influence // 暴力dfs
- ZOJ 3820 Building Fire Stations
- Debian Stable (Jessie 8.1) 的normal.mod not found
- hdu 5493 Queue(线段树)