引入CSS
2015-09-28 13:13
621 查看
目录
[1]外部样式 [2]内部样式 [3]行间样式
[注意]样式表中不能包含HTML标记语言,只能有CSS规则和CSS注释

[注意]若一个候选样式表没有设置title,那么它将无法在候选样式列表中出现,则无法被引用

[注意]@import必须出现在style元素中,且要放在其他CSS规则之前,否则将根本不起作用。
[注意]行间样式若存在多个style属性,只能识别第一个
// var all = document.getElementById('cnblogs_post_body').children;
var select = [];
for(var i = 1; i < all.length; i++){
if(all[i].getAttribute('id')){
if(all[i].getAttribute('id').match(/anchor\d/)){
select.push(all[i]);
}
}
}
var wheel = function(e){
e = e || event;
var data;
if(e.wheelDelta){
data = e.wheelDelta;
}else{
data = -e.detail * 40;
}
for(var i = 0; i < select.length; i++){
if(select[i].getBoundingClientRect().top > 0){
return;
}
if(select[i].getBoundingClientRect().top <= 0 && select[i+1]){
if(select[i+1].getBoundingClientRect().top > 0){
change(oCon.children[i+1])
}
}else{
change(oCon.children[select.length])
}
}
}
document.body.onmousewheel = wheel;
document.body.addEventListener('DOMMouseScroll',wheel,false);
var oCon = document.getElementById("content");
for(var i = 1; i < oCon.children.length; i++){
oCon.children[i].onmouseover = function(){
this.style.color = '#3399ff';
}
oCon.children[i].onmouseout = function(){
this.style.color = 'inherit';
if(this.mark){
this.style.color = '#3399ff';
}
}
oCon.children[i].onclick = function(){
change(this);
}
}
function change(_this){
for(var i = 1; i < oCon.children.length; i++){
oCon.children[i].mark = false;
oCon.children[i].style.color = 'inherit';
oCon.children[i].style.textDecoration = 'none';
oCon.children[i].style.borderColor = 'transparent';
}
_this.mark = true;
_this.style.color = '#3399ff';
_this.style.textDecoration = 'underline';
_this.style.borderColor = '#2175bc';
}
// ]]>
[1]外部样式 [2]内部样式 [3]行间样式
前面的话
Web早期,HTML是一种很有限的语言,这种语言不关心外观,它只是一种简洁的小型标记机制。随着Mosaic网页浏览器的出现,网站开始到处涌现。对于页面改变外观的需求增加,于是增加了类似<font>和<big>之类的标记元素。几年之后,大多数网站标记几乎完全由表格和font元素组成,且对于所要表现的内容不能传达任何实际含义,使文档可用性降低,且不易于维护。于是1995年,W3C发布了CSS草案,试图解决结构与样式混杂的问题;1996年,W3C正式推出CSS1;1998年,推出CSS2。2001年从CSS3开始,CSS这门语言分割成多个独立的模块,每个模块独立分级,且只包含一小部分功能;2011年开始设计CSS4。外部样式表
使用link标记
在link标记中rel和href属性是必须的,type属性和media属性可省略<link rel="stylesheet" type="text/css" href="sheet1.css" media="all" />
<!DOCTYPE html>
<html lang="en">
<head>
<meta charset="UTF-8">
<link rel="stylesheet" href="sheet1.css">
<title>Document</title>
</head>
<body></body>
</html>
body{
background-color: red;
}
[注意]样式表中不能包含HTML标记语言,只能有CSS规则和CSS注释
/*若CSS文件中存在除了CSS样式和CSS注释的其他标记,则会导致在该标记后面的CSS样式将无法被识别*/
<style></style>
body{
background-color: red;
}
多个样式表
一个文档可能关联多个样式表,如果是这样,文档最初显示时只会使用rel为stylesheet的link标记<link rel="stylesheet" href="sheet1.css" /> <link rel="stylesheet" href="sheet2.css" />
<!DOCTYPE html>
<html lang="en">
<head>
<meta charset="UTF-8">
<link rel="stylesheet" href="sheet1.css">
<link rel="stylesheet" href="sheet2.css">
<title>Document</title>
</head>
<body>
</body>
</html>
/*sheet1*/
body{
background-color: red;
}
/*sheet2*/
body{
height: 100px;
border: 10px solid black;
}
候选样式表
将rel属性的设置为alternate stylesheet可以定义候选样式表,只有在用户选择这个样式表时才会用于文档表现。如果浏览器能使用候选样式表,它会使用link元素的title属性值生成一个候选样式列表,可在菜单栏中查看->样式中进行选择。(IE和firefox支持)[注意]若一个候选样式表没有设置title,那么它将无法在候选样式列表中出现,则无法被引用
<link rel="stylesheet" type="text/css" href="sheet1.css" />
<link rel="alternate stylesheet" type="text/css" href="sheet2.css" title="sheet2"/>
<!DOCTYPE html>
<html lang="en">
<head>
<meta charset="UTF-8">
<link rel="stylesheet" type="text/css" href="sheet1.css" />
<link rel="alternate stylesheet" type="text/css" href="sheet2.css" title="sheet2"/>
<title>Document</title>
</head>
<body>
</body>
</html>
/*sheet1*/
body{
background-color: red;
}
/*sheet2*/
body{
height: 100px;
border: 10px solid black;
}
内部样式表
使用style元素
内部样式表需要使用<style>元素包含样式表,它在文档中单独出现。<!DOCTYPE html>
<html lang="en">
<head>
<meta charset="UTF-8">
<style>
body{ background-color: red; }
</style>
<title>Document</title>
</head>
<body>
</body>
</html>
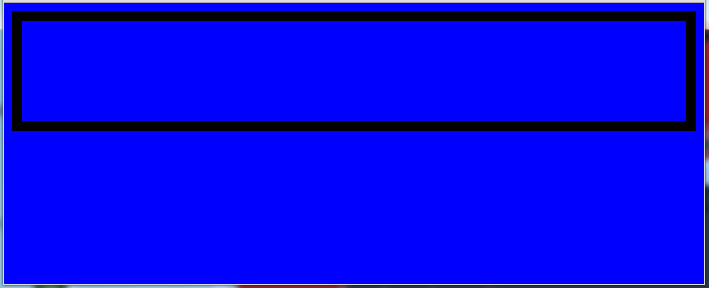
多个style标签
文档中可出现多个style标签,且样式规则与层叠样式规则一致<!DOCTYPE html>
<html lang="en">
<head>
<meta charset="UTF-8">
<style>
body{ background-color: red; }
</style>
<style>
body{
background-color: blue;
height: 100px;
border: 10px solid black;
}
</style>
<title>Document</title>
</head>
<body>
</body>
</html>
使用@import指令
与link类似,@import指令用于指示Web浏览器加载一个外部样式表,并在表现HTML文档时使用其样式。唯一的区别在于命令的具体语法和位置。@import指令常用于样式表需要使用另一个样式表中的样式的情况。<style>
@import url(sheet2.css);
body{ background-color: red; }
</style>
[注意]@import必须出现在style元素中,且要放在其他CSS规则之前,否则将根本不起作用。
<!DOCTYPE html>
<html lang="en">
<head>
<meta charset="UTF-8">
<style>
/*将@import放置在CSS规则之后将不起使用*/
body{
background-color: red;
}
@import url(sheet2.css);
</style>
<title>Document</title>
</head>
<body>
</body>
</html>
多个@import指令
可以使用@import指令导入多个CSS样式表,且可以使用media来限制应用场景。<!DOCTYPE html> <html lang="en"> <head> <meta charset="UTF-8"> <style> @import url(sheet1.css) all; @import url(sheet2.css); </style> <title>Document</title> </head> <body> </body> </html>
行间样式(内联样式)
如果只是想为单个元素指定一些样式,而不需要嵌套或外部样式表,可以使用HTML的style属性来设置一个行间样式。<!DOCTYPE html> <html lang="en"> <head> <meta charset="UTF-8"> <title>Document</title> </head> <body style="background-color: red; height: 100px; border: 10px solid black;" style="background-color: red;"> </body> </html>
[注意]行间样式若存在多个style属性,只能识别第一个
<!DOCTYPE html>
<html lang="en">
<head>
<meta charset="UTF-8">
<title>Document</title>
</head>
<!-- 只能识别第一个style属性的值,所以页面显示为红色-->
<body style="background-color: red; height: 100px; border: 10px solid black;" style="background-color: blue;">
</body>
</html>
// var all = document.getElementById('cnblogs_post_body').children;
var select = [];
for(var i = 1; i < all.length; i++){
if(all[i].getAttribute('id')){
if(all[i].getAttribute('id').match(/anchor\d/)){
select.push(all[i]);
}
}
}
var wheel = function(e){
e = e || event;
var data;
if(e.wheelDelta){
data = e.wheelDelta;
}else{
data = -e.detail * 40;
}
for(var i = 0; i < select.length; i++){
if(select[i].getBoundingClientRect().top > 0){
return;
}
if(select[i].getBoundingClientRect().top <= 0 && select[i+1]){
if(select[i+1].getBoundingClientRect().top > 0){
change(oCon.children[i+1])
}
}else{
change(oCon.children[select.length])
}
}
}
document.body.onmousewheel = wheel;
document.body.addEventListener('DOMMouseScroll',wheel,false);
var oCon = document.getElementById("content");
for(var i = 1; i < oCon.children.length; i++){
oCon.children[i].onmouseover = function(){
this.style.color = '#3399ff';
}
oCon.children[i].onmouseout = function(){
this.style.color = 'inherit';
if(this.mark){
this.style.color = '#3399ff';
}
}
oCon.children[i].onclick = function(){
change(this);
}
}
function change(_this){
for(var i = 1; i < oCon.children.length; i++){
oCon.children[i].mark = false;
oCon.children[i].style.color = 'inherit';
oCon.children[i].style.textDecoration = 'none';
oCon.children[i].style.borderColor = 'transparent';
}
_this.mark = true;
_this.style.color = '#3399ff';
_this.style.textDecoration = 'underline';
_this.style.borderColor = '#2175bc';
}
// ]]>

相关文章推荐
- CSS图像替换技术的几种方案介绍
- CSS的半透明处理
- 浅谈CSS中overflow清除浮动的用法
- CSS的一些圆角图形实例分享
- js实现分页列表添加样式
- 判断手机旋转代码 屏幕旋转的事件和样式
- CSS的position属性详解
- CSS的定位原理
- CSS3绘制圆角矩形的简单示例
- CSS实现菜单背景自适应宽度的方法
- CSS3 Filter详解(改变模糊度 亮度 透明度等方法)
- css
- 改写控件之《仿iOS滑动枷锁样式的登录》
- 改写控件之《仿iOS滑动枷锁样式的登录》
- css 中使用 z-index + absolute控制层的堆叠
- 用css写三角
- CSS-3 Transition 的使用
- CSS属性小结之--半透明处理
- Web前端HTML+CSS+JS初级入门视频课程 001
- CSS 框模型概述