0825Android基础ListView自定义Adapter优化
2015-08-25 21:08
399 查看
用convertView进行了内存的优化
ListView中,一般除了显示的几个View外会提前缓存好两个view,之前的方法是一直findviewbyid。现在用convertView将滚动出屏幕的View重新利用到缓存中,不必每次都进行findviewbyid,减少内存的占用。这次的Demo添加了checkbox,如果不设置他的点击事件的话,没法得到checkbox的状态,所以要设置点击事件,然后用mManagerCheckBox数组来放checkbox的状态。
public View getView(final int position, View convertView, ViewGroup parent) {
Fruit fruit = mFruits.get(position);
//        局部变量赋初值
ViewHolder vh = null;
if (convertView == null) {
//          vh必须new一个,不然会报空指针
vh=new ViewHolder();
convertView = mInflater.inflate(R.layout.fruit_item_list, null);
vh.checkBox = (CheckBox) convertView.findViewById(R.id.checkbox);
vh.img_fruit = (ImageView) convertView.findViewById(R.id.img_fruit);
vh.tv_fruit = (TextView) convertView.findViewById(R.id.tv_fruit);
convertView.setTag(vh);
} else {
vh = (ViewHolder) convertView.getTag();
}
vh.img_fruit.setImageResource(fruit.getImg());
vh.tv_fruit.setText(fruit.getName());
vh.checkBox.setOnCheckedChangeListener(new CompoundButton.OnCheckedChangeListener() {
@Override
public void onCheckedChanged(CompoundButton buttonView, boolean isChecked) {
//              position是局部变量,然后这是匿名内部类,所以要传入的话只能用fianl修饰变成常量

//                在FruitAdapter中设置isCheck
mManagerCheckBox[position]=isChecked;
//              刷新屏幕
notifyDataSetChanged();
}
});
vh.checkBox.setChecked(mManagerCheckBox[position]);
return convertView;
}
//      缓存用到的数据,下次用直接调用,不需要再次find
class ViewHolder {
CheckBox checkBox;
ImageView img_fruit;
TextView tv_fruit;
}
}
添加header和footer
需要注意的是要将addHeaderView和addFooterView放在setAdapter的前面。另外如果添加了header以后ListView的点击事件setOnItemClickListener中的position要-1,因为这个点击事件中默认把Header设在第一个位置上通过LayoutInflater对布局进行动态加载
获得所得View中的按键
用addHeaderView和addFooterView添加到ListView中
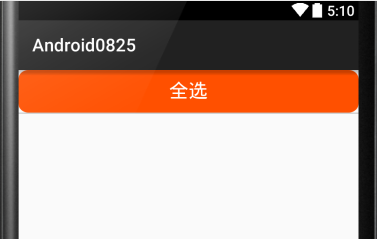
设置点击事件(此处设置了全选和反选,涉及到checkbox的状态,所以点击事件的方法写在适配器中比较方便控制checkbox的状态)
相应代码
//       获得并添加header,注意添加了header后listview的setOnItemClickListener中position要-1
//        因为setOnItemClickListener中默认把header作为第一个.其他的方法中positon不需要改变
//        见53,55
mHeadView=mInflater.inflate(R.layout.fruit_head,null);
mBtn_check_all= (Button) mHeadView.findViewById(R.id.btn_check_all);
mListView.addHeaderView(mHeadView);
//       获得并添加footer
mFootView=mInflater.inflate(R.layout.fruit_foot,null);
mBtn_invert_check= (Button) mFootView.findViewById(R.id.btn_invert_check);
mListView.addFooterView(mFootView);
//       添加mHeaderView和mFootView的点击事件
mBtn_check_all.setOnClickListener(new View.OnClickListener() {
@Override
public void onClick(View v) {
mAdapter.checkAll();
}
});
mBtn_invert_check.setOnClickListener(new View.OnClickListener() {
@Override
public void onClick(View v) {
mAdapter.invertCheck();
}
});

//对应的点击事件存在FruitAdapter中
//    全选
public void checkAll(){
for (int i=0;i<mManagerCheckBox.length;i++){
mManagerCheckBox[i]=true;
}
notifyDataSetChanged();
}
//     反选
public void invertCheck(){
for (int i=0;i<mManagerCheckBox.length;i++){
mManagerCheckBox[i]=!mManagerCheckBox[i];
}
notifyDataSetChanged();
}
将checkboxd的点击范围扩大到整个View
点击checkbox以外的地方也要能选中checkbox,即设置ListView的点击事件,使ListView的点击事件关联到checkbox的点击事件。也是通过控制改变checkbox的状态来控制。方法还是放在适配器中。需要注意的是,要将checkbox做以下设置: android:focusable=”false”,如果不这样设置的话ListView的点击事件就会被checkbox抢占,也就是无法触发ListView点击事件。这里这样设置的效果是checkbox将本界面除他以外的点击事件传递给LiseView,也就是可以触发ListView的点击事件。
代码如下
mListView.setOnItemClickListener(new AdapterView.OnItemClickListener() {
@Override
public void onItemClick(AdapterView<?> parent, View view, int position, long id) {
//                调用适配器中扩展checkbox点击范围的方法
mAdapter.expandClickArea(position-1);
}
});

//方法
public void expandClickArea(int position){
//        点击后只能变为true,无法由true变为false
//        mManagerCheckBox[position]=true;
//        点击则true/false交替变化
mManagerCheckBox[position]=!mManagerCheckBox[position];
//        刷新界面,设置下面85行相应的checkbox为true或者false.他是BaseAdapter的一个方法
notifyDataSetChanged();
}
一个小知识点:ListView中android:divider=”@color/grey”; android:dividerHeight=”2dp”分别设置插入线,以及插入线的宽度和颜色。
全文代码如下//自定义水果适配器
public class FruitAdapter extends BaseAdapter {
private LayoutInflater mInflater;
private List<Fruit> mFruits;
private boolean[] mManagerCheckBox;
public FruitAdapter(LayoutInflater mInflater, List<Fruit> mFruits) {
this.mInflater = mInflater;
this.mFruits = mFruits;
mManagerCheckBox=new boolean[mFruits.size()];
}
// 全选
public void checkAll(){
for (int i=0;i<mManagerCheckBox.length;i++){
mManagerCheckBox[i]=true;
}
notifyDataSetChanged();
}
// 反选
public void invertCheck(){
for (int i=0;i<mManagerCheckBox.length;i++){
mManagerCheckBox[i]=!mManagerCheckBox[i];
}
notifyDataSetChanged();
}
// 扩大checkbox点击范围
public void expandClickArea(int position){
// 点击后只能变为true,无法由true变为false
// mManagerCheckBox[position]=true;
// 点击则true/false交替变化
mManagerCheckBox[position]=!mManagerCheckBox[position];
// 刷新界面,设置下面85行相应的checkbox为true或者false.他是BaseAdapter的一个方法
notifyDataSetChanged();
}
@Override
public int getCount() {
return mFruits.size();
}
@Override
public Object getItem(int position) {
return position;
}
@Override
public long getItemId(int position) {
return position;
}
@Override
public View getView(final int position, View convertView, ViewGroup parent) {
Fruit fruit = mFruits.get(position);
// 局部变量赋初值
ViewHolder vh = null;
if (convertView == null) {
// vh必须new一个,不然会报空指针
vh=new ViewHolder();
convertView = mInflater.inflate(R.layout.fruit_item_list, null);
vh.checkBox = (CheckBox) convertView.findViewById(R.id.checkbox);
vh.img_fruit = (ImageView) convertView.findViewById(R.id.img_fruit);
vh.tv_fruit = (TextView) convertView.findViewById(R.id.tv_fruit);
convertView.setTag(vh);
} else {
vh = (ViewHolder) convertView.getTag();
}
vh.img_fruit.setImageResource(fruit.getImg());
vh.tv_fruit.setText(fruit.getName());
vh.checkBox.setOnCheckedChangeListener(new CompoundButton.OnCheckedChangeListener() {
@Override
public void onCheckedChanged(CompoundButton buttonView, boolean isChecked) {
// position是局部变量,然后这是匿名内部类,所以要传入的话只能用fianl修饰变成常量
// 在FruitAdapter中设置isCheck
mManagerCheckBox[position]=isChecked;
// 刷新屏幕
notifyDataSetChanged();
}
});
// vh.checkBox.setChecked(fruit.getIsCheck());
vh.checkBox.setChecked(mManagerCheckBox[position]);
return convertView;
}
// 缓存用到的数据,下次用直接调用,不需要再次find
class ViewHolder {
CheckBox checkBox;
ImageView img_fruit;
TextView tv_fruit;
}
}
//水果类
public class Fruit {
private String name;
private int img;
public Fruit(String name, int img) {
this.name = name;
this.img = img;
}
public int getImg() {
return img;
}
public void setImg(int img) {
this.img = img;
}
public String getName() {
return name;
}
public void setName(String name) {
this.name = name;
}
}
//ListView布局
<LinearLayout xmlns:android="http://schemas.android.com/apk/res/android"
xmlns:tools="http://schemas.android.com/tools"
android:layout_width="match_parent"
android:layout_height="match_parent"
android:orientation="vertical"
android:paddingBottom="@dimen/activity_vertical_margin"
android:paddingLeft="@dimen/activity_horizontal_margin"
android:paddingRight="@dimen/activity_horizontal_margin"
android:paddingTop="@dimen/activity_vertical_margin"
tools:context=".MainActivity">
<ListView
android:id="@+id/listView"
android:layout_width="match_parent"
android:layout_height="match_parent"
android:divider="@color/grey"
android:dividerHeight="2dp"></ListView>
</LinearLayout>
//自定义的View
<?xml version="1.0" encoding="utf-8"?>
<LinearLayout xmlns:android="http://schemas.android.com/apk/res/android"
android:layout_width="match_parent"
android:layout_height="match_parent"
android:gravity="center_vertical"
android:orientation="horizontal">
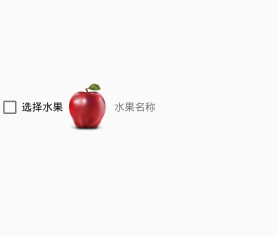
<CheckBox
android:id="@+id/checkbox"
android:layout_width="wrap_content"
android:layout_height="wrap_content"
android:focusable="false"
android:text="选择水果" />
<ImageView
android:id="@+id/img_fruit"
android:layout_width="wrap_content"
android:layout_height="wrap_content"
android:src="@mipmap/apple" />
<TextView
android:id="@+id/tv_fruit"
android:layout_width="wrap_content"
android:layout_height="wrap_content"
android:layout_margin="5dp"
android:text="水果名称" />
</LinearLayout>
//添加的header和footer
<?xml version="1.0" encoding="utf-8"?>
<LinearLayout xmlns:android="http://schemas.android.com/apk/res/android"
android:layout_width="match_parent"
android:layout_height="match_parent"
android:orientation="vertical">

<Button
android:id="@+id/btn_invert_check"
android:layout_width="match_parent"
android:layout_height="wrap_content"
android:background="@drawable/button_orange"
android:text="反选"
android:textColor="#ffffff"
android:textAppearance="@android:style/TextAppearance.Large"/>
</LinearLayout>

<?xml version="1.0" encoding="utf-8"?>
<LinearLayout xmlns:android="http://schemas.android.com/apk/res/android"
android:orientation="vertical" android:layout_width="match_parent"
android:layout_height="match_parent">
<Button
android:id="@+id/btn_check_all"
android:layout_width="match_parent"
android:layout_height="wrap_content"
android:background="@drawable/button_orange"
android:text="全选"
android:textColor="#ffffff"
android:textAppearance="@android:style/TextAppearance.Large"/>
</LinearLayout>


//button_orange.xml
<?xml version="1.0" encoding="utf-8"?>
<selector xmlns:android="http://schemas.android.com/apk/res/android">
<item android:drawable="@mipmap/buttom_click" android:state_pressed="true"/>
<item android:drawable="@mipmap/buttom"/>
</selector>

//活动
public class MainActivity extends Activity {
private List<Fruit> mFruits;
private ListView mListView;
private FruitAdapter mAdapter;
private LayoutInflater mInflater;
private View mHeadView;
private View mFootView;
private Button mBtn_check_all;
private Button mBtn_invert_check;

@Override
protected void onCreate(Bundle savedInstanceState) {
super.onCreate(savedInstanceState);
setContentView(R.layout.activity_main);
mListView = (ListView) findViewById(R.id.listView);
//      LayoutInflater的方法只能在活动中调用,适配器是个类没有这个方法
mInflater=getLayoutInflater();
initmFruit();
mAdapter=new FruitAdapter(mInflater,mFruits);
//       获得并添加header,注意添加了header后listview的setOnItemClickListener中position要-1
//        因为setOnItemClickListener中默认把header作为第一个.其他的方法中positon不需要改变
//        见53,55
mHeadView=mInflater.inflate(R.layout.fruit_head,null);
mBtn_check_all= (Button) mHeadView.findViewById(R.id.btn_check_all);
mListView.addHeaderView(mHeadView);
//       获得并添加footer
mFootView=mInflater.inflate(R.layout.fruit_foot,null);
mBtn_invert_check= (Button) mFootView.findViewById(R.id.btn_invert_check);
mListView.addFooterView(mFootView);
//        addfooterview和addheaderview必须要在setadapter之前
mListView.setAdapter(mAdapter);
mListView.setOnItemClickListener(new AdapterView.OnItemClickListener() {
@Override
public void onItemClick(AdapterView<?> parent, View view, int position, long id) {
//                调用适配器中扩展checkbox点击范围的方法
mAdapter.expandClickArea(position-1);
}
});
//       添加mHeaderView和mFootView的点击事件
mBtn_check_all.setOnClickListener(new View.OnClickListener() {
@Override
public void onClick(View v) {
mAdapter.checkAll();
}
});
mBtn_invert_check.setOnClickListener(new View.OnClickListener() {
@Override
public void onClick(View v) {
mAdapter.invertCheck();
}
});
}

private void initmFruit() {
mFruits = new ArrayList<>();
for (int i = 0; i < 10; i++) {
//          这三个要放在for里面,放在for外面的话每次循环的都只有三个一样的对象
Fruit apple = new Fruit("apple", R.mipmap.apple);
Fruit lemon = new Fruit("lemon", R.mipmap.lemon);
Fruit orange = new Fruit("orange", R.mipmap.orange);
mFruits.add(apple);
mFruits.add(lemon);
mFruits.add(orange);
}
}
}


相关文章推荐
- Android Studio开发入门-引用jar及so文件
- 【请求加密】android ios java后台通用DES base64加密
- Android-实现图片的简单特效(平移、缩放、旋转、镜面、倒影)
- Android-基本控件(Toast 全解)
- Android中asset文件夹和raw文件夹区别
- [Android]代码实现ColorStateList及StateListDrawable
- Android学习 之 ColorStateList按钮文字变色
- Android控件之ListView
- Android帧率测试
- Android-基本控件(Ratingbar 实现)
- Android的重要控件ListView的诸多问题处理方案
- Android-实现简单画图画板
- Android学习之Intent过滤器的使用
- Android-从图库中加载图片到屏幕并在上面画图
- Android下SQLite数据库学习笔记5——Android下数据库的事务
- Android笔记 4
- Android 内存溢出解决方案(OOM) 整理总结
- Android 记录的(MediaRecorder)而播放(MediaPlayer)
- Android之ListView原理学习与优化总结
- android4.3 SDK控制动态显示导航栏(NavigationBar)
