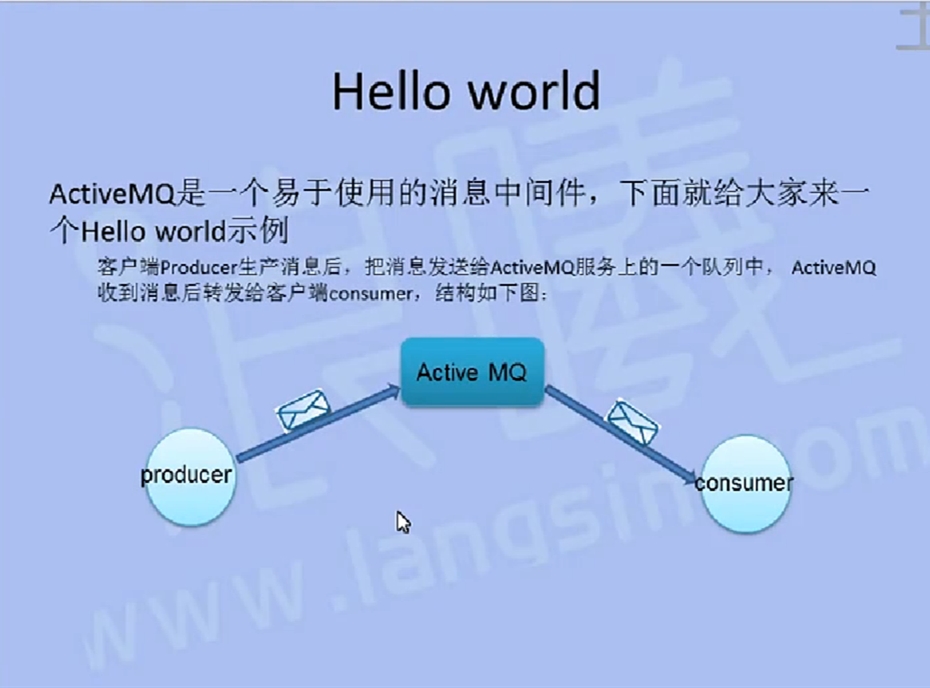
ActiveMQ消息中间件Producer和Consumer
2015-08-18 18:08
369 查看

生产者代码:
package com.java1234.activemq;

import javax.jms.Connection;
import javax.jms.ConnectionFactory;
import javax.jms.Destination;
import javax.jms.JMSException;
import javax.jms.MessageProducer;
import javax.jms.Session;
import javax.jms.TextMessage;

import org.apache.activemq.ActiveMQConnection;
import org.apache.activemq.ActiveMQConnectionFactory;

/**
* 消息生产者
* @author Administrator
*
*/
public class JMSProducer {

private static final String USERNAME=ActiveMQConnection.DEFAULT_USER; // 默认的连接用户名
private static final String PASSWORD=ActiveMQConnection.DEFAULT_PASSWORD; // 默认的连接密码
private static final String BROKEURL=ActiveMQConnection.DEFAULT_BROKER_URL; // 默认的连接地址
private static final int SENDNUM=10; // 发送的消息数量

public static void main(String[] args) {

ConnectionFactory connectionFactory; // 连接工厂
Connection connection = null; // 连接
Session session; // 会话 接受或者发送消息的线程
Destination destination; // 消息的目的地
MessageProducer messageProducer; // 消息生产者

// 实例化连接工厂
connectionFactory=new ActiveMQConnectionFactory(JMSProducer.USERNAME, JMSProducer.PASSWORD, JMSProducer.BROKEURL);

try {
connection=connectionFactory.createConnection(); // 通过连接工厂获取连接
connection.start(); // 启动连接
session=connection.createSession(Boolean.TRUE, Session.AUTO_ACKNOWLEDGE); // 创建Session
destination=session.createQueue("FirstQueue1"); // 创建消息队列
messageProducer=session.createProducer(destination); // 创建消息生产者
sendMessage(session, messageProducer); // 发送消息
session.commit();
} catch (Exception e) {
// TODO Auto-generated catch block
e.printStackTrace();
} finally{
if(connection!=null){
try {
connection.close();
} catch (JMSException e) {
// TODO Auto-generated catch block
e.printStackTrace();
}
}
}
}

/**
* 发送消息
* @param session
* @param messageProducer
* @throws Exception
*/
public static void sendMessage(Session session,MessageProducer messageProducer)throws Exception{
for(int i=0;i<JMSProducer.SENDNUM;i++){
TextMessage message=session.createTextMessage("ActiveMQ 发送的消息"+i);
System.out.println("发送消息:"+"ActiveMQ 发送的消息"+i);
messageProducer.send(message);
}
}
}
消费者分两种:
1.主动接受消息[b]receive()[/b]
package com.java1234.activemq;

import javax.jms.Connection;
import javax.jms.ConnectionFactory;
import javax.jms.Destination;
import javax.jms.JMSException;
import javax.jms.MessageConsumer;
import javax.jms.Session;
import javax.jms.TextMessage;

import org.apache.activemq.ActiveMQConnection;
import org.apache.activemq.ActiveMQConnectionFactory;

/**
* 消息消费者
* @author Administrator
*
*/
public class JMSConsumer {

private static final String USERNAME=ActiveMQConnection.DEFAULT_USER; // 默认的连接用户名
private static final String PASSWORD=ActiveMQConnection.DEFAULT_PASSWORD; // 默认的连接密码
private static final String BROKEURL=ActiveMQConnection.DEFAULT_BROKER_URL; // 默认的连接地址

public static void main(String[] args) {
ConnectionFactory connectionFactory; // 连接工厂
Connection connection = null; // 连接
Session session; // 会话 接受或者发送消息的线程
Destination destination; // 消息的目的地
MessageConsumer messageConsumer; // 消息的消费者

// 实例化连接工厂
connectionFactory=new ActiveMQConnectionFactory(JMSConsumer.USERNAME, JMSConsumer.PASSWORD, JMSConsumer.BROKEURL);

try {
connection=connectionFactory.createConnection();  // 通过连接工厂获取连接
connection.start(); // 启动连接
session=connection.createSession(Boolean.FALSE, Session.AUTO_ACKNOWLEDGE); // 创建Session
destination=session.createQueue("FirstQueue1");  // 创建连接的消息队列
messageConsumer=session.createConsumer(destination); // 创建消息消费者
while(true){
TextMessage textMessage=(TextMessage)messageConsumer.receive(100000);
if(textMessage!=null){
System.out.println("收到的消息:"+textMessage.getText());
}else{
break;
}
}
} catch (JMSException e) {
// TODO Auto-generated catch block
e.printStackTrace();
}
}
}2.使用listener被动监听消息(非阻塞的)(观察者模式)Listener代码
package com.java1234.activemq;

import javax.jms.JMSException;
import javax.jms.Message;
import javax.jms.MessageListener;
import javax.jms.TextMessage;

/**
* 消息监听
* @author Administrator
*
*/
public class Listener implements MessageListener{

@Override
public void onMessage(Message message) {
// TODO Auto-generated method stub
try {
System.out.println("收到的消息:"+((TextMessage)message).getText());
} catch (JMSException e) {
// TODO Auto-generated catch block
e.printStackTrace();
}
}

}
package com.java1234.activemq;
import javax.jms.Connection;
import javax.jms.ConnectionFactory;
import javax.jms.Destination;
import javax.jms.JMSException;
import javax.jms.MessageConsumer;
import javax.jms.Session;
import javax.jms.TextMessage;
import org.apache.activemq.ActiveMQConnection;
import org.apache.activemq.ActiveMQConnectionFactory;
/**
* 消息消费者
* @author Administrator
*
*/
public class JMSConsumer2 {
private static final String USERNAME=ActiveMQConnection.DEFAULT_USER; // 默认的连接用户名
private static final String PASSWORD=ActiveMQConnection.DEFAULT_PASSWORD; // 默认的连接密码
private static final String BROKEURL=ActiveMQConnection.DEFAULT_BROKER_URL; // 默认的连接地址
public static void main(String[] args) {
ConnectionFactory connectionFactory; // 连接工厂
Connection connection = null; // 连接
Session session; // 会话 接受或者发送消息的线程
Destination destination; // 消息的目的地
MessageConsumer messageConsumer; // 消息的消费者
// 实例化连接工厂
connectionFactory=new ActiveMQConnectionFactory(JMSConsumer2.USERNAME, JMSConsumer2.PASSWORD, JMSConsumer2.BROKEURL);
try {
connection=connectionFactory.createConnection(); // 通过连接工厂获取连接
connection.start(); // 启动连接
session=connection.createSession(Boolean.FALSE, Session.AUTO_ACKNOWLEDGE); // 创建Session
destination=session.createQueue("FirstQueue1"); // 创建连接的消息队列
messageConsumer=session.createConsumer(destination); // 创建消息消费者
messageConsumer.setMessageListener(new Listener()); // 注册消息监听
} catch (JMSException e) {
// TODO Auto-generated catch block
e.printStackTrace();
}
}
}如果想主动的去接受消息,而不用异步消息监听的话,把consumer.setMessageListener(this)改为Message message = consumer.receive(),手动去调用MessageConsumer的receive方法即可。
参考文章:
http://blog.csdn.net/courage89/article/details/8809551
相关文章推荐
- 解析ActiveMQ的使用说明总结
- ActiveMQ发消息、收消息、持久化,查询队列剩余消息数、出队数的实现
- activemq报EOFExceptionjvm错误
- 基于zookeeper+leveldb搭建activemq集群
- ActiveMQ 实例
- Ubuntu 14.04.1 安装 activemq 5.11.1
- 在Spring中使用ActiveMQ发送邮件
- 多个地市连接MQ,如果较长时间没有消息发送,ActiveMQ的消费端会自动断开连接(topic端)
- JMS和消息驱动Bean(MDB)
- JMS_使用ActiveMQ实现消息的发送和接收
- ActiveMQ 消息游标
- ActiveMQ 生产者流量控制
- ActiveMQ 全排序(Total Ordering)
- ActiveMQ 使用笔记
- ActiveMq 不能正确获取有过期时间的消息的原因
- Spring JMS笔记
- Spring和Apache CXF,ActiveMQ整合记录
- 解决apache activemq 前端推送延迟问题
- ActiveMQ
- ActiveMQ 启动Broker
