Android自定义Dialog
2015-05-11 16:03
253 查看
简单说明下为什么要自定义Dialog
因为之前项目用的都是Android系统提供的AlertDialog来做对话框。那么问题就来了,如果这时需求要改变弹出框的样式呢?哈哈,恭喜你中奖了。首先,你可能会想到使用Android的Style样式去自定义弹出框的样式,这样可以不改变Java代码,只需要改Style样式文件就可以了,想法很不错,现实很残酷。(我自己摸索大半天这种配制,改样式很难控制,而且很难达到效果,也可能是我水平有限,若有大神有好的办法,还请指教)基于以上说的几点,在项目开始的时候,我们就应该写好通用的Dialog。好吧,不多扯,开工!先看效果图: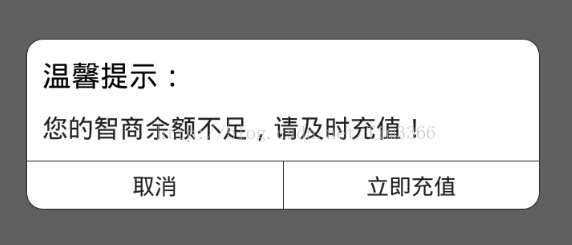
首先我们要写个MyDialog类继承Dialog,代码如下:
public class MyDialog extends Dialog {

private TextView tv_title;
private TextView tv_msg;
private Button btn_cancel;
private Button btn_ok;

private View.OnClickListener btn_ok_listener;
private View.OnClickListener btn_cancel_listener;

private String title;
private String msg;
private String ok;
private String cancel;

public MyDialog(Context context) {
super(context, R.style.MyDialogTheme);
}

@Override
protected void onCreate(Bundle savedInstanceState) {
super.onCreate(savedInstanceState);

setContentView(R.layout.view_my_alert_dialog);
getWindow().setBackgroundDrawableResource(android.R.color.transparent); //注意,我们是有圆角的,设置透明,可以将四个角透明掉。
this.setCancelable(false);

//初始化控件
tv_title = (TextView) findViewById(R.id.tv_title);
tv_msg = (TextView) findViewById(R.id.tv_msg);
btn_cancel = (Button) findViewById(R.id.btn_cancel);
btn_ok = (Button) findViewById(R.id.btn_ok);

btn_ok.setText(ok);
btn_cancel.setText(cancel);
tv_title.setText(title);
tv_msg.setText(msg);

//设置 OK And Cancel OnClickListener
btn_ok.setOnClickListener(new View.OnClickListener() {
@Override
public void onClick(View v) {
if (btn_ok_listener != null) {
btn_ok_listener.onClick(btn_ok);
}
}
});

btn_cancel.setOnClickListener(new View.OnClickListener() {
@Override
public void onClick(View v) {
if (btn_cancel_listener != null) {
btn_cancel_listener.onClick(btn_cancel);
}
}
});
}

/**
* 设置OnOKClickListener
*
* @param ok
* @param onClickListener
* @return
*/
public MyDialog setButtonOK(String ok, View.OnClickListener onClickListener) {
this.ok = ok;
btn_ok_listener = onClickListener;
return this;
}

/**

4000
* 设置OnCancelClickListener
*
* @param cancel
* @param onClickListener
* @return
*/
public MyDialog setButtonCancel(String cancel, View.OnClickListener onClickListener) {
this.cancel = cancel;
btn_cancel_listener = onClickListener;
return this;
}

/**
* 设置标题
*
* @param title
* @return
*/
public MyDialog setTitle(String title) {
this.title = title;
return this;
}

/**
* 设置消息
*
* @param msg
* @return
*/
public MyDialog setMsg(String msg) {
this.msg = msg;
return this;
}
}
然后我们来实现布局(很简单不用多说) R.layout.view_my_alert_dialog
<?xml version="1.0" encoding="utf-8"?><LinearLayout xmlns:android="http://schemas.android.com/apk/res/android"android:layout_width="wrap_content"android:layout_height="wrap_content"android:background="@drawable/bg_dialog"android:orientation="vertical"><TextViewandroid:id="@+id/tv_title"android:layout_width="match_parent"android:layout_height="wrap_content"android:layout_margin="10dp"android:textColor="#000"android:textSize="18sp" /><TextViewandroid:id="@+id/tv_msg"android:layout_width="match_parent"android:layout_height="wrap_content"android:layout_marginLeft="10dp"android:layout_marginRight="10dp"android:textSize="16sp" /><Viewandroid:layout_width="match_parent"android:layout_height="0.1dp"android:layout_marginTop="10dp"android:background="#222" /><LinearLayoutandroid:layout_width="match_parent"android:layout_height="wrap_content"android:orientation="horizontal"><Buttonandroid:id="@+id/btn_cancel"android:layout_width="match_parent"android:layout_height="30dp"android:layout_weight="1"android:background="@null" /><Viewandroid:layout_width="0.1dp"android:layout_height="match_parent"android:background="#222" /><Buttonandroid:id="@+id/btn_ok"android:layout_width="match_parent"android:layout_height="30dp"android:layout_weight="1"android:background="@null" /></LinearLayout></LinearLayout>
圆角背景
<?xml version="1.0" encoding="utf-8"?><shape xmlns:android="http://schemas.android.com/apk/res/android"android:shape="rectangle"><corners android:radius="10dp" /><solid android:color="#FFF" /><strokeandroid:width="0.1dp"android:color="#222"></stroke></shape>还有个简单的样式(用来设置Dialog不显示系统默认的标题) R.style.MyDialogTheme
<style name="MyDialogTheme" parent="Base.Theme.AppCompat.Light.Dialog"><item name="android:windowNoTitle">true</item></style>
客户端使用方法跟也很简单:
myDialog = new MyDialog(MainActivity.this);myDialog.setTitle("温馨提示:").setMsg("您的智商余额不足,请及时充值!").setButtonCancel("取消", new View.OnClickListener() {@Overridepublic void onClick(View v) {myDialog.dismiss();}}).setButtonOK("立即充值", new View.OnClickListener() {@Overridepublic void onClick(View v) {myDialog.dismiss();}});myDialog.show();
还需要完善的地方(我这就不去弄了,大家可以自已动动手)
1、应该隐藏未设置的,比如我只设置确认按钮而没有设置取消按钮,这时候应该只显示确认按钮。2、扩展更多的实用性,目前这样只能用来显示这样固定样式的对话框,如果要显示带图片,带列表,带色彩的呢?这点可以参考Android API的 AlertDialog。推荐增加些View(标题View,内容View),让使用者直接设置View进来,灵活放便。
相关文章推荐
- Android自定义类似ProgressDialog效果的Dialog
- Android 自定义Dialog
- Android自定义Dialog和Toast布局应注意的事项
- Android-Cloud-TagView-Plus集合到自定义dialog遇到的问题
- android 自定义闪退Dialog 收集闪退信息
- 【android】自定义dialog对话框
- Android自定义圆角Dialog
- Android 自定义dialog,实现右上角显示一个控件按钮
- Android中自定义Dialog外形,去除黑底和白色边框
- Android自定义Dialog
- android 如何修改自定义dialog的宽度
- android 自定义dialog初探
- Android自定义对话框(Dialog)位置,大小
- Android深度自定义Dialog对话框
- Android——自定义Dialog
- Android 完美自定义Dialog
- Android自定义View示例(四)—带有动画的Dialog
- android 自定义Dialog背景透明及显示位置设置
- android如何写一个自定义的dialog可以在Title的位置弹出来
- android 自定义Dialog背景透明及显示位置设置