rsyslog收集nginx日志配置 推荐
2015-02-14 14:05
627 查看
rsyslog日志收集配置
rsyslog服务器收集各服务器的日志,并汇总,再由logstash处理
请查看上一篇文章 http://bbotte.blog.51cto.com/6205307/1613571
客户端/发送端 web服务器
服务器/收集端 rsyslog收集,logstash服务器
#rsyslog测试log传送完毕,下面是用rsyslog收集其他服务器日志:
rsyslog其他配置选项:
日志级别:
———————————————————————-
debug –有调式信息的,日志信息最多
info –一般信息的日志,最常用
notice –最具有重要性的普通条件的信息
warning –警告级别
err –错误级别,阻止某个功能或者模块不能正常工作的信息
crit –严重级别,阻止整个系统或者整个软件不能正常工作的信息
alert –需要立刻修改的信息
emerg –内核崩溃等严重信息
none –什么都不记录
从上到下,级别从低到高,记录的信息越来越少
#过滤日志, 由:号开头
:msg, contains, “error” /var/log/error.log
:msg, contains, “error” ~ # 忽略包含error的日志
#如果要把不同服务器发送过来的日志保存到不同的文件, 可以这样操作:
:fromhost-ip, isequal, “192.168.10.2″ /var/log/host1002.log
:FROMHOST-IP, isequal, “192.168.10.3″ /var/log/host1003.log
#现在是要把web服务器的nginx日志收集到logstash服务器上,nginx原生不支持syslog,所以要打补丁
#为nginx打syslog补丁
#下面是nginx1.4.7版本,其他版本请查看此链接 https://github.com/splitice/nginx_syslog_patch
#现在的话,nginx日志有3份,一份位于/usr/local/nginx/logs,一份在/var/log/messages里面,刷新nginx首页,查看日志
#当然,在syslog收集端也有一份nginx的访问日志
# tail -f /var/log/messages
#刷新下面页面, http://192.168.10.1/index.html#/dashboard/file/logstash.json
如果感觉这篇文章比较乱,那么请了解一些关于rsyslog的配置,以便更灵活的操控日志的收集,上面需要改动的是不同web服务器的nginx日志存储到不同的文件或目录,在logstash配置文件中稍微修改即可。
如果不希望为nginx打补丁的方式,可以参考下一篇文章 http://bbotte.blog.51cto.com/6205307/1615477
参考
https://github.com/yaoweibin/nginx_syslog_patch
http://www.rsyslog.com/doc/property_replacer.html
http://www.logstashbook.com/TheLogstashBook_sample.pdf
http://blog.chinaunix.net/uid-21807675-id-1814878.html
http://my.oschina.net/duxuefeng/blog/317570
http://www.cnblogs.com/blueswu/p/3564763.html
http://blog.clanzx.net/2013/12/31/rsyslog.html
rsyslog服务器收集各服务器的日志,并汇总,再由logstash处理
请查看上一篇文章 http://bbotte.blog.51cto.com/6205307/1613571
客户端/发送端 web服务器
# yum install rsyslog -y
# vim /etc/rsyslog.conf
*.* @192.168.10.1:514
# vim /etc/bashrc                              #收集其他服务器的操作命令
export PROMPT_COMMAND='{ msg=$(history 1 | { read x y; echo $y; });logger "[euid=$(whoami)]":$(who am i):[`pwd`]"$msg"; }'
# . /etc/bashrc
# crontab -e
*/1 * * * * /bin/echo `date`
# service rsyslog restart
服务器/收集端 rsyslog收集,logstash服务器
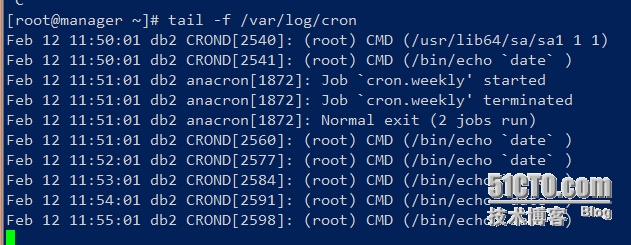
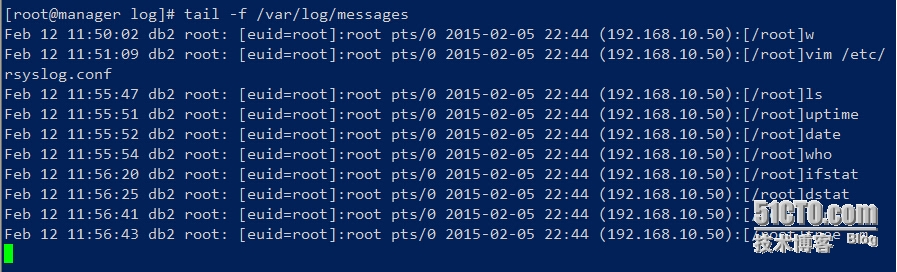
# yum install rsyslog -y
# vim /etc/rsyslog.conf
$ModLoad imudp                                 #启用udp,514端口收集日志
$UDPServerRun 514
$template logformat,"%FROMHOST-IP% %structured-data% %timegenerated% %msg%\n"  #定义日志模板
$template DynFile,"/var/log/%$year%%$month%%$day%.log"                         #定义日志路径
:rawmsg, contains, "CROND" ?DynFile;logformat   #含有"CROND"日志,输出为/var/log/%$year%%$month%%$day%.log
:rawmsg, contains, "CROND" ~
# service rsyslog restart
# tail -f /var/log/20150212.log                 #查看crontab的log
# tail -f /var/log/messages                     #查看客户端输入的命令
#rsyslog测试log传送完毕,下面是用rsyslog收集其他服务器日志:
# vim /etc/sysconfig/rsyslog
SYSLOGD_OPTIONS="-c 5 -Q -x"
# vim /etc/rsyslog.conf                         #把下面几行注释
#$template logformat,"%FROMHOST-IP% %structured-data% %timegenerated% %msg%\n"
#$template DynFile,"/var/log/%$year%%$month%%$day%.log"
#:rawmsg, contains, "CROND" ?DynFile;logformat
# service rsyslog restart
#现在服务端收集客户端日志,并保存在/var/log各日志文件中,tail -f 查看
rsyslog其他配置选项:
日志级别:
———————————————————————-
debug –有调式信息的,日志信息最多
info –一般信息的日志,最常用
notice –最具有重要性的普通条件的信息
warning –警告级别
err –错误级别,阻止某个功能或者模块不能正常工作的信息
crit –严重级别,阻止整个系统或者整个软件不能正常工作的信息
alert –需要立刻修改的信息
emerg –内核崩溃等严重信息
none –什么都不记录
从上到下,级别从低到高,记录的信息越来越少
#过滤日志, 由:号开头
:msg, contains, “error” /var/log/error.log
:msg, contains, “error” ~ # 忽略包含error的日志
#如果要把不同服务器发送过来的日志保存到不同的文件, 可以这样操作:
:fromhost-ip, isequal, “192.168.10.2″ /var/log/host1002.log
:FROMHOST-IP, isequal, “192.168.10.3″ /var/log/host1003.log
#现在是要把web服务器的nginx日志收集到logstash服务器上,nginx原生不支持syslog,所以要打补丁
#为nginx打syslog补丁
#下面是nginx1.4.7版本,其他版本请查看此链接 https://github.com/splitice/nginx_syslog_patch
# tar -xzf nginx-1.4.7.tar.gz
# cd nginx-1.4.7
# ./configure --user=www --group=www --prefix=/usr/local/nginx \
--with-http_stub_status_module --with-http_ssl_module --with-http_gzip_static_module \
--with-pcre=/root/pcre-8.35 --with-http_realip_module --with-http_image_filter_module #这个是测试,我是把pcre-8.35解压到root目录
# make
# make install
#以上是安装nginx的步骤,下面打补丁
# git clone https://github.com/splitice/nginx_syslog_patch # patch -p1 < /root/nginx-1.4.7/nginx_syslog_patch/syslog-1.4.0.patch
patching file src/core/ngx_cycle.c
patching file src/core/ngx_log.c
patching file src/core/ngx_log.h
patching file src/http/modules/ngx_http_log_module.c
patching file src/http/ngx_http_core_module.c
Hunk #2 succeeded at 4895 (offset 2 lines).
Hunk #3 succeeded at 4913 (offset 2 lines).
Hunk #4 succeeded at 4952 (offset 2 lines).
patching file src/http/ngx_http_request.c
Hunk #1 succeeded at 517 (offset -14 lines).
Hunk #2 succeeded at 798 (offset -23 lines).
Hunk #3 succeeded at 2002 (offset -23 lines).
# ./configure --user=www --group=www --prefix=/usr/local/nginx \
--with-http_stub_status_module --with-http_ssl_module --with-http_gzip_static_module \
--with-pcre=/root/pcre-8.35 --with-http_realip_module --with-http_image_filter_module \
--add-module=/root/nginx-1.4.7/nginx_syslog_patch/
# make
# make install
# /usr/local/nginx/sbin/nginx -V                             #查看编译的配置参数
nginx version: nginx/1.4.7
built by gcc 4.4.7 20120313 (Red Hat 4.4.7-11) (GCC)
TLS SNI support enabled
configure arguments: --user=www --group=www --prefix=/usr/local/nginx \
--with-http_stub_status_module --with-http_ssl_module --with-http_gzip_static_module \
--with-pcre=/root/pcre-8.35 --with-http_realip_module --with-http_image_filter_module \
--add-module=/root/nginx-1.4.7/nginx_syslog_patch/
# grep -v ^.*# /usr/local/nginx/conf/nginx.conf|sed '/^$/d'  #nginx配置
worker_processes  1;
syslog local6 nginx;
events {
worker_connections  1024;
}
http {
include       mime.types;
default_type  application/octet-stream;
log_format  main  '$remote_addr - $remote_user [$time_local] "$request" '
'$status $body_bytes_sent "$http_referer" '
'"$http_user_agent" "$http_x_forwarded_for"';
sendfile        on;
keepalive_timeout  65;
server {
listen       80;
server_name  localhost;
index index.html;
root /var/www;
access_log  syslog:notice|logs/host1.access.log main;
error_log   syslog:notice|logs/host1.error.log;
error_page   500 502 503 504  /50x.html;
location = /50x.html {
root   html;
}
}
}
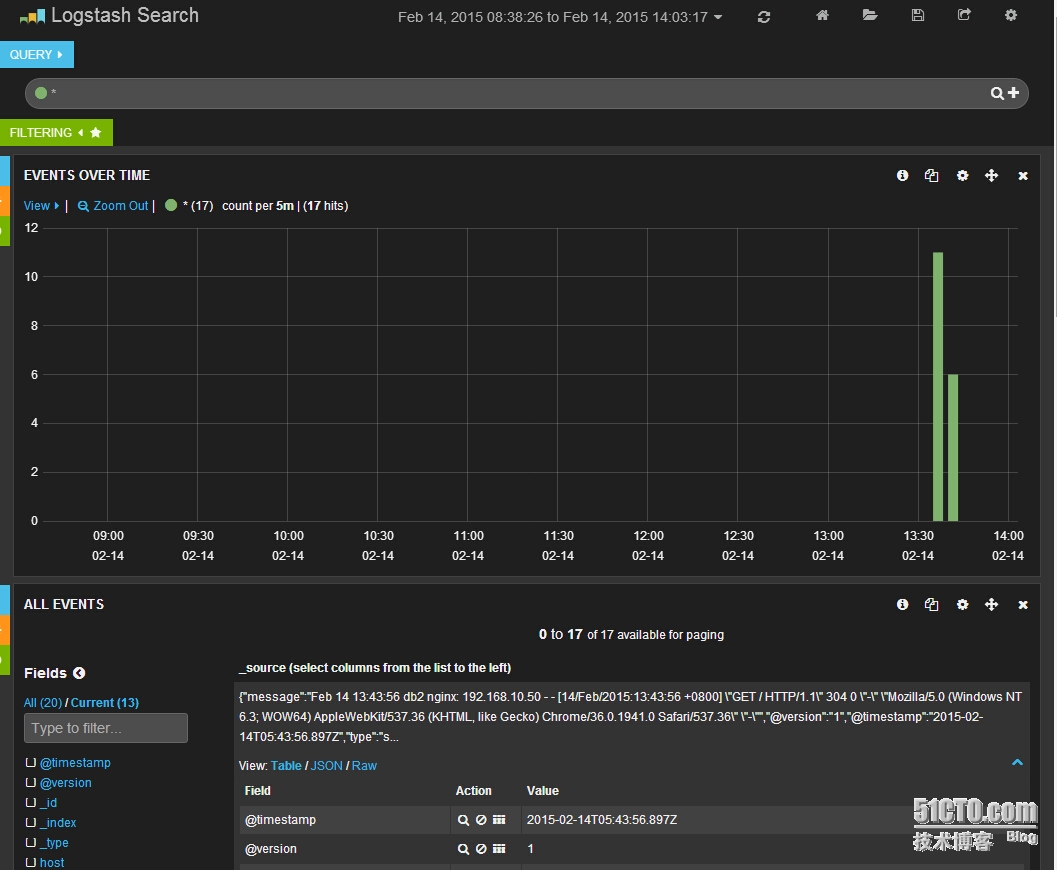
#现在的话,nginx日志有3份,一份位于/usr/local/nginx/logs,一份在/var/log/messages里面,刷新nginx首页,查看日志
#当然,在syslog收集端也有一份nginx的访问日志
# tail -f /var/log/messages
#刷新下面页面, http://192.168.10.1/index.html#/dashboard/file/logstash.json
如果感觉这篇文章比较乱,那么请了解一些关于rsyslog的配置,以便更灵活的操控日志的收集,上面需要改动的是不同web服务器的nginx日志存储到不同的文件或目录,在logstash配置文件中稍微修改即可。
如果不希望为nginx打补丁的方式,可以参考下一篇文章 http://bbotte.blog.51cto.com/6205307/1615477
参考
https://github.com/yaoweibin/nginx_syslog_patch
http://www.rsyslog.com/doc/property_replacer.html
http://www.logstashbook.com/TheLogstashBook_sample.pdf
http://blog.chinaunix.net/uid-21807675-id-1814878.html
http://my.oschina.net/duxuefeng/blog/317570
http://www.cnblogs.com/blueswu/p/3564763.html
http://blog.clanzx.net/2013/12/31/rsyslog.html

相关文章推荐
- logstash通过rsyslog对nginx的日志收集和分析 推荐
- rsyslog收集nginx日志配置
- rsyslog收集nginx日志配置
- rsyslog收集nginx日志配置
- Nginx https加密以及nginx日志配置与管理 推荐
- centos6.5下安装配置ELK及收集nginx日志
- Syslog-ng+Rsyslog收集日志:rsyslog配置(二)
- 配置使用rsyslog+loganalyzer收集防火墙及交换机日志
- ELK日志系统之使用Rsyslog快速方便的收集Nginx日志
- logstash通过rsyslog对nginx的日志收集和分析
- ELK日志服务器的快速搭建并收集nginx日志 推荐
- 利用Rsyslog集中收集系统日志和用户操作记录以及相关处理方法 推荐
- LNMP第二部分nginx、php配置(用户认证、域名重定向、日志、配置缓存、防盗链) 推荐
- Nginx之反向代理、日志格式、集群、缓存、压缩、URl 重写,读写分离配置 推荐
- ELK日志系统之使用Rsyslog快速方便的收集Nginx日志
- elk部署配置,收集nginx和tomcat日志
- Syslog-ng+Rsyslog收集日志:rsyslog-v8.X版 配置(二)
- logstash通过rsyslog对nginx的日志收集和分析
- Rsyslog实现Nginx日志统一收集