Nginx之反向代理、日志格式、集群、缓存、压缩、URl 重写,读写分离配置 推荐
2016-12-25 20:15
701 查看
location的模式匹配按照优先级由低到高有以下四种:
Nginx作为一个优秀的Web服务器,不仅在处理静态内容上比Apache优秀,还经常被用来做反向代理服务器,且支持缓存,URL重写,自定义格式,读写分离等功能,并且支持在TCP/IP第七层实现集群功能,基于AIO(异步I/O)event_driven(事件驱动)mmap(内存映射)等机制和功能,具有轻量级、高性能、消耗低、特性丰富、配置简单等特点
实验环境: node1:192.168.139.2 node2:192.168.139.4 node4:192.168.139.8 node5:192.168.139.9
node1、node2装有Nginx,其中node1为备用,本实验所有与Nginx相关的配置都在node2进行 node4、node5装有httpd,主要用来做后端RS_Server
1:location = URI { }花括号在的规则只对当前URI匹配,如果为目录只对目录匹配2:location ^~URI { }不用正则表达式进行逐字符匹配3:location ~* URI{ }不区分大小写花括号在的规则对URI进行模式匹配,URI可以用正则表达式 location ~ URI { }区分大小写花括号在的规则对URI进行模式匹配,URI可以用正则表达式4:location URI { }花括号中的规则对URI中所有路径包括子目录都匹配
location URI { } 花括号中的规则对URI中所有路径包括子目录都匹配 如 location ~ \.php$ { fastcgi_pass 127.0.0.1:9000; } 所有的以.php结尾的URI都有fastcgi转发到本机的9000端口处理(php监听在9000端口)
不用模式匹配的location定义 location /forum/ { proxy_pass http://192.168.139.8:8080/bbs/; } 如访问www.baidu.com/forum/ 则相当于访问后端的http://192.168.139.8:8080/bbs/
使用模式匹配定义location时,后面的http://路径只能写到端口处,不能出现URI 如 location ~* ^/forum { proxy_pass http://192.168.139.8:8080; } 不区分大小写匹配所有以forum开头的URI,转发到 http://192.168.139.8:8080/forum 如访问www.baidu.com/forum相当于访问http://192.168.139.8:8080/forum
[root@node2 html]# vim /etc/nginx/nginx.conf
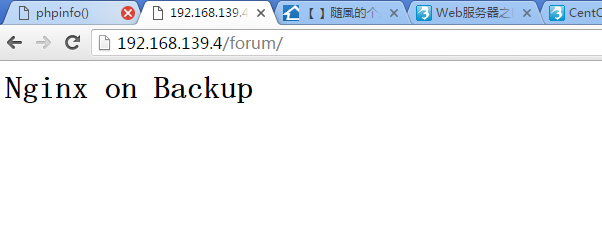
location /forum { proxy_pass http://192.168.139.8/bbs; }
[root@node2 html]# service nginx reload[root@node4 bbs]# vim /var/www/html/bbs/index.html
<h1>Nginx on Backup</h1>[root@node4 bbs]# service httpd restart
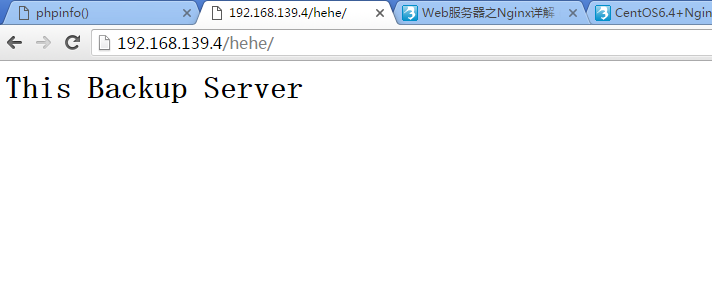
[root@node2 html]# vim /etc/nginx/nginx.conf location ~ ^/hehe { proxy_pass http://192.168.139.8; }
[root@node2 html]# service nginx reload[root@node4 bbs]# vim /var/www/html/hehe/index.html <h1>This Backup Server</h1>
[root@node4 html]# service httpd restart
将所有的请求都转发到后端192.168.139.8/bbs/ location / { proxy_pass http://192.168.139.8/bbs; }
通过分析后端server的日志可以看到所有的访问client_ip都是来自node2(node2只是个代理服务器,记录他的ip不能进行client来源分析)没有记录真正的client_ip[root@node4 bbs]# tail /var/log/httpd/access_log
192.168.139.4 - - [24/Dec/2016:18:05:59 +0800] "GET /hehe HTTP/1.0" 301 313 "-" "Mozilla/5.0 (Windows NT 6.1; WOW64) AppleWebKit/537.36 (KHTML, like Gecko) Chrome/51.0.2704.106 Safari/537.36"192.168.139.4 - - [24/Dec/2016:18:05:59 +0800] "GET /hehe/ HTTP/1.0" 200 28 "-" "Mozilla/5.0 (Windows NT 6.1; WOW64) AppleWebKit/537.36 (KHTML, like Gecko) Chrome/51.0.2704.106 Safari/537.36"
日志变量有:$remote_addr client_ip$remote_port client_port$remote_user client_user (基于用户认证时)$request_body 请求主题$request_method 请求方法 #put get post delete options trace connection head$server_addr server_ip$server_port server_port$server_name server_name$server_protol http1.0/1.1$uri 请求的真正uri
定义日志记录client来源location ~ ^/hehe { proxy_pass http://192.168.139.8; proxy_set_header X-Real-IP $remote_ddr; }
real-ip由前端代理服务器传过来了,但也要改一下后端server的日志记录格式[root@node4 html]# vim /etc/httpd/conf/httpd.confLogFormat "%{X-Real-IP}i %l %u %t \"%r\" %>s %b \"%{Referer}i\" \"%{User-Agent}i\"" combined[root@node4 html]# service httpd restart浏览器多访问几次 http://192.168.139.4/hehe/
[root@node4 html]# tail /var/log/httpd/access_log192.168.139.1 - - [24/Dec/2016:18:23:28 +0800] "GET /hehe/ HTTP/1.0" 304 - "-" "Mozilla/5.0 (Windows NT 6.1; WOW64) AppleWebKit/537.36 (KHTML, like Gecko) Chrome/51.0.2704.106 Safari/537.36"192.168.139.1 - - [24/Dec/2016:18:23:28 +0800] "GET /hehe/ HTTP/1.0" 304 - "-" "Mozilla/5.0 (Windows NT 6.1; WOW64) AppleWebKit/537.36 (KHTML, like Gecko) Chrome/51.0.2704.106 Safari/537.36"192.168.139.1 - - [24/Dec/2016:18:23:28 +0800] "GET /hehe/ HTTP/1.0" 304 - "-" "Mozilla/5.0 (Windows NT 6.1; WOW64) AppleWebKit/537.36 (KHTML, like Gecko) Chrome/51.0.2704.106 Safari/537.36"192.168.139.1 - - [24/Dec/2016:18:23:29 +0800] "GET /hehe/ HTTP/1.0" 304 - "-" "Mozilla/5.0 (Windows NT 6.1; WOW64) AppleWebKit/537.36 (KHTML, like Gecko) Chrome/51.0.2704.106 Safari/537.36"可以看到client_ip 192.168.139.1(而不是node2的IP_192.168.139.4)
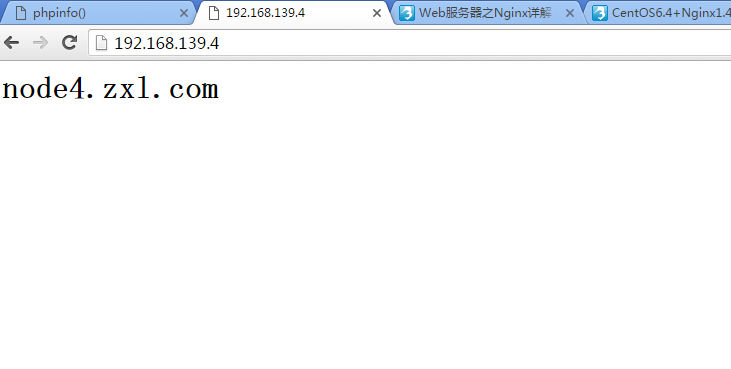
Nginx的upstream端定义:将多个server做成一个负载均衡的集群,默认使用wrr调度算法(权重一样则为rr,权重为0 ,则不加入集群)
[root@node2 html]# vim /etc/nginx/nginx.conf upstream my_web_server { #upstream在server外定义my_web_server为集群名,要引用 server 192.168.139.8 weight=1; server 192.168.139.9 weight=1; } location / { root /web/html; index index.html index.htm; proxy_pass http://my_web_server/; #转发到my_web_server集群 proxy_set_header X-Real_IP $remote_addr;
}
[root@node2 html]# service nginx reload
刷新
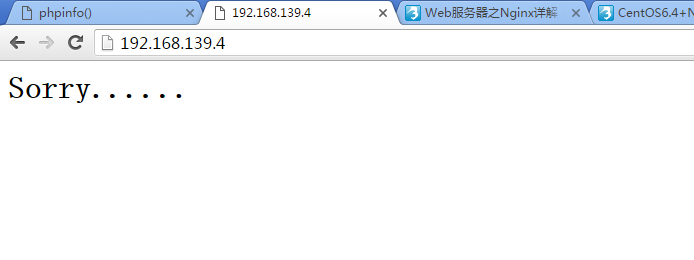
upstream还可以为后端server做健康状态检查,万一两个后端server都挂了,准备一个sorry页面 [root@node2 html]# vim /etc/nginx/nginx.conf upstream my_web_server { server 192.168.139.8 weight=1 max_fails=2 fail_timeout=2 ;#失败超时2秒 #失败两次就认为挂了 server 192.168.139.9 weight=1 max_fails=2 fail_timeout=2 ; server 127.0.0.1:8080 backup ; }
server { listen 8080; server_name localhost; root /web/error; index index.html; }
[root@node2 html]# vim /web/error/index.html
<h1>Sorry......</h1>
[root@node2 html]# service nginx reload[root@node4 html]# service httpd stop[root@node5 html]# service httpd stop
[root@node4 html]# service httpd start
[root@node5 ~]# service httpd start
Nginx支持三种负载均衡的调度算法:
1:wrr(weight round robin 加权轮调) 如果权重相同则为rr(轮调),每个请求按时间顺序逐一分配到不同的后端服务器,如果后端某台服务器宕机,故障系统被自动剔除,使用户访问不受影响。Weight 指定轮询权值,Weight值越大,分配到的访问机率越高,主要用于后端每个服务器性能不均的情况下
2:ip_hash (ip_哈希) server端会将client的访问IP做一个哈希运算,并将结果保存在本地内存中的哈希表中,这样对IP运算结果的相同的client会被始终分发给通一个后端RS_Server,从而不会出现client因为访问的是不同server造成的没有session信息的问题(其实要根本解决session问题,还是要加一个共享存储,比如那台server挂了,这时client请求肯定会发给其他server,可以将session信息保存在memory cache中实现session共享)
3:least_conn (最小连接数)比较当前节点上活动连接数+非活动连接数,输小给谁发,这是一种动态调度算法,如active*256+inactive
注:使用ip_hash时要将backup去掉,万一定向到backup_server上,即使RS_Server恢复正常,也不会再给转发
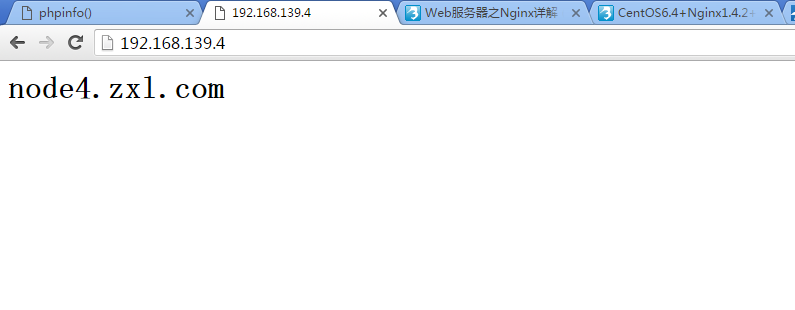
[root@node2 html]# vim /etc/nginx/nginx.confupstream my_web_server { server 192.168.139.8 weight=1 max_fails=2 fail_timeout=2 ; server 192.168.139.9 weight=1 max_fails=2 fail_timeout=2 ; ip_hash; }
[root@node2 html]# service nginx reload
一直刷新都是定向在node4
为了减轻后端RS的压力,Nginx应该启用本地缓存,其缓存有两种形式1:在共享内存中,缓存键和缓存对象的元数据(主要用于在内存中查找数据)2:在磁盘空间中,存储数据(如静态、或者经过静态处理的动态数据)在磁盘中,为了提高效率,可以用SSD作为本地磁盘,且可以将多块SSD做成一个Raid0,那速度老快了
根据请求方法进行缓存proxy_cache_methods GET HEAD POST;#这三种请求方法的请求进行缓存
根据状态码进行缓存proxy_cache_valid 200 302 10m ;#状态码为200 302 的请求缓存10min proxy_cache_valid 404 1m; #状态码为200 的请求缓存1minproxy_cache_valid any 5m; #其他的状态码缓存5min
根据相同请求的次数进行缓存proxy_cache_min_uses 5; #只有当相同请求出现5次才对其进行缓存
更详细的缓存介绍请看官网 https://www.nginx.com/resources/admin-guide/content-caching/
proxy_cache_path ; 缓存的保存路径,不能定义在server{ }段中keys_zone=first:20m; 用来存储键的区域名叫first,大小为20Mmax_size=1G ; 最多用1 G的内存进行缓存,如果缓存空间满了,Nginx的cache_manager进程会根据最近最少连接原则进行缓存清除
[root@node2 html]# vim /etc/nginx/nginx.conf upstream my_web_server { server 192.168.139.8 weight=1 max_fails=2 fail_timeout=2 ; server 192.168.139.9 weight=1 max_fails=2 fail_timeout=2 ; ip_hash; } proxy_cache_path /nginx/cache/my_cache levels=1:2 keys_zone=first:20M; server { listen 80; server_name localhost; add_header X_cache "$upstream_cache_status from $server_addr"
配置文件时;前忘了加"结果一直 nginx: [emerg] unexpected end of file, expecting "}" in /etc/nginx/nginx.con,差点将整个文件删了^_^ location / { root /web/html; index index.html index.htm; proxy_pass http://my_web_server/; proxy_set_header X-Real_IP $remote_addr; proxy_cache first; proxy_cache_valid 200 10m;
}.......}
[root@node2 html]# mkdir -pv /nginx/cache/my_cache[root@node2 html]# service nginx reload
浏览器访问:192.168.139.4 Ctrl+F5 强制刷新页面,按F12键,弹出开发者页面,点击Network便可看到下面内容,在Response Headers段 HIT from 192.168.139.4 (从192.168.139.4命中)
Request URL:http://192.168.139.4/
Request Method:GET
Status Code:
304 Not Modified
Remote Address:192.168.139.4:80
Response Headersview sourceConnection:keep-alive
Date:Sat, 24 Dec 2016 12:31:37 GMT
ETag:"dfea9-17-54411d5f3b69e"
Last-Modified:Tue, 20 Dec 2016 07:17:58 GMT
Server:nginx/1.10.2
X-cache:HIT from 192.168.139.4
Request Headersview sourceAccept:text/html,application/xhtml+xml,application/xml;q=0.9,image/webp,*/*;q=0.8
Accept-Encoding:gzip, deflate, sdch
Accept-Language:zh-CN,zh;q=0.8
Cache-Control:max-age=0
Connection:keep-alive
Host:192.168.139.4
If-Modified-Since:Tue, 20 Dec 2016 07:17:58 GMT
If-None-Match:"dfea9-17-54411d5f3b69e"
Upgrade-Insecure-Requests:1
User-Agent:Mozilla/5.0 (Windows NT 6.1; WOW64) AppleWebKit/537.36 (KHTML, like Gecko) Chrome/51.0.2704.106 Safari/537.36
删除本地缓存再刷新一次
[root@node2 5b]# rm /nginx/cache/my_cache/b/5b/d0f1246dc67a25097fa3a295a393f5bb
Connection:keep-alive
Date:Sat, 24 Dec 2016 12:38:29 GMT
ETag:"dfea9-17-54411d5f3b69e"
Last-Modified:Tue, 20 Dec 2016 07:17:58 GMT
Server:nginx/1.10.2
X-cache:MISS from 192.168.139.4 #MISS代表缓存未命中
再刷新一次Connection:keep-alive
Date:Sat, 24 Dec 2016 12:39:37 GMT
ETag:"dfea9-17-54411d5f3b69e"
Last-Modified:Tue, 20 Dec 2016 07:17:58 GMT
Server:nginx/1.10.2
X-cache:HIT from 192.168.139.4 #缓存又命中了
miss :缓存未命中
hit :缓存命中
expired : 缓存已过期
updating :缓存内容已经更新 stale : 缓存已经失效
除了以上缓存外,还有fastcgi_cache,可以缓存php脚本处理的结果,及php代码编译的opcode,但一般来说动态响应内容往往不一样,只能讲那些经常请求的动态资源进行缓存,这时可以根据最少相同访问次数来设定缓存,fastcgi也有自己的缓存配置(将尽量多的动态资源进行静态化,是一个好的大型站点必须做好的事)
open_log_cache: 还有日志缓存open_file_cache:将文件的元数据缓存再Nginx的内存中
对于一个大型站点来说,一个集群组可能不能满足其需求,这时就需要多个集群组进行不同的分工处理不同的请求,可以采取如下操作解决
1:专门处理php动态请求的集群 upstream php_servers { server 192.168.139.11....; server 192.168.139.12.....; ...... }
2:专门处理图片请求的集群upstream img_servers { server 192.168.139.20....; server 192.168.139.21.....; ...... }
3:处理其他请求的集群upstream other_servers { server 192.168.139.30....; server 192.168.139.31.....; ...... }
定义location,根据URI进行匹配(记住location几种模式匹配优先级奥^_^)
location / { proxy_pass http://other_servers; }
location ~* \.php$ { fastcgi_pass http://img_servers; }
location ~* "\.(jpg|gpeg|gif|png)$" { proxy_pass http://php_server; }
开启压缩
gzip on|off;gzip_min_length 1000; #定义小于1000个字节的数据不进行压缩gzip_proxied; #定义gzip的压缩代理gzip_type text/plain application/xml; #定义什么类型的数据压缩
需要注意的是,压缩的主要目是节约带宽,如果带宽够用就不用压缩,因为压缩会消耗CPU资源,而对于内存中要缓存的数据一般也不要进行压缩
rewrite:URL重写双目测试: ~ :匹配为真,不匹配为假 !~:不匹配为真,匹配为假 =:等于为真,不等于为假 !=:不等于为真,等于为假 ~*:不区分大小写,匹配为真,不匹配为假 !~*:不区分大小写,不匹配为真,匹配为假如:
if ($request_method = "post") { fastcgi_pass 127.0.0.1:9000; }如果请求方法为post,则经fastcgi转发到本机的php处理
if ($request_method = "put") { proxy_pass http://192.168.139.8; }如果请求方法为put,则转发到后端server 192.168.138.8 处理
if ($request_uri ~* "/forum" { proxy_pass http://192.168.139.8/bbs; }如果请求的URI中不区分大小写包含forum则转发到后端http://192.168.139.8/bbs
单目测试
location /photos/ { valid_referers none blocked www.zxl.com; if ($valid_referer) { returen 403; 或者 rewrite http://192.168.139.9/images/ }
} valid_referers 从哪个页面进行访问的1 none 表示通过浏览器输入来的2 blocked www.zxl.com 防火墙匹配到 www.zxl.com
if ($valid_referer) 如果不是1和2两种方式访问我的网页,则放回403(页面不存在)或者直接URL重写到rewrite http://192.168.139.9/images/ (这个页面下方一个图片,上面写着该网站内容只允许本站内部使用)
这样就可以防止盗链
rewrite指令可以用在server,location,if的上下文中
支持正则表达式如 rewrite "^(/download/.*)/media/(.*)\..*$" $1/mp3/$2.mp3 last; rewrite "^(/download/.*)/audio/(.*)\..*$" $1/mp3/$2.ra last; 表示以download目录开头后面跟任意目录再跟audio目录,任意字符的文件名,以任意格式结尾的uri,将其rewrite到/download/.*/mp3/(.*).ra。其中的\为文件格式.XX中.的脱义符
location / { root /web/html; index index.html index.hml; rewrite "^/bbs/(.*)$" http://192.168.139.8/forum/$1; }
则如果访问的URI中以bbs开头,则跳转到 http://192.168.139.8/forum/$1,$1表示引用第一个括号中内容,相当于正则表达式中的\1
[root@node2 nginx]# mv nginx.conf nginx.conf.proxy[root@node2 nginx]# cp nginx.conf.default nginx.conf[root@node2 nginx]# vim nginx.conflocation / { root /web/html; index index.html index.htm; rewrite "^/bbs/(.*)$" http://192.168.139.8/forum/$1; }[root@node2 nginx]# service nginx reload
[root@node4 html]# vim /var/www/html/forum/index.html
<h1>Rewrited.....</h1>~ 浏览器测试
rewrite后面可以跟四种参数1 last 表示本次重写完成后,下次请求还会进行uri检查(如果还匹配,会再次rewrite),但有时会产生循环,这时循环十次后会break退出如rewrite "^/bbs/(.*)/images/(.*)\.jpg$" http://www.zxl.com/bbs/$2/images/$1.jpg last;
你访问 http://www.zxl.com/bbs/a/images/b.jpg 会rewrite到http://222.zxl.com/bbs/b/images/a.jpg 你在访问又会rewrite到http://www.zxl.com/bbs/a/images/b.jpg再访问又rewrite到http://222.zxl.com/bbs/b/images/a.jpg 这样会一直产生循环,直到10此会break
2 break 表示本次重写后,直接执行后续操作,不再进行二次重写
3 redirect 代表临时重定向,只用于状态码显示
4 permanent 代表永久重定向,只用于状态码显示
有的时候为了解决session共享的问题,有以下几种方案:1 持久连接,但持久连接也有时间限制2 rsync + inotify/sersync 但这样往往只有一个节点为主节点,其他备节点只能从这个主节点同步session,万一DR将请求分发到了备节点,就不能讲session同步到其他节点 3 实现session的共享,如存在memory cache中(这种方法很好)4 实现读写分离,读时可以从A,B主机读,写时可以将session保存在C主机,然后让C主机进行session文件同步到A,B主机便可解决session共享问题 下面将演示Nginx的读写分离,node5为写入write_server,node4为read_server,node2为前段Nginx_server
weDAV(web_based Distributed Authoring and versioning),是一种基于Http1.1协议的通信协议,它扩展了Http1.1在get,post,head等几个Http标准方法以外添加了一些新的方法,使应用程序可以直接对web server进行读写,并且支持文件锁定(Locking)及解锁(unlock),及支持文件的版本控制
所以要让node5支持put请求(put为写操作),必须编辑vim /etc/httpd/conf/httpd.conf[root@node5 ~]# vim /etc/httpd/conf/httpd.conf <Directory "/var/www/html"> 加入 Dav on
[root@node5 ~]# service httpd restart
[root@node2 nginx]# curl http://192.168.139.9 -T /etc/passwd<!DOCTYPE HTML PUBLIC "-//IETF//DTD HTML 2.0//EN"><html><head><title>403 Forbidden</title></head><body><h1>Forbidden</h1><p>You don't have permission to access /passwdon this server.</p><hr><address>Apache/2.2.15 (CentOS) Server at 192.168.139.9 Port 80</address></body></html>可以看到node5的/var/www/html目录不允许Apache写操作,目录属主和属组都是root
[root@node5 html]# lltotal 4-rw-r--r--. 1 root root 23 Dec 22 16:25 index.html[root@node5 html]# setfacl -m u:apache:rwx /var/www/html/[root@node2 nginx]# curl http://192.168.139.9 -T /etc/passwd<!DOCTYPE HTML PUBLIC "-//IETF//DTD HTML 2.0//EN"><html><head><title>201 Created</title></head><body><h1>Created</h1><p>Resource /passwd has been created.</p><hr /><address>Apache/2.2.15 (CentOS) Server at 192.168.139.9 Port 80</address></body></html>
编辑Nginx的配置文件[root@node2 nginx]# vim nginx.conf location / {
proxy_pass http://192.168.139.8; #PUT一定要大写
if ( $request_method = "PUT") { proxy_pass http://192.168.139.9;
}
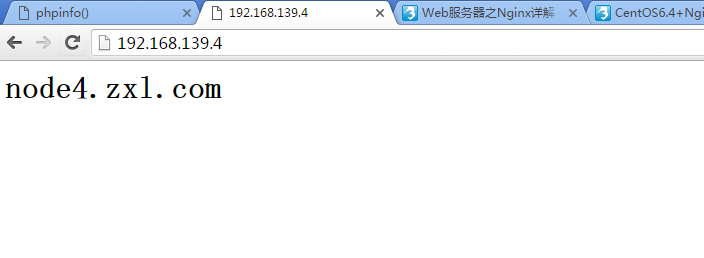
[root@node2 nginx]# curl http://192.168.139.4<h1>node4.zxl.com</h1>[root@node2 nginx]# curl http://192.168.139.4<h1>node4.zxl.com</h1>[root@node2 nginx]# curl http://192.168.139.4<h1>node4.zxl.com</h1>[root@node2 nginx]# curl http://192.168.139.4<h1>node4.zxl.com</h1>[root@node2 nginx]# curl http://192.168.139.4<h1>node4.zxl.com</h1>[root@node2 nginx]# curl -T /etc/fstab http://192.168.139.4 <!DOCTYPE HTML PUBLIC "-//IETF//DTD HTML 2.0//EN"><html><head><title>201 Created</title></head><body><h1>Created</h1><p>Resource /fstab has been created.</p><hr /><address>Apache/2.2.15 (CentOS) Server at 192.168.139.9 Port 80</address></body></html>
读写分离到两个不同的集群[root@node2 nginx]# vim nginx.confupstream read_group { server 192.168.139.2 weight=1; server 192.168.139.8 weight=2; } upstream write_group { server 192.168.139.9 weight=2; } server { listen 80; server_name localhost;
#charset koi8-r;
#access_log logs/host.access.log main; location / {
proxy_pass http://read_group;
if ( $request_method = "PUT") { proxy_pass http://write_group;
}
[root@node2 nginx]# service nginx reloadnginx: the configuration file /etc/nginx/nginx.conf syntax is oknginx: configuration file /etc/nginx/nginx.conf test is successfulReloading nginx: [ OK ][root@node2 nginx]# curl http://192.168.139.4<h1>node4.zxl.com</h1>[root@node2 nginx]# curl http://192.168.139.4<h1>node1.zxl.com</h1>[root@node2 nginx]# curl http://192.168.139.4<h1>node4.zxl.com</h1>[root@node2 nginx]# curl http://192.168.139.4<h1>node4.zxl.com</h1>[root@node2 nginx]# curl http://192.168.139.4<h1>node1.zxl.com</h1>用curl上传文件[root@node2 nginx]# curl -T /etc/passwd http://192.168.139.4<!DOCTYPE HTML PUBLIC "-//IETF//DTD HTML 2.0//EN"><html><head><title>201 Created</title></head><body><h1>Created</h1><p>Resource /passwd has been created.</p><hr /><address>Apache/2.2.15 (CentOS) Server at write_group Port 80</address></body></html>
[root@node5 html]# lltotal 12-rw-r--r--. 1 apache apache 779 Dec 25 19:44 fstab-rw-r--r--. 1 root root 23 Dec 22 16:25 index.html-rw-r--r--. 1 apache apache 1519 Dec 25 19:48 passwd
准备备用节点,平时不用,只有所有节点挂了才加入集群[root@node2 nginx]# vim nginx.conf upstream group { server 192.168.139.2 weight=1; server 192.168.139.8 weight=2; server 192.168.139.9 weight=2 backup; }
location / {
proxy_pass http://group;
}
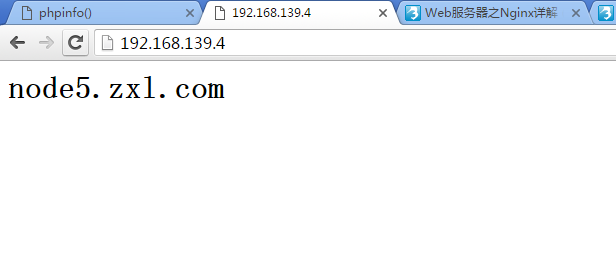
[root@node2 nginx]# curl http://192.168.139.4<h1>node4.zxl.com</h1>[root@node2 nginx]# curl http://192.168.139.4<h1>node1.zxl.com</h1>[root@node2 nginx]# curl http://192.168.139.4<h1>node4.zxl.com</h1>[root@node2 nginx]# curl http://192.168.139.4<h1>node4.zxl.com</h1>[root@node2 nginx]# curl http://192.168.139.4<h1>node1.zxl.com</h1>[root@node4 html]# service httpd stop[root@node1 web]# service nginx stop[root@node2 nginx]# curl http://192.168.139.4<h1>node5.zxl.com</h1>[root@node2 nginx]# curl http://192.168.139.4<h1>node5.zxl.com</h1>[root@node2 nginx]# curl http://192.168.139.4<h1>node5.zxl.com</h1>[root@node2 nginx]# curl http://192.168.139.4<h1>node5.zxl.com</h1>
Nginx作为一个优秀的Web服务器,不仅在处理静态内容上比Apache优秀,还经常被用来做反向代理服务器,且支持缓存,URL重写,自定义格式,读写分离等功能,并且支持在TCP/IP第七层实现集群功能,基于AIO(异步I/O)event_driven(事件驱动)mmap(内存映射)等机制和功能,具有轻量级、高性能、消耗低、特性丰富、配置简单等特点
实验环境: node1:192.168.139.2 node2:192.168.139.4 node4:192.168.139.8 node5:192.168.139.9
node1、node2装有Nginx,其中node1为备用,本实验所有与Nginx相关的配置都在node2进行 node4、node5装有httpd,主要用来做后端RS_Server
1:location = URI { }花括号在的规则只对当前URI匹配,如果为目录只对目录匹配2:location ^~URI { }不用正则表达式进行逐字符匹配3:location ~* URI{ }不区分大小写花括号在的规则对URI进行模式匹配,URI可以用正则表达式 location ~ URI { }区分大小写花括号在的规则对URI进行模式匹配,URI可以用正则表达式4:location URI { }花括号中的规则对URI中所有路径包括子目录都匹配
location URI { } 花括号中的规则对URI中所有路径包括子目录都匹配 如 location ~ \.php$ { fastcgi_pass 127.0.0.1:9000; } 所有的以.php结尾的URI都有fastcgi转发到本机的9000端口处理(php监听在9000端口)
不用模式匹配的location定义 location /forum/ { proxy_pass http://192.168.139.8:8080/bbs/; } 如访问www.baidu.com/forum/ 则相当于访问后端的http://192.168.139.8:8080/bbs/
使用模式匹配定义location时,后面的http://路径只能写到端口处,不能出现URI 如 location ~* ^/forum { proxy_pass http://192.168.139.8:8080; } 不区分大小写匹配所有以forum开头的URI,转发到 http://192.168.139.8:8080/forum 如访问www.baidu.com/forum相当于访问http://192.168.139.8:8080/forum
[root@node2 html]# vim /etc/nginx/nginx.conf
location /forum { proxy_pass http://192.168.139.8/bbs; }
[root@node2 html]# service nginx reload[root@node4 bbs]# vim /var/www/html/bbs/index.html
<h1>Nginx on Backup</h1>[root@node4 bbs]# service httpd restart
[root@node2 html]# vim /etc/nginx/nginx.conf location ~ ^/hehe { proxy_pass http://192.168.139.8; }
[root@node2 html]# service nginx reload[root@node4 bbs]# vim /var/www/html/hehe/index.html <h1>This Backup Server</h1>
[root@node4 html]# service httpd restart
将所有的请求都转发到后端192.168.139.8/bbs/ location / { proxy_pass http://192.168.139.8/bbs; }
通过分析后端server的日志可以看到所有的访问client_ip都是来自node2(node2只是个代理服务器,记录他的ip不能进行client来源分析)没有记录真正的client_ip[root@node4 bbs]# tail /var/log/httpd/access_log
192.168.139.4 - - [24/Dec/2016:18:05:59 +0800] "GET /hehe HTTP/1.0" 301 313 "-" "Mozilla/5.0 (Windows NT 6.1; WOW64) AppleWebKit/537.36 (KHTML, like Gecko) Chrome/51.0.2704.106 Safari/537.36"192.168.139.4 - - [24/Dec/2016:18:05:59 +0800] "GET /hehe/ HTTP/1.0" 200 28 "-" "Mozilla/5.0 (Windows NT 6.1; WOW64) AppleWebKit/537.36 (KHTML, like Gecko) Chrome/51.0.2704.106 Safari/537.36"
日志变量有:$remote_addr client_ip$remote_port client_port$remote_user client_user (基于用户认证时)$request_body 请求主题$request_method 请求方法 #put get post delete options trace connection head$server_addr server_ip$server_port server_port$server_name server_name$server_protol http1.0/1.1$uri 请求的真正uri
定义日志记录client来源location ~ ^/hehe { proxy_pass http://192.168.139.8; proxy_set_header X-Real-IP $remote_ddr; }
real-ip由前端代理服务器传过来了,但也要改一下后端server的日志记录格式[root@node4 html]# vim /etc/httpd/conf/httpd.confLogFormat "%{X-Real-IP}i %l %u %t \"%r\" %>s %b \"%{Referer}i\" \"%{User-Agent}i\"" combined[root@node4 html]# service httpd restart浏览器多访问几次 http://192.168.139.4/hehe/
[root@node4 html]# tail /var/log/httpd/access_log192.168.139.1 - - [24/Dec/2016:18:23:28 +0800] "GET /hehe/ HTTP/1.0" 304 - "-" "Mozilla/5.0 (Windows NT 6.1; WOW64) AppleWebKit/537.36 (KHTML, like Gecko) Chrome/51.0.2704.106 Safari/537.36"192.168.139.1 - - [24/Dec/2016:18:23:28 +0800] "GET /hehe/ HTTP/1.0" 304 - "-" "Mozilla/5.0 (Windows NT 6.1; WOW64) AppleWebKit/537.36 (KHTML, like Gecko) Chrome/51.0.2704.106 Safari/537.36"192.168.139.1 - - [24/Dec/2016:18:23:28 +0800] "GET /hehe/ HTTP/1.0" 304 - "-" "Mozilla/5.0 (Windows NT 6.1; WOW64) AppleWebKit/537.36 (KHTML, like Gecko) Chrome/51.0.2704.106 Safari/537.36"192.168.139.1 - - [24/Dec/2016:18:23:29 +0800] "GET /hehe/ HTTP/1.0" 304 - "-" "Mozilla/5.0 (Windows NT 6.1; WOW64) AppleWebKit/537.36 (KHTML, like Gecko) Chrome/51.0.2704.106 Safari/537.36"可以看到client_ip 192.168.139.1(而不是node2的IP_192.168.139.4)
Nginx的upstream端定义:将多个server做成一个负载均衡的集群,默认使用wrr调度算法(权重一样则为rr,权重为0 ,则不加入集群)
[root@node2 html]# vim /etc/nginx/nginx.conf upstream my_web_server { #upstream在server外定义my_web_server为集群名,要引用 server 192.168.139.8 weight=1; server 192.168.139.9 weight=1; } location / { root /web/html; index index.html index.htm; proxy_pass http://my_web_server/; #转发到my_web_server集群 proxy_set_header X-Real_IP $remote_addr;
}
[root@node2 html]# service nginx reload
刷新
upstream还可以为后端server做健康状态检查,万一两个后端server都挂了,准备一个sorry页面 [root@node2 html]# vim /etc/nginx/nginx.conf upstream my_web_server { server 192.168.139.8 weight=1 max_fails=2 fail_timeout=2 ;#失败超时2秒 #失败两次就认为挂了 server 192.168.139.9 weight=1 max_fails=2 fail_timeout=2 ; server 127.0.0.1:8080 backup ; }
server { listen 8080; server_name localhost; root /web/error; index index.html; }
[root@node2 html]# vim /web/error/index.html
<h1>Sorry......</h1>
[root@node2 html]# service nginx reload[root@node4 html]# service httpd stop[root@node5 html]# service httpd stop
[root@node4 html]# service httpd start
[root@node5 ~]# service httpd start
Nginx支持三种负载均衡的调度算法:
1:wrr(weight round robin 加权轮调) 如果权重相同则为rr(轮调),每个请求按时间顺序逐一分配到不同的后端服务器,如果后端某台服务器宕机,故障系统被自动剔除,使用户访问不受影响。Weight 指定轮询权值,Weight值越大,分配到的访问机率越高,主要用于后端每个服务器性能不均的情况下
2:ip_hash (ip_哈希) server端会将client的访问IP做一个哈希运算,并将结果保存在本地内存中的哈希表中,这样对IP运算结果的相同的client会被始终分发给通一个后端RS_Server,从而不会出现client因为访问的是不同server造成的没有session信息的问题(其实要根本解决session问题,还是要加一个共享存储,比如那台server挂了,这时client请求肯定会发给其他server,可以将session信息保存在memory cache中实现session共享)
3:least_conn (最小连接数)比较当前节点上活动连接数+非活动连接数,输小给谁发,这是一种动态调度算法,如active*256+inactive
注:使用ip_hash时要将backup去掉,万一定向到backup_server上,即使RS_Server恢复正常,也不会再给转发
[root@node2 html]# vim /etc/nginx/nginx.confupstream my_web_server { server 192.168.139.8 weight=1 max_fails=2 fail_timeout=2 ; server 192.168.139.9 weight=1 max_fails=2 fail_timeout=2 ; ip_hash; }
[root@node2 html]# service nginx reload
一直刷新都是定向在node4
为了减轻后端RS的压力,Nginx应该启用本地缓存,其缓存有两种形式1:在共享内存中,缓存键和缓存对象的元数据(主要用于在内存中查找数据)2:在磁盘空间中,存储数据(如静态、或者经过静态处理的动态数据)在磁盘中,为了提高效率,可以用SSD作为本地磁盘,且可以将多块SSD做成一个Raid0,那速度老快了
根据请求方法进行缓存proxy_cache_methods GET HEAD POST;#这三种请求方法的请求进行缓存
根据状态码进行缓存proxy_cache_valid 200 302 10m ;#状态码为200 302 的请求缓存10min proxy_cache_valid 404 1m; #状态码为200 的请求缓存1minproxy_cache_valid any 5m; #其他的状态码缓存5min
根据相同请求的次数进行缓存proxy_cache_min_uses 5; #只有当相同请求出现5次才对其进行缓存
更详细的缓存介绍请看官网 https://www.nginx.com/resources/admin-guide/content-caching/
proxy_cache_path ; 缓存的保存路径,不能定义在server{ }段中keys_zone=first:20m; 用来存储键的区域名叫first,大小为20Mmax_size=1G ; 最多用1 G的内存进行缓存,如果缓存空间满了,Nginx的cache_manager进程会根据最近最少连接原则进行缓存清除
[root@node2 html]# vim /etc/nginx/nginx.conf upstream my_web_server { server 192.168.139.8 weight=1 max_fails=2 fail_timeout=2 ; server 192.168.139.9 weight=1 max_fails=2 fail_timeout=2 ; ip_hash; } proxy_cache_path /nginx/cache/my_cache levels=1:2 keys_zone=first:20M; server { listen 80; server_name localhost; add_header X_cache "$upstream_cache_status from $server_addr"
配置文件时;前忘了加"结果一直 nginx: [emerg] unexpected end of file, expecting "}" in /etc/nginx/nginx.con,差点将整个文件删了^_^ location / { root /web/html; index index.html index.htm; proxy_pass http://my_web_server/; proxy_set_header X-Real_IP $remote_addr; proxy_cache first; proxy_cache_valid 200 10m;
}.......}
[root@node2 html]# mkdir -pv /nginx/cache/my_cache[root@node2 html]# service nginx reload
浏览器访问:192.168.139.4 Ctrl+F5 强制刷新页面,按F12键,弹出开发者页面,点击Network便可看到下面内容,在Response Headers段 HIT from 192.168.139.4 (从192.168.139.4命中)
Request URL:http://192.168.139.4/
Request Method:GET
Status Code:
304 Not Modified
Remote Address:192.168.139.4:80
Response Headersview sourceConnection:keep-alive
Date:Sat, 24 Dec 2016 12:31:37 GMT
ETag:"dfea9-17-54411d5f3b69e"
Last-Modified:Tue, 20 Dec 2016 07:17:58 GMT
Server:nginx/1.10.2
X-cache:HIT from 192.168.139.4
Request Headersview sourceAccept:text/html,application/xhtml+xml,application/xml;q=0.9,image/webp,*/*;q=0.8
Accept-Encoding:gzip, deflate, sdch
Accept-Language:zh-CN,zh;q=0.8
Cache-Control:max-age=0
Connection:keep-alive
Host:192.168.139.4
If-Modified-Since:Tue, 20 Dec 2016 07:17:58 GMT
If-None-Match:"dfea9-17-54411d5f3b69e"
Upgrade-Insecure-Requests:1
User-Agent:Mozilla/5.0 (Windows NT 6.1; WOW64) AppleWebKit/537.36 (KHTML, like Gecko) Chrome/51.0.2704.106 Safari/537.36
删除本地缓存再刷新一次
[root@node2 5b]# rm /nginx/cache/my_cache/b/5b/d0f1246dc67a25097fa3a295a393f5bb
Connection:keep-alive
Date:Sat, 24 Dec 2016 12:38:29 GMT
ETag:"dfea9-17-54411d5f3b69e"
Last-Modified:Tue, 20 Dec 2016 07:17:58 GMT
Server:nginx/1.10.2
X-cache:MISS from 192.168.139.4 #MISS代表缓存未命中
再刷新一次Connection:keep-alive
Date:Sat, 24 Dec 2016 12:39:37 GMT
ETag:"dfea9-17-54411d5f3b69e"
Last-Modified:Tue, 20 Dec 2016 07:17:58 GMT
Server:nginx/1.10.2
X-cache:HIT from 192.168.139.4 #缓存又命中了
miss :缓存未命中
hit :缓存命中
expired : 缓存已过期
updating :缓存内容已经更新 stale : 缓存已经失效
除了以上缓存外,还有fastcgi_cache,可以缓存php脚本处理的结果,及php代码编译的opcode,但一般来说动态响应内容往往不一样,只能讲那些经常请求的动态资源进行缓存,这时可以根据最少相同访问次数来设定缓存,fastcgi也有自己的缓存配置(将尽量多的动态资源进行静态化,是一个好的大型站点必须做好的事)
open_log_cache: 还有日志缓存open_file_cache:将文件的元数据缓存再Nginx的内存中
对于一个大型站点来说,一个集群组可能不能满足其需求,这时就需要多个集群组进行不同的分工处理不同的请求,可以采取如下操作解决
1:专门处理php动态请求的集群 upstream php_servers { server 192.168.139.11....; server 192.168.139.12.....; ...... }
2:专门处理图片请求的集群upstream img_servers { server 192.168.139.20....; server 192.168.139.21.....; ...... }
3:处理其他请求的集群upstream other_servers { server 192.168.139.30....; server 192.168.139.31.....; ...... }
定义location,根据URI进行匹配(记住location几种模式匹配优先级奥^_^)
location / { proxy_pass http://other_servers; }
location ~* \.php$ { fastcgi_pass http://img_servers; }
location ~* "\.(jpg|gpeg|gif|png)$" { proxy_pass http://php_server; }
开启压缩
gzip on|off;gzip_min_length 1000; #定义小于1000个字节的数据不进行压缩gzip_proxied; #定义gzip的压缩代理gzip_type text/plain application/xml; #定义什么类型的数据压缩
需要注意的是,压缩的主要目是节约带宽,如果带宽够用就不用压缩,因为压缩会消耗CPU资源,而对于内存中要缓存的数据一般也不要进行压缩
rewrite:URL重写双目测试: ~ :匹配为真,不匹配为假 !~:不匹配为真,匹配为假 =:等于为真,不等于为假 !=:不等于为真,等于为假 ~*:不区分大小写,匹配为真,不匹配为假 !~*:不区分大小写,不匹配为真,匹配为假如:
if ($request_method = "post") { fastcgi_pass 127.0.0.1:9000; }如果请求方法为post,则经fastcgi转发到本机的php处理
if ($request_method = "put") { proxy_pass http://192.168.139.8; }如果请求方法为put,则转发到后端server 192.168.138.8 处理
if ($request_uri ~* "/forum" { proxy_pass http://192.168.139.8/bbs; }如果请求的URI中不区分大小写包含forum则转发到后端http://192.168.139.8/bbs
单目测试
location /photos/ { valid_referers none blocked www.zxl.com; if ($valid_referer) { returen 403; 或者 rewrite http://192.168.139.9/images/ }
} valid_referers 从哪个页面进行访问的1 none 表示通过浏览器输入来的2 blocked www.zxl.com 防火墙匹配到 www.zxl.com
if ($valid_referer) 如果不是1和2两种方式访问我的网页,则放回403(页面不存在)或者直接URL重写到rewrite http://192.168.139.9/images/ (这个页面下方一个图片,上面写着该网站内容只允许本站内部使用)
这样就可以防止盗链
rewrite指令可以用在server,location,if的上下文中
支持正则表达式如 rewrite "^(/download/.*)/media/(.*)\..*$" $1/mp3/$2.mp3 last; rewrite "^(/download/.*)/audio/(.*)\..*$" $1/mp3/$2.ra last; 表示以download目录开头后面跟任意目录再跟audio目录,任意字符的文件名,以任意格式结尾的uri,将其rewrite到/download/.*/mp3/(.*).ra。其中的\为文件格式.XX中.的脱义符
location / { root /web/html; index index.html index.hml; rewrite "^/bbs/(.*)$" http://192.168.139.8/forum/$1; }
则如果访问的URI中以bbs开头,则跳转到 http://192.168.139.8/forum/$1,$1表示引用第一个括号中内容,相当于正则表达式中的\1
[root@node2 nginx]# mv nginx.conf nginx.conf.proxy[root@node2 nginx]# cp nginx.conf.default nginx.conf[root@node2 nginx]# vim nginx.conflocation / { root /web/html; index index.html index.htm; rewrite "^/bbs/(.*)$" http://192.168.139.8/forum/$1; }[root@node2 nginx]# service nginx reload
[root@node4 html]# vim /var/www/html/forum/index.html
<h1>Rewrited.....</h1>~ 浏览器测试
rewrite后面可以跟四种参数1 last 表示本次重写完成后,下次请求还会进行uri检查(如果还匹配,会再次rewrite),但有时会产生循环,这时循环十次后会break退出如rewrite "^/bbs/(.*)/images/(.*)\.jpg$" http://www.zxl.com/bbs/$2/images/$1.jpg last;
你访问 http://www.zxl.com/bbs/a/images/b.jpg 会rewrite到http://222.zxl.com/bbs/b/images/a.jpg 你在访问又会rewrite到http://www.zxl.com/bbs/a/images/b.jpg再访问又rewrite到http://222.zxl.com/bbs/b/images/a.jpg 这样会一直产生循环,直到10此会break
2 break 表示本次重写后,直接执行后续操作,不再进行二次重写
3 redirect 代表临时重定向,只用于状态码显示
4 permanent 代表永久重定向,只用于状态码显示
有的时候为了解决session共享的问题,有以下几种方案:1 持久连接,但持久连接也有时间限制2 rsync + inotify/sersync 但这样往往只有一个节点为主节点,其他备节点只能从这个主节点同步session,万一DR将请求分发到了备节点,就不能讲session同步到其他节点 3 实现session的共享,如存在memory cache中(这种方法很好)4 实现读写分离,读时可以从A,B主机读,写时可以将session保存在C主机,然后让C主机进行session文件同步到A,B主机便可解决session共享问题 下面将演示Nginx的读写分离,node5为写入write_server,node4为read_server,node2为前段Nginx_server
weDAV(web_based Distributed Authoring and versioning),是一种基于Http1.1协议的通信协议,它扩展了Http1.1在get,post,head等几个Http标准方法以外添加了一些新的方法,使应用程序可以直接对web server进行读写,并且支持文件锁定(Locking)及解锁(unlock),及支持文件的版本控制
所以要让node5支持put请求(put为写操作),必须编辑vim /etc/httpd/conf/httpd.conf[root@node5 ~]# vim /etc/httpd/conf/httpd.conf <Directory "/var/www/html"> 加入 Dav on
[root@node5 ~]# service httpd restart
[root@node2 nginx]# curl http://192.168.139.9 -T /etc/passwd<!DOCTYPE HTML PUBLIC "-//IETF//DTD HTML 2.0//EN"><html><head><title>403 Forbidden</title></head><body><h1>Forbidden</h1><p>You don't have permission to access /passwdon this server.</p><hr><address>Apache/2.2.15 (CentOS) Server at 192.168.139.9 Port 80</address></body></html>可以看到node5的/var/www/html目录不允许Apache写操作,目录属主和属组都是root
[root@node5 html]# lltotal 4-rw-r--r--. 1 root root 23 Dec 22 16:25 index.html[root@node5 html]# setfacl -m u:apache:rwx /var/www/html/[root@node2 nginx]# curl http://192.168.139.9 -T /etc/passwd<!DOCTYPE HTML PUBLIC "-//IETF//DTD HTML 2.0//EN"><html><head><title>201 Created</title></head><body><h1>Created</h1><p>Resource /passwd has been created.</p><hr /><address>Apache/2.2.15 (CentOS) Server at 192.168.139.9 Port 80</address></body></html>
编辑Nginx的配置文件[root@node2 nginx]# vim nginx.conf location / {
proxy_pass http://192.168.139.8; #PUT一定要大写
if ( $request_method = "PUT") { proxy_pass http://192.168.139.9;
}
[root@node2 nginx]# curl http://192.168.139.4<h1>node4.zxl.com</h1>[root@node2 nginx]# curl http://192.168.139.4<h1>node4.zxl.com</h1>[root@node2 nginx]# curl http://192.168.139.4<h1>node4.zxl.com</h1>[root@node2 nginx]# curl http://192.168.139.4<h1>node4.zxl.com</h1>[root@node2 nginx]# curl http://192.168.139.4<h1>node4.zxl.com</h1>[root@node2 nginx]# curl -T /etc/fstab http://192.168.139.4 <!DOCTYPE HTML PUBLIC "-//IETF//DTD HTML 2.0//EN"><html><head><title>201 Created</title></head><body><h1>Created</h1><p>Resource /fstab has been created.</p><hr /><address>Apache/2.2.15 (CentOS) Server at 192.168.139.9 Port 80</address></body></html>
读写分离到两个不同的集群[root@node2 nginx]# vim nginx.confupstream read_group { server 192.168.139.2 weight=1; server 192.168.139.8 weight=2; } upstream write_group { server 192.168.139.9 weight=2; } server { listen 80; server_name localhost;
#charset koi8-r;
#access_log logs/host.access.log main; location / {
proxy_pass http://read_group;
if ( $request_method = "PUT") { proxy_pass http://write_group;
}
[root@node2 nginx]# service nginx reloadnginx: the configuration file /etc/nginx/nginx.conf syntax is oknginx: configuration file /etc/nginx/nginx.conf test is successfulReloading nginx: [ OK ][root@node2 nginx]# curl http://192.168.139.4<h1>node4.zxl.com</h1>[root@node2 nginx]# curl http://192.168.139.4<h1>node1.zxl.com</h1>[root@node2 nginx]# curl http://192.168.139.4<h1>node4.zxl.com</h1>[root@node2 nginx]# curl http://192.168.139.4<h1>node4.zxl.com</h1>[root@node2 nginx]# curl http://192.168.139.4<h1>node1.zxl.com</h1>用curl上传文件[root@node2 nginx]# curl -T /etc/passwd http://192.168.139.4<!DOCTYPE HTML PUBLIC "-//IETF//DTD HTML 2.0//EN"><html><head><title>201 Created</title></head><body><h1>Created</h1><p>Resource /passwd has been created.</p><hr /><address>Apache/2.2.15 (CentOS) Server at write_group Port 80</address></body></html>
[root@node5 html]# lltotal 12-rw-r--r--. 1 apache apache 779 Dec 25 19:44 fstab-rw-r--r--. 1 root root 23 Dec 22 16:25 index.html-rw-r--r--. 1 apache apache 1519 Dec 25 19:48 passwd
准备备用节点,平时不用,只有所有节点挂了才加入集群[root@node2 nginx]# vim nginx.conf upstream group { server 192.168.139.2 weight=1; server 192.168.139.8 weight=2; server 192.168.139.9 weight=2 backup; }
location / {
proxy_pass http://group;
}
[root@node2 nginx]# curl http://192.168.139.4<h1>node4.zxl.com</h1>[root@node2 nginx]# curl http://192.168.139.4<h1>node1.zxl.com</h1>[root@node2 nginx]# curl http://192.168.139.4<h1>node4.zxl.com</h1>[root@node2 nginx]# curl http://192.168.139.4<h1>node4.zxl.com</h1>[root@node2 nginx]# curl http://192.168.139.4<h1>node1.zxl.com</h1>[root@node4 html]# service httpd stop[root@node1 web]# service nginx stop[root@node2 nginx]# curl http://192.168.139.4<h1>node5.zxl.com</h1>[root@node2 nginx]# curl http://192.168.139.4<h1>node5.zxl.com</h1>[root@node2 nginx]# curl http://192.168.139.4<h1>node5.zxl.com</h1>[root@node2 nginx]# curl http://192.168.139.4<h1>node5.zxl.com</h1>

相关文章推荐
- Nginx_地址重写(rewrite)_日志管理(log_format)_压缩输出_Nginx设定限速_Nginx设置反向代理及反向代理缓存
- Nginx 反向代理、负载均衡、页面缓存、URL 重写及读写分离详解
- LNMP第二部分nginx、php配置(用户认证、域名重定向、日志、配置缓存、防盗链) 推荐
- Nginx web服务器 安装 配置PHP SSL 反向代理 负载均衡 web缓存 URL 重写 写分离
- 高性能web服务器nginx(四)之nginx的反向代理、负载均衡、缓存、URL重写
- nginx日志切割,日志格式,静态文件不记录日志,配置缓存
- Node.js站点使用Nginx作反向代理时配置GZip压缩的教程
- Nginx反向代理和缓存服务和手动清除缓存模块purge的配置
- nginx反向代理tomcat集群达到负载均衡,同时使用proxy_cache做web缓存 推荐
- nginx中用JSON格式记录日志的配置示例
- nginx配置文件(反向代理+集群+动静分离)
- codeigniter 在 nginx 下的 pathinfo url 重写配置
- Nginx服务器作反向代理时的缓存配置要点解析
- Nginx 反向代理、负载均衡、页面缓存、URL重写及读写分离详解 推荐
- Nginx的配置与部署(12)应用模块之Memcached做文件缓存时压缩引起的问题
- 在nginx中配置pathinfo模式支持thinkphp的URL重写
- nginx配置用户认证、域名跳转、日志记录、静态文件缓存、防盗链
- 高性能Web服务器Nginx的配置与部署研究(12)应用模块之Memcached做文件缓存时压缩引起的问题
- 反向代理中的Nginx.conf缓存配置
- Nginx HTTP负载均衡和反向代理配置 推荐