Unity中手动合并图集
2015-01-13 15:06
351 查看
大家在开发端游的时候,我们经常需要通过工具程序手动合并dds图片,意思是为了提高效率,需要我们把一些小的图片合并成一张1024或者2048的大图片。它的图片合成跟NGUI的图集原理是一样的,在这里我们不用NGUI的合并图集,我们手动合并图集。
大家在游戏开发中我们需要讲一些零碎的图片合并成一张大的,比如3D场景中一些物件的材质,Avatar换装的材质等等。
接下来我们用代码实现,我们的实现原理是通过二叉树原理实现,首先我们需要定义AslatsNode节点,这个节点满足我们插入节点,建立二叉树,首先我们需要定义图集的大小,鉴于移动端硬件的限制,我们初步定义为1024,插入节点核心代码如下:
最后一步实现就是把我们生成的图集保存一下:
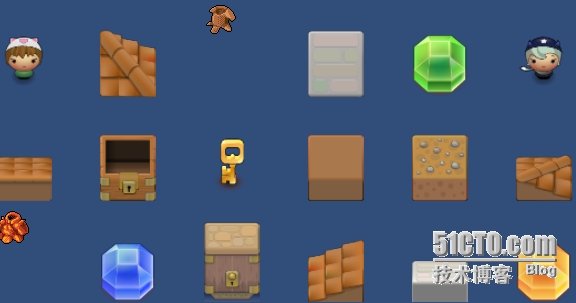
以上是零散的图片,接下来我们将其合成图集:

大家在游戏开发中我们需要讲一些零碎的图片合并成一张大的,比如3D场景中一些物件的材质,Avatar换装的材质等等。
接下来我们用代码实现,我们的实现原理是通过二叉树原理实现,首先我们需要定义AslatsNode节点,这个节点满足我们插入节点,建立二叉树,首先我们需要定义图集的大小,鉴于移动端硬件的限制,我们初步定义为1024,插入节点核心代码如下:
public AtlasNode Insert(Texture2D image, int index) {

if (image == null)
return null;

if (child != null)

AtlasNode newNode = child[0].Insert(image, index);

if (newNode != null)

return newNode;

return child[1].Insert(image, index);

}

else {

if (hasImage)

return null;

if (!ImageFits(image, rc))

return null;

if (PerfectFit(image, rc)) {

hasImage = true;

imageRef = image;

name = imageRef.name;

sortIndex = index;

return this;

}

child = new AtlasNode[2];

child[0] = new AtlasNode();

child[1] = new AtlasNode();

float deltaW = rc.width - image.width;

float deltaH = rc.height - image.height;

if (deltaW > deltaH) {

child[0].rc = new Rect(rc.xMin, rc.yMin, image.width, rc.height);

child[1].rc = new Rect(rc.xMin + image.width + TEXTURE_PADDING, rc.yMin, rc.width - (image.width + TEXTURE_PADDING), rc.height);

}

else {

child[0].rc = new Rect(rc.xMin, rc.yMin, rc.width, image.height);

child[1].rc = new Rect(rc.xMin, rc.yMin + image.height + TEXTURE_PADDING, rc.width, rc.height - (image.height + TEXTURE_PADDING));

}
return child[0].Insert(image, index);

}

}以上代码实现了图片在二叉树进行图片的插入,接下来我们需要建立二叉树代码如下:public void Build(Texture2D target) {
if (child != null) {
if (child[0] != null) {
child[0].Build(target);
}
if (child[1] != null) {
child[1].Build(target);
}
}
if (imageRef != null) {
Color[] data = imageRef.GetPixels(0);
for (int x = 0; x < imageRef.width; ++x) {
for (int y = 0; y < imageRef.height; ++y) {
target.SetPixel(x + (int)rc.x, y + (int)rc.y, data[x + y * imageRef.width]);
}
}
if (TEXTURE_PADDING > 0 && BLEED) {
for (int y = 0; y < imageRef.height; ++y) {
int x = imageRef.width - 1;
target.SetPixel(x + (int)rc.x + TEXTURE_PADDING, y + (int)rc.y, data[x + y * imageRef.width]);
}
for (int x = 0; x < imageRef.width; ++x) {
int y = imageRef.height - 1;
target.SetPixel(x + (int)rc.x, y + (int)rc.y + TEXTURE_PADDING, data[x + y * imageRef.width]);
}
}
}
}
}第三步是创建图集代码如下:public static Atlas[] CreateAtlas(string name, Texture2D[] textures, Atlas startWith = null) {
List<Texture2D> toProcess = new List<Texture2D>();
toProcess.AddRange(textures);
int index = toProcess.Count - 1;
toProcess.Reverse(); // Because we index backwards
List<Atlas> result = new List<Atlas>();
int insertIndex = 0;
if (startWith != null) {
insertIndex = startWith.root.sortIndex;
}
while(index >= 0) {
Atlas _atlas = startWith;
if (_atlas == null) {
_atlas = new Atlas();
_atlas.texture = new Texture2D(AtlasSize, AtlasSize, TextureFormat.RGBA32, false);
_atlas.root = new AtlasNode();
_atlas.root.rc = new Rect(0, 0, AtlasSize, AtlasSize);
}
startWith = null;
while (index >= 0 && (_atlas.root.Contains(toProcess[index].name) || _atlas.root.Insert(toProcess[index], insertIndex++) != null)) {
index -= 1;
}
result.Add(_atlas);
_atlas.root.sortIndex = insertIndex;
insertIndex = 0;
_atlas = null;
}
foreach(Atlas atlas in result) {
atlas.root.Build(atlas.texture);
List<AtlasNode> nodes = new List<AtlasNode>();
atlas.root.GetBounds(ref nodes);
nodes.Sort(delegate (AtlasNode x, AtlasNode y) {
if (x.sortIndex == y.sortIndex) return 0;
if (y.sortIndex > x.sortIndex) return -1;
return 1;
});
List<Rect> rects = new List<Rect>();
foreach(AtlasNode node in nodes) {
Rect normalized = new Rect(node.rc.xMin / atlas.root.rc.width, node.rc.yMin / atlas.root.rc.height, node.rc.width / atlas.root.rc.width, node.rc.height / atlas.root.rc.height);
normalized.x += 0.5f / atlas.root.rc.width;
normalized.width -= 1.0f / atlas.root.rc.width;
normalized.y += 0.5f / atlas.root.rc.height;
normalized.height -= 1.0f / atlas.root.rc.height;
rects.Add(normalized);
}
atlas.uvRects = new AtlasDescriptor[rects.Count];
for (int i = 0; i < rects.Count; i++) {
atlas.uvRects[i] = new AtlasDescriptor();
atlas.uvRects[i].width = (int)nodes[i].rc.width;
atlas.uvRects[i].height = (int)nodes[i].rc.height;
atlas.uvRects[i].name = nodes[i].name;
atlas.uvRects[i].uvRect = rects[i];
}
atlas.root.Clear();
atlas.texture.Apply(false, false);
SaveAtlas(atlas, name);
atlas.texture.Apply(false, false);
}
return result.ToArray();
}最后一步实现就是把我们生成的图集保存一下:
public static void SaveAtlas(Atlas atlas, string name) {

if (atlas == null || atlas.texture == null)

return;
var bytes = atlas.texture.EncodeToPNG();
if (!System.IO.Directory.Exists(Application.dataPath + "/Debug/"))

System.IO.Directory.CreateDirectory(Application.dataPath + "/Debug/");
string file = Application.dataPath + "/Debug/" + name + ".png";
System.IO.File.WriteAllBytes(file, bytes);

}图片示例如下:以上是零散的图片,接下来我们将其合成图集:

相关文章推荐
- Unity网格合并_材质合并
- unity手动静态批处理
- Unity -网格合并
- Unity手动创建模型添加贴图
- Unity手动控制动画播放
- 关于Unity5.3UGUI图集的使用方法
- Unity制作图集
- unity2d游戏开发大坑之图集打包
- Unity 网格合并
- Unity3D研究院之利用unity自带API提前合并场景Mesh
- unity手动选择文件夹保存文件
- Unity MeshBaker 合并网格和材质
- 我对Unity中AndroidManifest合并的一些了解
- Unity合并mesh
- unity手动拖拽播放视频的bug小结
- Unity中,利用shader将NGUI图集大小缩小四倍
- Unity性能优化1-->材质合并
- unity_NGUI系统学习(四)_Atlas图集的创建和使用_Button触发状态还可以用图片做背景效果设定
- [置顶] unity利用Texture Packer一键打包图集(五)
- Unity Android插件制作和合并多个安卓插件