linux ssh 使用ssh-keygen设置SSH无密码登录
2014-12-24 00:28
721 查看
一、SSH简介
SSH是一个专为远程登录会话和其他网络服务提供安全性的协议。默认状态下SSH链接是需要密码认证的,可以通过添加系统认证(即公钥-私钥)的修改,修改后系统间切换可以避免密码输入和SSH认证。二、公钥认证的基本思想:
对信息的加密和解密采用不同的key,这对key分别称作private key和public key,其中,public key存放在欲登录的服务器上,而private key为特定的客户机所持有。当客户机向服务器发出建立安全连接的请求时,首先发送自己的public key,如果这个public key是被服务器所允许的,服务器就发送一个经过public key加密的随机数据给客户机,这个数据只能通过private key解密,客户机将解密后的信息发还给服务器,服务器验证正确后即确认客户机是可信任的,从而建立起一条安全的信息通道。
通过这种方式,客户机不需要向外发送自己的身份标志“private key”即可达到校验的目的,并且private key是不能通过public key反向推断出来的。这避免了网络窃听可能造成的密码泄露。客户机需要小心的保存自己的private key,以免被其他人窃取,一旦这样的事情发生,就需要各服务器更换受信的public key列表。
三、实验网络拓扑图和实验目的
1、网络拓扑图
如下所示: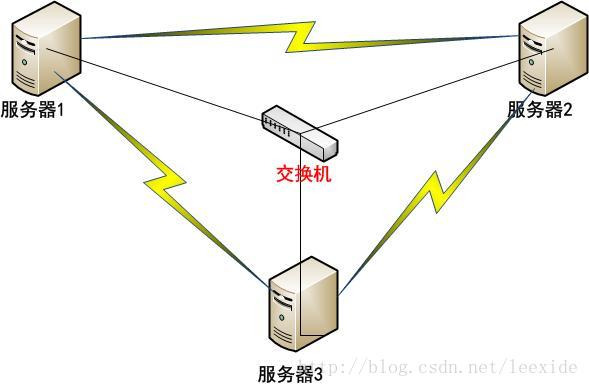
2、实现目的
服务器1,服务器2,服务器3能实现彼此无密码登录。3、补充说明
Linux下修改主机名的完整步骤如下:第一步:
#hostname Server1
第二步:
修改/etc/sysconfig/network中的hostname
第三步:
修改/etc/hosts文件
四、无密码登录实现方式
1、用ssh-keygen创建公钥
(1)在服务器1上执行下面的命令:[root@Server1 ~]# ssh-keygen -t rsa Generating public/private rsa key pair. Enter file in which to save the key(/root/.ssh/id_rsa): Created directory '/root/.ssh'. Enter passphrase (empty for no passphrase): Enter same passphrase again: Your identification has been saved in/root/.ssh/id_rsa. Your public key has been saved in/root/.ssh/id_rsa.pub. The key fingerprint is: 7b:aa:08:a0:99:fc:d9:cc:d8:2e:4b:1a:c0:6b:da:e4root@Server1 The key's randomart image is: +--[ RSA 2048]----+ | | | | | | |. | |o. S | |++. . | |+=o. . . | |o+=oB. o | |..E==*... | +-----------------+
输入后,会提示创建.ssh/id_rsa、id_rsa.pub的文件,其中第一个为密钥,第二个为公钥。过程中会要求输入密码,为了ssh访问过程无须密码,可以直接回车 。
(2)补充说明:
ssh-keygen:生成秘钥
其中:
-t指定算法
-f 指定生成秘钥路径
-N 指定密码
2、查看钥匙
[root@Server1 ~]# ls -l .ssh
总用量 8
-rw-------. 1 root root 1675 12月 10 22:20 id_rsa
-rw-r--r--. 1 root root 394 12月 10 22:20 id_rsa.pub
可以发现 ssh目录下的两枚钥匙。
3.将公钥复制到被管理机器Server2和Server3下的.ssh目录下(先确保存在这个目录)
[root@server1 .ssh]# scp id_rsa.pubroot@192.168.1.3:~/.ssh/
The authenticity of host '192.168.1.3(192.168.1.3)' can't be established.
RSA key fingerprint is93:eb:f9:47:b1:f6:3f:b4:2e:21:c3:d5:ab:1d:ae:65.
Are you sure you want to continueconnecting (yes/no)? yes
Warning: Permanently added '192.168.1.3'(RSA) to the list of known hosts.
root@192.168.1.3's password:
id_rsa.pub
[root@server1 .ssh]# scp id_rsa.pubroot@192.168.1.4:~/.ssh/authorized_keys
The authenticity of host '192.168.1.4(192.168.1.4)' can't be established.
RSA key fingerprint is93:eb:f9:47:b1:f6:3f:b4:2e:21:c3:d5:ab:1d:ae:65.
Are you sure you want to continueconnecting (yes/no)? yes
Warning: Permanently added '192.168.1.4'(RSA) to the list of known hosts.
root@192.168.1.4's password:
id_rsa.pub
到Server2和Server3目录下执行下面的命令
#cat id_dsa.pub >> ~/.ssh/authorized_keys
4、设置文件和目录权限:
设置authorized_keys权限$ chmod 600 authorized_keys
设置.ssh目录权限
$ chmod 700 -R .ssh
5、验证使用SSH IP地址的方式无密码访问
[root@server1 .ssh]# ssh 192.168.1.3
Last login: Tue Dec 10 22:34:02 2013
[root@Server2 ~]#
[root@Server2 ~]#
[root@Server2 ~]#
6、验证使用SSH 主机名的方式无密码访问
我们在Server1上将Server2和Server3的IP地址解析为主机名[root@server1 .ssh]# cat /etc/hosts 192.168.1.2 Server1 192.168.1.3 Server2 192.168.1.4 Server3
我们试试下面这种ssh登录方式:
[root@server1 .ssh]# ssh Server3
The authenticity of host 'server3(192.168.1.4)' can't be established.
RSA key fingerprint is93:eb:f9:47:b1:f6:3f:b4:2e:21:c3:d5:ab:1d:ae:65.
Are you sure you want to continueconnecting (yes/no)? yes
Warning: Permanently added 'server3' (RSA)to the list of known hosts.
Last login: Tue Dec 10 22:34:08 2013
五、注意:
1、文件和目录的权限千万别设置成chmod 777.这个权限太大了,不安全,数字签名也不支持。2、生成的rsa/dsa签名的公钥是给对方机器使用的。这个公钥内容还要拷贝到authorized_keys
3、linux之间的访问直接 ssh 机器ip
4、某个机器生成自己的RSA或者DSA的数字签名,将公钥给目标机器,然后目标机器接收后设定相关权限(公钥和authorized_keys权限),这个目标机就能被生成数字签名的机器无密码访问了
转载自:http://blog.csdn.net/leexide/article/details/17252369
参考:http://wangheng.org/implement-ssh-without-password.html
http://www.cnblogs.com/jdksummer/articles/2521550.html
http://blog.csdn.net/h70614959/article/details/9088389
http://blog.chinaunix.net/uid-28329865-id-3512645.html
参考:
ssh 无密码登录要使用公钥与私钥。linux下可以用用ssh-keygen生成公钥/私钥对,下面我以CentOS为例。
有机器A(192.168.1.155),B(192.168.1.181)。现想A通过ssh免密码登录到B。
1.在A机下生成公钥/私钥对。
[chenlb@A ~]$ ssh-keygen -t rsa -P ''-P表示密码,-P '' 就表示空密码,也可以不用-P参数,这样就要三车回车,用-P就一次回车。
它在/home/chenlb下生成.ssh目录,.ssh下有id_rsa和id_rsa.pub。
2.把A机下的id_rsa.pub复制到B机下,在B机的.ssh/authorized_keys文件里,我用scp复制。
[chenlb@A ~]$ scp .ssh/id_rsa.pub chenlb@192.168.1.181:/home/chenlb/id_rsa.pub
chenlb@192.168.1.181's password:
id_rsa.pub 100% 223 0.2KB/s 00:00由于还没有免密码登录的,所以要输入密码。
3.B机把从A机复制的id_rsa.pub添加到.ssh/authorzied_keys文件里。
[chenlb@B ~]$ cat id_rsa.pub >> .ssh/authorized_keys
[chenlb@B ~]$ chmod 600 .ssh/authorized_keysauthorized_keys的权限要是600。
4.A机登录B机。
[chenlb@A ~]$ ssh 192.168.1.181
The authenticity of host '192.168.1.181 (192.168.1.181)' can't be established.
RSA key fingerprint is 00:a6:a8:87:eb:c7:40:10:39:cc:a0:eb:50:d9:6a:5b.
Are you sure you want to continue connecting (yes/no)? yes
Warning: Permanently added '192.168.1.181' (RSA) to the list of known hosts.
Last login: Thu Jul  3 09:53:18 2008 from chenlb
[chenlb@B ~]$
第一次登录是时要你输入yes。
现在A机可以无密码登录B机了。
小结:登录的机子可有私钥,被登录的机子要有登录机子的公钥。这个公钥/私钥对一般在私钥宿主机产生。上面是用rsa算法的公钥/私钥对,当然也可以用dsa(对应的文件是id_dsa,id_dsa.pub)
想让A,B机无密码互登录,那B机以上面同样的方式配置即可。
参考:SSH-KeyGen 的用法 http://blog.163.com/chen98_2006@126/blog/static/158584272007101862513886/

相关文章推荐
- 使用ssh-keygen设置ssh无密码登录
- Linux/UNIX下使用ssh-keygen设置SSH无密码登录
- 使用ssh-keygen设置ssh无密码登录
- Linux/UNIX下使用ssh-keygen设置SSH无密码登录
- Linux/UNIX下使用ssh-keygen设置SSH无密码登录
- 使用ssh-keygen设置ssh无密码登录
- 使用ssh-keygen设置ssh无密码登录
- 使用ssh-keygen设置ssh无密码登录
- 使用ssh-keygen设置ssh无密码登录
- 使用ssh-keygen设置ssh无密码登录
- 使用ssh-keygen设置ssh无密码登录
- 使用ssh-keygen设置ssh无密码登录
- 使用ssh-keygen设置ssh无密码登录
- 使用ssh-keygen设置ssh无密码登录
- Linux/UNIX下使用ssh-keygen设置SSH无密码登录
- 使用ssh-keygen设置ssh无密码登录
- SSH使用ssh-keygen远程登录主机免输入密码
- 使用ssh-keygen和ssh-copy-id三步实现SSH无密码登录
- 设置 ssh 使用public key 免密码登录
- 用ssh-keygen来设置ssh无密码登录