Cobbler自动化工具同时批量部署CentOS7及CentOS6.5 推荐
2014-10-08 21:36
661 查看
Cobbler介绍:
Cobbler是一款自动化操作系统安装的实现,与PXE安装系统的区别就是可以同时部署多个版本的系统,而PXE只能选择一种系统。而如今的架构动辄就是上千台的服务器。而存在一些操作系统不统一的现象,例如最初的架构采用的是CentOS5系列的系统,而新出现了一些技术后,需要新的操作系统的支持,一方面是需要批量部署装机,而另一方面还需要考虑到如果老版本的服务器出现故障后还需要重新去部署。并且提供Web配置页面,可以只需要一些点击就可以完成一些操作。
Cobbler的实现和PXE的方法大同小异,例如都需要安装tftp,dhcp,http等,但是使用yum安装Cobbler的时候,会自动把需要的全部安装上,而不需要去手动一个个的安装。
本次将实现CentOS 6.5和CentOS7的安装。
而此次安装CentOS7的操作系统,新的系统将不再使用默认的EXT文件系统,对新引入的XFS做下简介:
XFS文件系统是SGI开发的高级日志文件系统,XFS极具伸缩性。并且在CentOS7上已经是默认的文件系统。主要特性包含一下几点:
数据完整性:
采用XFS文件系统时,如果发生宕机现象,由于文件系统开启日志功能,磁盘上的文件会记录到日志,并且可以短时间内恢复磁盘数据。
传输性:
XFS文件系统采用优化算法,日志记录对于IO影响小,而并不映像查询与分配的性能。XFS文件系统能够连续提供快速的反映时间。
可扩展性:
XFS是一个64bit的文件系统,可以支持上百万T字节的存储空间。对特大文件及小尺寸文件的支持非常好,支持大数量目录。XFS文件系统使用表结构(B+树)保证文件系统可以快速搜索及快速分配空间。XFS文件系统能够持续提供高速操作,文件系统性能不受目录及文件数量限制。
传输带宽:
XFS文件系统能以接近裸设备的IO的性能存储数据,在单个文件系统测试中,吞吐量可以达到7GB美妙,对单个文件的读写操作达到4GB每秒。
安装Cobbler。
使用yum安装cobbler。
可以看到这里是安装了http,lftp,因为dhcp服务还是需要手动去安装的。
使用yum安装dhcp。
启动httpd,lftp,cobbler, xinetd,rsync查看端口。
启动cobbler时,使用cobbler –help可以看到cbbler的命令选项,而使用cobbler check检测环境时,会有如下的报错。
编辑settings配置文件,修改上面报错的位置信息。
复制pxelinux.0, menu.c32到/var/lib/cobbler/loaders/。
修改完成后执行cobbler sync。
Cobbler 子命令介绍。
因为dhcp需要还是需要手动安装配置,而不是需要cobbler来管理的,还需要配置dhcp。
接下来开始导入光盘映像文件。
导入CentOS6.5的映像文件
# cobbler import --name=CentOS_6.5_x86_64 --path=/mnt/
期间因为导入CentOS7的镜像文件时我的电脑磁盘满了而虚拟机停止,触发了一个Cobbler的BUG,再次启动虚拟机后重新导入CentOS7的映像文件时显示如下。
解决方法。
重新导入。
这个时候又一次的出错了:!!! TASK FAILED !!!,使用如下命令解决。
查看/var/www/cobbler/ks_mirror路径下的目录。
查看dirstro。
接下来准备ks.cfg文件。CentOS6.5的cfg文件是参考我上次PXE时使用的,而CentOS7的在软件包安装以及磁盘分区上有些出入,CentOS7使用的是xfs系统。
添加Cobbler Profile。
这时候就可以开始装机了。先安装CentOS7。
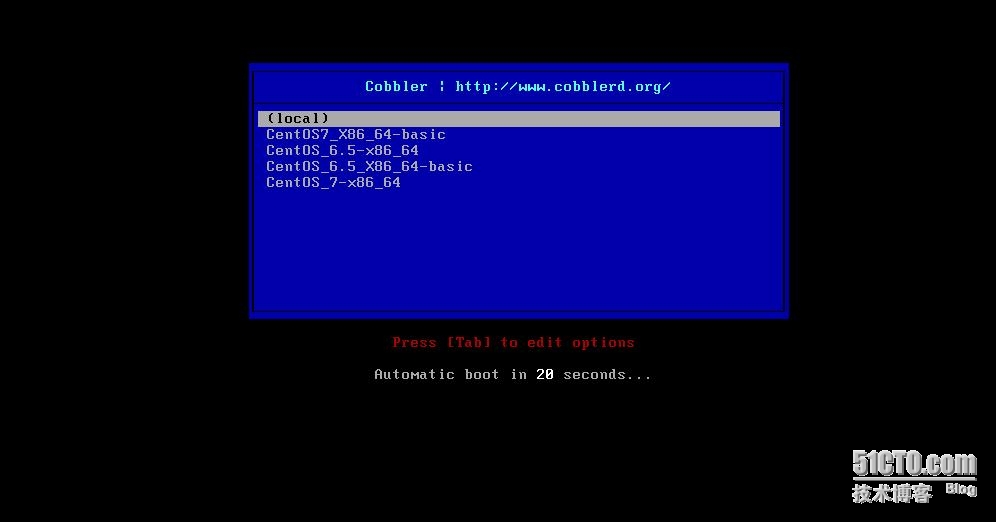
在安装CentOS6.5。
CobblerWeb界面。
Web页面默认不允许任何人登录,需要手动修改认证相关配置。
创建账户,使其能够登录CobblerWeb页面。
修改Cobbler的用户配置文件,添加进Cobbler管理组。
重启http,Cobbler。
地址栏输入172.16.32.10/cobbler_web,就可以访问了。
登录进去后就可以通过Web页面来配置了。
Cobbler是一款自动化操作系统安装的实现,与PXE安装系统的区别就是可以同时部署多个版本的系统,而PXE只能选择一种系统。而如今的架构动辄就是上千台的服务器。而存在一些操作系统不统一的现象,例如最初的架构采用的是CentOS5系列的系统,而新出现了一些技术后,需要新的操作系统的支持,一方面是需要批量部署装机,而另一方面还需要考虑到如果老版本的服务器出现故障后还需要重新去部署。并且提供Web配置页面,可以只需要一些点击就可以完成一些操作。
Cobbler的实现和PXE的方法大同小异,例如都需要安装tftp,dhcp,http等,但是使用yum安装Cobbler的时候,会自动把需要的全部安装上,而不需要去手动一个个的安装。
本次将实现CentOS 6.5和CentOS7的安装。
而此次安装CentOS7的操作系统,新的系统将不再使用默认的EXT文件系统,对新引入的XFS做下简介:
XFS文件系统是SGI开发的高级日志文件系统,XFS极具伸缩性。并且在CentOS7上已经是默认的文件系统。主要特性包含一下几点:
数据完整性:
采用XFS文件系统时,如果发生宕机现象,由于文件系统开启日志功能,磁盘上的文件会记录到日志,并且可以短时间内恢复磁盘数据。
传输性:
XFS文件系统采用优化算法,日志记录对于IO影响小,而并不映像查询与分配的性能。XFS文件系统能够连续提供快速的反映时间。
可扩展性:
XFS是一个64bit的文件系统,可以支持上百万T字节的存储空间。对特大文件及小尺寸文件的支持非常好,支持大数量目录。XFS文件系统使用表结构(B+树)保证文件系统可以快速搜索及快速分配空间。XFS文件系统能够持续提供高速操作,文件系统性能不受目录及文件数量限制。
传输带宽:
XFS文件系统能以接近裸设备的IO的性能存储数据,在单个文件系统测试中,吞吐量可以达到7GB美妙,对单个文件的读写操作达到4GB每秒。
安装Cobbler。
使用yum安装cobbler。
# yum install cobbler
Install      21 Package(s)
Total download size: 6.0 M
Installed size: 23 M
Is this ok [y/N]: Y
Downloading Packages:
(1/21): PyYAML-3.10-3.el6.x86_64.rpm                                                                           | 157 kB     00:00
(2/21): apr-util-ldap-1.3.9-3.el6_0.1.x86_64.rpm                                                               |  15 kB     00:00
(3/21): cobbler-2.4.0-1.el6.noarch.rpm                                                                         | 664 kB     00:00
(4/21): createrepo-0.9.9-18.el6.noarch.rpm                                                                     |  94 kB     00:00
(5/21): deltarpm-3.5-0.5.20090913git.el6.x86_64.rpm                                                            |  71 kB     00:00
(6/21): genisoimage-1.1.9-12.el6.x86_64.rpm                                                                    | 348 kB     00:00
(7/21): httpd-2.2.15-29.el6.centos.x86_64.rpm                                                                  | 821 kB     00:00
(8/21): httpd-tools-2.2.15-29.el6.centos.x86_64.rpm                                                            |  73 kB     00:00
(9/21): libyaml-0.1.5-1.el6.x86_64.rpm                                                                         |  52 kB     00:00
(10/21): mod_wsgi-3.2-3.el6.x86_64.rpm                                                                         |  66 kB     00:00
(11/21): mtools-4.0.12-1.el6.x86_64.rpm                                                                        | 194 kB     00:00
(12/21): python-cheetah-2.4.1-1.el6.x86_64.rpm                                                                 | 365 kB     00:00
(13/21): python-deltarpm-3.5-0.5.20090913git.el6.x86_64.rpm                                                    |  27 kB     00:00
(14/21): python-markdown-2.0.1-3.1.el6.noarch.rpm                                                              | 118 kB     00:00
(15/21): python-netaddr-0.7.5-4.el6.noarch.rpm                                                                 | 1.0 MB     00:00
(16/21): python-pygments-1.1.1-1.el6.noarch.rpm                                                                | 562 kB     00:00
(17/21): python-setuptools-0.6.10-3.el6.noarch.rpm                                                             | 336 kB     00:00
(18/21): python-simplejson-2.0.9-3.1.el6.x86_64.rpm                                                            | 126 kB     00:00
(19/21): syslinux-4.02-8.el6.x86_64.rpm                                                                        | 859 kB     00:00
(20/21): tftp-server-0.49-7.el6.x86_64.rpm                                                                     |  39 kB     00:00
(21/21): xinetd-2.3.14-39.el6_4.x86_64.rpm                                                                     | 121 kB     00:00
--------------------------------------------------------------------------------------------------------------------------------------
Total
5.6 MB/s | 6.0 MB     00:01
可以看到这里是安装了http,lftp,因为dhcp服务还是需要手动去安装的。
使用yum安装dhcp。
# yum install dhcp
启动httpd,lftp,cobbler, xinetd,rsync查看端口。
# ss -tual
Netid  State      Recv-Q Send-Q                              Local Address:Port                                  Peer Address:Port
udp    UNCONN     0      0                                               *:bootps                                           *:*       #dhcp相关
udp    UNCONN     0      0                                               *:bootpc                                           *:*
udp    UNCONN     0      0                                               *:tftp                                             *:*       #
tcp    LISTEN     0      128                                            :::http                                            :::*       #
tcp    LISTEN     0      128                                            :::ssh                                             :::*
tcp    LISTEN     0      128                                             *:ssh                                              *:*
tcp    LISTEN     0      100                                           ::1:smtp                                            :::*
tcp    LISTEN     0      100                                     127.0.0.1:smtp                                             *:*
tcp    LISTEN     0      5                                       127.0.0.1:25151                                            *:*       #cobbler默认端口
tcp    LISTEN     0      64                                             :::rsync                                           :::*   #
启动cobbler时,使用cobbler –help可以看到cbbler的命令选项,而使用cobbler check检测环境时,会有如下的报错。
# cobbler check
The following are potential configuration items that you may want to fix:
#错误指出我们的cobbler不应该是本地的IP地址,而是一个可以被解析的hostname或者IP
1 : The 'server' field in /etc/cobbler/settings must be set to something other than localhost, or kickstarting features will not work.  This should be a resolvable hostname or IP for the boot server as reachable by all machines that will use it.

#错误指出next_server的IP地址不应该是127.0.0.1的主机地址,而应该是一个真正的tftp服务器地址
2 : For PXE to be functional, the 'next_server' field in /etc/cobbler/settings must be set to something other than 127.0.0.1, and should match the IP of the boot server on the PXE network.

#错误是不一定要联网下载某些程序,而安装syslinux就可以
3 : some network boot-loaders are missing from /var/lib/cobbler/loaders, you may run 'cobbler get-loaders' to download them, or, if you only want to handle x86/x86_64 netbooting, you may ensure that you have installed a *recent* version of the syslinux package installed and can ignore this message entirely.  Files in this directory, should you want to support all architectures, should include pxelinux.0, menu.c32, elilo.efi, and yaboot. The 'cobbler get-loaders' command is the easiest way to resolve these requirements.

#debmrror没有定义好
4 : debmirror package is not installed, it will be required to manage debian deployments and repositories

#需要额外安装pykickstart
5 : ksvalidator was not found, install pykickstart

#cobbler安装完成后的管理员密码需要替换,因为所有安装后的密码都是一致的
6 : The default password used by the sample templates for newly installed machines (default_password_crypted in /etc/cobbler/settings) is still set to 'cobbler' and should be changed, try: "openssl passwd -1 -salt 'random-phrase-here' 'your-password-here'" to generate new one

#没有fencing设备,为可选的
7 : fencing tools were not found, and are required to use the (optional) power management features. install cman or fence-agents to use them
Restart cobblerd and then run 'cobbler sync' to apply changes.
编辑settings配置文件,修改上面报错的位置信息。
# vim /etc/cobbler/settings
server: 192.168.151.128#修改cobbler的主机地址
next_server: 172.16.32.10#修改tftpIP地址
default_password_crypted: "$1$f75165f2$vmkPJLhF1yCiLhosykXOC/"#修改cobbler默认加密密码,使用如下命令生成

# openssl passwd -1 -salt `openssl rand -hex 4`
Password:
$1$f75165f2$vmkPJLhF1yCiLhosykXOC/
复制pxelinux.0, menu.c32到/var/lib/cobbler/loaders/。
# cd /usr/share/syslinux/
# cp -r * /var/lib/cobbler/loaders/
修改完成后执行cobbler sync。
# cobbler sync
task started: 2014-10-07_231726_sync
task started (id=Sync, time=Tue Oct  7 23:17:26 2014)
running pre-sync triggers
cleaning trees
mkdir: /var/lib/tftpboot/pxelinux.cfg
mkdir: /var/lib/tftpboot/grub
mkdir: /var/lib/tftpboot/s390x
mkdir: /var/lib/tftpboot/ppc
mkdir: /var/lib/tftpboot/etc
removing: /var/lib/tftpboot/grub/images
copying bootloaders
copying: /usr/share/syslinux/pxelinux.0 -> /var/lib/tftpboot/pxelinux.0
copying: /usr/share/syslinux/menu.c32 -> /var/lib/tftpboot/menu.c32
copying: /usr/share/syslinux/memdisk -> /var/lib/tftpboot/memdisk
copying distros to tftpboot
copying images
generating PXE configuration files
generating PXE menu structure
rendering TFTPD files
generating /etc/xinetd.d/tftp
cleaning link caches
running post-sync triggers
running python triggers from /var/lib/cobbler/triggers/sync/post/*
running python trigger cobbler.modules.sync_post_restart_services
running shell triggers from /var/lib/cobbler/triggers/sync/post/*
running python triggers from /var/lib/cobbler/triggers/change/*
running python trigger cobbler.modules.scm_track
running shell triggers from /var/lib/cobbler/triggers/change/*
*** TASK COMPLETE ***
Cobbler 子命令介绍。
cobbler check         #检查cobbler配置
cobbler sync          #步配置到dhcp pxe和数据目录
cobbler list          #列出所有的cobbler元素
cobbler import        #导入安装的系统光盘镜像
cobbler report        #列出各元素的详细信息
cobbler distro        #查看导入的发行版系统信息
cobbler profile       #查看配置信息
cobbler system        #查看添加的系统信息
cobbler reposync      #同步yum仓库到本地
因为dhcp需要还是需要手动安装配置,而不是需要cobbler来管理的,还需要配置dhcp。
# cp /usr/share/doc/dhcp-4.1.1/dhcpd.conf.sample /etc/dhcp/dhcpd.conf
cp: overwrite `/etc/dhcp/dhcpd.conf'? y
# vim /etc/dhcp/dhcpd.conf
subnet 172.16.32.0 netmask 255.255.255.0 {
range 172.16.32.15 172.16.32.50;        #dhcp分配网络
option routers 172.16.32.10;            #dhcp主机地址
next-server 172.16.32.10;               #lftp地址
filename="pxelinux.0";
}
# service dhcpd start
接下来开始导入光盘映像文件。
# mount /dev/cdrom /mnt/
mount: block device /dev/sr0 is write-protected, mounting read-only
导入CentOS6.5的映像文件
# cobbler import --name=CentOS_6.5_x86_64 --path=/mnt/
期间因为导入CentOS7的镜像文件时我的电脑磁盘满了而虚拟机停止,触发了一个Cobbler的BUG,再次启动虚拟机后重新导入CentOS7的映像文件时显示如下。
# cobbler import --name=CentOS_7_x86_64 --path=/mnt/
Traceback (most recent call last):
File "/usr/bin/cobbler", line 35, in <module>
sys.exit(app.main())
File "/usr/lib/python2.6/site-packages/cobbler/cli.py", line 644, in main
rc = cli.run(sys.argv)
File "/usr/lib/python2.6/site-packages/cobbler/cli.py", line 270, in run
self.token         = self.remote.login("", self.shared_secret)
File "/usr/lib64/python2.6/xmlrpclib.py", line 1199, in __call__
return self.__send(self.__name, args)
File "/usr/lib64/python2.6/xmlrpclib.py", line 1489, in __request
verbose=self.__verbose
File "/usr/lib64/python2.6/xmlrpclib.py", line 1253, in request
return self._parse_response(h.getfile(), sock)
File "/usr/lib64/python2.6/xmlrpclib.py", line 1392, in _parse_response
return u.close()
File "/usr/lib64/python2.6/xmlrpclib.py", line 838, in close
raise Fault(**self._stack[0])
xmlrpclib.Fault: <Fault 1: "<class 'cobbler.cexceptions.CX'>:'login failed'">
解决方法。
# service cobblerd restart
Stopping cobbler daemon:                                   [  OK  ]
Starting cobbler daemon:                                   [  OK  ]
# cobbler get-loaders
重新导入。
# cobbler import --name=CentOS_7_x86_64 --path=/mnt/
task started: 2014-10-08_173739_import
task started (id=Media import, time=Wed Oct  8 17:37:39 2014)
Found a candidate signature: breed=redhat, version=rhel6
Found a candidate signature: breed=redhat, version=fedora16
Found a candidate signature: breed=redhat, version=fedora17
Found a candidate signature: breed=redhat, version=fedora18
No signature matched in /var/www/cobbler/ks_mirror/CentOS_7_x86_64
!!! TASK FAILED !!!
这个时候又一次的出错了:!!! TASK FAILED !!!,使用如下命令解决。
# cobbler signature update
再次导入。
# cobbler import --name=CentOS_7_x86_64 --path=/mnt/
查看/var/www/cobbler/ks_mirror路径下的目录。
# ls
CentOS_6.5_x86_64  CentOS_7_x86_64  config
查看dirstro。
# cobbler distro list
CentOS_6.5-x86_64
CentOS_7-x86_64
接下来准备ks.cfg文件。CentOS6.5的cfg文件是参考我上次PXE时使用的,而CentOS7的在软件包安装以及磁盘分区上有些出入,CentOS7使用的是xfs系统。
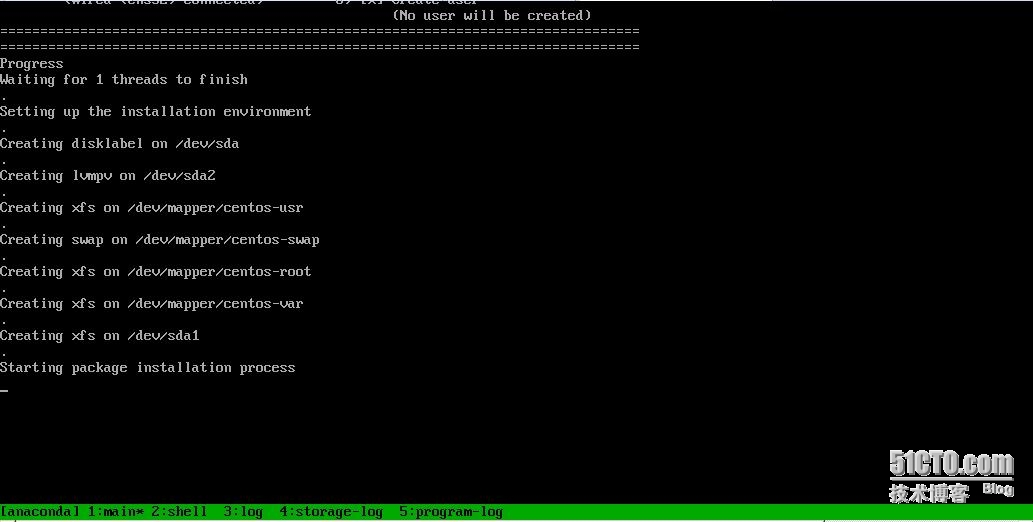
#version=RHEL7
# System authorization information
auth --enableshadow --passalgo=sha512
url --url=http://172.16.32.10/cobbler/ks_mirror/CentOS_7_x86_64

# Run the Setup Agent on first boot
reboot
firewall --disabled
ignoredisk --only-use=sda

# Keyboard layouts
keyboard --vckeymap=us --xlayouts='cn'
# System language
lang en_US.UTF-8

# Network information
network  --bootproto=dhcp --device=ens32 --onboot=off --ipv6=auto
network  --hostname=localhost.localdomain

# Root password
rootpw --iscrypted $6$rHQRho3gkPJXIgy7$LTVHkf8PwxnOUc8QPvotK3myXGDsp2FKfdHWjWftjwcSAAB.V/j7Ki3lTDbu6e2Kc55imnNLc/Hno./VQh2cz.

# System timezone
timezone Asia/Shanghai --isUtc

# System bootloader configuration
bootloader --location=mbr --boot-drive=sda
# Partition clearing information
zerombr
clearpart --all
clearpart --none --initlabel

# Disk partitioning information
part /boot --fstype="xfs" --ondisk=sda --size=500
part pv.10 --fstype="lvmpv" --ondisk=sda --size=82087
volgroup centos --pesize=4096 pv.10
logvol /var  --fstype="xfs" --size=40000 --name=var --vgname=centos    #此处便是XFS的LVM逻辑卷划分
logvol /  --fstype="xfs" --size=20000 --name=root --vgname=centos
logvol swap  --fstype="swap" --size=2080 --name=swap --vgname=centos
logvol /usr  --fstype="xfs" --size=20000 --name=usr --vgname=centos

%packages
@core
@development
%end
添加Cobbler Profile。
# cobbler profile add --name=CentOS7_X86_64-basic --distro=CentOS_7-x86_64 --kickstart=/tmp/CentOS7_x86_64.ks.cfg
# cobbler profile add --name=CentOS_6.5_X86_64-basic --distro=CentOS_6.5-x86_64 --kickstart=/tmp/CentOS6.5_x86_64.ks.cfg
# cobbler profile list
CentOS7_X86_64-basic
CentOS_6.5-x86_64
CentOS_6.5_X86_64-basic
CentOS_7-x86_64
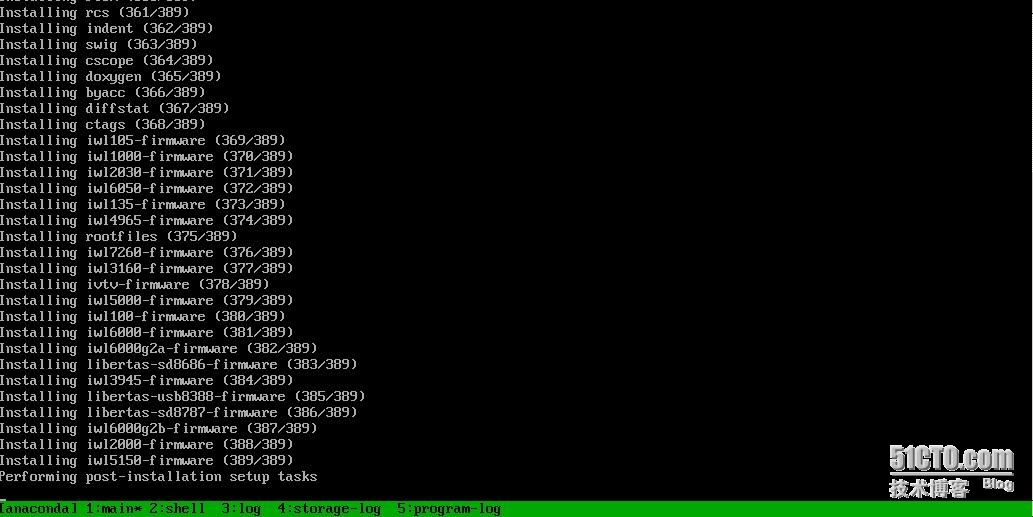
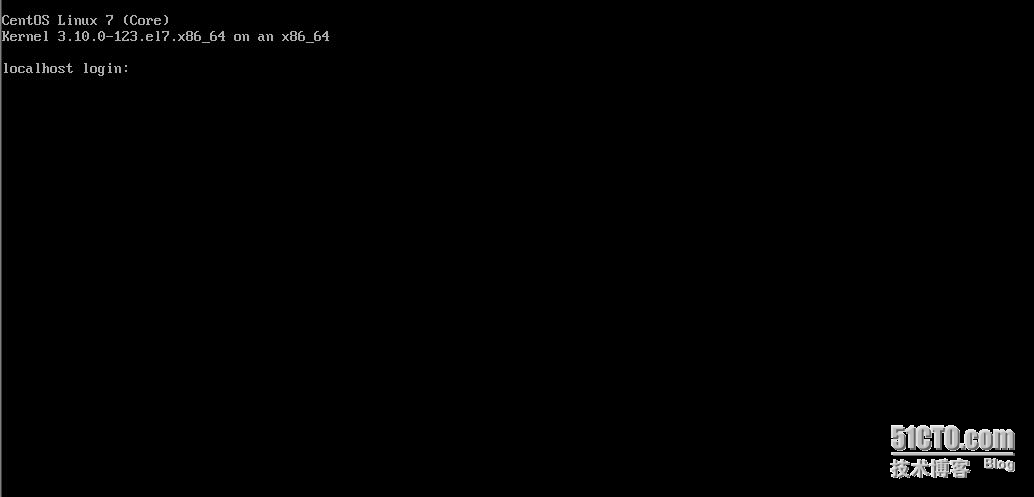
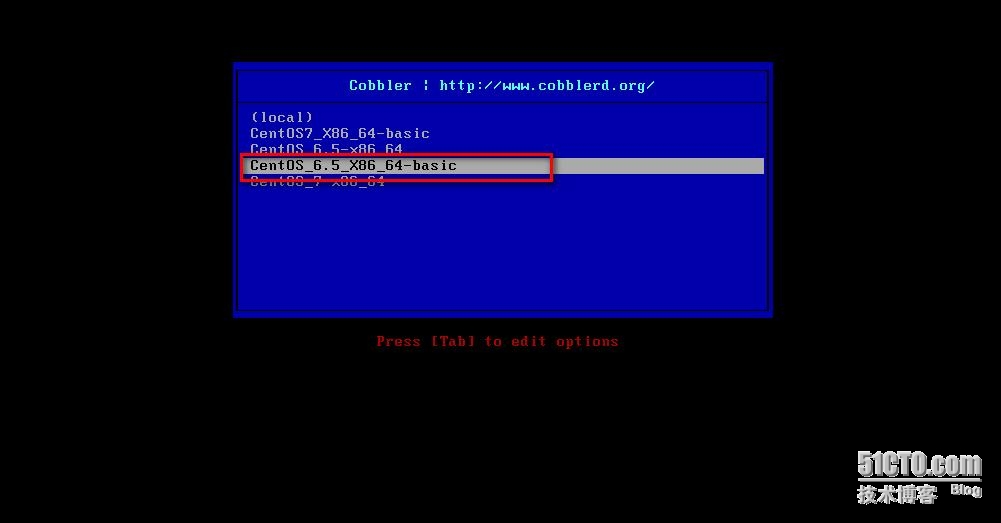
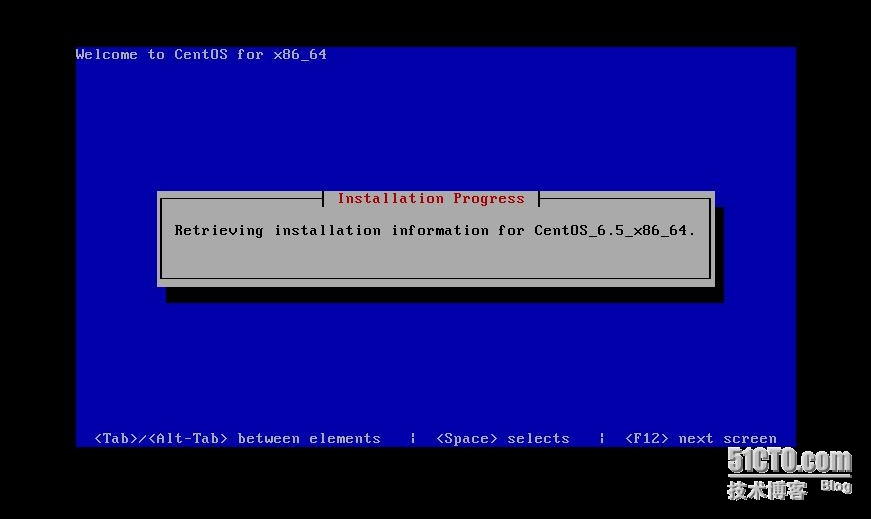
这时候就可以开始装机了。先安装CentOS7。
在安装CentOS6.5。
CobblerWeb界面。
# yum install cobbler-web
Web页面默认不允许任何人登录,需要手动修改认证相关配置。
# vim /etc/cobbler/modules.conf
[authentication]
#module = authn_denyall
module = authn_pam
创建账户,使其能够登录CobblerWeb页面。
# useradd Cadmin
[root@web tmp]# passwd Cadmin
Changing password for user Cadmin.
New password:
BAD PASSWORD: it is too simplistic/systematic
BAD PASSWORD: is too simple
修改Cobbler的用户配置文件,添加进Cobbler管理组。
# vim /etc/cobbler/users.conf
[admins]
admin = "Cadmin"
cobbler = ""
重启http,Cobbler。
# service cobblerd restart
Stopping cobbler daemon:                                   [  OK  ]
Starting cobbler daemon:                                   [  OK  ]
# service httpd restart
Stopping httpd:                                            [  OK  ]
Starting httpd:                                            [  OK  ]
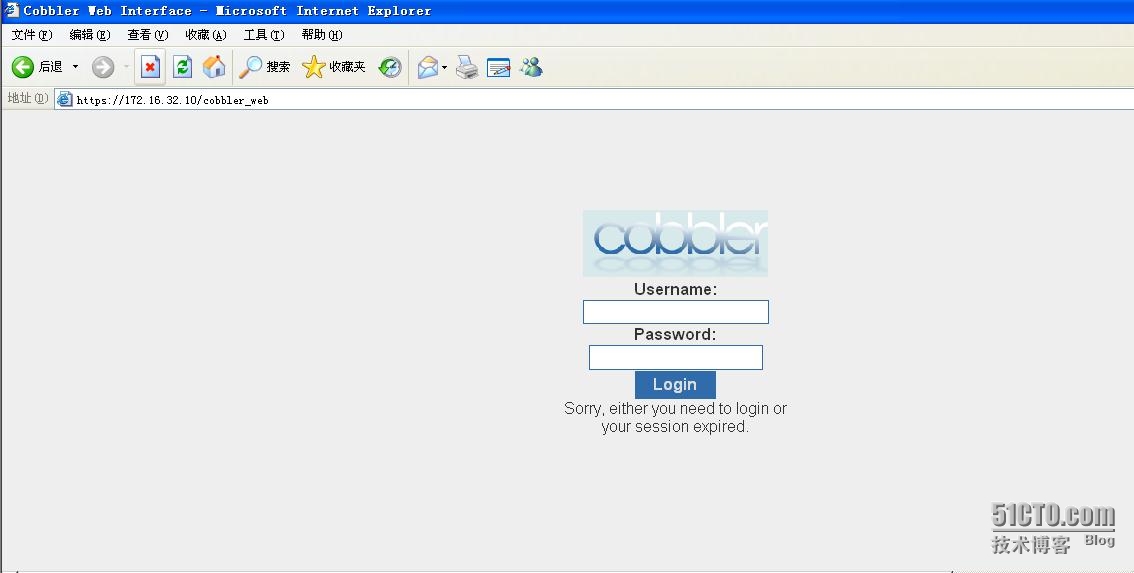
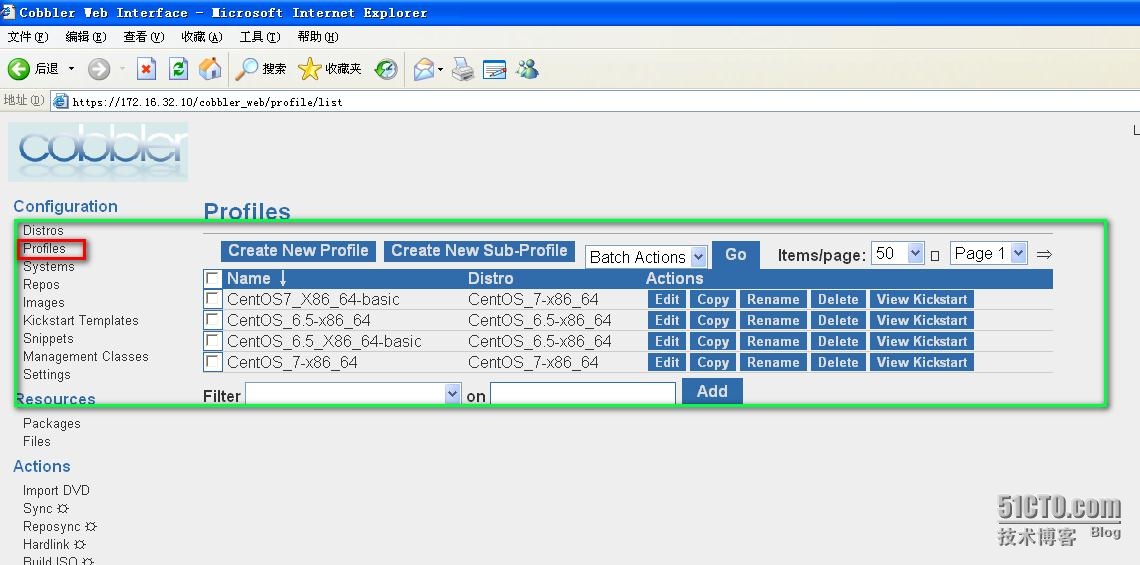
地址栏输入172.16.32.10/cobbler_web,就可以访问了。
登录进去后就可以通过Web页面来配置了。

相关文章推荐
- Cobbler自动化批量部署CentOS6.5系统
- Centos7安装cobbler2.6.9自动化部署工具
- 总结之:CentOS 6.5基于DHCP的PXE自动化安装系统详解 推荐
- CentOS6.5上部署redmine程序 推荐
- centos6.5上部署集中化管理平台Saltstack!!! 推荐
- centos6.5/centos7安装部署企业内部知识管理社区系统wecenter
- Cobbler自动化部署ubuntu和centos技术文档
- 运维自动化之中级进阶—Cobbler实战,实现批量多版本os自动部署。
- Cobbler实现自动化无人值守网络批量安装部署Linux系统
- 基于cobbler完成自动批量部署centos
- centos6.5/centos7安装部署企业内部知识管理社区系统wecenter
- Linux 运维自动化之Cobbler全自动安装Centos管理与使用详解 推荐
- cobbler自动批量部署centOS6和centOS7
- 运维自动化之批量部署(cobbler)的使用
- CentOS 6.5自动化运维之基于cobbler服务的自动化安装操作系统详解
- 运维自动化部署Cobbler之服务安装篇 推荐
- Cobbler自动化批量部署系统(2)_koan客户端重装系统
- PXE kickstart 批量部署 centOS6.5
- Ansible自动化运维工具部署及使用 推荐
- CentOS 6.5自动化运维之基于cobbler服务的自动化安装操作系统详解