Android中如何使用JUnit进行单元测试
2014-08-17 21:25
471 查看
在我们日常开发android app的时候,需要不断地进行测试,所以使用JUnit测试框架显得格外重要,学会JUnit可以加快应用的开发周期。
Android中建立JUnit测试环境有以下两种方法。一、直接在需要被测试的工程中新建测试类
集成步骤:
1.在androidManifest.xml文件中添加以下代码:
| <instrumentation android:name="android.test.InstrumentationTestRunner" android:targetPackage="com.example.junittest" android:label="@string/app_name" ></instrumentation> |
以上代码配置是添加测试指令和引入测试环境,完整的清单文件如下:
| <?xml version="1.0" encoding="utf-8"?> <manifest xmlns:android="http://schemas.android.com/apk/res/android" package="com.example.junittest" android:versionCode="1" android:versionName="1.0" > <uses-sdk android:minSdkVersion="8" android:targetSdkVersion="18" /> <instrumentation android:name="android.test.InstrumentationTestRunner" android:targetPackage="com.example.junittest" android:label="@string/app_name" ></instrumentation> <application android:allowBackup="true" android:icon="@drawable/ic_launcher" android:label="@string/app_name" android:theme="@style/AppTheme" > <uses-library android:name="android.test.runner"/> <activity android:name="com.example.junittest.MainActivity" android:label="@string/app_name" > <intent-filter> <action android:name="android.intent.action.MAIN" /> <category android:name="android.intent.category.LAUNCHER" /> </intent-filter> </activity> </application> </manifest> |
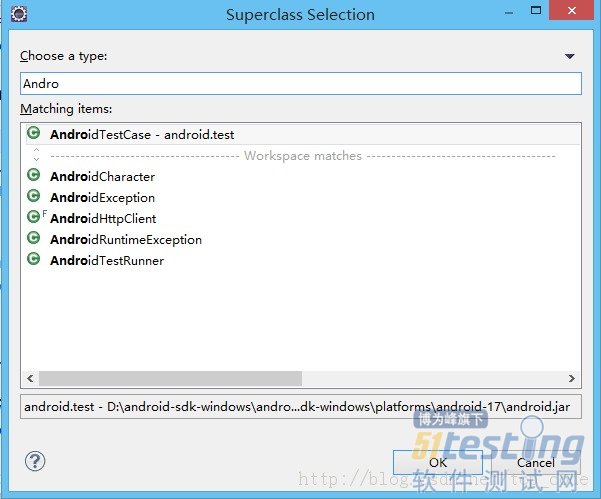
2.新建一个测试测试类并继承AndroidTestCase类,编写测试方法,在测试方法内使用断言assert来测试要测试的方法。
3.点击右面的大纲视图,选择要测试的方法,右键,run as --->Android JUnit test
下面通过一个简单的示例来演示一下如何使用JUnit单元测试
1、先创建简单的待测试类Calculator.java
| package com.example.junittest; public class Calculator { public int add(int x,int y){ return x+y; } public int sub(int x,int y){ return x-y; } public int divide(int x,int y){ return x/y; } public int multiply(int x,int y){ return x*y; } } |
示例代码如下:
| package com.example.test; import junit.framework.Assert; import com.example.junittest.Calculator; import android.test.AndroidTestCase; import android.util.Log; public class CalculatorTester extends AndroidTestCase { private static final String TAG = CalculatorTester.class.getSimpleName(); private Calculator calculator; /** * This method is invoked before any of the test methods in the class. * Use it to set up the environment for the test (the test fixture. You can use setUp() to instantiate a new Intent with the action ACTION_MAIN. You can then use this intent to start the Activity under test. */ @Override protected void setUp() throws Exception { Log.e(TAG, "setUp"); calculator = new Calculator(); super.setUp(); } /** * 测试Calculator的add(int x, int y)方法 * 把异常抛给测试框架 * @throws Exception */ public void testAdd() throws Exception{ int result = calculator.add(3, 5); Assert.assertEquals(8, result); } /** * 测试Calculator的divide(int x, int y)方法 * 把异常抛给测试框架 * @throws Exception */ public void testDivide() throws Exception{ int result = calculator.divide(10, 0); Assert.assertEquals(10, result); } /** * This method is invoked after all the test methods in the class. * Use it to do garbage collection and to reset the test fixture. */ @Override protected void tearDown() throws Exception { Log.e(TAG, "tearDown"); calculator = null; super.tearDown(); } } |
3、通过大纲视图运行测试方法
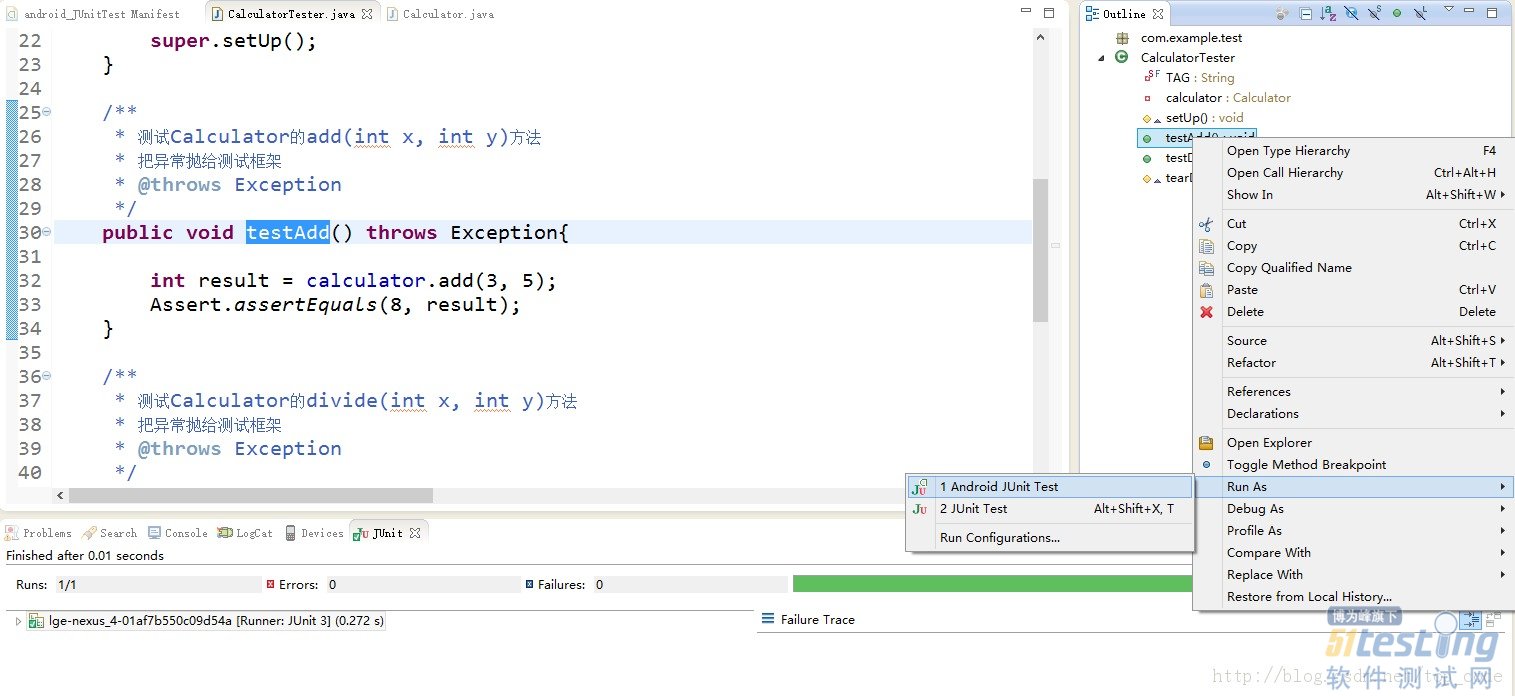
绿条表示测试通过,在代码中我们测试的时3+5是否等于8,所以结果肯定是通过的,如果我们把assertEquals()中的8改为5的话,会出现以下结果:

红条表示测试没通过,点击右边的错误信息可以定位到出错的代码行。 二、创建一个专门用于测试的工程
推荐创建专门的测试工程,因为这样可以降低代码的耦合度。
集成步骤:
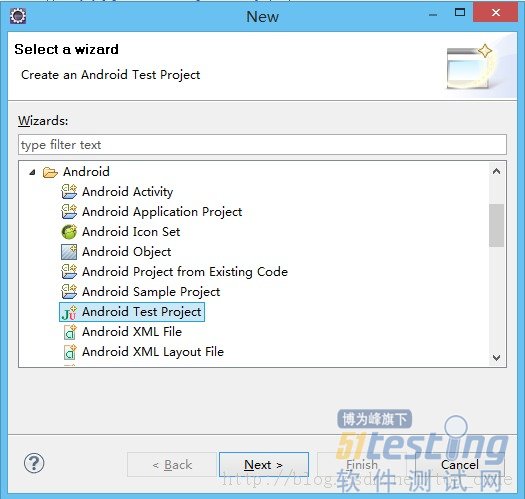
1.新建工程,选择new ---- > other ---->android Test Project
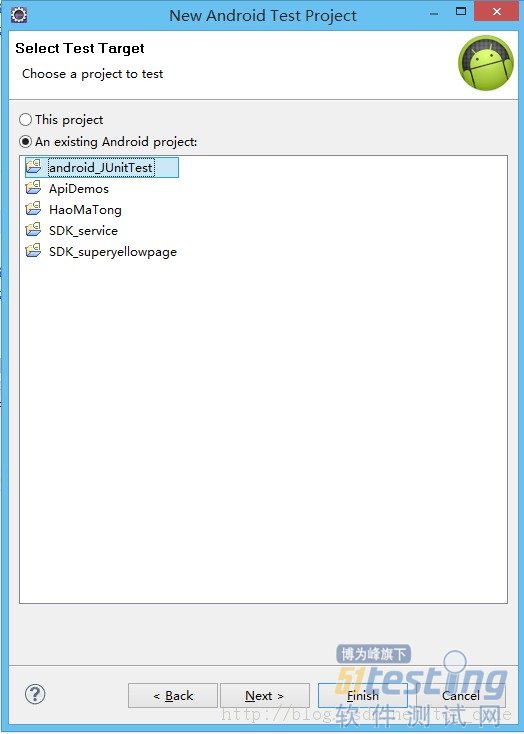
2.选择要测试的工程
3.接着和第一种建立测试类的方法是一样的,这里比较简单就略过了。
使用这种方法的话,androidManifest.xml中已经自动配置好相关的参数,无需在进行配置,比较方便。
文章出处:http://www.blogjava.net/qileilove/archive/2014/05/19/413824.html

相关文章推荐
- Android中如何使用JUnit进行单元测试
- Android中如何使用JUnit进行单元测试
- Android中如何使用JUnit进行单元测试
- Android中如何使用JUnit进行单元测试 eclipse
- Android中使用Junit进行单元测试
- 如何使用Junit进行单元测试
- 使用Junit对Android应用进行单元测试
- Android:使用junit对应用进行单元测试
- 使用Junit对Android应用进行单元测试
- 使用Junit对Android应用进行单元测试
- Android 使用JUnit进行单元测试
- 如何使用JUnit进行单元测试
- 使用Junit对Android应用进行单元测试
- 使用Junit对Android应用进行单元测试
- 如何使用Junit进行单元测试
- android使用junit进行单元测试
- Android 使用 Junit进行单元测试
- Android使用JUnit进行单元测试
- 使用Junit对Android应用进行单元测试
- 使用Junit对Android应用进行单元测试